How to Use S20 Palettes
m (→Driver Properties) |
m (→Loading Consists (Incl Locomotives)) |
||
| (45 intermediate revisions by one user not shown) | |||
| Line 66: | Line 66: | ||
<td>within '''Sections''' to jump to the next or previous '''Sub-section'''<br> | <td>within '''Sections''' to jump to the next or previous '''Sub-section'''<br> | ||
e.g. '''12.1.1''' to '''12.1.2''', etc</td> | e.g. '''12.1.1''' to '''12.1.2''', etc</td> | ||
| + | </tr> | ||
| + | <tr valign="top"> | ||
| + | <td>[[image:PageLink.PNG|link=]] <span style="font-weight: 700; font-size: 15px; color: blue;">Link</span></td> | ||
| + | <td>'''Internal link''' to another section within this document</td> | ||
| + | </tr> | ||
| + | <tr valign="top"> | ||
| + | <td>[[image:WikiLink.PNG|link=]] <span style="font-weight: 700; font-size: 15px; color: blue;">Link</span></td> | ||
| + | <td>'''External link''' to another document</td> | ||
</tr> | </tr> | ||
</table> | </table> | ||
| Line 411: | Line 419: | ||
</table> | </table> | ||
</td> | </td> | ||
| + | </tr> | ||
| + | </table> | ||
| + | </td> | ||
| + | </tr> | ||
| + | </table> | ||
| + | <br> | ||
| + | <table width=1000 bgcolor=#000000 cellpadding=2> | ||
| + | <tr valign="top"> | ||
| + | <td> | ||
| + | <table bgcolor=#ffffe0 cellpadding=2> | ||
| + | <tr valign="top"> | ||
| + | <td width=25>[[image:PencilTips.PNG|link=]]</td> | ||
| + | <td><span style="font-weight: 700; font-size: 15px;">Hiding the Menu Bar and Side Panels</span></td> | ||
| + | </tr> | ||
| + | <tr valign="top"> | ||
| + | <td> </td> | ||
| + | <td>In '''Surveyor''' you can '''Hide''' the '''Menu Bar''' and all the palettes docked in the two side panels. Press the <span style="font-weight: 700; font-size: 15px;"><span style="color: white; background-color: black;"> Ctrl </span> + <span style="color: white; background-color: black;"> Space </span></span> keys to hide and show the menu bar and the side panels. This will not hide those palettes and windows that are undocked and "free floating".<br> | ||
| + | See the '''Tips''' in [[image:PageLink.PNG|link=]] '''[[#skipMinMax|Minimise Maximise Close]]''' for an additional option.</td> | ||
</tr> | </tr> | ||
</table> | </table> | ||
| Line 881: | Line 907: | ||
<tr valign="top"> | <tr valign="top"> | ||
<td width=25>[[image:PencilTips.PNG|link=]]</td> | <td width=25>[[image:PencilTips.PNG|link=]]</td> | ||
| − | <td> | + | <td><span style="font-weight: 700; font-size: 15px;"><span style="color: white; background-color: red;"> 1 </span> Hiding the Menu Bar and Side Panels</span></td> |
| + | </tr> | ||
| + | <tr valign="top"> | ||
| + | <td> </td> | ||
| + | <td>In '''Surveyor''' you can '''Hide''' the '''Menu Bar''' and all the palettes docked in the two side panels. Press the <span style="font-weight: 700; font-size: 15px;"><span style="color: white; background-color: black;"> Ctrl </span> + <span style="color: white; background-color: black;"> Space </span></span> keys to hide and show the menu bar and the side panels. This will not hide those palettes and windows that are undocked and "free floating"</td> | ||
| + | </tr> | ||
| + | <tr valign="top"> | ||
| + | <td width=25>[[image:PencilTips.PNG|link=]]</td> | ||
| + | <td><span style="font-weight: 700; font-size: 15px;"><span style="color: white; background-color: red;"> 2 </span> Minimising All the Undocked Palettes and Windows</span></td> | ||
| + | </tr> | ||
| + | <tr valign="top"> | ||
| + | <td> </td> | ||
| + | <td>In '''Surveyor''' and '''Driver''' you can '''Minimise''' all the "free floating" palettes and windows by selecting the <span style="font-weight: 700; font-size: 15px; color: white; background-color: black;"> Minimize All Windows </span> option from the [[image:SurveyorWindowIcon.png|link=]] '''Windows Menu'''. This will not hide the menu bar and the palettes that are docked in the two side panels. The minimized palettes and windows will appear at the bottom of the '''Windows Menu''' drop down list so they can be maximised and returned to the screen</td> | ||
| + | </tr> | ||
| + | <tr valign="top"> | ||
| + | <td colspan=2>You can combine both '''Tips''' <span style="font-weight: 700; font-size: 15px; color: white; background-color: red;"> 1 </span> and <span style="font-weight: 700; font-size: 15px; color: white; background-color: red;"> 2 </span> above in '''Surveyor''' to clear the screen of all items that are not part of your '''Trainz World'''</td> | ||
</tr> | </tr> | ||
</table> | </table> | ||
| Line 1,212: | Line 1,253: | ||
</table> | </table> | ||
| − | Open up the '''Focus''' by a <span style="font-weight: 700; font-size: 15px; background-color: lightcyan;">Left Click</span> on its arrowhead icon.<br> | + | Open up the '''Focus''' by a <span style="font-weight: 700; font-size: 15px; background-color: lightcyan;"> Left Click </span> on its arrowhead icon.<br> |
<table width=1000> | <table width=1000> | ||
| Line 1,219: | Line 1,260: | ||
<td> | <td> | ||
<br> | <br> | ||
| − | The current cursor position is shown in the | + | The current cursor position is shown in the '''x:''', '''y:''' and '''z:''' text boxes. These values can be edited to move the cursor to a new position but '''CARE''' will be needed. |
| − | <table bgcolor=#000000 width= | + | <table bgcolor=#000000 width=775 cellpadding=2> |
<tr valign="top"> | <tr valign="top"> | ||
<td> | <td> | ||
| − | <table bgcolor=#ffffe0 width= | + | <table bgcolor=#ffffe0 width=771 cellpadding=2> |
<tr valign="top"> | <tr valign="top"> | ||
| − | <td width=25>[[image:PencilTips.PNG|link=]]</td> | + | <td width=25>[[image:PencilTips.PNG|link=]]</td><td>On the right of each data entry box is a pair of '''Up/Down''' arrow controls. <span style="font-weight: 700; font-size: 15px; background-color: lightcyan;">Left Click and Drag</span> up or down on these to adjust the position in smaller increments down to '''centimetres'''</td> |
| − | <td>On the right of each data entry box is a pair of '''Up/Down''' arrow controls. <span style="font-weight: 700; font-size: 15px; background-color: lightcyan;">Left Click and Drag</span> up or down on these to adjust the position in smaller increments down to '''centimetres'''</td> | + | |
</tr> | </tr> | ||
</table> | </table> | ||
| Line 1,233: | Line 1,273: | ||
</table> | </table> | ||
<br> | <br> | ||
| − | <table bgcolor=#000000 width= | + | <table bgcolor=#000000 width=775 cellpadding=2> |
<tr valign="top"> | <tr valign="top"> | ||
<td> | <td> | ||
| − | <table bgcolor=#ffffb0 width= | + | <table bgcolor=#ffffb0 width=771 cellpadding=2> |
<tr valign="top"> | <tr valign="top"> | ||
<td width=25>[[image:NotePad.PNG|link=]]</td> | <td width=25>[[image:NotePad.PNG|link=]]</td> | ||
<td><span style="font-size: 17px; font-weight: 700;">Notes:</span><br> | <td><span style="font-size: 17px; font-weight: 700;">Notes:</span><br> | ||
| − | ---- | + | ----</td> |
| − | If you enter an '''x''' or '''y''' value that is "out in empty space" (beyond the edge of a boundary baseboard) then the cursor will be refocused at a point on the baseboard edge that is the closest to the entered co-ordinates. | + | </tr> |
| + | <tr valign="top"> | ||
| + | <td colspan=2> | ||
| + | <table> | ||
| + | <tr valign="top"> | ||
| + | <td width=10>[[image:DotPoint.JPG|10px|link=]]</td> | ||
| + | <td>If you enter an '''x:''' or '''y:''' value that is "out in empty space" (beyond the edge of a boundary baseboard) then the cursor will be refocused at a point on the baseboard edge that is the closest to the entered co-ordinates.</td> | ||
| + | </tr> | ||
| + | <tr valign="top"> | ||
| + | <td>[[image:DotPoint.JPG|10px|link=]]</td> | ||
| + | <td>The '''z:''' value gives the ground height at the cursor position and it can be copied into the <span style="font-weight: 700; font-size: 15px; color: white; background-color: #797979;"> Tool Options Palette </span> <span style="font-weight: 700; font-size: 15px; color: gold; background-color: black;"> Height </span> setting (open the '''down arrowhead''' next the '''z:''' value). Entering a '''z:''' value that is above or below the ground height will have no effect on the height of the cursor.</td> | ||
| + | </tr> | ||
| + | </table> | ||
</td> | </td> | ||
</tr> | </tr> | ||
| Line 1,258: | Line 1,310: | ||
<tr valign="top"> | <tr valign="top"> | ||
<td width=25>[[image:PencilTips.PNG|link=]]</td> | <td width=25>[[image:PencilTips.PNG|link=]]</td> | ||
| − | <td>If it has not been deleted you can identify the '''North-West''' corner of the original (first) baseboard by entering <span style="font-weight: 700; font-size: 15px;">0</span> as the '''Focus''' <span style="font-weight: 700; font-size: 15px; color: white; background-color: black;"> x </span> and <span style="font-weight: 700; font-size: 15px; color: white; background-color: black;"> y </span> co-ordinates</td> | + | <td>If it has not been deleted you can identify the '''North-West''' corner of the original (first) baseboard by entering <span style="font-weight: 700; font-size: 15px;">0</span> as the '''Focus''' <span style="font-weight: 700; font-size: 15px; color: white; background-color: black;"> x: </span> and <span style="font-weight: 700; font-size: 15px; color: white; background-color: black;"> y: </span> co-ordinates</td> |
</tr> | </tr> | ||
</table> | </table> | ||
| Line 1,403: | Line 1,455: | ||
</table> | </table> | ||
| − | <table> | + | <table width=1000> |
<tr valign="top"> | <tr valign="top"> | ||
<td width=225>[[image:InfoPaletteObjectName_S20.png|link=]]</td> | <td width=225>[[image:InfoPaletteObjectName_S20.png|link=]]</td> | ||
| Line 1,420: | Line 1,472: | ||
<tr valign="top"> | <tr valign="top"> | ||
<td>[[image:DotPoint2.JPG|link=]]</td> | <td>[[image:DotPoint2.JPG|link=]]</td> | ||
| − | <td>Enter | + | <td>Enter or edit the name</td> |
</tr> | </tr> | ||
<tr valign="top"> | <tr valign="top"> | ||
<td>[[image:DotPoint3.JPG|link=]]</td> | <td>[[image:DotPoint3.JPG|link=]]</td> | ||
<td>Press the <span style="font-weight: 700; font-size: 15px; color: white; background-color: black;"> Enter </span> key</td> | <td>Press the <span style="font-weight: 700; font-size: 15px; color: white; background-color: black;"> Enter </span> key</td> | ||
| + | </tr> | ||
| + | <tr valign="top"> | ||
| + | <td>[[image:BugMini.PNG|link=]]</td> | ||
| + | <td><span style="color: red; text-decoration: underline; font-weight: 700;">KNOWN BUG</span><span style="color: red; font-weight: 700;">:</span> Changes to the name of a '''Track Object''' will not save unless something else in the route is also edited. The following additional step is a workaround when renaming '''Track Objects'''</td> | ||
| + | </tr> | ||
| + | <tr valign="top"> | ||
| + | <td>[[image:DotPoint4.JPG|link=]]</td> | ||
| + | <td bgcolor="yellow">Move the '''Track Object''' slightly or open its '''Context Menu''' and select the option the <span style="font-weight: 700; font-size: 15px; color: white; background-color: black;"> Rotate Trackside </span> '''TWICE''' (the first time to flag a change to the object and the second time to return it to its original direction). If you have already edited something else in the route but not yet saved then this step will not be necessary</td> | ||
</tr> | </tr> | ||
</table> | </table> | ||
</td> | </td> | ||
| + | </tr> | ||
| + | </table> | ||
| + | </td> | ||
| + | </tr> | ||
| + | </table> | ||
| + | <br> | ||
| + | <table width=1000 bgcolor=#000000 cellpadding=2> | ||
| + | <tr valign="top"> | ||
| + | <td> | ||
| + | <table width=996 bgcolor=#ffffb0 cellpadding=2> | ||
| + | <tr valign="top"> | ||
| + | <td width=25>[[image:NotePad.PNG|link=]]</td> | ||
| + | <td>If more than one object has been selected then only the '''last selected object''', the one with the '''Context Icon''', will be named.</td> | ||
</tr> | </tr> | ||
</table> | </table> | ||
| Line 1,477: | Line 1,550: | ||
<tr valign="top"> | <tr valign="top"> | ||
<td width=629><span id="skip Position Info and Controls"></span> | <td width=629><span id="skip Position Info and Controls"></span> | ||
| + | |||
=='''Position Info and Controls'''== | =='''Position Info and Controls'''== | ||
</td> | </td> | ||
| Line 1,487: | Line 1,561: | ||
</tr> | </tr> | ||
</table> <!-- END Section Nav Buttons --> | </table> <!-- END Section Nav Buttons --> | ||
| − | You must have an object (or objects) selected for the position data to be shown and edited. Open up the position data by a <span style="font-weight: 700; font-size: 15px; background-color: lightcyan;">Left Click</span> on its '''Pos:''' arrowhead icon.<br> | + | You must have an object (or objects) selected for the position data to be shown and edited. Open up the position data by a <span style="font-weight: 700; font-size: 15px; background-color: lightcyan;"> Left Click </span> on its '''Pos:''' arrowhead icon.<br> |
<table width=1000> | <table width=1000> | ||
<tr valign="top"> | <tr valign="top"> | ||
<td width=310>[[image:InfoPalettePos_S20.png|link=]]</td> | <td width=310>[[image:InfoPalettePos_S20.png|link=]]</td> | ||
| − | <td>The position of the selected object (or the last object if more than one is selected) is shown in the '''x''', '''y''' and '''z''' text boxes. These values can be edited to move the object or objects to a new position but '''CARE''' will be needed. | + | <td>The position of the selected object (or the last object if more than one is selected) is shown in the '''x:''', '''y:''' and '''z:''' text boxes. These values can be edited to move the object or objects to a new position but '''CARE''' will be needed. |
<br> | <br> | ||
| − | <table bgcolor=#000000 width= | + | <table bgcolor=#000000 width=690 cellpadding=2> |
<tr valign="top"> | <tr valign="top"> | ||
<td> | <td> | ||
| − | <table bgcolor=#ffffe0 width= | + | <table bgcolor=#ffffe0 width=686 cellpadding=2> |
<tr valign="top"> | <tr valign="top"> | ||
<td width=25>[[image:PencilTips.PNG|link=]]</td><td>On the right of each data entry box is a pair of '''Up/Down''' arrow controls. <span style="font-weight: 700; font-size: 15px; background-color: lightcyan;">Left Click and Drag</span> up or down on these to adjust the position in smaller increments down to '''centimetres'''</td> | <td width=25>[[image:PencilTips.PNG|link=]]</td><td>On the right of each data entry box is a pair of '''Up/Down''' arrow controls. <span style="font-weight: 700; font-size: 15px; background-color: lightcyan;">Left Click and Drag</span> up or down on these to adjust the position in smaller increments down to '''centimetres'''</td> | ||
| Line 1,506: | Line 1,580: | ||
</table> | </table> | ||
<br> | <br> | ||
| − | <table bgcolor=#000000 width= | + | <table bgcolor=#000000 width=690 cellpadding=2> |
<tr valign="top"> | <tr valign="top"> | ||
<td> | <td> | ||
| − | <table bgcolor=#ffffb0 width= | + | <table bgcolor=#ffffb0 width=686 cellpadding=2> |
<tr valign="top"> | <tr valign="top"> | ||
<td width=25>[[image:NotePad.PNG|link=]]</td> | <td width=25>[[image:NotePad.PNG|link=]]</td> | ||
<td><span style="font-size: 17px; font-weight: 700;">Notes:</span><br> | <td><span style="font-size: 17px; font-weight: 700;">Notes:</span><br> | ||
| − | ---- | + | ----</td> |
| − | If you enter an '''x''' or '''y''' value that is "out in empty space" (beyond the edge of a boundary baseboard) then the objects will be moved to that position and may vanish from view. The '''Undo''' command can be used to reverse the move or the '''Marquee Tool''' can be used to add a baseboard under the "floating" objects.</td> | + | </tr> |
| + | <tr valign="top"> | ||
| + | <td colspan=2> | ||
| + | <table> | ||
| + | <tr valign="top"> | ||
| + | <td width=10>[[image:DotPoint.JPG|10px|link=]]</td> | ||
| + | <td>If you enter an '''x:''' or '''y:''' value that is "out in empty space" (beyond the edge of a boundary baseboard) then the objects will be moved to that position and may vanish from view. The '''Undo''' (<span style="font-weight: 700; font-size: 15px;"><span style="color: white; background-color: black;"> Ctrl </span> + <span style="color: white; background-color: black;"> Z </span></span>) command can be used to immediately reverse the move or the '''Marquee Tool''' can be used to add a baseboard under the "floating" objects if you know where they are located. <span style="background-color: yellow;"><span style="font-weight: 700; font-size: 15px;">Note:</span> The cursor cannot be moved to a matching position beyond the edge of a boundary baseboard to fix the problem, so '''Undo''' may be the best option.</span></td> | ||
| + | </tr> | ||
| + | <tr valign="top"> | ||
| + | <td>[[image:DotPoint.JPG|10px|link=]]</td> | ||
| + | <td>The '''z:''' value gives the current height of the object (or the last object selected) and it can be copied into the <span style="font-weight: 700; font-size: 15px; color: white; background-color: #797979;"> Tool Options Palette </span> <span style="font-weight: 700; font-size: 15px; color: gold; background-color: black;"> Height </span> setting (open the '''down arrowhead''' next the '''z:''' value). Entering a '''z:''' value that is above or below the ground height will move the object to that height. In the case of multiple selected objects the height of each will be adjusted up or down by the same value.</td> | ||
| + | </tr> | ||
| + | </table> | ||
| + | </td> | ||
</tr> | </tr> | ||
</table> | </table> | ||
| Line 1,925: | Line 2,012: | ||
<tr valign="top"> | <tr valign="top"> | ||
<td width=10>[[image:DotPoint.JPG|10px|link=]]</td> | <td width=10>[[image:DotPoint.JPG|10px|link=]]</td> | ||
| − | <td>Setting a layer for an object | + | <td>Setting a layer for an object or a group of selected objects will move them to that layer</td> |
| − | + | ||
| − | + | ||
| − | + | ||
| − | + | ||
</tr> | </tr> | ||
<tr valign="top"> | <tr valign="top"> | ||
| Line 2,188: | Line 2,271: | ||
<td>[[image:LinkWiki.PNG|link=]]</td> | <td>[[image:LinkWiki.PNG|link=]]</td> | ||
<td> | <td> | ||
| − | More information on creating, editing and using '''Layers''' can be found on the '''Trainz Wiki''' at:-< | + | More information on creating, editing and using '''Layers''' can be found on the '''Trainz Wiki''' at:- |
| − | :'''[[How_to_Use_Layers|How to Use Layers]]''' | + | <table> |
| + | <tr valign="top"> | ||
| + | <td>[[image:BlackDot10x10.png|link=]]</td> | ||
| + | <td>'''[[How_to_Use_Layers|How to Use Layers]]''' | ||
| + | </td> | ||
| + | </tr> | ||
| + | </table> | ||
</td> | </td> | ||
</tr> | </tr> | ||
| Line 3,545: | Line 3,634: | ||
<tr valign="top"> | <tr valign="top"> | ||
<td>[[image:LinkWiki.PNG|link=]]</td> | <td>[[image:LinkWiki.PNG|link=]]</td> | ||
| − | <td>More examples and more detailed descriptions of the '''Tool Options Palette Active Controls''' can be found on the '''Trainz Wiki''' at:-< | + | <td>More examples and more detailed descriptions of the '''Tool Options Palette Active Controls''' can be found on the '''Trainz Wiki''' at:- |
| − | :'''[[How_to_Use_S20_Tools#The Brush Tool|How to Use S20 Tools: The Brush Tool]]'''</td> | + | <table> |
| + | <tr valign="top"> | ||
| + | <td>[[image:BlackDot10x10.png|link=]]</td> | ||
| + | <td>'''[[How_to_Use_S20_Tools#The Brush Tool|How to Use S20 Tools: The Brush Tool]]'''</td> | ||
| + | </tr> | ||
| + | </table> | ||
| + | </td> | ||
</tr> | </tr> | ||
</table> | </table> | ||
| Line 5,720: | Line 5,815: | ||
='''The Layers Palette'''= | ='''The Layers Palette'''= | ||
</td> | </td> | ||
| − | <td width=50>[[image:SkipDown.png|link=#skip | + | <td width=50>[[image:SkipDown.png|link=#skip Lock Route Layer Group|Skip Down]]</td> |
<td width=50>[[image:SkipUp.png|link=#skipBulkReplace|Skip Up]]</td> | <td width=50>[[image:SkipUp.png|link=#skipBulkReplace|Skip Up]]</td> | ||
<td width=46>[[image:BackToTop.png|link=#top|alt=Top|Top]]</td> | <td width=46>[[image:BackToTop.png|link=#top|alt=Top|Top]]</td> | ||
| Line 5,778: | Line 5,873: | ||
</table> | </table> | ||
<br> | <br> | ||
| + | <table width=1000> <!-- BEGIN Section Nav Buttons --> | ||
| + | <tr valign="top"> | ||
| + | <td width=629><span id="skip Lock Route Layer Group"></span> | ||
=='''Lock the Route Layer Group'''== | =='''Lock the Route Layer Group'''== | ||
| + | </td> | ||
| + | <td width=50>[[image:SkipDown.png|link=#skip Open a Layer Group|Skip Down]]</td> | ||
| + | <td width=50>[[image:SkipUp.png|link=#stepLayers|Skip Up]]</td> | ||
| + | <td width=46> </td> <!-- for Top --> | ||
| + | <td width=75>[[image:HeadingUp.png|link=#stepLayers|alt=Heading|To Heading]]</td> | ||
| + | <td width=75> </td> <!-- for Next Down --> | ||
| + | <td width=75> </td> <!-- for Bottom --> | ||
| + | </tr> | ||
| + | </table> <!-- END Section Nav Buttons --> | ||
<table width=1000 bgcolor="lightcyan" cellpadding=2> | <table width=1000 bgcolor="lightcyan" cellpadding=2> | ||
| Line 5,815: | Line 5,922: | ||
=='''Open a Layer Group'''== | =='''Open a Layer Group'''== | ||
</td> | </td> | ||
| − | <td width=50>[[image:SkipDown.png|link=#skip | + | <td width=50>[[image:SkipDown.png|link=#skip Add a New Layer|Skip Down]]</td> |
| − | <td width=50>[[image:SkipUp.png|link=# | + | <td width=50>[[image:SkipUp.png|link=#skip Lock Route Layer Group|Skip Up]]</td> |
<td width=46> </td> <!-- for Top --> | <td width=46> </td> <!-- for Top --> | ||
<td width=75>[[image:HeadingUp.png|link=#stepLayers|alt=Heading|To Heading]]</td> | <td width=75>[[image:HeadingUp.png|link=#stepLayers|alt=Heading|To Heading]]</td> | ||
| Line 5,852: | Line 5,959: | ||
</table> | </table> | ||
<br> | <br> | ||
| + | <table width=1000> <!-- BEGIN Section Nav Buttons --> | ||
| + | <tr valign="top"> | ||
| + | <td width=629><span id="skip Add a New Layer"></span> | ||
=='''Add a New Layer'''== | =='''Add a New Layer'''== | ||
| + | </td> | ||
| + | <td width=50>[[image:SkipDown.png|link=#skip Renaming a Layer|Skip Down]]</td> | ||
| + | <td width=50>[[image:SkipUp.png|link=#skip Open a Layer Group|Skip Up]]</td> | ||
| + | <td width=46> </td> <!-- for Top --> | ||
| + | <td width=75>[[image:HeadingUp.png|link=#stepLayers|alt=Heading|To Heading]]</td> | ||
| + | <td width=75> </td> <!-- for Next Down --> | ||
| + | <td width=75> </td> <!-- for Bottom --> | ||
| + | </tr> | ||
| + | </table> <!-- END Section Nav Buttons --> | ||
<table width=1000 bgcolor="lightcyan" cellpadding=2> | <table width=1000 bgcolor="lightcyan" cellpadding=2> | ||
| Line 5,872: | Line 5,991: | ||
=='''Renaming a Layer'''== | =='''Renaming a Layer'''== | ||
</td> | </td> | ||
| − | <td width=50>[[image:SkipDown.png|link=#skip | + | <td width=50>[[image:SkipDown.png|link=#skip Deleting a Layer|Skip Down]]</td> |
| − | <td width=50>[[image:SkipUp.png|link=#skip | + | <td width=50>[[image:SkipUp.png|link=#skip Add a New Layer|Skip Up]]</td> |
<td width=46> </td> <!-- for Top --> | <td width=46> </td> <!-- for Top --> | ||
<td width=75>[[image:HeadingUp.png|link=#stepLayers|alt=Heading|To Heading]]</td> | <td width=75>[[image:HeadingUp.png|link=#stepLayers|alt=Heading|To Heading]]</td> | ||
| Line 5,925: | Line 6,044: | ||
</table> | </table> | ||
<br> | <br> | ||
| + | <table width=1000> <!-- BEGIN Section Nav Buttons --> | ||
| + | <tr valign="top"> | ||
| + | <td width=629><span id="skip Deleting a Layer"></span> | ||
=='''Deleting a Layer'''== | =='''Deleting a Layer'''== | ||
| + | </td> | ||
| + | <td width=50>[[image:SkipDown.png|link=#skip Moving a Layer|Skip Down]]</td> | ||
| + | <td width=50>[[image:SkipUp.png|link=#skip Renaming a Layer|Skip Up]]</td> | ||
| + | <td width=46> </td> <!-- for Top --> | ||
| + | <td width=75>[[image:HeadingUp.png|link=#stepLayers|alt=Heading|To Heading]]</td> | ||
| + | <td width=75> </td> <!-- for Next Down --> | ||
| + | <td width=75> </td> <!-- for Bottom --> | ||
| + | </tr> | ||
| + | </table> <!-- END Section Nav Buttons --> | ||
<table bgcolor=#ff0000 ellpadding=2> | <table bgcolor=#ff0000 ellpadding=2> | ||
| Line 5,991: | Line 6,122: | ||
</td> | </td> | ||
<td width=50>[[image:SkipDown.png|link=#skip Merging a Layer|Skip Down]]</td> | <td width=50>[[image:SkipDown.png|link=#skip Merging a Layer|Skip Down]]</td> | ||
| − | <td width=50>[[image:SkipUp.png|link=#skip | + | <td width=50>[[image:SkipUp.png|link=#skip Deleting a Layer|Skip Up]]</td> |
<td width=46> </td> <!-- for Top --> | <td width=46> </td> <!-- for Top --> | ||
<td width=75>[[image:HeadingUp.png|link=#stepLayers|alt=Heading|To Heading]]</td> | <td width=75>[[image:HeadingUp.png|link=#stepLayers|alt=Heading|To Heading]]</td> | ||
| Line 6,207: | Line 6,338: | ||
=='''Merging a Layer'''== | =='''Merging a Layer'''== | ||
</td> | </td> | ||
| − | <td width=50>[[image:SkipDown.png|link=#skip | + | <td width=50>[[image:SkipDown.png|link=#skip Hiding Layers|Skip Down]]</td> |
<td width=50>[[image:SkipUp.png|link=#skip Moving a Layer|Skip Up]]</td> | <td width=50>[[image:SkipUp.png|link=#skip Moving a Layer|Skip Up]]</td> | ||
<td width=46> </td> <!-- for Top --> | <td width=46> </td> <!-- for Top --> | ||
| Line 6,286: | Line 6,417: | ||
</table> | </table> | ||
<br> | <br> | ||
| + | <table width=1000> <!-- BEGIN Section Nav Buttons --> | ||
| + | <tr valign="top"> | ||
| + | <td width=629><span id="skip Hiding Layers"></span> | ||
=='''Hiding Layers'''== | =='''Hiding Layers'''== | ||
| + | </td> | ||
| + | <td width=50>[[image:SkipDown.png|link=#skip Locking Layers|Skip Down]]</td> | ||
| + | <td width=50>[[image:SkipUp.png|link=#skip Merging a Layer|Skip Up]]</td> | ||
| + | <td width=46> </td> <!-- for Top --> | ||
| + | <td width=75>[[image:HeadingUp.png|link=#stepLayers|alt=Heading|To Heading]]</td> | ||
| + | <td width=75> </td> <!-- for Next Down --> | ||
| + | <td width=75> </td> <!-- for Bottom --> | ||
| + | </tr> | ||
| + | </table> <!-- END Section Nav Buttons --> | ||
| + | |||
<table width=1000 bgcolor="lightcyan" cellpadding=2> | <table width=1000 bgcolor="lightcyan" cellpadding=2> | ||
<tr valign="top"> | <tr valign="top"> | ||
| Line 6,359: | Line 6,503: | ||
=='''Locking Layers'''== | =='''Locking Layers'''== | ||
</td> | </td> | ||
| − | <td width=50>[[image:SkipDown.png|link=#skip | + | <td width=50>[[image:SkipDown.png|link=#skip Setting the Active Layer|Skip Down]]</td> |
| − | <td width=50>[[image:SkipUp.png|link=#skip | + | <td width=50>[[image:SkipUp.png|link=#skip Hiding Layers|Skip Up]]</td> |
<td width=46> </td> <!-- for Top --> | <td width=46> </td> <!-- for Top --> | ||
<td width=75>[[image:HeadingUp.png|link=#stepLayers|alt=Heading|To Heading]]</td> | <td width=75>[[image:HeadingUp.png|link=#stepLayers|alt=Heading|To Heading]]</td> | ||
| Line 6,439: | Line 6,583: | ||
</table> | </table> | ||
<br> | <br> | ||
| − | + | <table width=1000> <!-- BEGIN Section Nav Buttons --> | |
| + | <tr valign="top"> | ||
| + | <td width=629><span id="skip Setting the Active Layer"></span> | ||
=='''Setting the Active Layer'''== | =='''Setting the Active Layer'''== | ||
| + | </td> | ||
| + | <td width=50>[[image:SkipDown.png|link=#skip Move an Object to Another Layer|Skip Down]]</td> | ||
| + | <td width=50>[[image:SkipUp.png|link=#skip Locking Layers|Skip Up]]</td> | ||
| + | <td width=46> </td> <!-- for Top --> | ||
| + | <td width=75>[[image:HeadingUp.png|link=#stepLayers|alt=Heading|To Heading]]</td> | ||
| + | <td width=75> </td> <!-- for Next Down --> | ||
| + | <td width=75> </td> <!-- for Bottom --> | ||
| + | </tr> | ||
| + | </table> <!-- END Section Nav Buttons --> | ||
<table width=1000 bgcolor="lightcyan" cellpadding=2> | <table width=1000 bgcolor="lightcyan" cellpadding=2> | ||
| Line 6,503: | Line 6,658: | ||
</td> | </td> | ||
<td width=50>[[image:SkipDown.png|link=#stepScrapbook|Skip Down]]</td> | <td width=50>[[image:SkipDown.png|link=#stepScrapbook|Skip Down]]</td> | ||
| − | <td width=50>[[image:SkipUp.png|link=#skip | + | <td width=50>[[image:SkipUp.png|link=#skip Setting the Active Layer|Skip Up]]</td> |
<td width=46> </td> <!-- for Top --> | <td width=46> </td> <!-- for Top --> | ||
<td width=75>[[image:HeadingUp.png|link=#stepLayers|alt=Heading|To Heading]]</td> | <td width=75>[[image:HeadingUp.png|link=#stepLayers|alt=Heading|To Heading]]</td> | ||
| Line 6,575: | Line 6,730: | ||
<tr valign="top"> | <tr valign="top"> | ||
<td>[[image:PencilTips.PNG|link=]]</td> | <td>[[image:PencilTips.PNG|link=]]</td> | ||
| − | <td>Multiple objects from the same layer | + | <td>Multiple objects from the same layer can be selected and assigned to another layer</td> |
| − | + | ||
| − | + | ||
| − | + | ||
| − | + | ||
| − | + | ||
| − | + | ||
| − | + | ||
| − | </td> | + | |
</tr> | </tr> | ||
</table> | </table> | ||
| Line 6,897: | Line 7,044: | ||
<tr valign="top"> | <tr valign="top"> | ||
<td>[[image:PencilTips.PNG|link=]]</td> | <td>[[image:PencilTips.PNG|link=]]</td> | ||
| − | <td>You don't have to use the '''Marquee Tool''' to create a new '''Scrapbook'''. You can use the [[image:S20_FreeMoveToolIcon.png|link=|20px]] '''Free Move Tool''' or the [[image:S20_FineAdjustmentToolIcon.png|link=|20px]] '''Fine Adjustment Tool''' to select any number of objects and then press <span style="font-weight: 700; font-size: 15px;"><span style="color: white; background-color: black;"> Ctrl </span> + <span style="color: white; background-color: black;"> C </span></span>. The selected objects, along with the ground height, ground textures, and any effect layers, will be copied into a new '''Scrapbook'''</td> | + | <td>You don't have to use the '''Marquee Tool''' to create a new '''Scrapbook'''. You can use the [[image:S20_FreeMoveToolIcon.png|link=|20px]] '''Free Move Tool''' or the [[image:S20_FineAdjustmentToolIcon.png|link=|20px]] '''Fine Adjustment Tool''' to select any number of objects and then press <span style="font-weight: 700; font-size: 15px;"><span style="color: white; background-color: black;"> Ctrl </span> + <span style="color: white; background-color: black;"> C </span></span>. The selected objects, along with the ground height, ground textures, and any effect layers that are below them, will be copied into a new '''Scrapbook'''</td> |
</tr> | </tr> | ||
</table> | </table> | ||
| Line 7,109: | Line 7,256: | ||
<td width=50>[[image:SkipDown.png|link=#stepPreview|Skip Down]]</td> | <td width=50>[[image:SkipDown.png|link=#stepPreview|Skip Down]]</td> | ||
<td width=50>[[image:SkipUp.png|link=#skip Creating a New Scrapbook|Skip Up]]</td> | <td width=50>[[image:SkipUp.png|link=#skip Creating a New Scrapbook|Skip Up]]</td> | ||
| − | <td width=46> | + | <td width=46>[[image:SkipMinorDown.png|link=#Paint Scrapbook]][[image:SkipMinorBlank.png|link=]]</td> <!-- for Top and Minor Up/Down --> |
<td width=75>[[image:HeadingUp.png|link=#stepScrapbook|alt=Heading|To Heading]]</td> | <td width=75>[[image:HeadingUp.png|link=#stepScrapbook|alt=Heading|To Heading]]</td> | ||
<td width=75> </td> <!-- for Next Down --> | <td width=75> </td> <!-- for Next Down --> | ||
| Line 7,116: | Line 7,263: | ||
</table> <!-- END Section Nav Buttons --> | </table> <!-- END Section Nav Buttons --> | ||
| + | <table width=1000 bgcolor="lightcyan" cellpadding=2> | ||
| + | <tr valign="top"> | ||
| + | <td width=10>[[image:BlueDot10x10.png|link=]]</td> | ||
| + | <td>Scrapbooks can be '''Pasted''' into your '''Trainz World''' using the normal paste <span style="font-weight: 700; font-size: 15px;"><span style="color: white; background-color: black;"> Ctrl </span> + <span style="color: white; background-color: black;"> V </span></span> keys</td> | ||
| + | </tr> | ||
| + | <tr valign="top"> | ||
| + | <td>[[image:BlueDot10x10.png|link=]]</td> | ||
| + | <td>Scrapbooks can be '''Painted''' into your '''Trainz World''' using the '''Brush Tool'''</td> | ||
| + | </tr> | ||
| + | <tr valign="top"> | ||
| + | <td>[[image:BlueDot10x10.png|link=]]</td> | ||
| + | <td>In both cases the contents of the scrapbook that will be pasted/painted and how they will be pasted/painted are controlled by the '''Filter Settings''' in the '''Scrapbook Palette''' </td> | ||
| + | </tr> | ||
| + | </table> | ||
| + | <br> | ||
| + | <table width=1000> <!-- BEGIN Section Nav Buttons --> | ||
| + | <tr valign="top"> | ||
| + | <td width=629><span id="Paint Scrapbook"></span> | ||
==='''Painting a Scrapbook'''=== | ==='''Painting a Scrapbook'''=== | ||
| + | </td> | ||
| + | <td width=50> </td> | ||
| + | <td width=50> </td> | ||
| + | <td width=46>[[image:SkipMinorDown.png|link=#skip Paint Clone]][[image:SkipMinorUp.png|link=#skip Painting or Pasting a Scrapbook]]</td> <!-- for Top and Minor Up/Down --> | ||
| + | <td width=75> </td> | ||
| + | <td width=75> </td> | ||
| + | <td width=75> </td> <!-- for Bottom --> | ||
| + | </tr> | ||
| + | </table> <!-- END Section Nav Buttons --> | ||
<table width=1000> | <table width=1000> | ||
<tr valign="top"> | <tr valign="top"> | ||
| − | <td>Existing '''Scrapbooks''' can be painted into the '''Trainz World''' using the '''Brush Tool''' (see the '''Trainz Wiki''' page [[image:WikiLink.PNG|link=]] '''[[How_to_Use_S20_Tools#The Tools Palette|How to Use the Surveyor 2.0 Tools]]''') | + | <td>Existing '''Scrapbooks''' can be painted into the '''Trainz World''' using the '''Brush Tool''' (see the '''Trainz Wiki''' page [[image:WikiLink.PNG|link=]] '''[[How_to_Use_S20_Tools#The Tools Palette|How to Use the Surveyor 2.0 Tools]]''').<br><br> |
| − | When the <span style="font-weight: 700; font-size: 15px; color: white; background-color: black;"> Scrapbook Data </span> '''Target''' is selected | + | When the '''Brush Tool''' <span style="font-weight: 700; font-size: 15px; color: white; background-color: black;"> Scrapbook Data </span> '''Target''' is selected, a second drop down box will give a choice of two brush '''Actions''' that control how the scrapbook will be applied.</td> |
</tr> | </tr> | ||
</table> | </table> | ||
| Line 7,153: | Line 7,327: | ||
</tr> | </tr> | ||
<tr valign="top"> | <tr valign="top"> | ||
| − | <td><span style="font-weight: 700; font-size: 15px; color: white; background-color: black;"> Scrapbook Brush </span> will '''resize''' the scrapbook contents to fit the | + | <td> |
| − | <span style="font-weight: 700; font-size: 15px; color: white; background-color: black;"> Scrapbook Clone </span> | + | <table> |
| + | <tr valign="top"> | ||
| + | <td width=150><span style="font-weight: 700; font-size: 15px; color: white; background-color: black;"> Scrapbook Brush </span></td> | ||
| + | <td>will '''resize''' the scrapbook contents to fit the <span style="font-weight: 700; font-size: 15px; color: white; background-color: #797979;"> Tool Options Palette </span> <span style="font-weight: 700; font-size: 15px; color: gold; background-color: black;"> Shape </span> and <span style="font-weight: 700; font-size: 15px; color: gold; background-color: black;"> Radius </span> settings</td> | ||
| + | </tr> | ||
| + | <tr valign="top"> | ||
| + | <td><span style="font-weight: 700; font-size: 15px; color: white; background-color: black;"> Scrapbook Clone </span></td> | ||
| + | <td>will paint the scrapbook sized according to the <span style="font-weight: 700; font-size: 15px; color: white; background-color: #797979;"> Tool Options Palette </span> <span style="font-weight: 700; font-size: 15px; color: gold; background-color: black;"> Scale </span> and <span style="font-weight: 700; font-size: 15px; color: gold; background-color: black;"> Radius </span> settings. See '''Notes''' below</td> | ||
| + | </tr> | ||
| + | </table> | ||
</td> | </td> | ||
</tr> | </tr> | ||
| Line 7,254: | Line 7,437: | ||
</table> | </table> | ||
<br> | <br> | ||
| − | <span id="Paint Clone"></span> | + | <table width=1000> <!-- BEGIN Section Nav Buttons --> |
| − | ====Using the Scrapbook Clone Brush==== | + | <tr valign="top"> |
| + | <td width=629><span id="skip Paint Clone"></span> | ||
| + | ====<span style="font-weight: 700; font-size: 17px; color: white; background-color: blue;"> Using the Scrapbook Clone Brush </span>==== | ||
| + | </td> | ||
| + | <td width=50> </td> | ||
| + | <td width=50> </td> | ||
| + | <td width=46>[[image:SkipMinorDown.png|link=#skip Scrapbook Options]][[image:SkipMinorUp.png|link=#Paint Scrapbook]]</td> <!-- for Top and Minor Up/Down --> | ||
| + | <td width=75> </td> | ||
| + | <td width=75> </td> | ||
| + | <td width=75> </td> <!-- for Bottom --> | ||
| + | </tr> | ||
| + | </table> <!-- END Section Nav Buttons --> | ||
<table width=1000> | <table width=1000> | ||
| Line 7,403: | Line 7,597: | ||
</table> | </table> | ||
<br> | <br> | ||
| − | + | <table width=1000> <!-- BEGIN Section Nav Buttons --> | |
| − | ====Scrapbook Tool Options Settings==== | + | <tr valign="top"> |
| + | <td width=629><span id="skip Scrapbook Options"></span> | ||
| + | ====<span style="font-weight: 700; font-size: 17px; color: white; background-color: blue;"> Scrapbook Tool Options Settings </span>==== | ||
| + | </td> | ||
| + | <td width=50> </td> | ||
| + | <td width=50> </td> | ||
| + | <td width=46>[[image:SkipMinorDown.png|link=#Pasting Scrapbook]][[image:SkipMinorUp.png|link=#skip Paint Clone]]</td> <!-- for Top and Minor Up/Down --> | ||
| + | <td width=75> </td> | ||
| + | <td width=75> </td> | ||
| + | <td width=75> </td> <!-- for Bottom --> | ||
| + | </tr> | ||
| + | </table> <!-- END Section Nav Buttons --> | ||
<table width=1000> | <table width=1000> | ||
| Line 7,568: | Line 7,773: | ||
</table> | </table> | ||
<br> | <br> | ||
| + | <table width=1000> <!-- BEGIN Section Nav Buttons --> | ||
| + | <tr valign="top"> | ||
| + | <td width=629><span id="Pasting Scrapbook"></span> | ||
==='''Pasting a Scrapbook'''=== | ==='''Pasting a Scrapbook'''=== | ||
| + | </td> | ||
| + | <td width=50> </td> | ||
| + | <td width=50> </td> | ||
| + | <td width=46>[[image:SkipMinorDown.png|link=#Scrapbook Filters]][[image:SkipMinorUp.png|link=#skip Scrapbook Options]]</td> <!-- for Top and Minor Up/Down --> | ||
| + | <td width=75> </td> | ||
| + | <td width=75> </td> | ||
| + | <td width=75> </td> <!-- for Bottom --> | ||
| + | </tr> | ||
| + | </table> <!-- END Section Nav Buttons --> | ||
<table bgcolor=#000000 width=800 cellpadding=2> | <table bgcolor=#000000 width=800 cellpadding=2> | ||
| Line 7,597: | Line 7,814: | ||
</table> | </table> | ||
<br> | <br> | ||
| + | <table width=1000> <!-- BEGIN Section Nav Buttons --> | ||
| + | <tr valign="top"> | ||
| + | <td width=629><span id="Scrapbook Filters"></span> | ||
==='''Setting the Scrapbook Filters'''=== | ==='''Setting the Scrapbook Filters'''=== | ||
| + | </td> | ||
| + | <td width=50> </td> | ||
| + | <td width=50> </td> | ||
| + | <td width=46>[[image:SkipMinorDown.png|link=#stepPreview]][[image:SkipMinorUp.png|link=#Pasting Scrapbook]]</td> <!-- for Top and Minor Up/Down --> | ||
| + | <td width=75> </td> | ||
| + | <td width=75> </td> | ||
| + | <td width=75> </td> <!-- for Bottom --> | ||
| + | </tr> | ||
| + | </table> <!-- END Section Nav Buttons --> | ||
<table bgcolor=#000000 width=1000 cellpadding=2> | <table bgcolor=#000000 width=1000 cellpadding=2> | ||
| Line 7,725: | Line 7,954: | ||
<td>  </td> | <td>  </td> | ||
<td><span style="font-size: 15px; font-weight: 700; color: white; background-color: black;"> Effect Layers </span></td> | <td><span style="font-size: 15px; font-weight: 700; color: white; background-color: black;"> Effect Layers </span></td> | ||
| − | <td> | + | <td>'''TurfFX/Clutter Effect Layers''' used in the scrapbook |
| + | <table bgcolor=#ffffb0 cellpadding=2> | ||
| + | <tr valign="top"> | ||
| + | <td width=25>[[image:NotePad.PNG|link=]]</td> | ||
| + | <td>'''Water''' and '''Color Effect Layers''' cannot be added to a scrapbook as they already cover the entire route</td> | ||
| + | </tr> | ||
| + | </table> | ||
| + | </td> | ||
</tr> | </tr> | ||
<tr valign="top"> | <tr valign="top"> | ||
| Line 7,733: | Line 7,969: | ||
<td>  </td> | <td>  </td> | ||
<td><span style="font-size: 15px; font-weight: 700; color: white; background-color: black;"> None </span></td> | <td><span style="font-size: 15px; font-weight: 700; color: white; background-color: black;"> None </span></td> | ||
| − | <td>do not | + | <td>do not paint/paste this feature</td> |
</tr> | </tr> | ||
<tr valign="top"> | <tr valign="top"> | ||
| Line 7,774: | Line 8,010: | ||
<tr valign="top"> | <tr valign="top"> | ||
<td width=629><span id="stepPreview"></span> | <td width=629><span id="stepPreview"></span> | ||
| − | |||
='''The Asset Preview Palette'''= | ='''The Asset Preview Palette'''= | ||
</td> | </td> | ||
| Line 7,859: | Line 8,094: | ||
<tr valign="top"> | <tr valign="top"> | ||
<td width=10>[[image:BlueDot10x10.png|link=]]</td> | <td width=10>[[image:BlueDot10x10.png|link=]]</td> | ||
| − | <td>This palette is mainly intended for content creators, particularly '''MPS''' ('''M'''ulti '''P'''layer '''S'''urveyor) content. It helps manage, prepare and upload to the '''MPS Server''' a user created "Content Package". The web site for the '''TCCP''' ('''T'''rainz '''C'''ontent '''C'''reation '''P'''rogram), which is not '''MPS''' specific, can be found at '''[https://info.trainzsimulator.com/tccp info.trainzsimulator.com/tccp ]''' </td> | + | <td>This palette is mainly intended for content creators, particularly '''MPS''' ('''M'''ulti '''P'''layer '''S'''urveyor) content. It helps manage, prepare and upload to the '''MPS Server''' a user created "Content Package". The web site for the '''TCCP''' ('''T'''rainz '''C'''ontent '''C'''reation '''P'''rogram), which is not '''MPS''' specific, can be found at [[image:WikiLink.PNG|link=]] '''[https://info.trainzsimulator.com/tccp info.trainzsimulator.com/tccp ]''' </td> |
</tr> | </tr> | ||
</table> | </table> | ||
| Line 8,889: | Line 9,124: | ||
<td width=50>[[image:SkipDown.png|link=#skip Driver Location|Skip Down]]</td> | <td width=50>[[image:SkipDown.png|link=#skip Driver Location|Skip Down]]</td> | ||
<td width=50>[[image:SkipUp.png|link=#skip Switching Drivers|Skip Up]]</td> | <td width=50>[[image:SkipUp.png|link=#skip Switching Drivers|Skip Up]]</td> | ||
| − | <td width=46> | + | <td width=46>[[image:SkipMinorDown.png|link=#skip Surveyor & Driver]][[image:SkipMinorBlank.png|link=]]</td> <!-- for Top and Minor Up/Down --> |
<td width=75>[[image:HeadingUp.png|link=#stepDriverCenter|alt=Heading|To Heading]]</td> | <td width=75>[[image:HeadingUp.png|link=#stepDriverCenter|alt=Heading|To Heading]]</td> | ||
<td width=75> </td> | <td width=75> </td> | ||
| Line 8,954: | Line 9,189: | ||
</table> | </table> | ||
<br> | <br> | ||
| − | <table> | + | <table width=1000> <!-- BEGIN Nav Buttons Table --> |
<tr valign="top"> | <tr valign="top"> | ||
| − | <td><span style="font-weight: 700; font-size: 15px; color: white; background-color: blue;"> In Surveyor and Driver </span></td> | + | <td width=629><span id="skip Surveyor & Driver"></span> |
| + | ===<span style="font-weight: 700; font-size: 15px; color: white; background-color: blue;"> In Surveyor and Driver </span>=== | ||
| + | </td> | ||
| + | <td width=50> </td> | ||
| + | <td width=50> </td> | ||
| + | <td width=46>[[image:SkipMinorDown.png|link=#skip Driver]][[image:SkipMinorUp.png|link=#skip Driver Properties]]</td> <!-- for Top and Minor Up/Down --> | ||
| + | <td width=75> </td> | ||
| + | <td width=75> </td> | ||
| + | <td width=75> </td> | ||
</tr> | </tr> | ||
| − | </table> | + | </table> <!-- END Nav Buttons Table --> |
| − | < | + | |
<table width=1000 bgcolor=#000000 cellpadding=2> | <table width=1000 bgcolor=#000000 cellpadding=2> | ||
<tr valign="top"> | <tr valign="top"> | ||
| Line 9,049: | Line 9,292: | ||
<tr valign="top"> | <tr valign="top"> | ||
<td width=10>[[image:DotPoint.JPG|10px|link=]]</td> | <td width=10>[[image:DotPoint.JPG|10px|link=]]</td> | ||
| − | <td>For drivers under '''Player Control''' you can add, edit and delete driver commands. The '''Add Command''' icon will be shown and the driver commands can be edited<br> | + | <td>For drivers under '''Player Control''' you can add, edit and delete driver commands. The '''Add Command''' icon will be shown (indicated by the arrow in the image below) and the driver commands can be edited<br> |
[[image:DispatchManagerCommandStatusManual_S20.png|link=]]</td> | [[image:DispatchManagerCommandStatusManual_S20.png|link=]]</td> | ||
</tr> | </tr> | ||
<tr valign="top"> | <tr valign="top"> | ||
<td>[[image:DotPoint.JPG|10px|link=]]</td> | <td>[[image:DotPoint.JPG|10px|link=]]</td> | ||
| − | <td>For drivers under the control of the '''TLR''' no '''Add Command''' icon will be shown and the | + | <td>For drivers under the control of the '''TLR''' no '''Add Command''' icon will be shown and the commands cannot be edited<br> |
[[image:DispatchManagerCommandStatusTLR_S20.png|link=]]</td> | [[image:DispatchManagerCommandStatusTLR_S20.png|link=]]</td> | ||
</tr> | </tr> | ||
| Line 9,105: | Line 9,348: | ||
<table width=1000> | <table width=1000> | ||
<tr valign="top"> | <tr valign="top"> | ||
| − | <td>Each | + | <td>Each '''Driver Setting''' has a '''sub menu''' as shown in the image below. <span style="font-weight: 700; font-size: 15px; background-color: lightcyan;"> Left Click </span> on the down arrowhead of a setting to open its sub menu</td> |
</tr> | </tr> | ||
<tr valign="top" align="center"> | <tr valign="top" align="center"> | ||
| Line 9,286: | Line 9,529: | ||
</table> | </table> | ||
<br> | <br> | ||
| − | <table width=1000> | + | <table width=1000> <!-- BEGIN Nav Buttons Table --> |
<tr valign="top"> | <tr valign="top"> | ||
| − | <td | + | <td width=629><span id="skip Driver"></span> |
| + | ===<span style="font-weight: 700; font-size: 15px; color: white; background-color: blue;"> In Driver </span>=== | ||
| + | </td> | ||
| + | <td width=50> </td> | ||
| + | <td width=50> </td> | ||
| + | <td width=46>[[image:SkipMinorDown.png|link=#skip Driver Location]][[image:SkipMinorUp.png|link=#skip Surveyor & Driver]]</td> <!-- for Top and Minor Up/Down --> | ||
| + | <td width=75> </td> | ||
| + | <td width=75> </td> | ||
| + | <td width=75> </td> | ||
</tr> | </tr> | ||
| + | </table> <!-- END Nav Buttons Table --> | ||
| + | |||
| + | <table width=1000> | ||
<tr valign="top"> | <tr valign="top"> | ||
<td colspan=2><span style="font-weight: 700; font-size: 15px; background-color: yellow;">Available in Trainz Plus only</span> When used in '''Driver Mode''' a coloured line will appear above the track showing the path, or possible paths, when the next command in the '''Command Status''' queue is a movement command, such as '''Drive To...''', '''Navigate To...''' or '''Couple To...'''. The path lines will not be shown when these commands are not being executed. The colour of the path lines are '''Blue''', '''Green''', '''Orange''' and '''Red'''.</td> | <td colspan=2><span style="font-weight: 700; font-size: 15px; background-color: yellow;">Available in Trainz Plus only</span> When used in '''Driver Mode''' a coloured line will appear above the track showing the path, or possible paths, when the next command in the '''Command Status''' queue is a movement command, such as '''Drive To...''', '''Navigate To...''' or '''Couple To...'''. The path lines will not be shown when these commands are not being executed. The colour of the path lines are '''Blue''', '''Green''', '''Orange''' and '''Red'''.</td> | ||
| Line 9,304: | Line 9,558: | ||
<td><span style="font-size: 17px; font-weight: 700;">Notes:'''</span> <span style="font-weight: 700; font-size: 15px;">Path Colours:-</span><br> | <td><span style="font-size: 17px; font-weight: 700;">Notes:'''</span> <span style="font-weight: 700; font-size: 15px;">Path Colours:-</span><br> | ||
---- | ---- | ||
| − | These colours identify the type of service and are a "Work In Progress". They may change in future releases</td> | + | </td> |
| + | </tr> | ||
| + | <tr valign="top"> | ||
| + | <td colspan=2>These colours identify the type of service and are a "Work In Progress". They may change in future releases</td> | ||
</tr> | </tr> | ||
<tr valign="top"> | <tr valign="top"> | ||
| Line 9,326: | Line 9,583: | ||
</tr> | </tr> | ||
</table> | </table> | ||
| − | </td> | + | <br> |
| + | <span style="font-weight: 700; font-size: 15px; background-color: lightcyan;">Left Click</span> on the <span style="font-weight: 700; font-size: 15px; color: white; background-color: black;"> Close </span> button to close the window and return to the '''Drivers Palette''' or '''Driver Control Center'''.</td> | ||
</tr> | </tr> | ||
</table> | </table> | ||
| Line 9,346: | Line 9,604: | ||
<td width=10>[[image:DotPoint.JPG|10px|link=]]</td> | <td width=10>[[image:DotPoint.JPG|10px|link=]]</td> | ||
<td>The signals and switches along the path may not be correctly set until the train approaches and activates them</td> | <td>The signals and switches along the path may not be correctly set until the train approaches and activates them</td> | ||
| − | |||
| − | |||
| − | |||
| − | |||
</tr> | </tr> | ||
<tr valign="top"> | <tr valign="top"> | ||
| Line 9,361: | Line 9,615: | ||
</table> | </table> | ||
</td> | </td> | ||
| − | |||
| − | |||
| − | |||
| − | |||
| − | |||
| − | |||
</tr> | </tr> | ||
</table> | </table> | ||
| Line 9,373: | Line 9,621: | ||
<tr valign="top"> | <tr valign="top"> | ||
<td width=629><span id="skip Driver Location"></span> | <td width=629><span id="skip Driver Location"></span> | ||
| − | |||
=='''Driver Location'''== | =='''Driver Location'''== | ||
</td> | </td> | ||
<td width=50>[[image:SkipDown.png|link=#skip Player Assignment|Skip Down]]</td> | <td width=50>[[image:SkipDown.png|link=#skip Player Assignment|Skip Down]]</td> | ||
<td width=50>[[image:SkipUp.png|link=#skip Driver Properties|Skip Up]]</td> | <td width=50>[[image:SkipUp.png|link=#skip Driver Properties|Skip Up]]</td> | ||
| − | <td width=46> | + | <td width=46>[[image:SkipMinorDown.png|link=#skip Train Properties]][[image:SkipMinorUp.png|link=#skip Driver]]</td> <!-- for Top and Minor Up/Down --> |
<td width=75>[[image:HeadingUp.png|link=#stepDriverCenter|alt=Heading|To Heading]]</td> | <td width=75>[[image:HeadingUp.png|link=#stepDriverCenter|alt=Heading|To Heading]]</td> | ||
<td width=75> </td> | <td width=75> </td> | ||
| Line 9,469: | Line 9,716: | ||
</table> | </table> | ||
<br> | <br> | ||
| − | <span style="font-weight: 700; font-size: | + | <table width=1000> <!-- BEGIN Nav Buttons Table --> |
| + | <tr valign="top"> | ||
| + | <td width=629><span id="skip Train Properties"></span> | ||
| + | ===<span style="font-weight: 700; font-size: 15px; color: white; background-color: blue;"> Train Properties </span>=== | ||
| + | </td> | ||
| + | <td width=50> </td> | ||
| + | <td width=50> </td> | ||
| + | <td width=46>[[image:SkipMinorDown.png|link=#skip Script Properties]][[image:SkipMinorUp.png|link=#skip Driver Location]]</td> <!-- for Top and Minor Up/Down --> | ||
| + | <td width=75> </td> | ||
| + | <td width=75> </td> | ||
| + | <td width=75> </td> | ||
| + | </tr> | ||
| + | </table> <!-- END Nav Buttons Table --> | ||
<table> | <table> | ||
| Line 9,521: | Line 9,780: | ||
</table> | </table> | ||
<br> | <br> | ||
| − | <span style="font-weight: 700; font-size: | + | <table width=1000> <!-- BEGIN Nav Buttons Table --> |
| + | <tr valign="top"> | ||
| + | <td width=629><span id="skip Script Properties"></span> | ||
| + | ===<span style="font-weight: 700; font-size: 15px; color: white; background-color: blue;"> Script Properties </span>=== | ||
| + | </td> | ||
| + | <td width=50> </td> | ||
| + | <td width=50> </td> | ||
| + | <td width=46>[[image:SkipMinorDown.png|link=#skip Player Assignment]][[image:SkipMinorUp.png|link=#skip Train Properties]]</td> <!-- for Top and Minor Up/Down --> | ||
| + | <td width=75> </td> | ||
| + | <td width=75> </td> | ||
| + | <td width=75> </td> | ||
| + | </tr> | ||
| + | </table> <!-- END Nav Buttons Table --> | ||
<table width=1000> | <table width=1000> | ||
| Line 9,603: | Line 9,874: | ||
<td width=50>[[image:SkipDown.png|link=#skip Command Status|Skip Down]]</td> | <td width=50>[[image:SkipDown.png|link=#skip Command Status|Skip Down]]</td> | ||
<td width=50>[[image:SkipUp.png|link=#skip Driver Location|Skip Up]]</td> | <td width=50>[[image:SkipUp.png|link=#skip Driver Location|Skip Up]]</td> | ||
| − | <td width=46> | + | <td width=46>[[image:SkipMinorBlank.png|link=]][[image:SkipMinorUp.png|link=#skip Script Properties]]</td> <!-- for Top and Minor Up/Down --> |
<td width=75>[[image:HeadingUp.png|link=#stepDriverCenter|alt=Heading|To Heading]]</td> | <td width=75>[[image:HeadingUp.png|link=#stepDriverCenter|alt=Heading|To Heading]]</td> | ||
<td width=75> </td> | <td width=75> </td> | ||
| Line 9,731: | Line 10,002: | ||
<table bgcolor=#ffffff cellpadding=2> | <table bgcolor=#ffffff cellpadding=2> | ||
<tr valign="top"> | <tr valign="top"> | ||
| − | <td>[[image:DriverPaletteCommandStatusList_S20.png|link=]]< | + | <td>[[image:DriverPaletteCommandStatusList_S20.png|link=]] |
| − | For a driver under '''AI control'''< | + | <table> |
| − | The '''Add Command''' icon is shown (circled in red in the image above) at the end of the command list. | + | <tr valign="top"> |
| − | + | <td colspan=2>For a driver under '''AI control'''</td> | |
| + | </tr> | ||
| + | <tr valign="top"> | ||
| + | <td width=10>[[image:DotPoint.JPG|10px|link=]]</td> | ||
| + | <td>The '''Add Command''' icon is shown (circled in red in the image above) at the end of the command list</td> | ||
| + | </tr> | ||
| + | <tr valign="top"> | ||
| + | <td>[[image:DotPoint.JPG|10px|link=]]</td> | ||
| + | <td>New commands can be added, existing commands can be deleted or edited</td> | ||
| + | </tr> | ||
| + | <tr valign="top"> | ||
| + | <td colspan=2>For a driver under '''Player Control'''</td> | ||
| + | </tr> | ||
| + | <tr valign="top"> | ||
| + | <td>[[image:DotPoint.JPG|10px|link=]]</td> | ||
| + | <td>The '''Add Command''' icon will be present without any commands<br> | ||
| + | </td> | ||
| + | </tr> | ||
| + | </table> | ||
| + | </td> | ||
</tr> | </tr> | ||
</table> | </table> | ||
| Line 9,748: | Line 10,038: | ||
<table bgcolor=#ffffff cellpadding=2> | <table bgcolor=#ffffff cellpadding=2> | ||
<tr valign="top"> | <tr valign="top"> | ||
| − | <td width=475>[[image:DriverPaletteCommandStatusList2_S20.png|link=]]< | + | <td width=475>[[image:DriverPaletteCommandStatusList2_S20.png|link=]] |
| − | For a driver under control of the '''TLR Automatic Scheduler''' <span style="font-weight: 700; background-color: yellow;">available in Trainz Plus only</span>< | + | <table> |
| − | There is no '''Add Command''' icon< | + | <tr valign="top"> |
| − | New driver commands cannot be added, existing commands cannot be deleted or edited</td> | + | <td colspan=2>For a driver under control of the '''TLR Automatic Scheduler''' <span style="font-weight: 700; background-color: yellow;">available in Trainz Plus only</span></td> |
| + | </tr> | ||
| + | <tr valign="top"> | ||
| + | <td width=10>[[image:DotPoint.JPG|10px|link=]]</td> | ||
| + | <td>There is no '''Add Command''' icon</td> | ||
| + | </tr> | ||
| + | <tr valign="top"> | ||
| + | <td>[[image:DotPoint.JPG|10px|link=]]</td> | ||
| + | <td>New driver commands cannot be added, existing commands cannot be deleted or edited</td> | ||
| + | </tr> | ||
| + | </table> | ||
| + | </td> | ||
</tr> | </tr> | ||
</table> | </table> | ||
| Line 9,858: | Line 10,159: | ||
=='''Activity Log'''== | =='''Activity Log'''== | ||
</td> | </td> | ||
| − | <td width=50>[[image:SkipDown.png|link=# | + | <td width=50>[[image:SkipDown.png|link=#stepDispatchManager|Skip Down]]</td> |
<td width=50>[[image:SkipUp.png|link=#skip Command Status|Skip Up]]</td> | <td width=50>[[image:SkipUp.png|link=#skip Command Status|Skip Up]]</td> | ||
<td width=46> </td> | <td width=46> </td> | ||
| Line 9,934: | Line 10,235: | ||
</td> | </td> | ||
<td width=50>[[image:SkipDown.png|link=#skipDispatchSettings|Skip Down]]</td> | <td width=50>[[image:SkipDown.png|link=#skipDispatchSettings|Skip Down]]</td> | ||
| − | <td width=50> | + | <td width=50>[[image:SkipUp.png|link=#skip Activity Log|Skip Up]]</td> |
<td width=46>[[image:BackToTop.png|link=#top|alt=Top|Top]]</td> | <td width=46>[[image:BackToTop.png|link=#top|alt=Top|Top]]</td> | ||
<td width=75>[[image:NextUp.png|link=#stepDriverCenter|alt=Next Up|Next Up]]</td> | <td width=75>[[image:NextUp.png|link=#stepDriverCenter|alt=Next Up|Next Up]]</td> | ||
| Line 10,124: | Line 10,425: | ||
<td width=50>[[image:SkipDown.png|link=#skipDispatchControls|Skip Down]]</td> | <td width=50>[[image:SkipDown.png|link=#skipDispatchControls|Skip Down]]</td> | ||
<td width=50>[[image:SkipUp.png|link=#stepDispatchManager|Skip Up]]</td> | <td width=50>[[image:SkipUp.png|link=#stepDispatchManager|Skip Up]]</td> | ||
| − | <td width=46> | + | <td width=46>[[image:SkipMinorDown.png|link=#skipDispatchStatus]][[image:SkipMinorBlank.png|link=]]</td> <!-- for Top and Minor Up/Down --> |
<td width=75>[[image:HeadingUp.png|link=#stepDispatchManager|alt=Heading|To Heading]]</td> | <td width=75>[[image:HeadingUp.png|link=#stepDispatchManager|alt=Heading|To Heading]]</td> | ||
<td width=75> </td> | <td width=75> </td> | ||
| Line 10,131: | Line 10,432: | ||
</table> <!-- END Nav Buttons Table --> | </table> <!-- END Nav Buttons Table --> | ||
| − | === | + | <table width=1000> <!-- BEGIN Nav Buttons Table --> |
| + | <tr valign="top"> | ||
| + | <td width=629><span id="skipDispatchStatus"></span> | ||
| + | ===<span style="font-weight: 700; font-size: 15px; color: white; background-color: blue;"> Dispatch Status </span>=== | ||
| + | </td> | ||
| + | <td width=50> </td> | ||
| + | <td width=50> </td> | ||
| + | <td width=46>[[image:SkipMinorDown.png|link=#skipRestartAI]][[image:SkipMinorUp.png|link=#skipDispatchSettings]]</td> <!-- for Top and Minor Up/Down --> | ||
| + | <td width=75> </td> | ||
| + | <td width=75> </td> | ||
| + | <td width=75> </td> | ||
| + | </tr> | ||
| + | </table> <!-- END Nav Buttons Table --> | ||
<table width=1000 bgcolor="lightcyan" cellpadding=2> | <table width=1000 bgcolor="lightcyan" cellpadding=2> | ||
| Line 10,211: | Line 10,524: | ||
</tr> | </tr> | ||
</table> | </table> | ||
| − | + | <br> | |
| − | === | + | <table width=1000> <!-- BEGIN Nav Buttons Table --> |
| + | <tr valign="top"> | ||
| + | <td width=629><span id="skipRestartAI"></span> | ||
| + | ===<span style="font-weight: 700; font-size: 15px; color: white; background-color: blue;"> Restart Stuck AI </span>=== | ||
| + | </td> | ||
| + | <td width=50> </td> | ||
| + | <td width=50> </td> | ||
| + | <td width=46>[[image:SkipMinorDown.png|link=#skipDispatchControls]][[image:SkipMinorUp.png|link=#skipDispatchStatus]]</td> <!-- for Top and Minor Up/Down --> | ||
| + | <td width=75> </td> | ||
| + | <td width=75> </td> | ||
| + | <td width=75> </td> | ||
| + | </tr> | ||
| + | </table> <!-- END Nav Buttons Table --> | ||
<table width=1000 bgcolor="lightcyan" cellpadding=2> | <table width=1000 bgcolor="lightcyan" cellpadding=2> | ||
| Line 10,290: | Line 10,615: | ||
<td width=50> </td> | <td width=50> </td> | ||
<td width=50>[[image:SkipUp.png|link=#skipDispatchSettings|Skip Up]]</td> | <td width=50>[[image:SkipUp.png|link=#skipDispatchSettings|Skip Up]]</td> | ||
| − | <td width=46> | + | <td width=46>[[image:SkipMinorDown.png|link=#DispatchFilters]][[image:SkipMinorUp.png|link=#skipRestartAI]]</td> <!-- for Top and Minor Up/Down --> |
<td width=75>[[image:HeadingUp.png|link=#stepDispatchManager|alt=Heading|To Heading]]</td> | <td width=75>[[image:HeadingUp.png|link=#stepDispatchManager|alt=Heading|To Heading]]</td> | ||
<td width=75> </td> | <td width=75> </td> | ||
| Line 10,322: | Line 10,647: | ||
</tr> | </tr> | ||
</table> | </table> | ||
| − | + | <br> | |
| − | <span id="DispatchFilters"></span> | + | <table width=1000> <!-- BEGIN Nav Buttons Table --> |
| − | + | <tr valign="top"> | |
| + | <td width=629><span id="DispatchFilters"></span> | ||
| + | =='''Dispatch Filters'''== | ||
| + | </td> | ||
| + | <td width=50> </td> | ||
| + | <td width=50>[[image:SkipUp.png|link=#skipDispatchSettings|Skip Up]]</td> | ||
| + | <td width=46>[[image:SkipMinorDown.png|link=#skipItemStatus]][[image:SkipMinorUp.png|link=#skipDispatchControls]]</td> <!-- for Top and Minor Up/Down --> | ||
| + | <td width=75>[[image:HeadingUp.png|link=#stepDispatchManager|alt=Heading|To Heading]]</td> | ||
| + | <td width=75> </td> | ||
| + | <td width=75> </td> | ||
| + | </tr> | ||
| + | </table> <!-- END Nav Buttons Table --> | ||
<table width=1000 bgcolor="lightcyan" cellpadding=2> | <table width=1000 bgcolor="lightcyan" cellpadding=2> | ||
| Line 10,405: | Line 10,741: | ||
</table> | </table> | ||
<br> | <br> | ||
| − | + | <table width=1000> <!-- BEGIN Nav Buttons Table --> | |
| − | ==='''Item Status'''=== | + | <tr valign="top"> |
| + | <td width=629><span id="skipItemStatus"></span> | ||
| + | =='''Item Status'''== | ||
| + | </td> | ||
| + | <td width=50> </td> | ||
| + | <td width=50>[[image:SkipUp.png|link=#skipDispatchSettings|Skip Up]]</td> | ||
| + | <td width=46>[[image:SkipMinorDown.png|link=#stepManageDrivers]][[image:SkipMinorUp.png|link=#DispatchFilters]]</td> <!-- for Top and Minor Up/Down --> | ||
| + | <td width=75>[[image:HeadingUp.png|link=#stepDispatchManager|alt=Heading|To Heading]]</td> | ||
| + | <td width=75> </td> | ||
| + | <td width=75> </td> | ||
| + | </tr> | ||
| + | </table> <!-- END Nav Buttons Table --> | ||
<table width=1000 bgcolor="lightcyan" cellpadding=2> | <table width=1000 bgcolor="lightcyan" cellpadding=2> | ||
| Line 10,557: | Line 10,904: | ||
<tr valign="top"> | <tr valign="top"> | ||
<td width=629><span id="stepManageIndustries"></span> | <td width=629><span id="stepManageIndustries"></span> | ||
| − | |||
='''Managing Industries'''= | ='''Managing Industries'''= | ||
</td> | </td> | ||
| Line 10,796: | Line 11,142: | ||
<table> | <table> | ||
<tr valign="top"> | <tr valign="top"> | ||
| − | <td colspan=2><span style="font-weight: 700; font-size: 15px; color: white; background-color: black;"> Commodity Levels </span></td> | + | <td colspan=2><span style="font-weight: 700; font-size: 15px; color: white; background-color: black;"> Commodity Levels </span><br> |
| + | Figures in '''(brackets)''' are those in the example shown in the image on the left</td> | ||
</tr> | </tr> | ||
<tr valign="top"> | <tr valign="top"> | ||
| Line 10,811: | Line 11,158: | ||
</tr> | </tr> | ||
<tr valign="top"> | <tr valign="top"> | ||
| − | <td colspan=2><span style="font-weight: 700; font-size: 15px; color: white; background-color: black;"> Industry Processes </span></td> | + | <td colspan=2><span style="font-weight: 700; font-size: 15px; color: white; background-color: black;"> Industry Processes </span><br> |
| + | Figures in '''(brackets)''' are those in the example shown in the image on the left</td> | ||
</tr> | </tr> | ||
<tr valign="top"> | <tr valign="top"> | ||
| Line 10,957: | Line 11,305: | ||
<table> | <table> | ||
<tr valign="top"> | <tr valign="top"> | ||
| − | <td colspan=2><span style="font-weight: 700; font-size: 15px; color: white; background-color: black;"> Commodity Levels </span></td> | + | <td colspan=2><span style="font-weight: 700; font-size: 15px; color: white; background-color: black;"> Commodity Levels </span><br> |
| + | Figures in '''(brackets)''' are those in the example shown in the image on the left</td> | ||
</tr> | </tr> | ||
<tr valign="top"> | <tr valign="top"> | ||
| Line 10,996: | Line 11,345: | ||
<table width=1000> | <table width=1000> | ||
<tr valign="top"> | <tr valign="top"> | ||
| − | <td colspan=2><span style="font-weight: 700; font-size: 15px; color: white; background-color: black;"> Industry Processes </span></td> | + | <td colspan=2><span style="font-weight: 700; font-size: 15px; color: white; background-color: black;"> Industry Processes </span><br> |
| + | Figures in '''(brackets)''' are those in the example shown in the image above</td> | ||
</tr> | </tr> | ||
<tr valign="top"> | <tr valign="top"> | ||
| Line 11,074: | Line 11,424: | ||
<table width=1000> | <table width=1000> | ||
<tr valign="top"> | <tr valign="top"> | ||
| − | <td colspan=2><span style="font-weight: 700; font-size: 15px; color: white; background-color: black;"> Commodity Levels </span></td> | + | <td colspan=2><span style="font-weight: 700; font-size: 15px; color: white; background-color: black;"> Commodity Levels </span><br> |
| + | Figures in '''(brackets)''' are those in the example shown in the image above</td> | ||
</tr> | </tr> | ||
<tr valign="top"> | <tr valign="top"> | ||
| Line 11,110: | Line 11,461: | ||
<table width=1000> | <table width=1000> | ||
<tr valign="top"> | <tr valign="top"> | ||
| − | <td colspan=2><span style="font-weight: 700; font-size: 15px; color: white; background-color: black;"> Industry Processes </span></td> | + | <td colspan=2><span style="font-weight: 700; font-size: 15px; color: white; background-color: black;"> Industry Processes </span><br> |
| + | Figures in '''(brackets)''' are those in the example shown in the image above</td> | ||
</tr> | </tr> | ||
<tr valign="top"> | <tr valign="top"> | ||
| Line 11,168: | Line 11,520: | ||
<tr valign="top"> | <tr valign="top"> | ||
<td>[[image:DotPoint.JPG|10px|link=]]</td> | <td>[[image:DotPoint.JPG|10px|link=]]</td> | ||
| − | <td>'''Peak Departing Passenger Time''' <span style="font-weight: 700; font-size: 15px; background-color: lightcyan;"> Left Click </span> on the '''Double Arrowhead''' to reveal the options< | + | <td>'''Peak Departing Passenger Time''' <span style="font-weight: 700; font-size: 15px; background-color: lightcyan;"> Left Click </span> on the '''Double Arrowhead''' to reveal the options |
| − | [[image:ManageIndustriesStationPeakProp_S20.png|link=]]</td> | + | <table> |
| + | <tr valign="top"> | ||
| + | <td>[[image:ManageIndustriesStationPeakProp_S20.png|link=]]</td> | ||
| + | <td>This sets the time(s) at which the platform will have the most number of waiting passengers</td> | ||
| + | </tr> | ||
| + | </table> | ||
| + | </td> | ||
</tr> | </tr> | ||
<tr valign="top"> | <tr valign="top"> | ||
<td>[[image:DotPoint.JPG|10px|link=]]</td> | <td>[[image:DotPoint.JPG|10px|link=]]</td> | ||
| − | <td>'''Peak Departing Passengers (120)''' <span style="font-weight: 700; font-size: 15px; background-color: lightcyan;"> Left Click </span> in the text box and enter the number of passengers that would be boarding during peak time(s)</td> | + | <td>'''Peak Departing Passengers (120)''' <span style="font-weight: 700; font-size: 15px; background-color: lightcyan;"> Left Click </span> in the text box and enter the number of passengers that would be boarding during peak time(s) as set above</td> |
</tr> | </tr> | ||
<tr valign="top"> | <tr valign="top"> | ||
| Line 11,184: | Line 11,542: | ||
<tr valign="top"> | <tr valign="top"> | ||
<td colspan=2>The same sequence is repeated for each platform</td> | <td colspan=2>The same sequence is repeated for each platform</td> | ||
| + | </tr> | ||
| + | </table> | ||
| + | </td> | ||
| + | </tr> | ||
| + | </table> | ||
| + | <br> | ||
| + | <table width=1000 bgcolor=#000000 cellpadding=2> | ||
| + | <tr valign="top"> | ||
| + | <td> | ||
| + | <table width=996 bgcolor=#ffffb0 cellpadding=2> | ||
| + | <tr valign="top"> | ||
| + | <td width=25>[[image:NotePad.PNG|link=]]</td> | ||
| + | <td width=975><span style="font-size: 17px; font-weight: 700;">Notes:'''</span><br> | ||
| + | ----</td> | ||
| + | </tr> | ||
| + | <tr valign="top"> | ||
| + | <td colspan=2> | ||
| + | <table> | ||
| + | <tr valign="top"> | ||
| + | <td colspan=2>To automatically load and unload passenger consists at station platforms use the normal '''Load''' and '''Unload''' driver commands (as you would for loading/unloading cattle) but with the following differences:-</td> | ||
| + | </tr> | ||
| + | <tr valign="top"> | ||
| + | <td width=10>[[image:DotPoint.JPG|10px|link=]]</td> | ||
| + | <td>'''Load''' will firstly unload passengers according to the option selected in the platform '''Arriving Passenger Behaviour''' (e.g. '''25%''' of passengers on board will unload using the '''Standard''' setting), and then load any waiting passengers upto the limit of each car</td> | ||
| + | </tr> | ||
| + | <tr valign="top"> | ||
| + | <td>[[image:DotPoint.JPG|10px|link=]]</td> | ||
| + | <td>'''Unload''' will unload only using the selected option, it will not load any waiting passengers</td> | ||
| + | </tr> | ||
| + | <tr valign="top"> | ||
| + | <td>[[image:DotPoint.JPG|10px|link=]]</td> | ||
| + | <td>To empty a passenger consist at a terminal station use the '''Unload''' command and set the '''Arriving Passenger Behaviour''' option of the platform to '''Terminus (100% Disembark)'''</td> | ||
| + | </tr> | ||
| + | </table> | ||
| + | </td> | ||
</tr> | </tr> | ||
</table> | </table> | ||
| Line 11,248: | Line 11,641: | ||
<tr valign="top"> | <tr valign="top"> | ||
<td> </td> | <td> </td> | ||
| − | <td colspan=2>A common example of this situation is when a scenery object has been created with the '''kind''' tag in its '''config.txt''' file set to "Industry" most likely because the object represents a factory, mine or other industrial structure but none of the special tags required for a working industry have been added. This type of error is more common in assets created for early versions of '''Trainz'''</td> | + | <td colspan=2>A common example of this situation is when a scenery object has been created with the '''kind''' tag in its '''config.txt''' file set to "Industry" most likely because the object represents a factory, mine or other industrial structure but none of the special tags required for a working industry have been added. This type of error is more common in assets created for early versions of '''Trainz''', usually because the asset creator assumed that the '''kind''' tag was descriptive only (i.e. the asset looked like an industry)</td> |
</tr> | </tr> | ||
</table> | </table> | ||
| Line 11,286: | Line 11,679: | ||
<table width=996 bgcolor=#ffffff cellpadding=2> | <table width=996 bgcolor=#ffffff cellpadding=2> | ||
<tr valign="top"> | <tr valign="top"> | ||
| − | <td>If the '''Script Properties''' section is empty, apart from the title '''Display Legacy View-Details Window''', then it is very unlikely that this object will work correctly as an industry.<br> | + | <td width=35>[[image:Information.png|35px|link=]]</td> |
| + | <td>If the '''Script Properties''' section is empty, apart from the title '''Display Legacy View-Details Window''', then it is '''very unlikely''' that this object will work correctly as an industry.<br> | ||
[[image:ManageIndustriesEmptyScript_S20.png|link=]]</td> | [[image:ManageIndustriesEmptyScript_S20.png|link=]]</td> | ||
</tr> | </tr> | ||
| Line 11,493: | Line 11,887: | ||
<td>[[image:DotPoint2.JPG|link=]]</td> | <td>[[image:DotPoint2.JPG|link=]]</td> | ||
<td><span style="font-weight: 700; font-size: 15px; background-color: lightcyan;"> Left Click </span> on the down '''Arrowhead''' icon of the selected consist in the '''Status''' column<br> | <td><span style="font-weight: 700; font-size: 15px; background-color: lightcyan;"> Left Click </span> on the down '''Arrowhead''' icon of the selected consist in the '''Status''' column<br> | ||
| − | [[image:DispatchManagerLeviDelivering_S20.png|link=]]< | + | [[image:DispatchManagerLeviDelivering_S20.png|link=]]</td> |
| − | + | </tr> | |
| + | <tr valign="top"> | ||
| + | <td>[[image:DotPoint3.JPG|link=]]</td> | ||
| + | <td>select the <span style="font-weight: 700; font-size: 15px; color: white; background-color: black;"> Show Consist... </span> option</td> | ||
</tr> | </tr> | ||
</table> | </table> | ||
| Line 11,522: | Line 11,919: | ||
<td width=10>[[image:BlueDot10x10.png|link=]]</td> | <td width=10>[[image:BlueDot10x10.png|link=]]</td> | ||
<td>The general properties of a consist, such as its '''Track Priority''' and '''Classification''', can be edited</td> | <td>The general properties of a consist, such as its '''Track Priority''' and '''Classification''', can be edited</td> | ||
| + | </tr> | ||
| + | <tr valign="top"> | ||
| + | <td>[[image:BlueDot10x10.png|link=]]</td> | ||
| + | <td>Configuring the properties of any wagon in a consist will configure the properties of '''ALL''' the wagons in the consist</td> | ||
</tr> | </tr> | ||
</table> | </table> | ||
| Line 11,589: | Line 11,990: | ||
</tr> | </tr> | ||
<tr valign="top"> | <tr valign="top"> | ||
| − | <td | + | <td>Select one option from <span style="font-weight: 700; font-size: 15px; color: white; background-color: black;"> 1 </span> <span style="font-weight: 700; font-size: 15px; color: white; background-color: black;"> 2 </span> or <span style="font-weight: 700; font-size: 15px; color: white; background-color: black;"> 3 </span></td> |
| − | + | ||
| − | + | ||
| − | + | ||
| − | + | ||
</tr> | </tr> | ||
<tr valign="top"> | <tr valign="top"> | ||
| − | <td | + | <td>These settings are used with [[image:WikiLink.PNG|link=]] '''[[How_to_Use_Track_Priority_Markers|Track Priority Marker]]''' objects, and a few other track objects, to control the path that a consist will normally take at a junction. Without the presence and use of '''Track Priority Markers''', or other track objects designed to work with priority levels, this setting has no effect on a consist</td> |
| − | + | ||
| − | + | ||
| − | + | ||
| − | + | ||
| − | + | ||
| − | + | ||
| − | + | ||
| − | + | ||
| − | + | ||
</tr> | </tr> | ||
</table> | </table> | ||
| Line 11,739: | Line 12,127: | ||
<tr valign="top"> | <tr valign="top"> | ||
<td width=629><span id="skipLoadConsists"></span> | <td width=629><span id="skipLoadConsists"></span> | ||
| − | |||
=='''Loading Consists (Incl Locomotives)'''== | =='''Loading Consists (Incl Locomotives)'''== | ||
</td> | </td> | ||
| − | <td width=50>[[image:SkipDown.png|link=# | + | <td width=50>[[image:SkipDown.png|link=#skipDriverConsists|Skip Down]]</td> <!-- Skip Down --> |
<td width=50>[[image:SkipUp.png|link=#skipConfigureConsists|Skip Up]]</td> <!-- Skip Up --> | <td width=50>[[image:SkipUp.png|link=#skipConfigureConsists|Skip Up]]</td> <!-- Skip Up --> | ||
<td width=46> </td> <!-- Top --> | <td width=46> </td> <!-- Top --> | ||
| Line 11,759: | Line 12,146: | ||
<td>[[image:BlueDot10x10.png|link=]]</td> | <td>[[image:BlueDot10x10.png|link=]]</td> | ||
<td>Not all consists and locomotives are designed to carry products, including locomotive fuel</td> | <td>Not all consists and locomotives are designed to carry products, including locomotive fuel</td> | ||
| + | </tr> | ||
| + | <tr valign="top"> | ||
| + | <td>[[image:BlueDot10x10.png|link=]]</td> | ||
| + | <td>Once the load has been set for one wagon in a consist it can be copied to '''ALL''' identical wagons in the consist</td> | ||
</tr> | </tr> | ||
</table> | </table> | ||
| Line 11,792: | Line 12,183: | ||
<tr valign="top"> | <tr valign="top"> | ||
<td width=25>[[image:NotePad.PNG|link=]]</td> | <td width=25>[[image:NotePad.PNG|link=]]</td> | ||
| − | <td>Not all rolling stock objects were created to carry loads - | + | <td>Not all rolling stock objects were created to carry loads - the rolling stock creator must have added attachment points for visible products to appear. '''Step''' <span style="font-weight: 700; font-size: 15px; color: white; background-color: red;"> 3 </span> below will reveal if the chosen rolling stock object has been configured for carrying a load. Rolling stock objects that cannot be loaded with a product can still be included in a consist sent to an industry but they will not load/unload</td> |
</tr> | </tr> | ||
</table> | </table> | ||
| Line 11,885: | Line 12,276: | ||
<tr valign="top"> | <tr valign="top"> | ||
<td>[[image:DotPoint.JPG|10px|link=]]</td> | <td>[[image:DotPoint.JPG|10px|link=]]</td> | ||
| − | <td>on the right pointing '''Arrowhead''' to display the icons of all the available products, as shown below | + | <td>on the right pointing '''Arrowhead''' to display the icons of all the available products, as shown below middle. Move the mouse pointer onto a product to reveal its name. To close the icon list <span style="font-weight: 700; font-size: 15px; background-color: lightcyan;"> Left Click </span> on the '''Arrowhead''' again</td> |
| + | </tr> | ||
| + | <tr valign="top"> | ||
| + | <td colspan=2>In both cases <span style="font-weight: 700; font-size: 15px; background-color: lightcyan;"> Left Click </span> on the name or icon of the required product to select it and add it to the consist product list.</td> | ||
</tr> | </tr> | ||
<tr valign="top"> | <tr valign="top"> | ||
| Line 11,893: | Line 12,287: | ||
<td width=140>[[image:LoadBulkWagonStep04_S20.png|link=]]</td> | <td width=140>[[image:LoadBulkWagonStep04_S20.png|link=]]</td> | ||
<td> </td> | <td> </td> | ||
| − | <td width=505>[[image:LoadBulkWagonStep03a_S20.png|link=]]</td> | + | <td width=505>[[image:LoadBulkWagonStep03a_S20.png|link=]]<br> |
| − | <td> | + | A <span style="font-weight: 700; font-size: 15px; background-color: lightcyan;"> Left Click </span> on the <span style="font-weight: 700; font-size: 15px; color: white; background-color: black;"> + Add </span> button in the icon list above will open a dialogue window (shown on the right) listing all the installed commodities. Select (<span style="font-weight: 700; font-size: 15px; background-color: lightcyan;"> Left Click </span>) an item from the list and on the '''Tick''' in the dialogue window to add it to the icon list.</td> |
| − | </td> | + | <td> </td> |
| + | <td width=330>[[image:LoadBulkWagonStep03b_S20.png|330px|link=]]</td> | ||
</tr> | </tr> | ||
</table> | </table> | ||
| Line 11,901: | Line 12,296: | ||
</tr> | </tr> | ||
</table> | </table> | ||
| − | + | The product will then appear in the '''Commodity List''' with a default '''Product Quantity''' value shown as a green bar which may be initially set at '''zero''' for some products. | |
<br> | <br> | ||
<table bgcolor=#000000 cellpadding=2> | <table bgcolor=#000000 cellpadding=2> | ||
| Line 11,926: | Line 12,321: | ||
<tr valign="top"> | <tr valign="top"> | ||
<td width=25>[[image:DotPoint1Blue.png|link=]]</td> | <td width=25>[[image:DotPoint1Blue.png|link=]]</td> | ||
| − | <td><span style="font-weight: 700; font-size: 15px; background-color: lightcyan;"> Left Click </span> on the '''ArrowHead''' icon after the message '''Click here to configure queue...'''</td> | + | <td><span style="font-weight: 700; font-size: 15px; background-color: lightcyan;"> Left Click </span> on the '''ArrowHead''' icon after the message '''Click here to configure queue...''' |
| − | <td rowspan=5>[[image:LoadNotPermittedQueues1b_S20.png|link=]]</td> | + | <table> |
| + | <tr valign="top"> | ||
| + | <td colspan=2>Depending on the consist object ...</td> | ||
| + | </tr> | ||
| + | <tr valign="top"> | ||
| + | <td width=10>[[image:DotPointBlueSquare.png|10px|link=]]</td> | ||
| + | <td>this '''may''' give you a list of possible loading points if they have been built into the rolling stock object - as shown on the upper right</td> | ||
| + | </tr> | ||
| + | <tr valign="top"> | ||
| + | <td>[[image:DotPointBlueSquare.png|10px|link=]]</td> | ||
| + | <td>it '''may''' only give you a single load queue - as shown on the lower right</td> | ||
| + | </tr> | ||
| + | </table> | ||
| + | </td> | ||
| + | <td rowspan=5>[[image:LoadNotPermittedQueues1b_S20.png|link=]]<br><br> | ||
| + | [[image:LoadBulkWagonStep03d_S20.png|link=]]</td> | ||
</tr> | </tr> | ||
<tr valign="top"> | <tr valign="top"> | ||
<td>[[image:DotPoint2Blue.png|link=]]</td> | <td>[[image:DotPoint2Blue.png|link=]]</td> | ||
| − | <td>Select (click) the required | + | <td>Select (click) the required option or options (if it gives you a choice) from those shown. A'''Tick''' will appear in front of each selected option name. A second click on the same option will remove the tick</td> |
<!-- td in rowspan --> | <!-- td in rowspan --> | ||
</tr> | </tr> | ||
| Line 12,015: | Line 12,425: | ||
<table> | <table> | ||
<tr valign="top"> | <tr valign="top"> | ||
| − | <td>You can copy the loaded products and their set levels from the current rolling stock object to all the other identical objects in the consist by a <span style="font-weight: 700; font-size: 15px; background-color: lightcyan;"> Left Click </span> on the [[image:CopyCommodities_S20.png|link=]] icon</td> | + | <td>You can copy the loaded products and their set levels from the current rolling stock object to all the other identical objects in the consist by a <span style="font-weight: 700; font-size: 15px; background-color: lightcyan;"> Left Click </span> on the [[image:CopyCommodities_S20.png|link=]] icon |
| + | <br> | ||
| + | <table bgcolor=#000000 cellpadding=2> | ||
| + | <tr valign="top"> | ||
| + | <td> | ||
| + | <table bgcolor=#ffffb0 cellpadding=2> | ||
| + | <tr valign="top"> | ||
| + | <td width=25>[[image:NotePad.PNG|link=]]</td> | ||
| + | <td>A bulk load will not appear in/on the rolling stock objects until after the session has been started in '''Driver'''</td> | ||
| + | </tr> | ||
| + | </table> | ||
| + | </td> | ||
| + | </tr> | ||
| + | </table> | ||
| + | </td> | ||
</tr> | </tr> | ||
</table> | </table> | ||
| Line 12,037: | Line 12,461: | ||
<table width=1000> <!-- BEGIN Nav Buttons Table --> | <table width=1000> <!-- BEGIN Nav Buttons Table --> | ||
<tr valign="top"> | <tr valign="top"> | ||
| − | <td width=629><span id=" | + | <td width=629><span id="skipDriverConsists"></span> |
| + | =='''Consists in Driver'''== | ||
| + | </td> | ||
| + | <td width=50>[[image:SkipDown.png|link=#stepLogs|Skip Down]]</td> <!-- Skip Down --> | ||
| + | <td width=50>[[image:SkipUp.png|link=#skipLoadConsists|Skip Up]]</td> <!-- Skip Up --> | ||
| + | <td width=46> </td> <!-- Top --> | ||
| + | <td width=75>[[image:HeadingUp.png|link=#stepManageConsists|alt=Heading|To Heading]]</td> <!-- Next Up --> | ||
| + | <td width=75> </td> <!-- Next Down --> | ||
| + | <td width=75> </td> <!-- Bottom --> | ||
| + | </tr> | ||
| + | </table> <!-- END Nav Buttons Table --> | ||
| + | |||
| + | <table width=1000 bgcolor="lightcyan" cellpadding=2> | ||
| + | <tr valign="top"> | ||
| + | <td width=10>[[image:BlueDot10x10.png|link=]]</td> | ||
| + | <td>In '''Driver Mode''' you can open up the properties window of a consist object to view its current load and the list of products it can carry</td> | ||
| + | </tr> | ||
| + | </table> | ||
| + | <br> | ||
| + | <table width=1000 bgcolor=#000000 cellpadding=2> | ||
| + | <tr valign="top"> | ||
| + | <td> | ||
| + | <table width=996 bgcolor=#ffffff cellpadding=2> | ||
| + | <tr valign="top"> | ||
| + | <td colspan=2><span style="font-weight: 700; font-size: 15px;">Steps:</span> To view the load properties of a consist in Driver:-</td> | ||
| + | </tr> | ||
| + | <tr valign="top"> | ||
| + | <td width=25>[[image:DotPoint1.JPG|link=]]</td> | ||
| + | <td width=513><span style="font-weight: 700; font-size: 15px; background-color: lightcyan;"> Right Click </span> on the consist rolling stock object to bring up its options menu. | ||
| + | <br> | ||
| + | The option <span style="font-weight: 700; font-size: 15px; color: white; background-color: black;"> Assign to Player > </span> is only available in '''Trainz Plus'''</td> | ||
| + | <td rowspan=2 width=462>[[image:CoalHopperDriverViewDetails.png|link=]]</td> | ||
| + | </tr> | ||
| + | <tr valign="top"> | ||
| + | <td>[[image:DotPoint2.JPG|link=]]</td> | ||
| + | <td> | ||
| + | <table> | ||
| + | <tr valign="top"> | ||
| + | <td>Select the option <span style="font-weight: 700; font-size: 15px; color: white; background-color: black;"> View Details... </span>. This will open up the properties window for the selected rolling stock object. In the '''Commodities''' section <span style="font-weight: 700; font-size: 15px; background-color: lightcyan;"> Left Click </span> on the '''Arrowhead''' in front of the list of commodies</td> | ||
| + | <td>[[image:CoalHopperDriverViewCommodities.png|link=]]</td> | ||
| + | </tr> | ||
| + | <tr valign="top"> | ||
| + | <td>The icons for all the commodities that can be carried by this rolling stock object will be shown - in this example, coal is the only supported commodity so only a single icon appears</td> | ||
| + | <td>[[image:CoalHopperDriverSupportsCoal.png|link=]]</td> | ||
| + | </tr> | ||
| + | </table> | ||
| + | </td> | ||
| + | <!-- <td></td> in rowspan --> | ||
| + | </tr> | ||
| + | <tr valign="top"> | ||
| + | <td>[[image:DotPoint3.JPG|link=]]</td> | ||
| + | <td colspan=2><span style="font-weight: 700; font-size: 15px; background-color: lightcyan;"> Left Click </span> on the icon for a commodity. The load status of that commodity will be shown</td> | ||
| + | </tr> | ||
| + | <tr valign="top"> | ||
| + | <td> </td> | ||
| + | <td colspan=2> | ||
| + | <table> | ||
| + | <tr valign="top"> | ||
| + | <td align="center">[[image:CoalHopperDriverPropertiesEmpty.png|link=]]<br> | ||
| + | '''No product loaded'''</td> | ||
| + | <td align="center">[[image:CoalHopperDriverPropertiesLoaded.png|link=]]<br> | ||
| + | '''Product fully loaded'''</td> | ||
| + | </tr> | ||
| + | </table> | ||
| + | </td> | ||
| + | </tr> | ||
| + | </table> | ||
| + | </td> | ||
| + | </tr> | ||
| + | </table> | ||
| + | <br> | ||
| + | |||
| + | |||
| + | |||
| + | <table width=1000> <!-- BEGIN Nav Buttons Table --> | ||
| + | <tr valign="top"> | ||
| + | <td width=629><span id="stepLogs"></span> | ||
='''The Logs Palette'''= | ='''The Logs Palette'''= | ||
</td> | </td> | ||
<td width=50> </td> | <td width=50> </td> | ||
| − | <td width=50>[[image:SkipUp.png|link=# | + | <td width=50>[[image:SkipUp.png|link=#skipDriverConsists|Skip Up]]</td> |
<td width=46>[[image:BackToTop.png|link=#top|alt=Top|Top]]</td> | <td width=46>[[image:BackToTop.png|link=#top|alt=Top|Top]]</td> | ||
<td width=75>[[image:NextUp.png|link=#stepManageConsists|alt=Next Up|Next Up]]</td> | <td width=75>[[image:NextUp.png|link=#stepManageConsists|alt=Next Up|Next Up]]</td> | ||
| Line 12,522: | Line 13,022: | ||
<td>[[image:DotPoint.JPG|10px|link=]]</td> | <td>[[image:DotPoint.JPG|10px|link=]]</td> | ||
<td>A [[image:Tick.PNG|link=]] icon indicates no more messages. <span style="font-weight: 700; font-size: 15px; background-color: lightcyan;">Left Click</span> on the [[image:Tick.PNG|link=]] or the [[image:Cross.PNG|link=]] icons to close the window</td> | <td>A [[image:Tick.PNG|link=]] icon indicates no more messages. <span style="font-weight: 700; font-size: 15px; background-color: lightcyan;">Left Click</span> on the [[image:Tick.PNG|link=]] or the [[image:Cross.PNG|link=]] icons to close the window</td> | ||
| + | </tr> | ||
| + | </table> | ||
| + | </td> | ||
| + | </tr> | ||
| + | </table> | ||
| + | <br> | ||
| + | <table cellpadding=2 bgcolor="Aquamarine"> | ||
| + | <tr valign="top"> | ||
| + | <td>[[image:LinkWiki.PNG|link=]]</td> | ||
| + | <td>Detailed descriptions on how to create '''HTML Assets''' and '''Message Popups''' can be found on the '''Trainz Wiki Page''' at:- | ||
| + | <table> | ||
| + | <tr valign="top"> | ||
| + | <td>[[image:BlackDot10x10.png|link=]]</td> | ||
| + | <td>'''[[How to Create a HTML Asset|How to Create a HTML Asset]]'''</td> | ||
| + | </tr> | ||
| + | <tr valign="top"> | ||
| + | <td>[[image:BlackDot10x10.png|link=]]</td> | ||
| + | <td>'''[[How to Use Message Popup Rule|How to Create a Message Popup]]'''</td> | ||
</tr> | </tr> | ||
</table> | </table> | ||
| Line 12,711: | Line 13,229: | ||
<td width=50>[[image:LinkWiki.PNG|link=]]</td> | <td width=50>[[image:LinkWiki.PNG|link=]]</td> | ||
<td> | <td> | ||
| − | <span style="font-size: 17px;">'''Related Links'''</span>< | + | <span style="font-size: 17px;">'''Related Links'''</span> |
| − | + | <table> | |
| − | + | <tr valign="top"> | |
| + | <td>[[image:BlackDot10x10.png|link=]]</td> | ||
| + | <td>'''[[How_to_Use_S20_Tools|How to Use the Surveyor 2.0 Tools]]'''</td> | ||
| + | </tr> | ||
| + | <tr valign="top"> | ||
| + | <td>[[image:BlackDot10x10.png|link=]]</td> | ||
| + | <td>'''[https://docs.trainzsimulator.com/ Trainz Simulator Official Documentation]'''</td> | ||
| + | </tr> | ||
| + | </table> | ||
| + | </td> | ||
</tr> | </tr> | ||
</table> | </table> | ||
Latest revision as of 22:58, 7 June 2025
| The information in this Wiki Page applies to Surveyor 2.0 (S20) as found in Trainz Plus and TRS22 Platinum. There is a companion Wiki Page, |
|
||||||||||||||||||||||||||||||||||
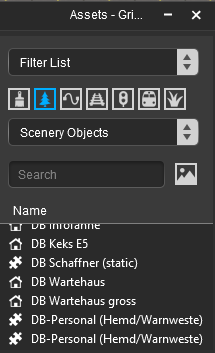


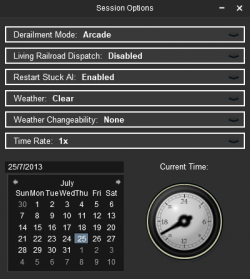
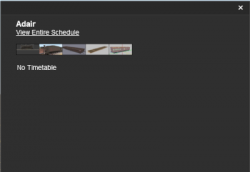
[edit] The Trainz Plus World |
| When you start Trainz Plus and TRS22 Platinum the world presented will look something like the following images, but what you actually see can be highly customised to your own preferences. |
Surveyor 2.0
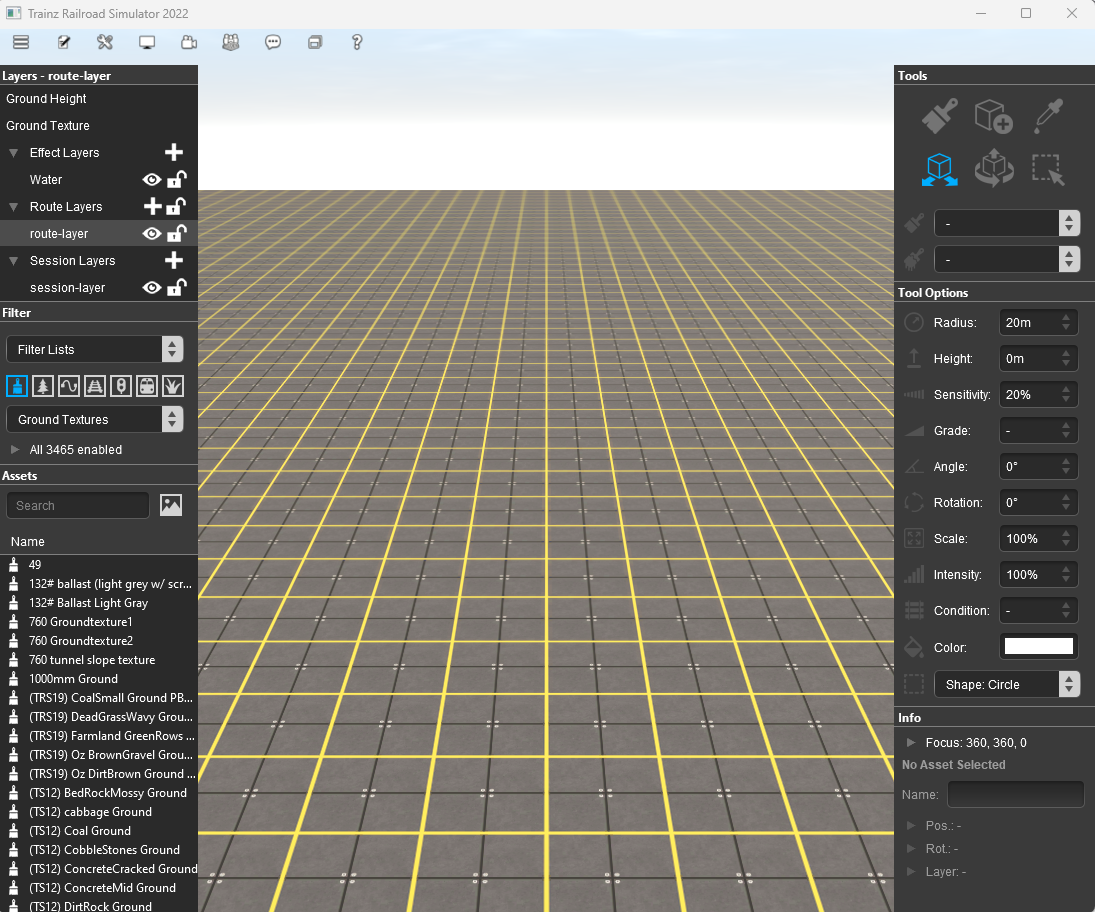
| The dark grey strips on the left and right of the screen contain Palettes that have been Docked into the positions shown. Palettes are where selections can be made, information displayed and controls set. | |||
|
|
|
||||||||||||||||||||||||||||
Driver
|
All the windows in Driver are normally hidden.
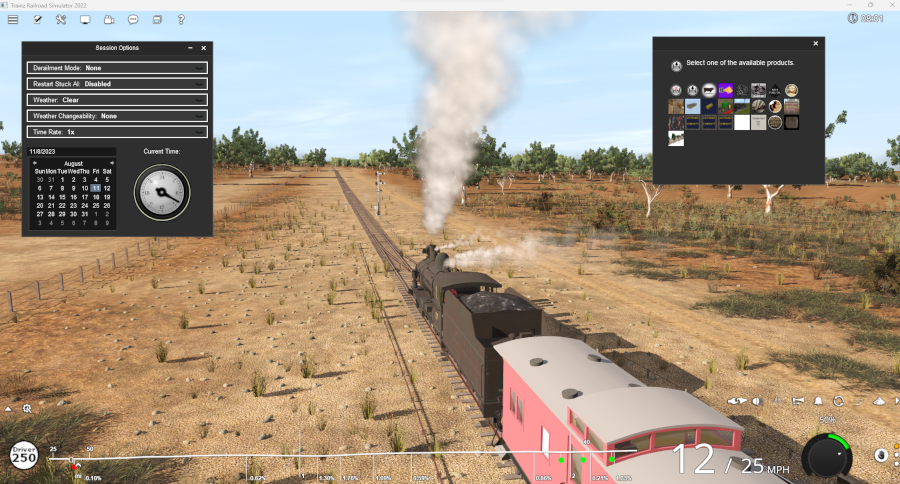
|
|
||||||||||||||||||
[edit] Hiding and Showing Palettes and Windows |
| Palettes and Windows, in both Surveyor and Driver, are hidden and revealed using the |
|
The visible and hidden Palettes and Windows in the screenshots shown above have had their visibility set by:-
Surveyor 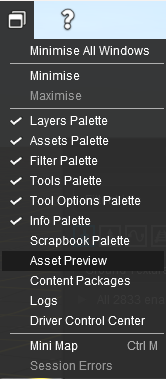 |
Driver 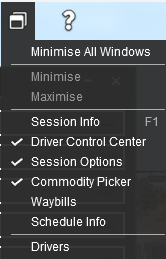 |
|
||||||||||||||||||||||
|
[edit] Docking and Undocking Palettes |
| Palettes in Surveyor are normally Docked, locked into fixed positions on both sides of the Surveyor Screen. They can be Undocked and freed to move anywhere on the screen. | |
| Windows in Driver are Undocked and are free to move anywhere on the screen. They cannot be Docked. |
|
Undocking a Palette
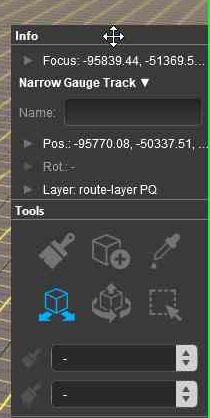 |
|
|||||||||||||||||||||||
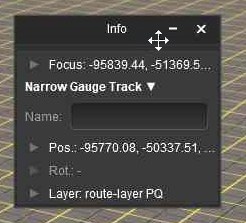
Docking a Palette
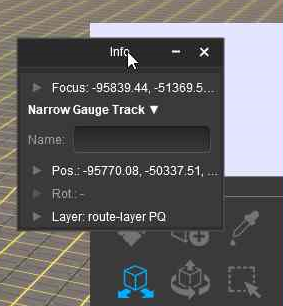 |
|
||||||||||||||||||||
[edit] Resizing Palettes and Windows |
| Only Surveyor palettes that are Undocked can be resized. Some palettes have to be resized to display all their available information. | |
| Most Driver windows cannot be resized. |
|
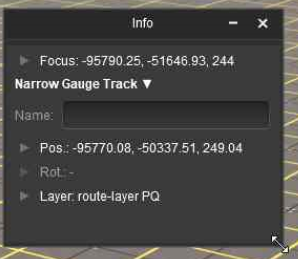 |
|
||||||||||||||||||||
[edit] Minimise Maximise Close |
| Minimising will hide a palette or window but retain its size and position data. | |
| Maximising will return a palette or window to the screen using its last size and position data. | |
| Closing will remove a palette or window from the screen but its size and position data will be saved. When it is next opened it will be shown on the screen using its last size and position data. |
|
The image below shows a Surveyor 2.0 screen with an open window box (the Find Object Tool) and two Undocked palettes (Info and Layers)
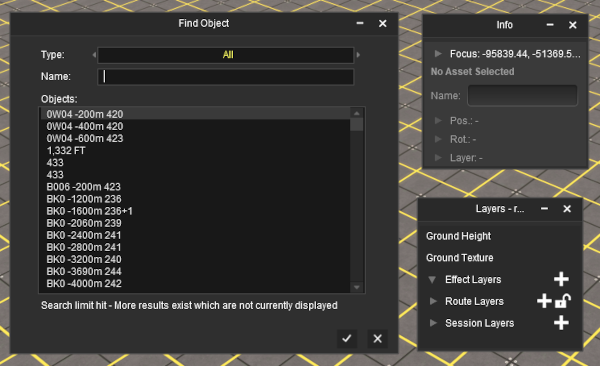 |
|
||||||||||||||||
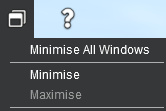
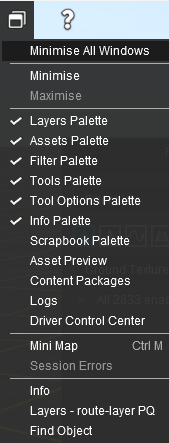 |
|
|||||||||||||||||||||||||
[edit] The Info Palette |
| This is a Surveyor Only palette |
|
| This palette can be easily overlooked but it has some very useful features:- | |
| naming objects | |
| providing precise data and control over the "focus" - the position of the cursor | |
| providing precise data and control over the position and orientation of objects (it can be used instead of the |
|
| identifying and setting the "home" layer and binding layer of a selected object | |
| used for locking and unlocking a selected objects layer | |
The components of the Info Palette are identified in the image below.
 |
|
[edit] Palette Coordinates |
|
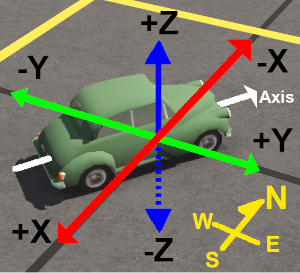 |
|||||||||||||||||||||||
[edit] Info Settings Menu |
All the Focus, Position and Rotation settings have drop down menus that allow values to be transferred to and from other settings and other tools.
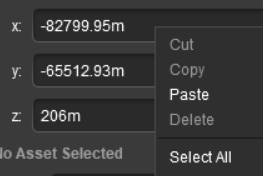 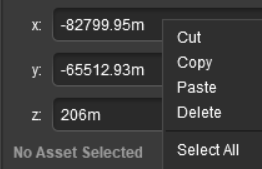 |
|
|||||||||||||||||||||||||||||
Next to the z co-ordinate in both the Focus and Position is a small white down arrowhead. Left Click on the arrowhead to open its menu.
 |
There is only one option in the sub-menu.
|
[edit] Focus Info and Controls |
| The Focus shows the current position and height of the Cursor object. |
Open up the Focus by a Left Click on its arrowhead icon.
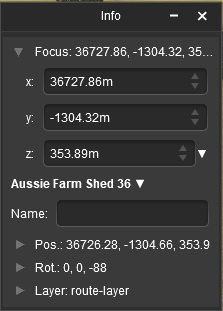 |
|
||||||||||||
|
[edit] Asset Name Menu |
| "Asset Name" refers to the name of the asset as displayed in the Assets Palette and in Content Manager. This is not the same as the Object Name (see the next section) |
You must have an object (or objects) selected for an Asset Name to be shown and for this menu to be available.
| If more than one object has been selected then the name and position data shown will be for the last selected object. If different objects (with different kuid codes) have been selected then a count of the additional objects will be added. The (+2) shown in the object name in the image on the left indicates that 2 additional different objects are in the group of selected objects. |
Next to the Asset Name is a small white Down Arrowhead. Left Click on the arrowhead to open its menu.
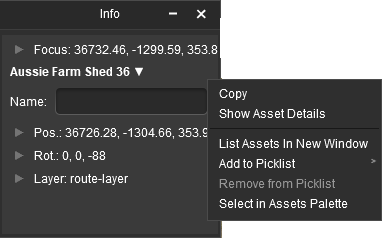 |
|
|||||||||||||||||||||||||||
[edit] Object Name |
| "Object Name" refers to the name that you give to an object |
| You can give any object in your Trainz World an identifying name. In some cases a name is vital for AI and session operations, in other cases it will be needed as a display feature - for example: to be shown on a station nameboard. You must have the object (or objects) selected for this option to be available. If more than one object has been selected then only the last object (the one with the Context Icon) will be affected |
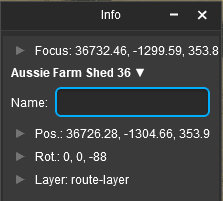 |
|
|||||||||||||
|
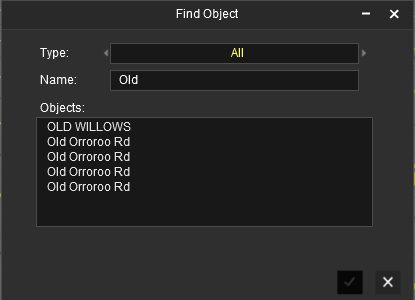 |
|
||||||||
[edit] Position Info and Controls |
You must have an object (or objects) selected for the position data to be shown and edited. Open up the position data by a Left Click on its Pos: arrowhead icon.
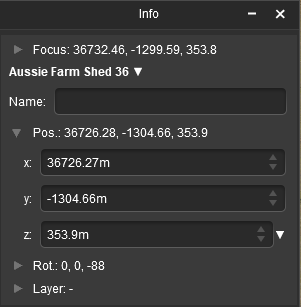 |
The position of the selected object (or the last object if more than one is selected) is shown in the x:, y: and z: text boxes. These values can be edited to move the object or objects to a new position but CARE will be needed.
|
||||||||||||
[edit] Rotation Info and Controls |
You must have an object (or objects) selected for the rotation data to be shown and edited. Open up the rotation data by a Left Click on its Rot: arrowhead icon.
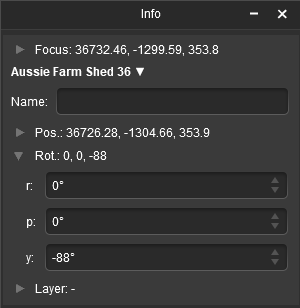 |
The rotational orientation of the selected object (or the last object if more than one is selected) is shown in the r:, p: and y: text boxes (the letters stand for Roll, Pitch and Yaw). These values can be edited to rotate the object or objects in 3D space BUT not all objects can be rotated in certain directions.
|
|
||||||||||||||||||||||||||||||||||||||||||

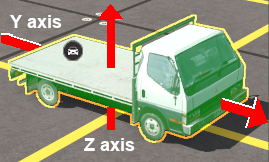
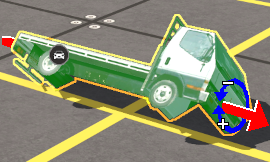
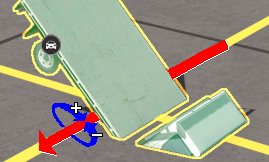
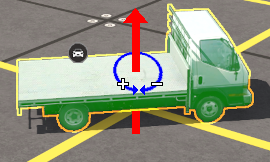
[edit] Layer Info and Controls |
| You must have an object (or objects) selected for the layer data to be shown and edited. Open up the layer data by a Left Click on its Layer: arrowhead icon. |
|
| For a single selected object | ||||||||||||||||||||||
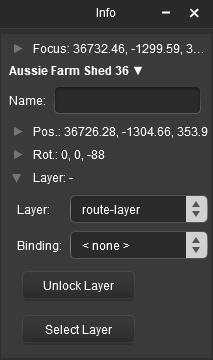 |
This will show the:-
|
|||||||||||||||||||||
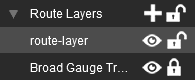
| For multiple selected objects | |||||
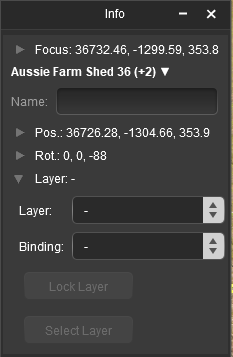 |
|
||||
[edit] Assigning Objects to a Different Layer |
| The Active Layer is the layer used by the Placement Tool when objects are added to your Trainz World. |
A selected object or group of selected objects can be assigned to a different layer. If multiple objects have been selected then they do not have to all be in the same layer.
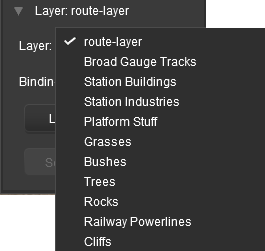 |
|
||||||||||||||
|
|
|
||||||||||
[edit] Assigning Objects to a Binding Layer |
| The Binding Layer, or Bound Layer as it is also called, is a tool used in the development of your Trainz World. It allows you to temporarily assign an object to a second layer while it is still in its original layer. The object will then take on the properties (Locked or Unlocked, Hidden or Visible) of both layers. |
|
|
|||||||||||||||||||||||||||||||||||||||||||||||
|
||||||||||||
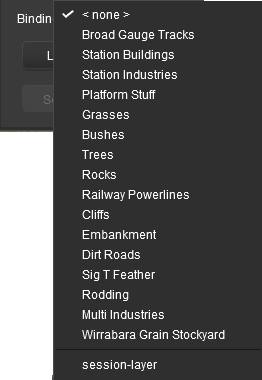 |
|
|||||||||||
| As an example, the image below shows what you will see for a single object that has had:- | |||||||||
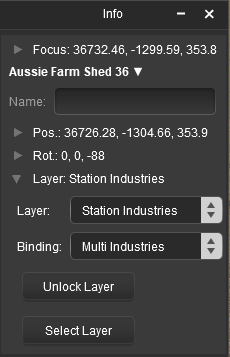 |
|
||||||||
 |
More information on creating, editing and using Layers can be found on the Trainz Wiki at:-
|
[edit] The Tools Palette |
| This is a Surveyor Only palette |
|
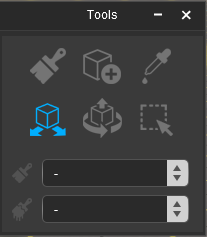 |
|
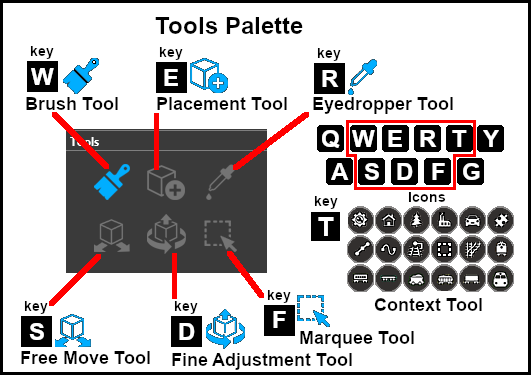
|
[edit] The Brush Tool
|
The Brush Tool "paints" the ground height, ground textures, effect layers and scrapbook scenes in the Trainz World |
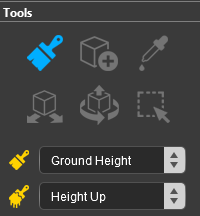 |
|
|||||||||||||||||||

| The Brush Targets Ground Height , Scrapbook Data and Effect Layers have a second drop down menu that controls the Brush Action. |
|
[edit] The Placement Tool
|
The Placement Tool adds objects to a Trainz World |
 |
|
||||||||||||||||||||||
[edit] The Eyedropper Tool
|
The Eyedropper Tool identifies and selects objects in a Trainz World |
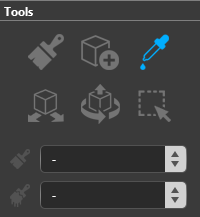 |
|
[edit] The Free Move Tool
|
The Free Move Tool moves objects around a Trainz World |
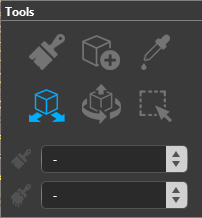 |
|
[edit] The Fine Adjustment Tool
|
The Fine Adjustment Tool makes 3D adjustments (XYZ position and rotations) to objects in a Trainz World |
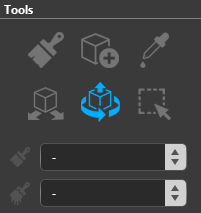 |
|
|||||||||||||||||||
|
[edit] The Marquee Tool
|
The Marquee Tool selects and copies objects, deletes baseboards, adds new baseboards and sets their properties, adds texture to baseboards in a Trainz World, creates scrapbooks |
 |
|
|
[edit] The Tool Options Palette |
| This is a Surveyor Only palette |
|
| This palette is used by various tools to set controls and parameters. For a detailed description of all the options presented by the Tools Palette for the different tools, see the Trainz Wiki page |
| All the Tool Options controls and settings are shown in the image below. The controls are shown in the image as being "inactive". An "active" control will have its icon (to the left of the control name) shown in Gold . Different Brush Types and Brush Actions will activate different controls. | ||||||||||||||||||||||||||||||||||||||||||||||||||||||||||||||||||||||||||||||||||||

|
|
|||||||||||||||||||||||||||||||||||||||||||||||||||||||||||||||||||||||||||||||||||
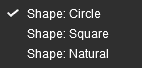
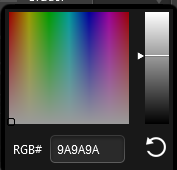
|
[edit] Tool Options Popups |
| Most of the data entry boxes in the Tool Options Palette have a Popup Menu. Right Click inside a box to bring up its menu |
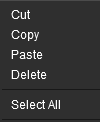 |
|
|||||||||||||
|
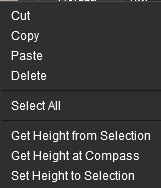 |
|
|||||||||||
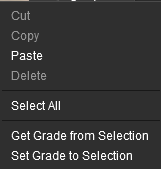 |
|
||||||||||||
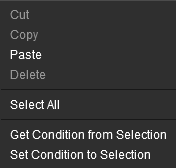 |
|
||||||||||||
[edit] Tool Options Active Controls |
| Different Tool Palette and Brush Type selections will activate different option controls |
Some examples of when the controls will become active are:-
| If a Brush Tool is selected then the exact controls that will be active will vary between the different brushes and brush actions. For example, selecting the Ground Height Brush and the Set Height brush action will active the following Tool Options. |
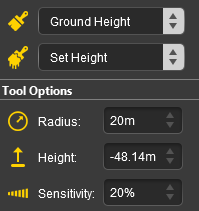 |
|
|||||||||||||||||||||||
| If a Track Spline Object is selected with the |
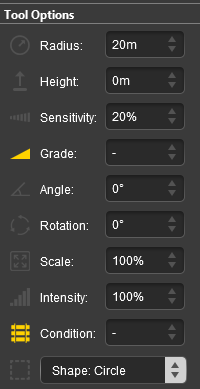 |
|
||||||||||||||||||||||
| If the Scrapbook Data Brush is selected to paint the current Scrapbook into the Trainz World then certain controls that will affect the painting of the Scrapbook will, depending on the brush action selected, become active. |
Scrapbook Brush 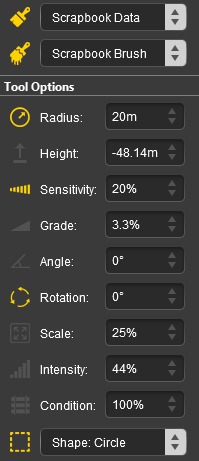 |
Scrapbook Clone 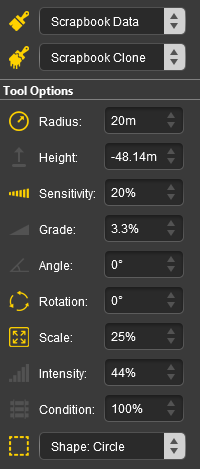 |
|
||||||||||||||||||||||||||||||||||||||||||
|
More examples and more detailed descriptions of the Tool Options Palette Active Controls can be found on the Trainz Wiki at:-
|
[edit] The Assets Palette |
| This is a Surveyor Only palette |
| The Assets Palette provides lists of assets that can be used with the Placement Tool, |
|
| The Filter Palette provides the tools used to narrow down the lists provided by the Assets Palette . |
|
|
[edit] Using the Assets Palette |
| When used by itself, the Assets Palette will be restricted to showing the list of assets for the asset type currently selected in the Filter Palette , regardless of whether the Filter Palette is visible or not. The default asset type shown in the Assets Palette for a displayed, or minimised, unedited Filter Palette will be Ground Textures. However, if the Filter Palette is closed ( Left Click on its menu bar x icon) then the Assets Palette will default to displaying the list of ALL installed assets |
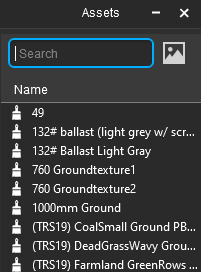 |
|
||||||||||||||
 |
|
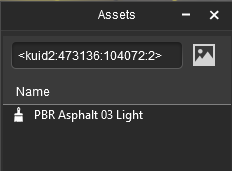
|
|
||||||||||||||||||||||||
| Each asset in the list has a Popup Menu. Right Click on an asset to open its menu. You can also select multiple assets as described above and then Right Click on any of the selected assets to open the common popup menu. | ||||||||||||||||
|
|
|||||||||||||||
|
||||||||||
[edit] Expanding the Assets List View |
| The Assets Palette can be expanded to provide more information about each listed asset. See |
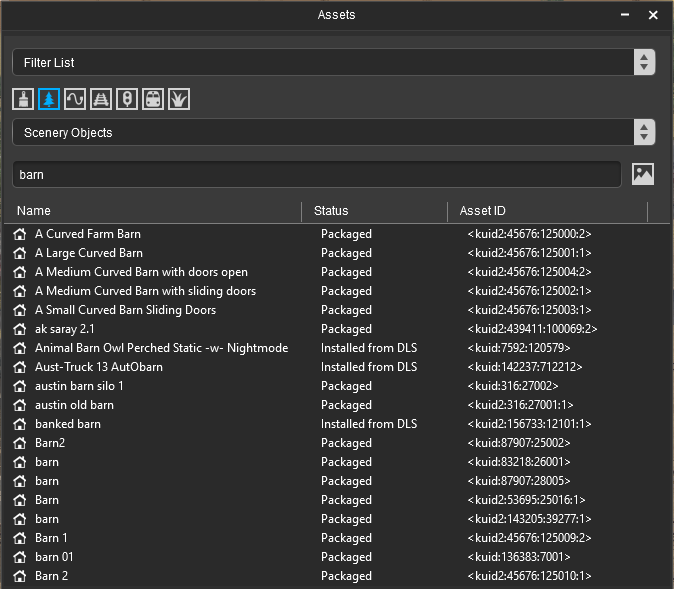
|
Just like in Content Manager, additional columns can be added, removed, resized and moved to a different position.
|
||||||||||||||||||||||||||
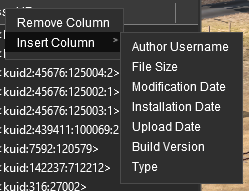
|
[edit] Thumbnail View |
| As an alternative to the list view of assets there is a thumbnail view option. This works best when the Assets Palette has been undocked. See |
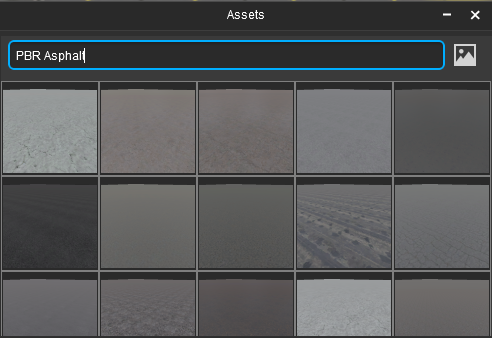 |
|
|||||||||||||||
|
||||||||||
|
||||||||
|
|||||||||||||||||||||


[edit] Picklists and Search Filters |
| the Assets Palette also manages your saved Picklists and gives you access to your saved Search Filters |
[edit] Using Search Filters and Picklists
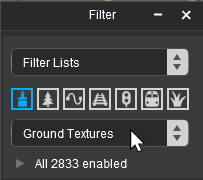 |
|
||||
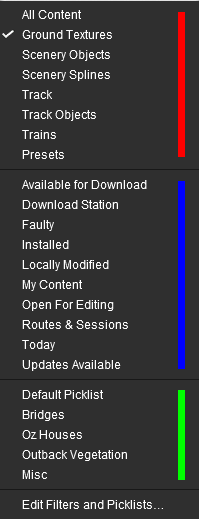 |
|
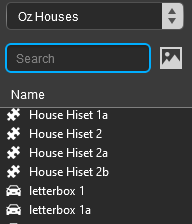
| At the bottom of the drop down list (you may have to scroll down to see it) is an option Edit Filters and Picklists... . This option will allow you to select and edit a Picklist or Search Filter. |
|
[edit] Creating and Editing a Picklist
| Picklists can be created and edited directly from the Assets Palette | |
| There are other more limited editing options available in the Assets Palette Edit Filters and Picklists... option |
To create a new picklist, or add assets to an existing picklist, the first step is to select the asset or assets to be added.
| Steps: To Create a new Picklist or to add assets to an existing Picklist:- | ||||||||||||||
| In the Filter Palette select the type of asset that will be added to the new or existing Picklist | ||||||||||||||
|
||||||||||||||
| To select multiple assets:- | ||||||||||||||
|
||||||||||||||
| A popup menu will appear. Left Click on the option Add to Picklist > . A new popup menu will appear
|
|||||
|
|||||
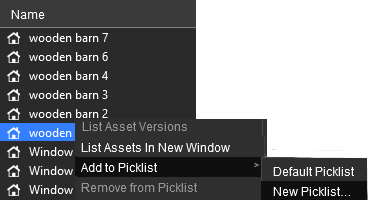
[edit] Editing a Search Filter
| Search Filters can be created and edited using the Assets Palette Edit Filters and Picklists... option |
| A summary of the editing process for Search Filters is provided here. For the full details see the Trainz Wiki Page |
|
||||||||||||||

[edit] The Filter Palette |
| This is a Surveyor Only palette |
|
The Filter Palette made its appearence in Trainz in the July 2024 quarterly update to Trainz Plus and in TRS22PE SP4.
| This palette is used to:- | |
| search the installed assets to provide asset lists for the tools in the Tools Palette | |
| in Trainz Plus bulk replace objects in your Trainz World with assets selected from the Assets Palette | |
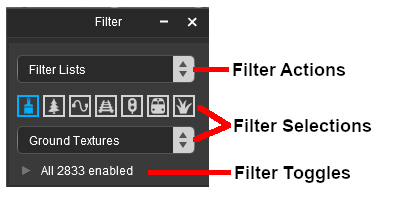 |
The Filter Palette has three parts. Each is explained in the following sections:-
|
[edit] Filter Actions |
| The Filter Actions control how the Filter Selections affect the visibility and accessability of objects in your Trainz World |
| The Filter Actions drop down list controls how the filters are applied. To open the list Left Click on the drop down box or on the double arrows on its right. | ||||||||||
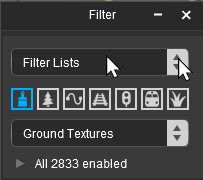 |
The top drop down box will provide four actions:-
|
 |
||||||||
These actions will affect the display and selection of objects in your Trainz World
|
| For examples of how the Filter Actions are used to restrict the selection and/or visibility of objects in a Trainz World see the Trainz Wiki Page |
[edit] Filter Selections |
| The Filter Selections identify the type of assets that will be listed by the filter |
| The Filter Selections are activated by either a Left Click on a icon that represents a type of asset (e.g. Trains), or by selecting the type of asset from a drop down list. The drop down box also provides additional selections that are not available in the icons. |
Options: Choose from:-
|
OR |
|
||||||||||||||||||||||||||||||||
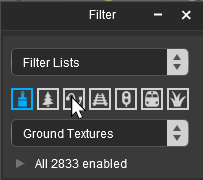
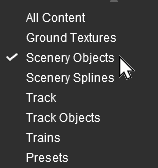
|
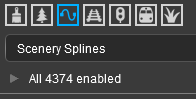 |
Below the icons and selection box the Filter Toggle will report the number of assets that will be present in the list returned by the filter. In this case, selecting Scenery Splines has returned a list containing 4374 assets, but the exact figure will vary between users and installs. |
[edit] Using the Filter and Assets Palettes |
| The Filter Palette is always used with the Assets Palette |
|
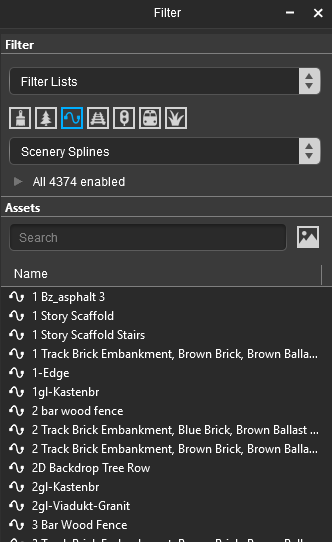 |
The image on the left shows the docked Filter and Assets Palettes displaying the filtered list for a Scenery Splines filter. Using the Asset Filter search text box, as described in the
|
|||||||||||
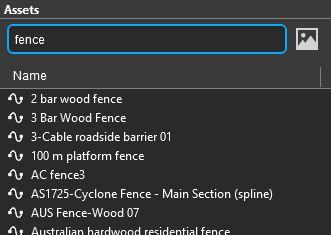
|
||||||||
[edit] Filter Toggles |
| The Filter Toggles are used to identify object to be replaced using the Bulk Asset Replace Tool found in Trainz Plus | |
| They can be used to further reduce the size of the Assets Filtered List |
| In the Filter Palette open the Filter Toggles by a Left Click on either the small arrowhead on the left of the Enabled box or on the "Enabled" message itself. | |
 |
This will open the Filter Palette Toggle List of assets and a separate Search text box. The Toggle List list is identical to the list shown in the Assets Palette except that each item can be toggled or switched ON or OFF by the check mark on its left. |
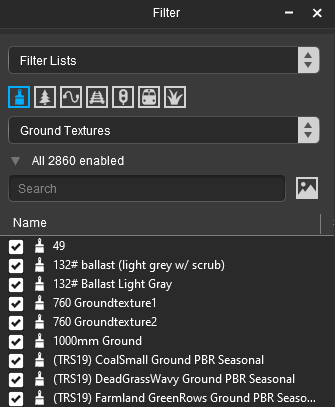 |
|
||||||||||||||||
|
||||||||||||||||||
[edit] Bulk Replace Asset Tool (Trainz Plus Only) |
| This tool is available in Trainz Plus only | |
| It will replace ALL seleted objects with a single selected replacement asset | |
| All objects, and its replacement, must be the same Asset Type | |
| The replacement will occur throughout the entire route |
|
| This tool uses the Filter Toggles described above to identify the object or objects in your Trainz World that will be replaced by a single selected asset. The process involves following a set sequence of steps:-
|
[edit] 1. Check the Compatibility |
|
||||||||||||||||||||||||||||||
[edit] 2. Identify the Objects to be Replaced |
|
The Filter Selection and Filter Toggle tools are used to identify the object or objects in the route that you want to replace.
|
||||||
| Use the Toggles and, if applicable, the Filter Toggle Search box to narrow down the list. |
|
||||||||||||||
|
|||||||||||||||||||||||||||||||

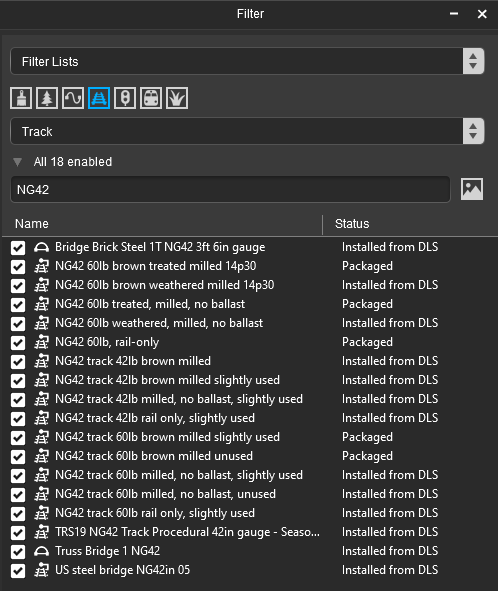
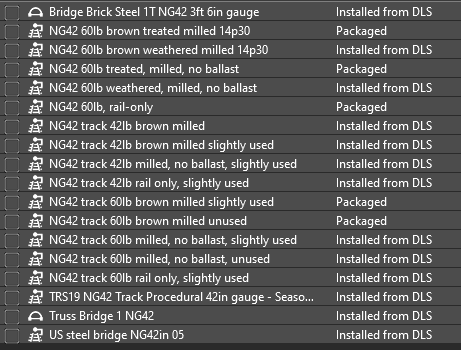
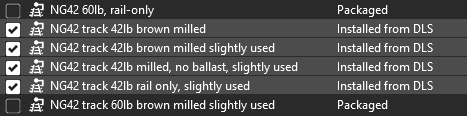
[edit] 3. Disable the Filter Action |
In the Filter Palette select Filter Disabled from the Filter Actions drop down menu.
|
|
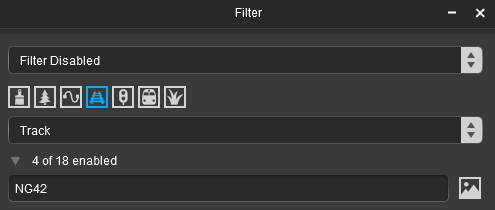
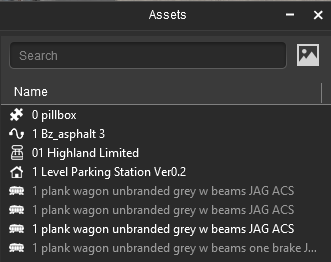
[edit] 4. Identify the Replacement Asset |
| Only a single asset has to be selected from the Assets Palette and it must be the same type of asset as those selected for replacement. |
|
||||||||
|
|||||||||||
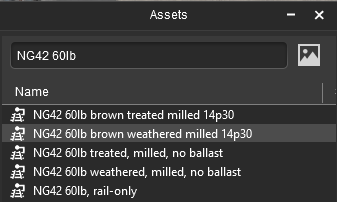
[edit] 5. Bulk Replace Assets |
|
|
||||||||||||||||||||
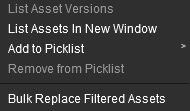
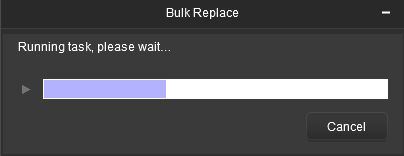
[edit] The Layers Palette |
| This is a Surveyor Only palette |
|
| This palette is used to manage layers, both object (route and session) and effect (TurfFX, clutter and water) layers | |
| It can create, rename, merge, delete, move, hide/show and lock/unlock layers and set the Active Layer |
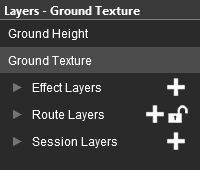 |
The Layers Palette will show all the layers in their groups (Effect, Route and Session) plus the Ground Height and Ground Textures special "layers". In the image on the left all the Layer Groups have been minimised (the arrowhead symbol to the left of each group name is pointing to the right).
|
[edit] Lock the Route Layer Group |
| All the Route Layers can be locked against accidental alteration. | ||
The Route Layers Group has a open padlock icon next to its name - shown as ![]() (unlocked).
(unlocked).
|
||||||
[edit] Open a Layer Group |
To the left of each group name is a small arrowhead pointing to the right. Left Click on the arrowhead to open up the group.
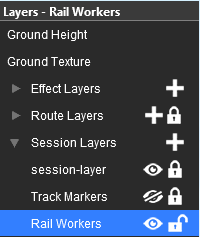 |
The image on the left shows that the Session Layers is open and its individual layers are now displayed. To close or minimise the group Left Click on the arrowhead again. The image shows that the Session Layers contains 3 individual layers:-
|
[edit] Add a New Layer |
| You cannot create new Layer Groups but you can add new layers to a existing group. |
| Each Layer Group has a |
[edit] Renaming a Layer |
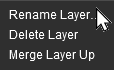 |
|
|||||||
|
[edit] Deleting a Layer |
|
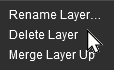 |
|
|||||||||||||||
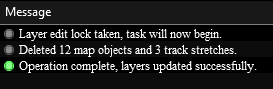
[edit] Moving a Layer |
| Layers can be individually moved up and down within the same Layer Group or between the Route Layers Group and the Session Layers Group. |
|
||||||||||||||
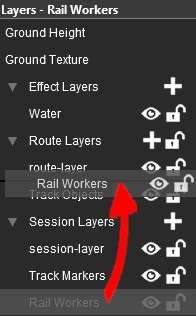 |
|
|||||||||||||||||||
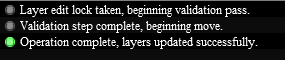
|
||||||||||||||||||||||||||||

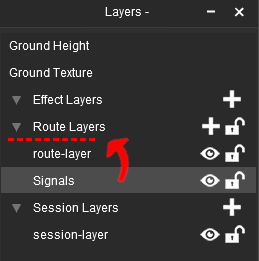
[edit] Merging a Layer |
| A layer can be merged with the layer immediately above it |
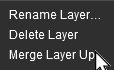 |
|
|||||||
|
[edit] Hiding Layers |
| Each individual layer has an Eye icon that controls the state (visible or hidden) of that layer |
Left Click on the Eye icon to toggle its state between visible and hidden.
|
|
||||||||||||||||||
[edit] Locking Layers |
| Each individual layer has a Padlock icon that controls the state (locked or unlocked) of that layer | |
| The Route Layers Group has a Padlock icon that controls the state (locked or unlocked) of ALL the Route Layers |
Left Click on the Padlock icon to toggle its state between locked and unlocked
|
|
||||||||||||||||||
[edit] Setting the Active Layer |
| The Active Layer is the layer where new objects will be automatically added when using the Placement Tool | |
| Only Route and Session layers can be selected as the Active Layer |
| The active layer is shown in the palette with its name on a Light Grey background. The name of the current Active Layer is also shown in the Layer Palette Title Bar. In the images below the Rail Workers layer from the Session Layers Group is the current Active Layer. |
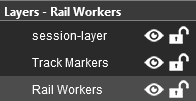 |
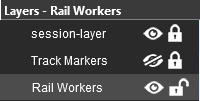 |
|
||||||
|
[edit] Move an Object to Another Layer |
| Use the Info Palette to move objects to another layer. |
| The Info Palette will show the layer assigned to the currently selected object. An object is selected by using the |
|||||||||||||||||||
|
|
|
||||||||||||||||||

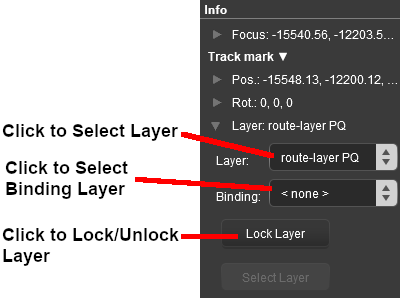
[edit] The Scrapbook Palette |
| This is a Surveyor Only palette |
|
| This palette manages the Scrapbooks that you have created yourself, installed from other sources (such as the DLS) or came installed with Trainz. It also controls which parts of a scrapbook are pasted or painted into the Trainz World. |
|
|
||||||||||||||||||||||||||||||||||
|
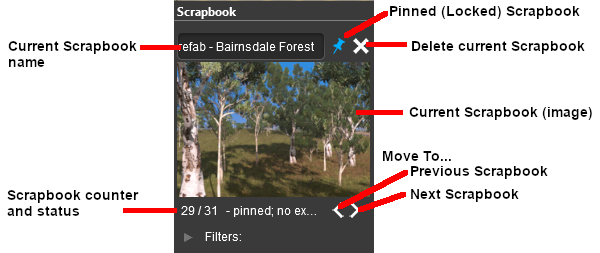
|
|||||||||||||||
[edit] Creating a New Scrapbook |
|
||||||||||||||||||||||||
|
| When a new Scrapbook is created by a Cut or Copy , it will appear in the Scrapbook palette with some basic details. | ||||||||||||||||
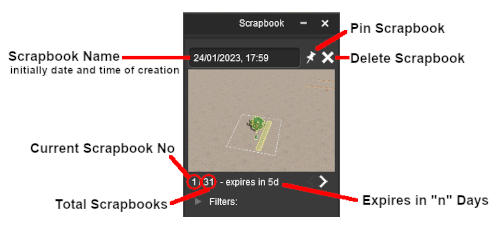 |
|
|||||||||||||||
|
|
|
 |
|||||||||||
| Once a scrapbook has been Pinned it becomes an asset and will appear in Content Manager |
 |
|
The scrapbook asset can be saved as a CDP file and uploaded to the DLS.
|
[edit] Painting or Pasting a Scrapbook |
| Scrapbooks can be Pasted into your Trainz World using the normal paste Ctrl + V keys | |
| Scrapbooks can be Painted into your Trainz World using the Brush Tool | |
| In both cases the contents of the scrapbook that will be pasted/painted and how they will be pasted/painted are controlled by the Filter Settings in the Scrapbook Palette |
[edit] Painting a Scrapbook |
| Existing Scrapbooks can be painted into the Trainz World using the Brush Tool (see the Trainz Wiki page When the Brush Tool Scrapbook Data Target is selected, a second drop down box will give a choice of two brush Actions that control how the scrapbook will be applied. |
| The actions are:- | |||||||||||||
|
|
||||||||||||
|
||||||||||||||||||||||||
|
[edit] Using the Scrapbook Clone Brush |
| When using the Scrapbook Clone brush its Radius and Scale settings in the Tool Options Palette are important. |
|
|||||||||||||||||||||||||||||||||||||||||||
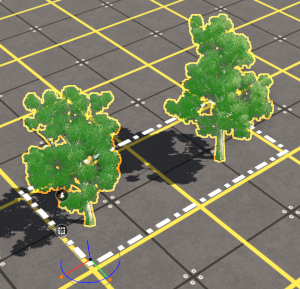
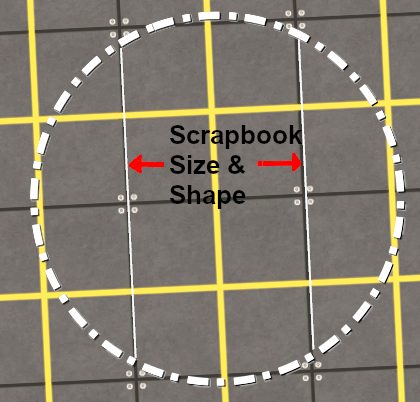
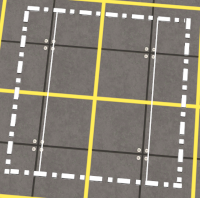
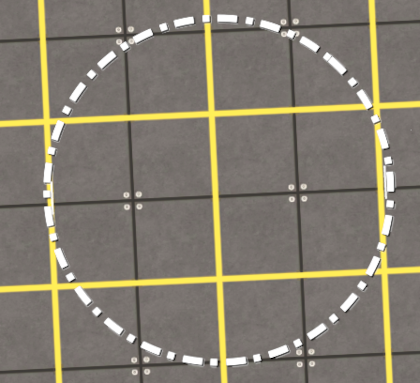
[edit] Scrapbook Tool Options Settings |
| Scrapbook Brush |
Scrapbook Clone |
|
|||||||||||||||||||||||||||||||||||||||
|
|||||||||||||||||||||||||||||||||||||||||
|
[edit] Pasting a Scrapbook |
|
||||||||||
[edit] Setting the Scrapbook Filters |
|
|
||||||
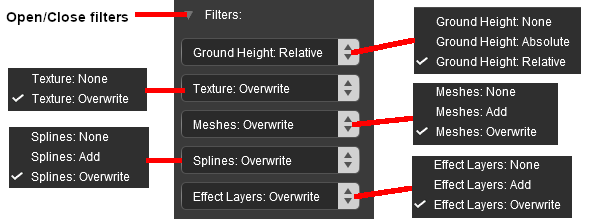
|
|
||||||||||||||||||||||||||||||||||||||||||||||||||||||||||||||||||||||||||
[edit] The Asset Preview Palette |
| This is a Surveyor Only palette |
|
| This palette gives a rotating 3D view of an asset that has been selected in the Assets Palette . It works with all assets except effect layers. |
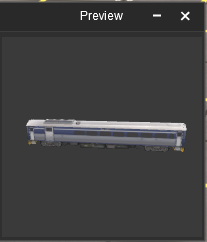 |
The Asset Preview Palette can be enlarged once it has been undocked. The current Surveyor 2.0 version has no display or control options and lacks the "zoom" and other features found in the Preview function of Content Manager. |
[edit] The Content Packages Palette |
| This is a Surveyor Only palette |
|
| This palette is mainly intended for content creators, particularly MPS (Multi Player Surveyor) content. It helps manage, prepare and upload to the MPS Server a user created "Content Package". The web site for the TCCP (Trainz Content Creation Program), which is not MPS specific, can be found at |
|
|
The palette lists all the installed Content Packages that have assets available for use. Two special packages are included in the list:-
| All Installed Content which covers all offline (non-MPS) content, and | |
| multiplayersurveyor which includes all the default content on the live MPS Server |
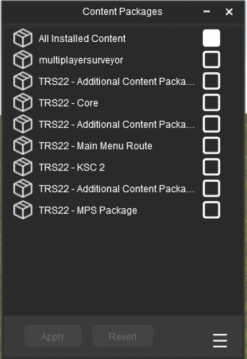 |
|
|||||||||||||||||||||
|
[edit] Content Package Details |
 |
|
|||||||
Some packages will display the message ![]()
If details are available then something like the following example will be shown.
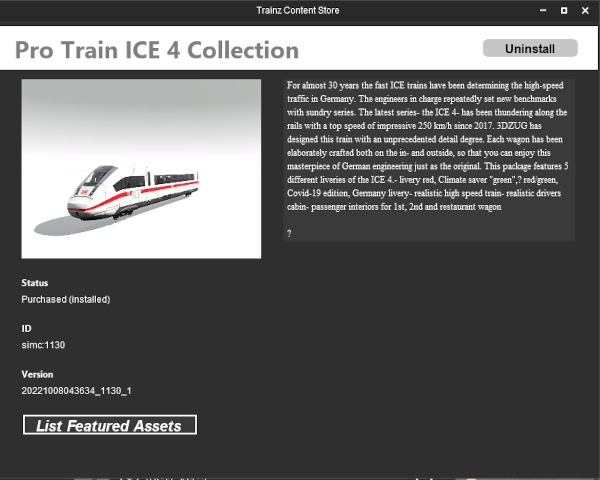 |
|
|||||||||||||||||
|
[edit] Testing the Packages |
| While you can manually select the packages to be enabled, an easier option may be to let the program perform that task. |
With or without any packages enabled, Left Click on the icon showing 3 horizontal bars (bottom right) to open a menu.

|
||||||||||
|
||||||||
[edit] Dealing with Unsupported Assets |
If you have manually selected and enabled the packages you want to include and have been shown a list of assets that are not supported by your selection, then you will need to identify the missing packages (if any) and add them manually.
|
||||||||||||||
| If you have used the Automatically Enable Required Packages option then any unsupported assets found will not belong to any installed packages. In this case you will need to create a new package using TCCP and add them to that package - see the Trainz Wiki Page at |
||||||||||||||
[edit] Apply and Upload |
Once you have enabled the required packages, you need to prepare the route for uploading to the live MPS Server
|
||||||||||||||
The next step is to upload the new package to the live MPS Server.
|
|||||||||||||||||||
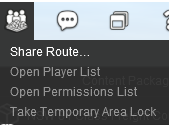
[edit] The Driver Control Center |
| This is a Surveyor palette | and a Driver window |
|
||||||||
|
| This provides a full list of available drivers, their assigned trains, tasks (if any) and the tools to manage them in both Surveyor and Driver |
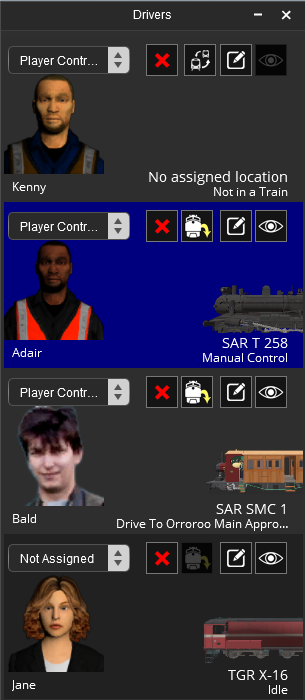
|
|
||||||||||||||||||||||||||||||||||||||||||||||||||
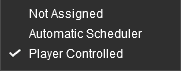
[edit] Adding a Driver |
| New drivers can be added to the Drivers Palette |
|
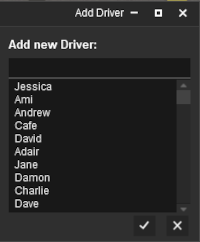 |
|
||||||||||||||
[edit] Assigning Drivers |
| A driver that has no currently assigned train can have one assigned to them |
|
 |
|||||||||||||||||||
[edit] Switching Drivers |
| A driver that is currently assigned to a train can be reassigned to a different train or to no train |
|
|
|||||||||||||||||||||||||||
[edit] Driver Properties |
|
||||||||||||||||||||||
[edit] In Surveyor and Driver |
|
||||||||||
| After selecting the |
|
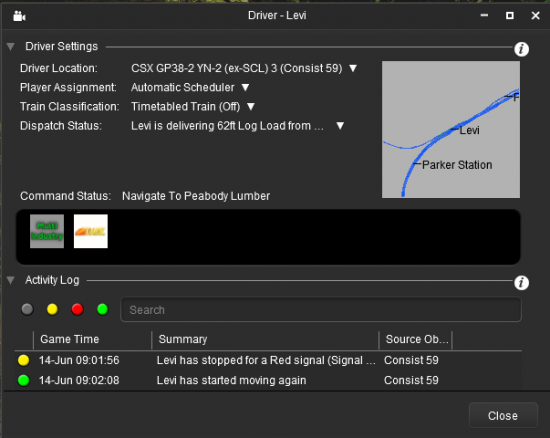
|
||||||||||||||||||||||||||||
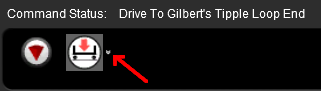
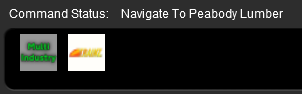
|
||||
| Each Driver Setting has a sub menu as shown in the image below. Left Click on the down arrowhead of a setting to open its sub menu |
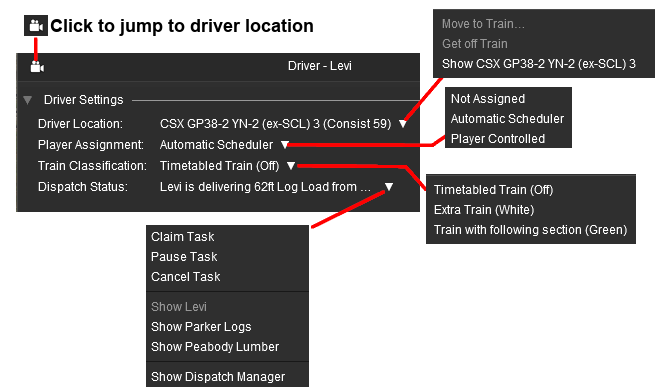 |
|
||||||||||||||||||||||||||||||||||||||||||||||||||||||||||||||||||||||||
[edit] In Driver |
| Available in Trainz Plus only When used in Driver Mode a coloured line will appear above the track showing the path, or possible paths, when the next command in the Command Status queue is a movement command, such as Drive To..., Navigate To... or Couple To.... The path lines will not be shown when these commands are not being executed. The colour of the path lines are Blue, Green, Orange and Red. | ||||||||||||||
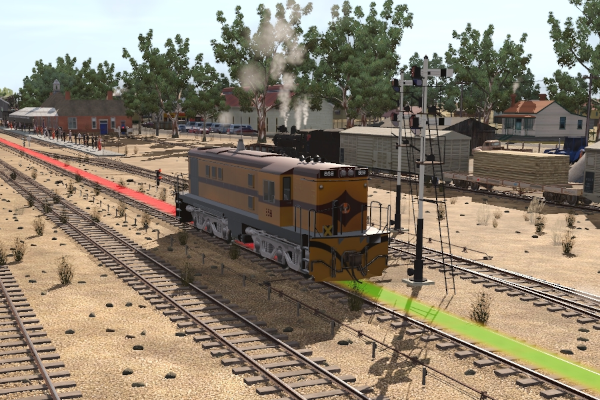 |
|
|||||||||||||
|
||||||||
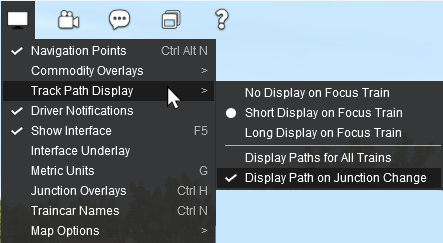
[edit] Driver Location |
| This allows you to move the driver to a new train and to view/edit the details of their current train |
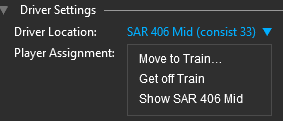 |
|
|||||||
|
| Left Click on the Close button to close the window and return to the Drivers Palette. |
[edit] Train Properties |
| The Show <name of loco> option will open the Train Properties window |
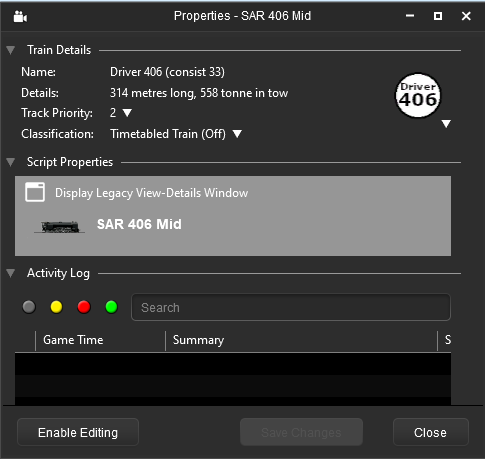 |
There are a number of control and display options built into this window.
|
||||||||||||
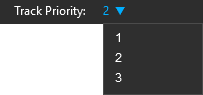
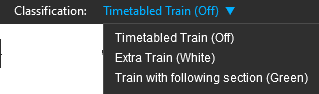
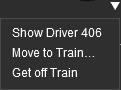
| Left Click on the Close button to close the window and return to the Driver Properties window. |
[edit] Script Properties |
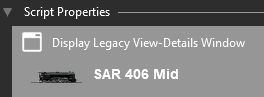 |
|
||||||||||
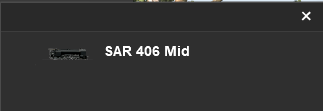
|
|||||||||||||
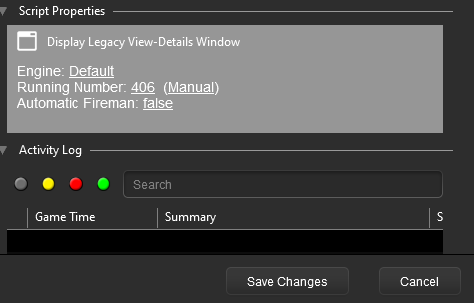
[edit] Player Assignment |
| This allows you to set the driver control assignment |
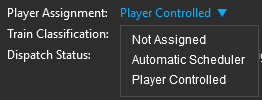 |
|
|||||||
|
| Left Click on the Close button to close the window and return to the Drivers Palette. |
[edit] Command Status |
| The Command Status displays the list of driver commands waiting for execution by the selected driver | |
| New driver commands can be added and existing commands removed |
| Two sample driver command lists | ||||||||||||||||||||||
|
|
|||||||||||||||||||||
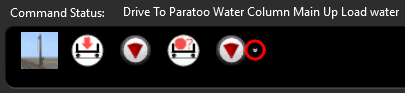
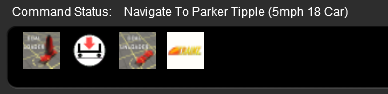
|
||||||||||||||||||||||||
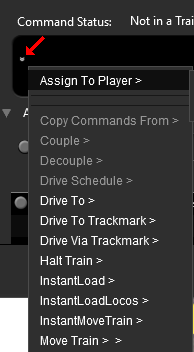
| Left Click on the Close button to close the window and return to the Drivers Palette. |
[edit] Activity Log |
| This allows you to monitor the activity and progress of a driver |
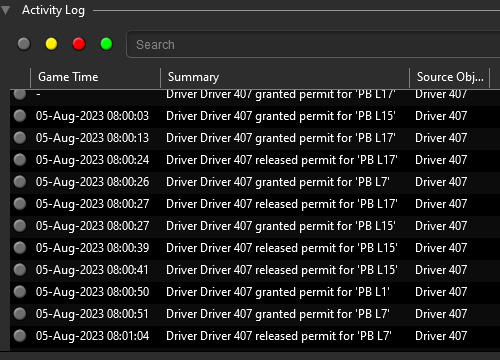 |
This gives a detailed list of every operation started and completed by the selected driver. In the example shown on the left this includes gaining and releasing "permits" (access or permission) for each junction switch along the drivers path.
|
| Left Click on the Close button to close the window and return to the Drivers Palette. |
[edit] The Dispatch Manager Window |
| This is a Surveyor window | and a Driver window | This window is only available in Trainz Plus |
| Dispatch Manager is a tool that gives you access to Drivers, Consists and Industries for assigning and monitoring product pickup and delivery tasks | |
| Dispatch Manager will work with all drivers but is best used with those that have been assigned to the Automatic Scheduler placing them under the control of the TLR (Trainz Living Railroad) and drivers under AI control that are servicing (loading/unloading at) industries |
|
||||||||||
|
|||||||||
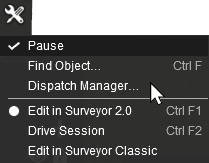
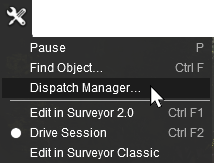
|
|
||||||||||||||||||||||||||||
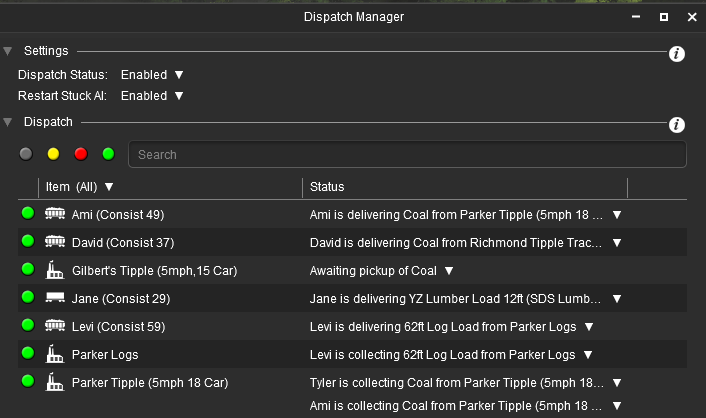 |
|
[edit] Dispatch Settings |
[edit] Dispatch Status |
| The Dispatch Status setting enables/disables the control of Dispatch Manager over ALL consists and industries |
|
||||||||
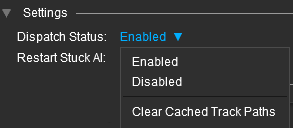
|
|||||||||||||
[edit] Restart Stuck AI |
| This setting enables/disables the ability of the AI to find an alternative path for a consist that is currently unable to proceed to its destination |
|
||||||||
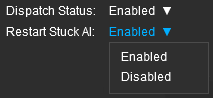
|
||||||||||
[edit] Dispatch Controls |
| The Dispatch Controls provide you with:- | |
| data on what is happening with your consists, both powered (under TLR or AI control) and unpowered (no loco attached) | |
| data on what is happening with your industries (loads waiting and/or delivered) | |
| the ability to override the TLR/AI and take complete manual control of any driver | |
| the ability to edit the product loads of any rolling stock object | |
| the ability to edit the product levels produced and consumed of any industry | |
[edit] Dispatch Filters |
| Filters built into the Dispatch Manager allow the list of displayed entries to be reduced to those that interest you |
There are some basic filter options available to reduce the quantity of data displayed.
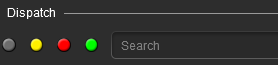 |
in the Search box enter the name of a driver (e.g. Ami), a location (e.g. Richmond), an industry (e.g. Tipple), a product (e.g. Coal) or a consist (e.g. Consist 29). UPPER/lower case is not important |
the coloured dots will filter the types of messages shown in the display. Left Click on a coloured dot to toggle on/off each message type
|
|||||||||||

the display can be filtered by its data categories. Left Click on the down arrowhead next to the title Item (All) to reveal the different data categories
|
|||||
the above filter options can be combined. Some examples:
|
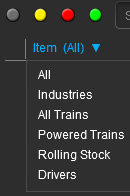
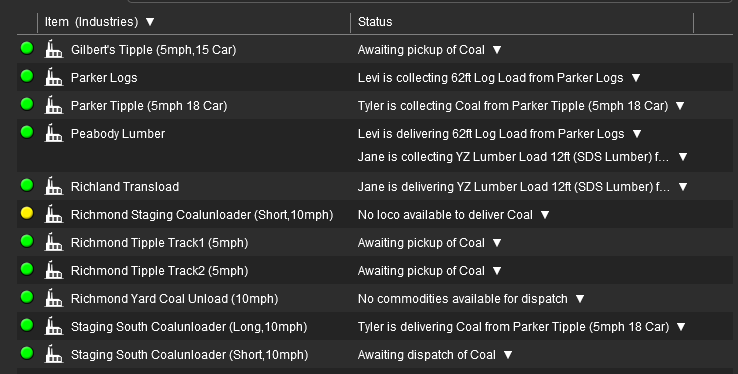
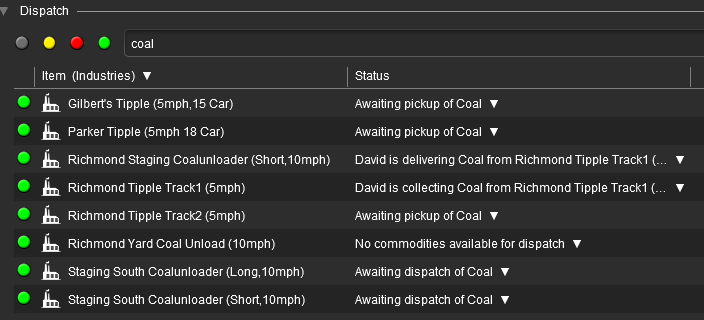

[edit] Item Status |
| The Status column of the display gives you access to more information about each item in the display as well as editing and control tools |
| Each item in the display has a sub menu that will give you access to additional information and control options. |
|
||||
|
|
||||||||||||||||||||||||
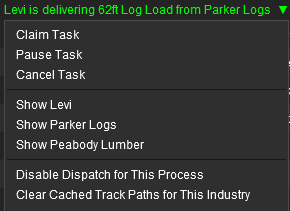
[edit] Managing Drivers |
|
[edit] Managing Industries |
| Industries are scenery objects that can load and/or unload products into/from consists | |
| Not all scenery objects are Industries |
You can open the Industry Properties Window of a selected industry by one of two methods depending on your Trainz version and starting point
|
|
|
||||||||||||||||||||||||||||||
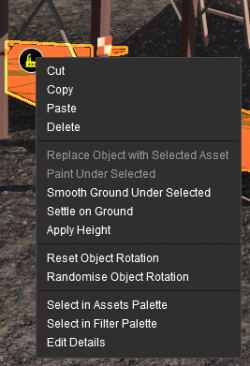
[edit] Configuring an Industry |
| Most industries have few, if any, settings apart from product levels that can be edited |
|
||||||||||
[edit] Preload an Industry |
| An industry can be preloaded with a product, or multiple products, that were specified when the industry was created | |
| Many industries are "locked" in that only one or a few set products will be allowed |
|
||||
| Example 1: Single Product Industry - Output Only |
| Typical Uses: Mines, locomotive coaling towers, locomotive water towers or columns |
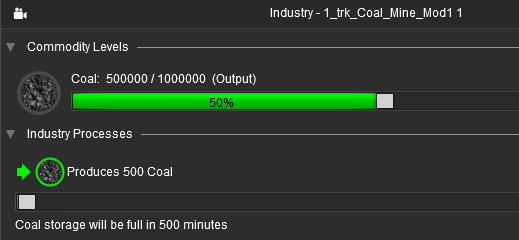 |
|
||||||||||||||||||
|
|||||||||||||||||||
|
|||||||||
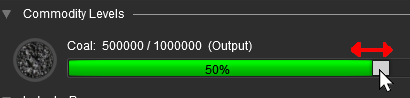
|
|||||||||||
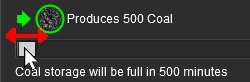
|
| Example 2: Two Product Industry - Input and Output |
| Typical Uses: Timber mill, mineral processing, factory |
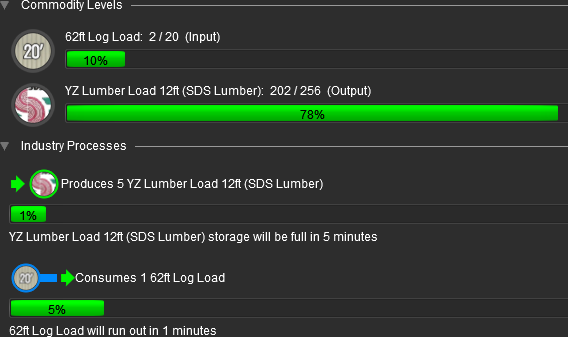 |
|
||||||||||||||||||
| Industry Processes Figures in (brackets) are those in the example shown in the image above |
|
| Product 2 - YZ Lumber Load (the products will not always be in the same order as above) | |
| Green Arrow leading into the product icon plus the words "Output" and "Produces" indicates a Production Process | |
| The quantity of the product produced every 30 seconds (5 units) | |
| An adjustable bar graph showing the above figure as a percentage (1%) | |
| The time (5 minutes) needed to fill the available storage at the set production rate | |
| Product 1 - 62ft Log Load | |
| Green Arrow leaving the product icon plus the words "Input" and "Consumes" indicates a Consumption Process | |
| The quantity of the product consumed every 30 seconds (1 unit) | |
| An adjustable bar graph showing the above figure as a percentage (5%) | |
| The time (1 minute) needed to empty the available storage at the set consumption rate | |
|
| Example 3: Two Product Holding Industry - Dual Input and Output |
| Typical Uses: Stockyards, warehouses |
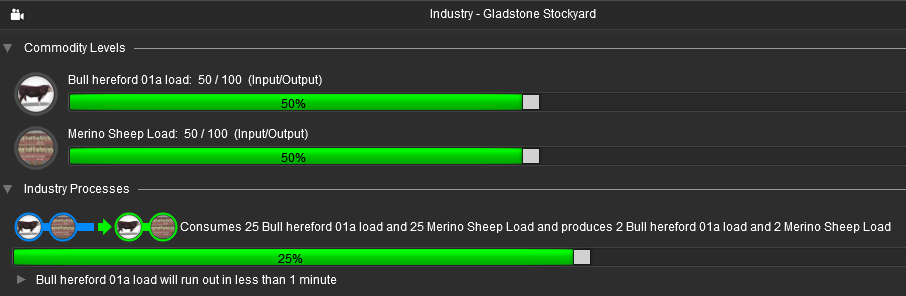 |
| Commodity Levels Figures in (brackets) are those in the example shown in the image above |
|
| Product 1 | |
| Name and icon - Bull Hereford 01a load | |
| The quantity of the product currently stored (50 units) and the maximum storage level (100 units) | |
| An adjustable bar graph showing the above figures as a percentage (50%) | |
| Product 2 | |
| Name and icon - Merino Sheep Load | |
| The quantity of the product currently stored (50 units) and the maximum storage level (100 units) | |
| An adjustable bar graph showing the above figures as a percentage (50%) | |
| Industry Processes Figures in (brackets) are those in the example shown in the image above |
|
| Product 1 and Product 2 both appear on both sides of the Green Arrow plus the term "Input/Output", and the words "consumes" and "produces", all indicating that both are Production and Consumption Processes | |
| The quantity of each product produced and consumed every 30 seconds | |
| An adjustable bar graph showing a figure (25%) of unknown meaning | |
| The time (less than 1 minute) needed for the Bull Hereford 01a load to be emptied at the set consumption rate | |
| There is an Arrowhead icon at the start of the above line. A Left Click on the arrowhead will reveal the following data. | |
 |
|
| Both of the Blue bars (Consumption Rates) and both the Green bars (Production Rates) can be adjusted | |
| Example 4: Two Track Passenger Station |
| Typical Uses: Passenger Station |
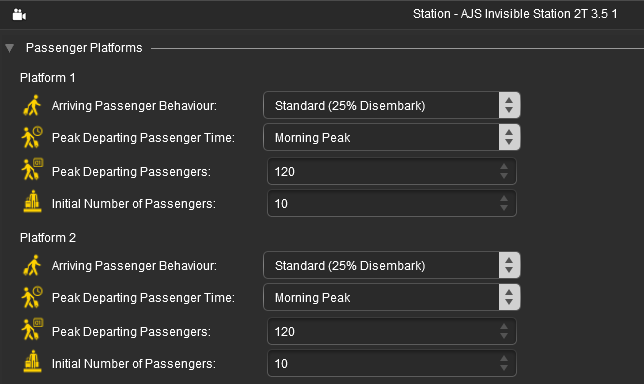 |
|
||||||||||||||||||
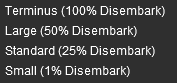
|
||||||||||||
[edit] Legacy Industries |
| Legacy Industries are those that were created for older versions of Trainz | |
| Many legacy industry assets will work with the Industry Properties Window but, in general, the lower the Asset Build Number of an industry asset (i.e. the older the Trainz version it was designed for) the less likely it is that it will work correctly or at all | |
| Legacy industry assets that do not work within the Industry Properties Window can sometimes be accessed and controlled through the Script Properties section of the window |
| Often the only way to discover if an "older" or Legacy Industry asset will work in the Industry Properties Window, and in the TLR (available in Trainz Plus only), is to open its Industry Properties Window and see what appears. If the Industry Properties Window appears with the Commodity Levels and Industry Processes sections, both with products as shown in Examples 1 to 3 in the section above, then the industry is compatible with the new interface and with the TLR. |
| Symptoms and Diagnosis |
|
||||||||||||
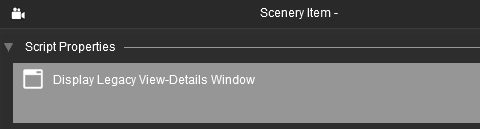

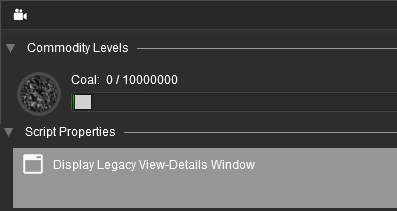
| In the legacy examples shown above in |
|
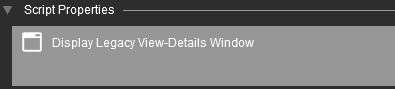
| Treatment |
| If the Script Properties section contains the legacy (TRS19 and earlier) Industry Properties Window, like the examples shown below, then it is likely (but not 100% certain) that this object will work as an industry | ||||||||
| Other interface designs and colour schemes are possible | ||||||||
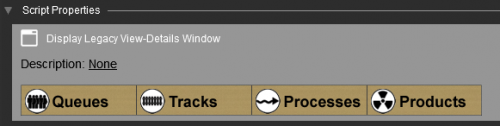
|
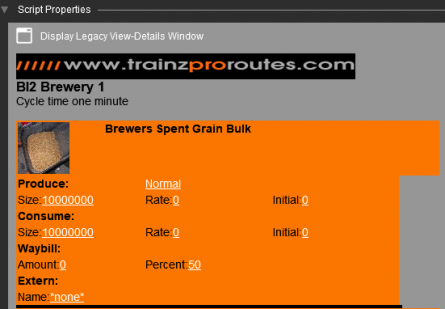
|
|||||||
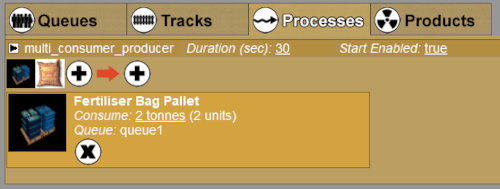
|
| When finished Left Click on the Save Changes button at the bottom right of the window |
|
| Close the Industry Properties Window | |
| Reopen the Industry Properties Window for the same industry object |
| Recovery |
If, after reopening the Industry Properties Window, you see all the Commodity Level and Input/Output Processes present and filled out to the values you just set then the procedure has been successful, but there is no 100% guarantee that the Legacy Industry will work perfectly.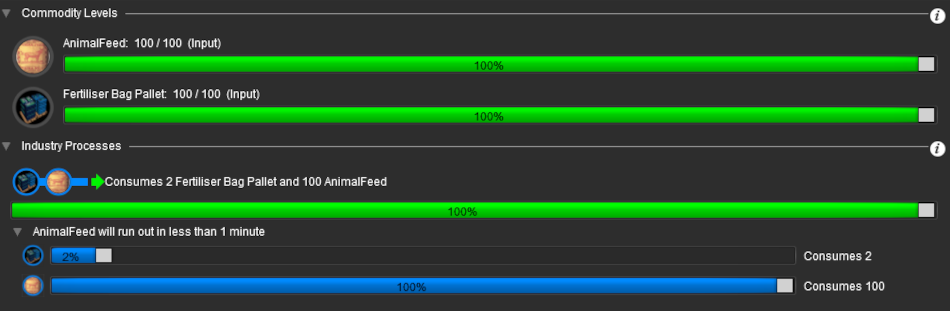 |
||
|
[edit] Managing Consists |
| Consist covers all rolling stock objects, including locomotives |
You can open the Consist Properties Window of a selected rolling stock object by one of two methods depending on your Trainz version and starting point
|
|
|
||||||||||||||||||||||||
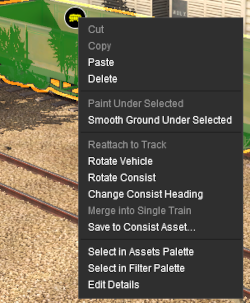
[edit] Configuring a Consist |
| The general properties of a consist, such as its Track Priority and Classification, can be edited | |
| Configuring the properties of any wagon in a consist will configure the properties of ALL the wagons in the consist |
| The Consist Properties Window of a selected consist is shown below with its option menus:- | |||||||||||
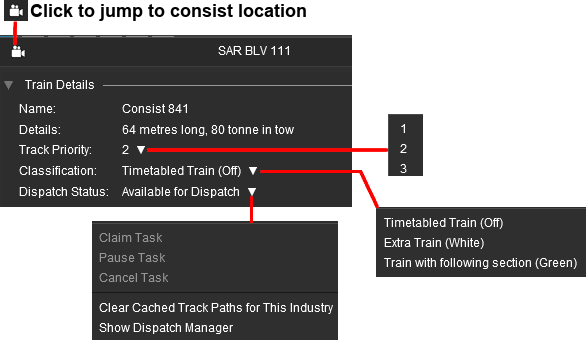 |
|
||||||||||
|
||||||||||||||||||||||||||||||||||||||||||||||||||||||||||||||||||
[edit] Loading Consists (Incl Locomotives) |
| In Surveyor consists and locomotives that are designed to carry products, including fuel for the locomotive, can be preloaded with products | |
| Not all consists and locomotives are designed to carry products, including locomotive fuel | |
| Once the load has been set for one wagon in a consist it can be copied to ALL identical wagons in the consist |
|
| Steps: To Load a Rolling Stock Object with a Product:- | ||||||||||||||||||||||||||||||||||||||||||||||||||
|
||||||||||||||||||||||||||||||||||||||||||||||||||
|
||||||||||||||||||||||||||||||||||||||||||||||||||
This will open the Consist Properties Window for the selected rolling stock object.
|
||||||||||||||||||||||||||||||||||||||||||||||||||
You can either Left Click :-
The product will then appear in the Commodity List with a default Product Quantity value shown as a green bar which may be initially set at zero for some products.
|
||||||||||||||||||||||||||||||||||||||||||||||||||
|
||||||||||||||||||||||||||||||||||||||||||||||||||
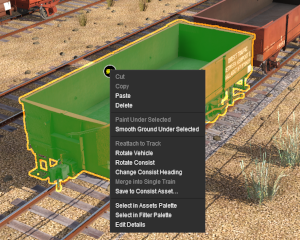
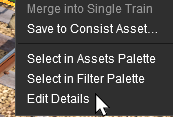
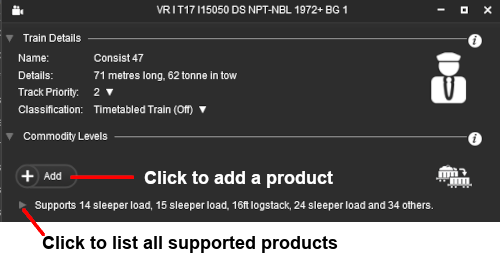
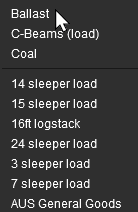
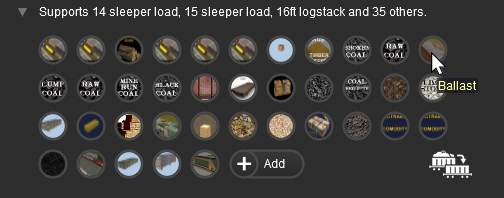
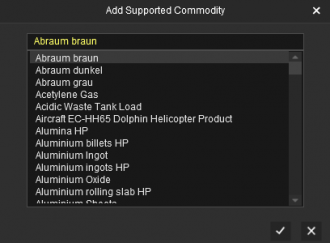

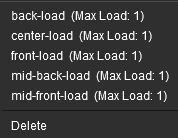
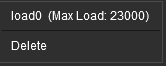
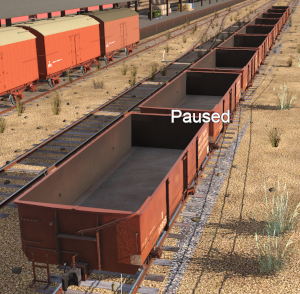
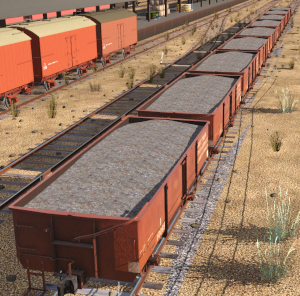
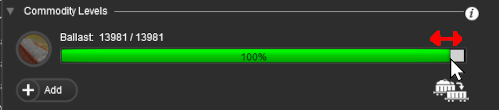
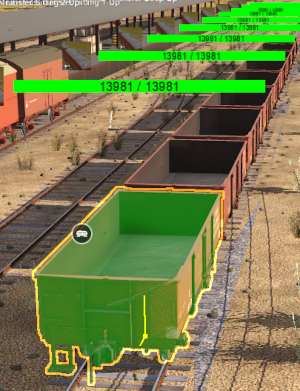

[edit] Consists in Driver |
| In Driver Mode you can open up the properties window of a consist object to view its current load and the list of products it can carry |
|
|||||||||||||||||||
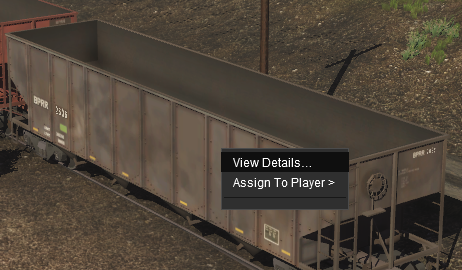
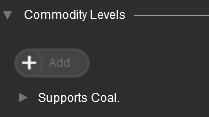
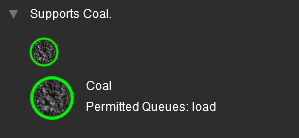

[edit] The Logs Palette |
| This is a Surveyor Only palette |
|
| This palette displays the Trainz System Log which details the loading of assets, the operation of scripts, messages displayed on the screen (in Driver), etc. It is for diagnostic purposes. |
 |
|
[edit] The Session Options Window |
| This is a Driver Only window |
|
| This window allows you to change session settings in Driver "on the fly" |

|
|
|||||||||||||||||||||||||||||||||||||||||||||||||||
[edit] The Commodity Picker Window |
| This is a Driver Only window |
|
| This window allows you to change the commodities (products) carried by rolling stock in Driver "on the fly" |
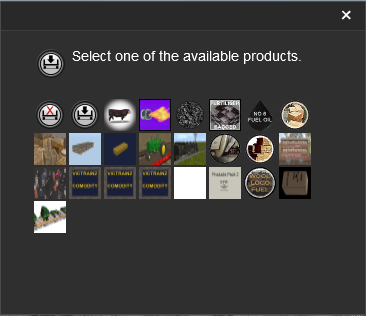
|
|
||||||||||||||||||||

[edit] The Session Info Window |
| This is a Driver Only window |
|
| This window displays the active message windows that were created for this session by a HTML Asset or a Message Popup Rule starting with the last one displayed |
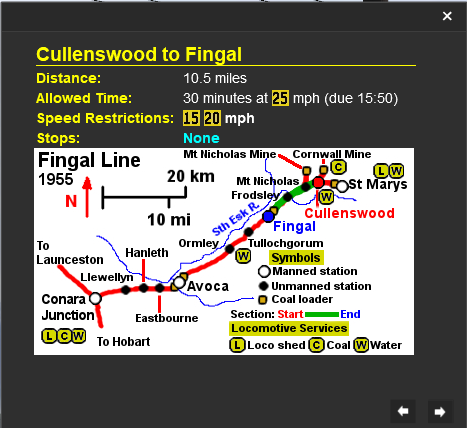 |
|
[edit] The Waybill Window |
| This is a Driver Only window |
|
| This window displays the commodity deliveries and pickups for this train |
 |
|
[edit] The Schedule Info Window |
| This is a Driver Only window |
|
| This window displays the Trainz Living Railroad (TLR) schedule for the train |
 |
|
[edit] Trainz Wiki
|
|

This page was created by Trainz user pware in February 2023 and was last updated as shown below.