How to Create a Picklist
From TrainzOnline
(Difference between revisions)
m (→Using Surveyor 2.0) |
|||
| Line 44: | Line 44: | ||
<tr valign="top"> | <tr valign="top"> | ||
<td>[[image:DotPoint.JPG|10px|link=]]</td> | <td>[[image:DotPoint.JPG|10px|link=]]</td> | ||
| − | <td>the '''Assets Palette''' in '''Surveyor 2.0''' (in '''Trainz Plus''' and '''TRS22 Platinum''' only), <span style="font-weight: 700; font-size: 15px;">OR</span></td> | + | <td>the '''Assets Palette''' and '''Info Palette''' in '''Surveyor 2.0''' (in '''Trainz Plus''' and '''TRS22 Platinum''' only), <span style="font-weight: 700; font-size: 15px;">OR</span></td> |
</tr> | </tr> | ||
<tr valign="top"> | <tr valign="top"> | ||
| Line 157: | Line 157: | ||
<tr valign="top"> | <tr valign="top"> | ||
<td width=25>[[image:Ablue.png|link=]]</td> | <td width=25>[[image:Ablue.png|link=]]</td> | ||
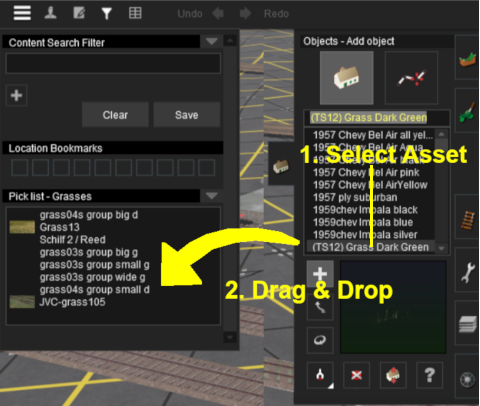
| − | <td><span style="font-weight: 700; font-size: 15px;">Steps: Using the Asset List</span></td> | + | <td><span style="font-weight: 700; font-size: 15px;">Steps: Using the Asset List</span>:-<br> |
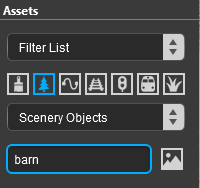
| + | Use this method if the asset you want to add to the new Picklist is not already in the route or is not present in the Surveyor scene in front of you.</td> | ||
</tr> | </tr> | ||
<tr valign="top"> | <tr valign="top"> | ||
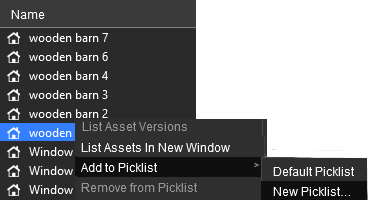
| Line 196: | Line 197: | ||
<tr valign="top"> | <tr valign="top"> | ||
<td width=25>[[image:Bblue.png|link=]]</td> | <td width=25>[[image:Bblue.png|link=]]</td> | ||
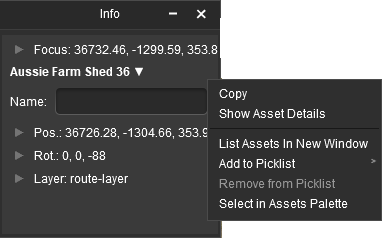
| − | <td><span style="font-weight: 700; font-size: 15px;">Steps: Using the Object Picker</span></td> | + | <td><span style="font-weight: 700; font-size: 15px;">Steps: Using the Object Picker</span>:-<br> |
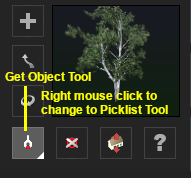
| + | Use this method if the asset you want to add to the new Picklist is already in the route and is present in the Surveyor scene in front of you.</td> | ||
</tr> | </tr> | ||
<tr valign="top"> | <tr valign="top"> | ||
| Line 655: | Line 657: | ||
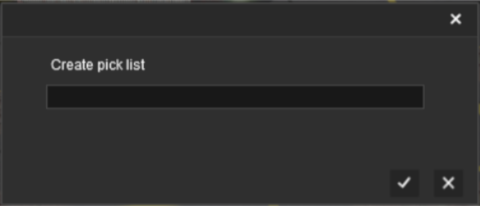
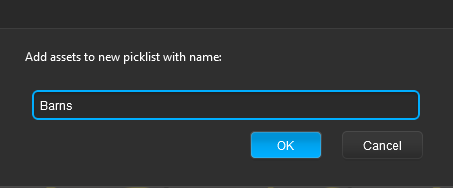
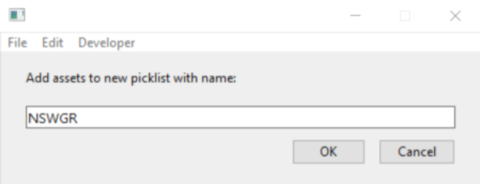
<td>Enter a name for the new Picklist (make it brief but informative) and <span style="font-weight: 700; font-size: 15px; background-color: lightcyan;">Left Click</span> on the <span style="font-weight: 700; font-size: 15px; color: white; background-color: blue;"> OK </span> button<br> | <td>Enter a name for the new Picklist (make it brief but informative) and <span style="font-weight: 700; font-size: 15px; background-color: lightcyan;">Left Click</span> on the <span style="font-weight: 700; font-size: 15px; color: white; background-color: blue;"> OK </span> button<br> | ||
[[image:PickListCreateNew_S20.png|link=]]</td> | [[image:PickListCreateNew_S20.png|link=]]</td> | ||
| + | </tr> | ||
| + | </table> | ||
| + | </td> | ||
| + | </tr> | ||
| + | </table> | ||
| + | <br> | ||
| + | <span style="font-weight: 700; font-size: 15px;">To Remove Assets from a Picklist</span> | ||
| + | <br> | ||
| + | <table width=1000 bgcolor=#000000 cellpadding=2> | ||
| + | <tr valign="top"> | ||
| + | <td> | ||
| + | <table bgcolor=#ffffff cellpadding=2> | ||
| + | <tr valign="top"> | ||
| + | <td colspan=2><span style="font-weight: 700; font-size: 15px;">Steps:</span> To remove assets from a Picklist:-</td> | ||
| + | </tr> | ||
| + | <tr valign="top"> | ||
| + | <td>[[image:DotPoint.JPG|10px|link=]]</td> | ||
| + | <td>select the Picklist in the '''Assets Palette'''</td> | ||
| + | </tr> | ||
| + | <tr valign="top"> | ||
| + | <td>[[image:DotPoint.JPG|10px|link=]]</td> | ||
| + | <td>select the asset(s) in the Picklist (you can select multiple assets):-<br> | ||
| + | <span style="font-weight: 700; font-size: 15px;">Options:</span> Choose one of:- | ||
| + | <table> | ||
| + | <tr valign="top"> | ||
| + | <td width=25>[[image:Ablue.png|link=]]</td> | ||
| + | <td><span style="font-weight: 700; font-size: 15px; background-color: lightcyan;">Right Click</span> on the asset to select a single asset, then select the option <span style="font-weight: 700; font-size: 15px; color: white; background-color: black;"> Remove from Picklist </span>, <span style="font-weight: 700; font-size: 15px;">OR</span></td> | ||
| + | </tr> | ||
| + | <tr valign="top"> | ||
| + | <td>[[image:Bblue.png|link=]]</td> | ||
| + | <td><span style="font-weight: 700; font-size: 15px;"><span style="color: white; background-color: black;"> Shift </span> + <span style="color: black; background-color: lightcyan;"> Left Click </span></span> on the '''first''' and '''last''' in a sequence of multiple assets to be removed. Then <span style="font-weight: 700; font-size: 15px; background-color: lightcyan;">Right Click</span> on one of the highlighted assets and select the option <span style="font-weight: 700; font-size: 15px; color: white; background-color: black;"> Remove from Picklist </span>, <span style="font-weight: 700; font-size: 15px;">OR</span></td> | ||
| + | </tr> | ||
| + | <tr valign="top"> | ||
| + | <td>[[image:Cblue.png|link=]]</td> | ||
| + | <td><span style="font-weight: 700; font-size: 15px;"><span style="color: white; background-color: black;"> Ctrl </span> + <span style="color: black; background-color: lightcyan;"> Left Click </span></span> on any number of individual assets to be removed. Then <span style="font-weight: 700; font-size: 15px; background-color: lightcyan;">Right Click</span> on one of the highlighted assets and select the option <span style="font-weight: 700; font-size: 15px; color: white; background-color: black;"> Remove from Picklist </span></td> | ||
| + | </tr> | ||
| + | </table> | ||
| + | <table bgcolor=#ffffb0 cellpadding=2> | ||
| + | <tr valign="top"> | ||
| + | <td width=25>[[image:NotePad.PNG|link=]]</td> | ||
| + | <td>Removing the last item from a Picklist will delete the Picklist</td> | ||
| + | </tr> | ||
| + | </table> | ||
| + | </td> | ||
</tr> | </tr> | ||
</table> | </table> | ||
| Line 664: | Line 710: | ||
<tr valign="top"> | <tr valign="top"> | ||
<td width=629><span id="stepUsingCM"></span> | <td width=629><span id="stepUsingCM"></span> | ||
| − | |||
='''Using Content Manager (CM)'''= | ='''Using Content Manager (CM)'''= | ||
</td> | </td> | ||
Revision as of 07:49, 8 October 2023
The information in this Wiki Page applies to TANE, TRS19, Trainz Plus and TRS22.
|
|
 |
|
|
||||||||
Using Surveyor Classic |
| Steps: | |||||
Open the Picklist Window:
|
|||||
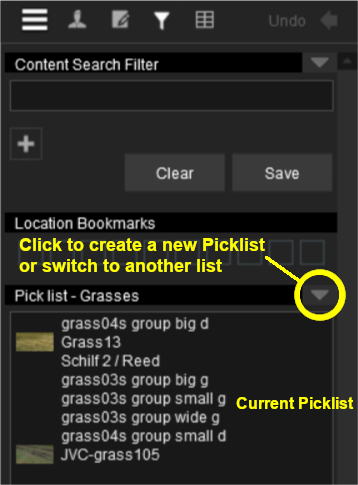
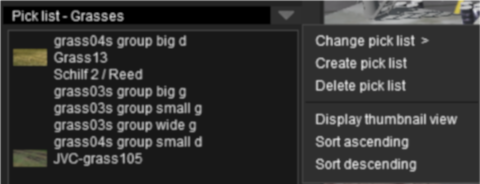
Select a Picklist or Create a New Picklist:
|
|||||||||||||
| Add Assets to the Picklist: Options: Choose one of two methods:- |
|||||||||||||||||||||||||||||||||||||||||
|
|||||||||||||||||||||||||||||||||||||||||
|
Using Surveyor 2.0 |
|
Locating the Picklists
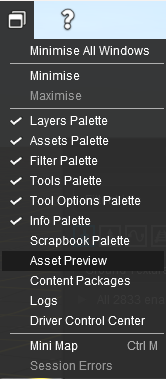
| Picklists are created, managed and deleted using the Assets Palette in Surveyor 2.0 |
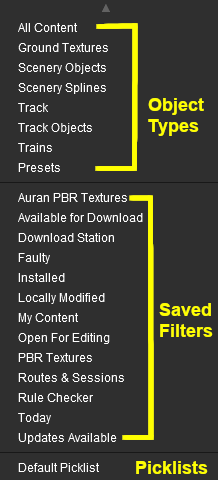
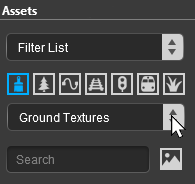
The Assets Palette gives you access to all the installed Assets, the Search Filters created in Content Manager and the Picklists.
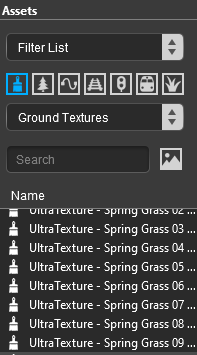 The Assets Palette |
|
|||||||||||||||||||||
 |
|
|||||||||||||||||||||||||||||
Creating a New Picklist |
| New Picklists are created by selecting an asset in the Assets Palette or by selecting an existing object in the route |
| A new Picklist is created by first identifying an asset or object that will be added to the new (yet to be created) Picklist. You cannot create an empty Picklist. | |||||||||||||||||||||||||||||||||||
| Options: Choose one of two methods:- | |||||||||||||||||||||||||||||||||||
|
|
||||||||||||||||||||||||||||||||||
| In both Options |
||||
 |
|
|||
|
To Remove Assets from a Picklist
|
||||||||||||||
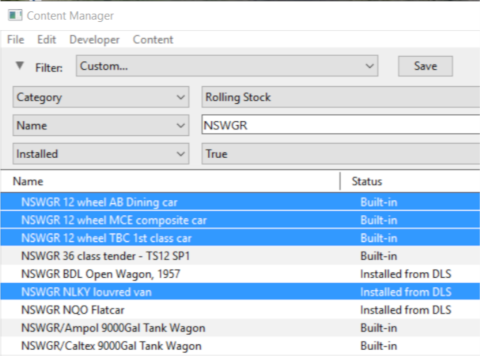
Using Content Manager (CM) |
| Steps: | ||||||||||||
Select the Assets:
|
||||||||||||
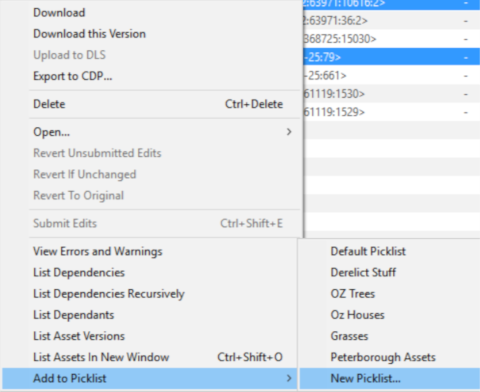
Add the Assets to the Picklist:
|
Enter Picklist Name (for New Picklist Option Only):
|
Trainz Wiki
 |
More Tutorials and Guides to Using Trainz |
This page was created by Trainz user pware in January 2019 and was last updated as shown below.
