How to Create a Picklist

From TrainzOnline
Revision as of 12:15, 27 November 2019 by Pware (Talk | contribs)

Jump to: navigation, search

The information in this Wiki Page applies to TANE, TRS19 and Trainz Plus.

LinkWiki.PNG


Trainz provides you with two different methods of creating Picklists, using either Content Manager (or Manage Content from the Trainz Launcher) or in Surveyor.

Using Content Manager (CM)

Steps.PNG Step 1: Select the assets

From the Trainz Launcher
  1. select Manage Content
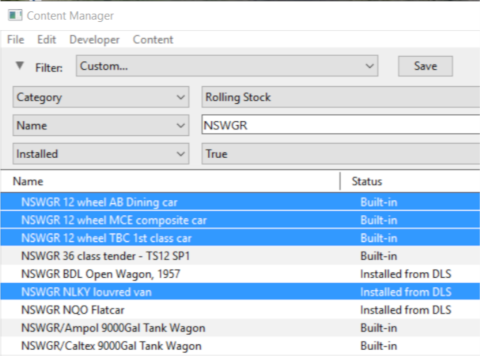
  2. (optional step) in Content Manager select a filter or create a custom filter to show the assets you want in the Picklist
  3. use the left mouse button and either the Ctrl or Shift key to click on each asset that is to be added to the Picklist
PickList CM01.png


Steps.PNG Step 2: Add the assets to the Picklist
NotePad.PNG Notes:
Only assets that are installed on your system can be added to a Picklist. They can be built-in, base, payware or installed from the DLS.
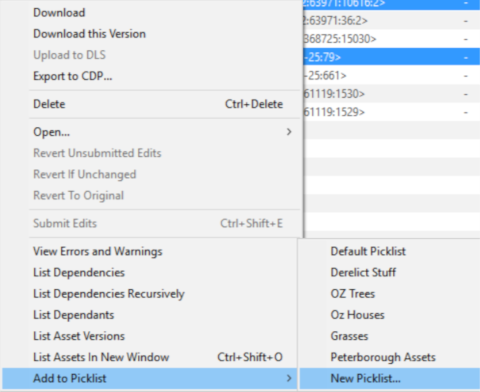
  1. right mouse click on any one of the highlighted assets
  2. select Add to Picklist from the popup menu
  3. select either:-
  1. an existing Picklist (if any) to add the assets to that Picklist, or
  2. New Picklist to create a new list
PickList CM02.png
PencilTips.PNG The Default Picklist should only be used for assets that will appear in the current project because the Default Picklist cannot be backed up or moved to another installation of Trainz


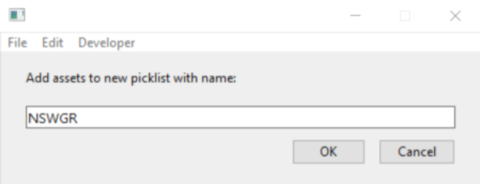
Steps.PNG Step 3: Enter Picklist Name (for New Picklist option only)
  • type a name for the new Picklist and click OK
PickList CM03.png


Top

Using Surveyor

In Surveyor.

Steps.PNG Step 1: Open the Picklist Window

From Surveyor...
  • press Ctrl-Shift-F to open the full Search Filter tool (Note: pressing Ctrl-F will only open the find named asset filter tool)
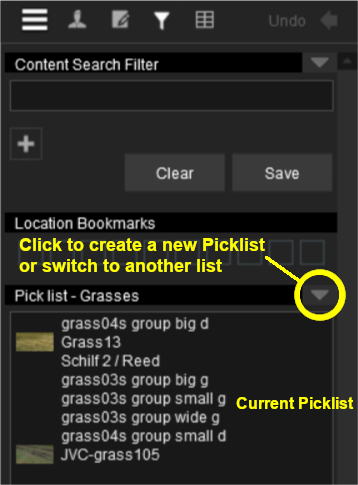
PickList Surveyor01.png If you already have one or more Picklists then the current Picklist will be shown. An empty Picklist window indicates that no Picklist has been created.
  • to switch to a different Picklist or to create a new one, click on the down arrow icon shown in the image.

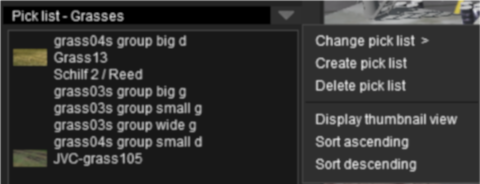
PickList Surveyor03.png then click either ...
  • Change pick list > to select a different Picklist, or
  • Create pick list to create a new one

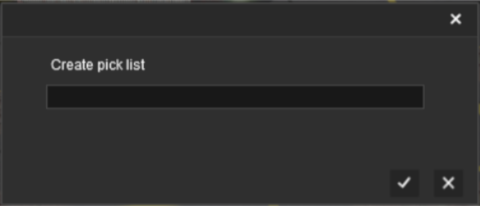
If you have selected Create pick list then you will have to enter a name for the list then click the OK (tick) button.

PickList Surveyor04.png


Steps.PNG Step 2: Add the assets to the Picklist
Alternatives.png Choose from one of two alternative methods
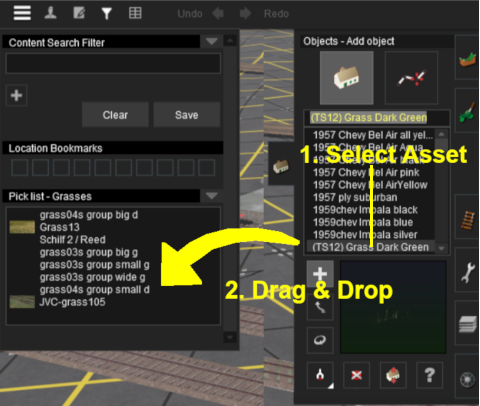
DotPoint1.JPG PickList Surveyor02.png
  1. Open the tool selection window for the types of assets to be added. For example: the Object Tool Window (F3 key)
  2. Scroll down the selection window to an asset that is to be added to the Picklist
  3. Drag & Drop the asset from the selection window to the Picklist window
  4. Repeat as required
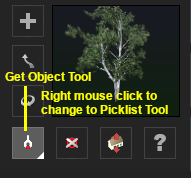
DotPoint2.JPG PickObjectGetTool.png
  1. Open the tool selection window for the types of assets to be added. For example: the Object Tool Window (F3 key)
  2. Right mouse click the Get Object tool to change it to a Picklist tool ...
  3. PickListGetTool.png and then simply click on each object in the Surveyor Map to add it to the current Picklist

When finished, right mouse click on the tool again to restore it to the Get Object state.
DotPoint.JPG Each asset is automatically saved to the Picklist when it is "dropped" or "clicked" into the Picklist window
DotPoint.JPG If an added asset does not appear in the window, then it usually means that the asset is already present in the list
DotPoint.JPG To remove an asset from the Picklist simply drag it out of the Picklist window onto the Surveyor screen

DotPoint.JPG To close the Search Filter/Picklist Tool:-
  • In TANE and TRS19 press the ESCape key
  • In TRS19 SP1 and Trainz Plus press Ctrl-Shift-F again


Top

Trainz Wiki

TrainzWiki.png

More Tutorials and Guides to Using Trainz

Personal tools