How to Move a Picklist
From TrainzOnline
(Difference between revisions)
m |
|||
| Line 1: | Line 1: | ||
| − | + | The information in this Wiki Page applies to both '''TANE''' and '''TRS19''' and will show you how to move a Picklist created in Trainz ('''TRS19''' or '''TANE''') to another installation of Trainz (for example, on another computer). | |
* For instructions on how to '''backup''' a Picklist, see the wiki page '''[[How to Backup a Picklist]]''' | * For instructions on how to '''backup''' a Picklist, see the wiki page '''[[How to Backup a Picklist]]''' | ||
* For instructions on how to '''create''' a Picklist, see the wiki page '''[[How to Create a Picklist]]'''<br> | * For instructions on how to '''create''' a Picklist, see the wiki page '''[[How to Create a Picklist]]'''<br> | ||
Revision as of 15:02, 3 February 2019
The information in this Wiki Page applies to both TANE and TRS19 and will show you how to move a Picklist created in Trainz (TRS19 or TANE) to another installation of Trainz (for example, on another computer).
- For instructions on how to backup a Picklist, see the wiki page How to Backup a Picklist
- For instructions on how to create a Picklist, see the wiki page How to Create a Picklist
Access Your Current Picklists
 |
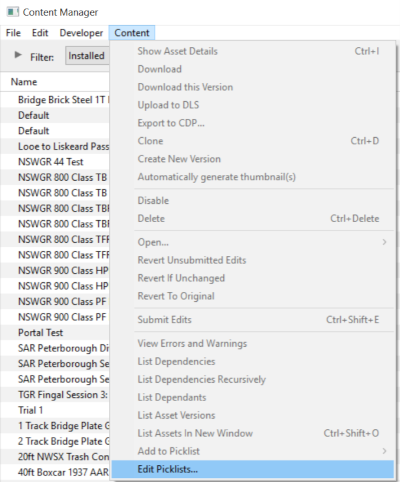
Step 1: Open CM and Your Picklists
|
 |
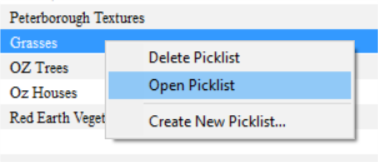
Step 2: Select the Picklist to be moved
|
 |
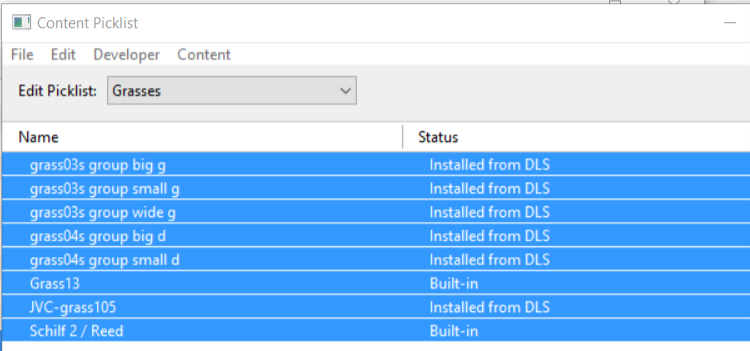
Step 3: Select Picklist Contents
|
 |
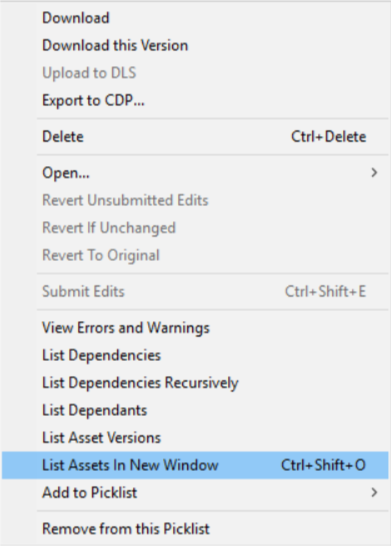
Step 4: Transfer List to a New Window
|
Transfer the List to Another Copy of Trainz
| Notes: If you are transferring the Picklist to another computer then you will need to:-
There you can reverse the steps by:-
|
 |
Step 6: Open CM in the Destination Trainz and Create a New Filter
|
 |
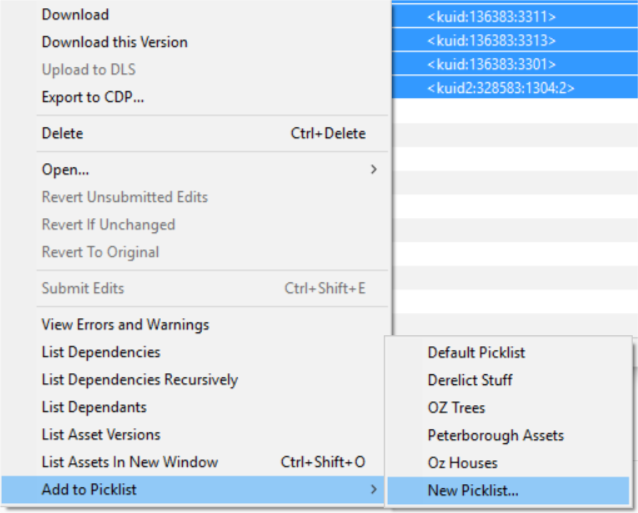
Step 7: Create a New Picklist The pasted asset list will appear in the CM display window, as shown below.
|
 |
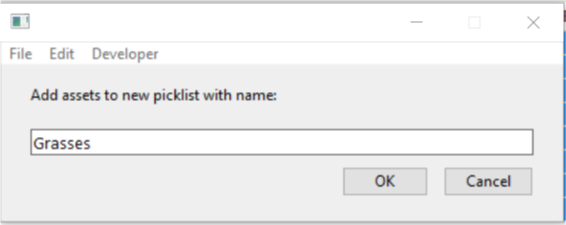
Step 8: Enter a Name for the Picklist
|
Trainz Wiki
 |
More Tutorials and Guides to Using Trainz |
