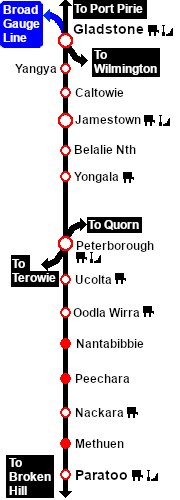
 |
| Switches |
| No. |
Name |
Facing and L/R Directions
(default direction first) |
No. |
Name |
Facing and L/R Directions
(default direction first) |
 |
 |
JT 1 |
Down (L) Main, (R) Goods Loop/Goods |
 |
JT 2 |
Down (R) Main, (L) Loop/Station |
 |
JT 3 |
Down (L) Goods Loop, (R) Goods |
 |
JTCP A |
Up (L) Catchpoint , (R) Port Pirie |
 |
JTCP B |
Up (L) Catchpoint , (R) Port Pirie |
 |
JT 4 |
Down (L) Station, (R) Loop |
 |
JT 5 |
Down (L) Goods Shed, (R) Goods Crane Siding DE |
 |
JT 6 |
Down (R) Main Yard/Broken Hill, (L) Loop Yard/Broken Hill |
 |
JT 7 |
Up (R) Loop, (L) Main |
 |
JT 8 |
Down (R) Station/Loop Yards/Broken Hill, (L) Depot/Sidings |
 |
JT 9 |
Down (L) Station Yard/Broken Hill, (R) Loop Yard/Broken Hill |
 |
JT 10 |
Up (L) Loop, (R) Station |
 |
JT 11 |
Down (L) Goods Loop Yard/Broken Hill, (R) Goods Yard/Grain |
 |
JT 12 |
Up (L) Goods Shed, (R) Goods Loop |
 |
JT 13 |
Down (L) Goods Loop/Yard, (R) Grain |
 |
JT 14 |
Down (R) Goods Loop Yard/Broken Hill, (L) Goods Yard |
 |
JT 15 |
Up (R) Goods Loop, (L) Goods Shed |
 |
JT 16 |
Up (R) Goods Yard, (L) Grain |
 |
JT 17 |
Up (R) Main, (L) Goods Loop Yard |
 |
JT 18 |
Up (L) Main, (R) Loop |
 |
JT 19 |
Up (L) Main, (R) Station |
 |
JT 20 |
Down (L) Loco Depot, (R) Depot Siding 1 DE |
 |
JT 21 |
Down (L) Loco Depot, (R) Depot Siding 2 DE |
|
 |
| Switch Sets |
| Port Pirie - Station |
1 -L 2 -L 4 -L ( 8 -R 9 -L ) |
Broken Hill - Station |
19 -R ( 9 -L 8 -R ) |
| Port Pirie - Loop |
1 -L 2 -L 4 -R ( 7 -R 10 -L ) |
Broken Hill - Loop |
19 -L 18 -R ( 10 -L 7 -R ) |
| Port Pirie - Main |
1 -L 2 -R ( 6 -R ) |
Broken Hill - Main |
19 -L 18 -L 17 -R ( 6 -R ) |
| Port Pirie - Goods Loop |
1 -R 3 -L B -R |
Broken Hill - Goods Loop |
19 -L 18 -L 17 -L
( 15 -R 11 -L ) |
| Port Pirie - Goods |
1 -R 3 -R A -R 5 -L |
Broken Hill - Goods |
19 -L 18 -L 17 -L 15 -L 14 -L 13 -L 12 -L |
| Port Pirie - Grain |
1 -R 3 -L B -R 11 -R 12 -R 13 -R |
|
|
|
| |
( ) = optional switches |
 |

