SAR Scenario Paratoo-Gladstone/Terowie Express Freight

From TrainzOnline
Revision as of 17:24, 25 June 2022 by Pware (Talk | contribs)

Jump to: navigation, search
ArrowLeftBtn.png   10   Paratoo to Gladstone/Terowie Express Freight  ArrowRightBtn.png
A scenario in the SAR Peterborough Base Session
Express freight from Broken Hill to Port Pirie and Terowie. At Peterborough the train is divided into two and each part is combined with additional rolling stock before continuing separately to Terowie and Gladstone. Bottom

Through Freight
 Era:  1920s to 1969
 Duration:  Paratoo to Terowie 2 hours 15 minutes
Paratoo to Gladstone 3 hours
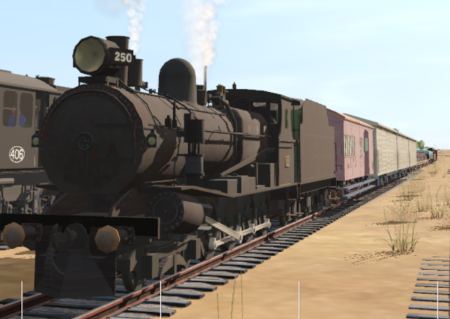
 Loco:  SAR T 250 on Paratoo  Goods Loop 

Other Available Locos: Loco Roster Label.png

  • SAR T 23 on Peterborough Depot  Siding 1 
  • SAR T 233 on Peterborough Depot  Loco Road 1 
  • SAR 407 on Peterborough Depot  Repair Shop Road 4 
 Consist:  Attached to SAR T 250: 3 QLX Box vans, 4 MTW Flat wagons, 2 CCC Gondola wagons, 2 WHE Gondola covered wagons, 3 Tank Fuel wagons, 2 Guard Vans (one at each end). Waiting at Peterborough are 4 QLX Box vans and 3 MTW Flat wagons. Each freight wagon has its destination as part of its name e.g. CCC Gladstone or MTW Terowie.

Location Index

Location Index
Each location in the layout has a detailed set of track diagrams that provide a variety of information. The  Getting Started  guide below gives a summary of the information that is available.

To display the data click any Line Index graphic, or go to the bottom of the page for all the session links (all links will open in this window).


Getting Started:
  1. If you have already closed the opening message window then the first step is to pause the session by pressing the  P  key.
  2. Next locate your loco. Either:-
    1. Open the Finder Tool (press  Ctrl   F ) and type, in the Name field, the name of the loco. For example SAR T 250 (or just T 250 should be enough). Click the tick icon, OR
    2. Open the Driver List (bottom left of the screen) and select the loco from there - click the drivers Eye icon to jump to the loco.
  3. Take a few moments to get your bearings. Click Paratoo Data (this link will open in this window) to show the location details and track plans for Paratoo. In each location details page:-
    • the Tab HM White.png tab gives an overall summary of each location with a "potted" history (where available).
    • the Tab TM Grey.png tab reveals the invisible TM Track Marks for Drive To commands.
    • the Tab IN Grey.png tab lists all active industries and their commodities.
    • the Tab SW Grey.png tab describes the names, locations and settings of all junction switches as well as some switch sets you may want to use.
  4. Each location details page has direct links to the adjacent locations so you can explore along the route.
  5. When you are ready to start, reload the Peterborough Base Session page (click the Scenarios button on your current location page) and select this Scenario again or just use the Back button on your browser - whichever is quicker.
  6. Switch back to Driver Mode and either close the opening message window or press the  P  key to start the session.


Tutorial:
Tutorial A tutorial on using these scenarios is provided in the link on the left. The link will open in this window


Orders:
  1. Take the train out of the  Loop  and onto the main line.
  2. Proceed to a suitable vacant road in Peterborough  Yard .
  3. Coal and water the loco at Peterborough Main  Loco Coal & Water  Stage as needed.
  4. The train has to be divided at Peterborough. Those wagons with Terowie in their names are to be marshalled into one train and combined with wagons stored on Peterborough  Goods Sidings 1  that also have Terowie in their names.
  5. Those wagons with Gladstone in their names are to be marshalled into another train on a different  Yard  road and combined with wagons stored on Peterborough  Goods Sidings 1  that also have Gladstone in their names.
  6. Select a suitable and unrostered loco from the main  Depot  and attach it to the front (eastern or Terowie end) of the Terowie train.
  7. Reattach SAR T 250 to the front (western or Gladstone end) of the Gladstone train.
  8. Proceed with both trains (seperately or simultaneously) to
    • Gladstone  Goods Transfer Narrow Gauge  and
    • Terowie  Relief  road.
Logo


Driving Notes:
  • The approaches to all locations are protected by invisible signals to prevent the AI Half Speed Slowdown Problem when approaching a signal at stop.
  • Trackmarks and industries have been provided for AI Drive To Trackmark, Drive via Trackmark and Drive to  Industry  commands. Click Location Index for details.
  • Manual (no AI) driving is possible. As a visual driving aid, a Caution warning sign has been placed at the location of the Main Approach Dn and Main Approach Up trackmarks. Click Location Index for details.
  • If driving manually in yards, you are responsible for correctly setting any catch points.
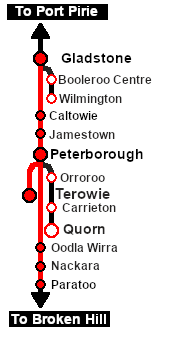
Strip Map
Route Key

Links: All links will open in this window
ArrowLeftBtn.png Scenarios
Session Scenarios
Location Index
Location List
Tutorial
Drive Tutorial
Rolling Stock
Rolling Stock
Loco Roster
Loco Roster
Industries
Active Industries
Top ArrowRightBtn.png


This page was created by Trainz user pware in February 2021 and was last updated as shown below.


Personal tools