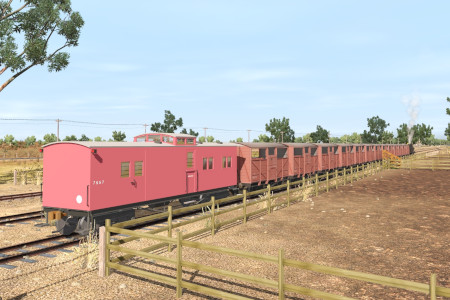
SAR Scenario Livestock Shuttle
From TrainzOnline
(Difference between revisions)
m |
|||
| Line 1: | Line 1: | ||
| − | <!-- V2.0 | + | <!-- V2.0 (seperate V1.0 file) --> |
<table width=1000> <!-- BEGIN Title table --> | <table width=1000> <!-- BEGIN Title table --> | ||
<tr valign="top"> | <tr valign="top"> | ||
| Line 138: | Line 138: | ||
</td> | </td> | ||
<td width=100>[[image:SAR Train Order Rotated.png|100px|link=|alt=Logo]]</td> | <td width=100>[[image:SAR Train Order Rotated.png|100px|link=|alt=Logo]]</td> | ||
| + | </tr> | ||
| + | <tr valign="top"> | ||
| + | <td colspan=2> | ||
| + | <table width=820 bgcolor="black"> <!-- BEGIN Working Timetable black border Table --> | ||
| + | <tr valign="top"> | ||
| + | <td align="center"><span style="font-weight: 700; font-size: 17px; color: white;"> Terowie-Peterborough-Paratoo Livestock Timetable </span></td> | ||
| + | </tr> | ||
| + | <tr valign="top"> | ||
| + | <td> | ||
| + | <table bgcolor="white" width=816> <!-- BEGIN Working Timetable contents Table --> | ||
| + | <tr valign="top"> | ||
| + | <td width=120> </td> | ||
| + | <td align="right" width=80 colspan=2>'''Frequency'''<br><br>'''Train №'''</td> | ||
| + | <td rowspan=40 width=1></td> <!-- row count --> | ||
| + | <td rowspan=40 bgcolor="black" width=1></td> <!-- row count --> | ||
| + | <td align="center" width=70>'''(M) W (F)'''<br>'''TL18'''</td> | ||
| + | <td align="center" width=70> </td> | ||
| + | <td rowspan=40 bgcolor="black" width=1></td> <!-- row count --> | ||
| + | <td rowspan=40 width=1></td> <!-- row count --> | ||
| + | <td width=260>'''(when required)'''</td> | ||
| + | </tr> | ||
| + | <tr> | ||
| + | <td colspan=10 bgcolor="black"></td> | ||
| + | </tr> | ||
| + | <tr valign="top"> | ||
| + | <td>'''Terowie Depot'''</td> | ||
| + | <td align="right" width=50>'''CEFJOWX'''</td> | ||
| + | <td align="right" width=30>'''dep'''</td> | ||
| + | <td align="center">'''08:00'''</td> | ||
| + | <td align="center"> </td> | ||
| + | <td> </td> | ||
| + | </tr> | ||
| + | <tr valign="top"> | ||
| + | <td colspan=2 align="right">'''Livestock Siding'''</td> | ||
| + | <td align="right">'''arr'''</td> | ||
| + | <td align="center">'''08:mm'''</td> | ||
| + | <td align="center"> </td> | ||
| + | <td>Collect livestock wagons from Siding 1 or Siding 2</td> | ||
| + | </tr> | ||
| + | <tr valign="top"> | ||
| + | <td colspan=2 align="right">'''Livestock Transfer'''</td> | ||
| + | <td align="right">'''arr'''</td> | ||
| + | <td align="center">'''L'''</td> | ||
| + | <td align="center"> </td> | ||
| + | <td>Load livestock</td> | ||
| + | </tr> | ||
| + | <tr valign="top"> | ||
| + | <td>'''Terowie'''</td> | ||
| + | <td colspan=2 align="right">'''dep'''</td> | ||
| + | <td align="center">'''08:mm'''</td> | ||
| + | <td align="center"> </td> | ||
| + | <td> </td> | ||
| + | </tr> | ||
| + | <tr valign="top"> | ||
| + | <td>'''Gumbowie'''</td> | ||
| + | <td align="right">'''FUX'''</td> | ||
| + | <td> </td> | ||
| + | <td align="center">'''..'''</td> | ||
| + | <td> </td> | ||
| + | <td> </td> | ||
| + | </tr> | ||
| + | <tr valign="top"> | ||
| + | <td>'''Peterborough Yard'''</td> | ||
| + | <td align="right">'''CEFJOWX'''</td> | ||
| + | <td align="right">'''arr'''</td> | ||
| + | <td align="center">'''hh:mm'''</td> | ||
| + | <td> </td> | ||
| + | <td> </td> | ||
| + | </tr> | ||
| + | <tr valign="top"> | ||
| + | <td colspan=3>'''Peterborough Stockard'''</td> | ||
| + | <td align="center">'''N'''</td> | ||
| + | <td> </td> | ||
| + | <td>uNload livestock</td> | ||
| + | </tr> | ||
| + | <tr valign="top"> | ||
| + | <td colspan=2>'''Peterborough Yard'''</td> | ||
| + | <td align="right">'''arr'''</td> | ||
| + | <td align="center">'''hh:mmCW'''</td> | ||
| + | <td> </td> | ||
| + | <td>Coal and Water loco when required. Turn and run loco around train or swap loco</td> | ||
| + | </tr> | ||
| + | <tr> | ||
| + | <td colspan=10 bgcolor="black"></td> | ||
| + | </tr> | ||
| + | <tr> | ||
| + | <td colspan=3 align="right">'''Frequency'''<br>'''Train №'''</td> | ||
| + | <td> </td> | ||
| + | <td align="center">'''W'''<br>'''PL18'''</td> | ||
| + | <td> </td> | ||
| + | </tr> | ||
| + | <tr> | ||
| + | <td colspan=10 bgcolor="black"></td> | ||
| + | </tr> | ||
| + | <tr valign="top"> | ||
| + | <td colspan=2>'''Peterborough Yard'''</td> | ||
| + | <td align="right">'''dep'''</td> | ||
| + | <td> </td> | ||
| + | <td align="center">'''hh:mm'''</td> | ||
| + | <td> </td> | ||
| + | </tr> | ||
| + | <tr valign="top"> | ||
| + | <td>'''Ucolta'''</td> | ||
| + | <td align="right">'''UWX'''</td> | ||
| + | <td align="right">'''arr'''</td> | ||
| + | <td> </td> | ||
| + | <td align="center">'''hh:mmW'''</td> | ||
| + | <td>Water loco when required. Deliver X wagons to stockyard</td> | ||
| + | </tr> | ||
| + | <tr valign="top"> | ||
| + | <td>'''Oodla Wirra'''</td> | ||
| + | <td align="right">'''UWX'''</td> | ||
| + | <td align="right">'''arr'''</td> | ||
| + | <td> </td> | ||
| + | <td align="center">'''hh:mmW'''</td> | ||
| + | <td>Water loco when required. Deliver X wagons to stockyard</td> | ||
| + | </tr> | ||
| + | <tr valign="top"> | ||
| + | <td>'''Peechara Loop'''</td> | ||
| + | <td align="right">'''X'''</td> | ||
| + | <td align="right"> </td> | ||
| + | <td> </td> | ||
| + | <td align="center">'''..'''</td> | ||
| + | <td> </td> | ||
| + | </tr> | ||
| + | <tr valign="top"> | ||
| + | <td>'''Nackara'''</td> | ||
| + | <td align="right">'''UWX'''</td> | ||
| + | <td align="right">'''arr'''</td> | ||
| + | <td> </td> | ||
| + | <td align="center">'''hh:mmW'''</td> | ||
| + | <td>Water loco when required. Deliver X wagons to stockyard</td> | ||
| + | </tr> | ||
| + | <tr valign="top"> | ||
| + | <td>'''Methuen Loop'''</td> | ||
| + | <td align="right">'''X'''</td> | ||
| + | <td align="right"> </td> | ||
| + | <td> </td> | ||
| + | <td align="center">'''..'''</td> | ||
| + | <td> </td> | ||
| + | </tr> | ||
| + | <tr valign="top"> | ||
| + | <td>'''Paratoo'''</td> | ||
| + | <td align="right">'''ΔCWX'''</td> | ||
| + | <td align="right">'''arr'''</td> | ||
| + | <td> </td> | ||
| + | <td align="center">'''hh:mmCW'''</td> | ||
| + | <td>Turn loco on WYE. Deliver X wagons to stockyard. Coal and water loco when required. </td> | ||
| + | </tr> | ||
| + | <tr> | ||
| + | <td colspan=10 bgcolor="black"></td> | ||
| + | </tr> | ||
| + | <tr> | ||
| + | <td colspan=3 align="right">'''Frequency'''<br>'''Train №'''</td> | ||
| + | <td> </td> | ||
| + | <td align="center">'''W'''<br>'''PL18'''</td> | ||
| + | <td> </td> | ||
| + | </tr> | ||
| + | <tr> | ||
| + | <td colspan=10 bgcolor="black"></td> | ||
| + | </tr> | ||
| + | <tr valign="top"> | ||
| + | <td colspan=2>'''Paratoo Stockyard'''</td> | ||
| + | <td align="right">'''dep'''</td> | ||
| + | <td> </td> | ||
| + | <td align="center">'''hh:mm'''</td> | ||
| + | <td>Collect loaded livestock wagons</td> | ||
| + | </tr> | ||
| + | <tr valign="top"> | ||
| + | <td colspan=2>'''Paratoo'''</td> | ||
| + | <td align="right">'''dep'''</td> | ||
| + | <td> </td> | ||
| + | <td align="center">'''hh:mm'''</td> | ||
| + | <td> </td> | ||
| + | </tr> | ||
| + | <tr valign="top"> | ||
| + | <td>'''Methuen Loop'''</td> | ||
| + | <td align="right"> </td> | ||
| + | <td align="right"> </td> | ||
| + | <td> </td> | ||
| + | <td align="center">'''..'''</td> | ||
| + | <td> </td> | ||
| + | </tr> | ||
| + | <tr valign="top"> | ||
| + | <td>'''Nackara'''</td> | ||
| + | <td align="right"> </td> | ||
| + | <td align="right">'''arr'''</td> | ||
| + | <td> </td> | ||
| + | <td align="center">'''hh:mmW'''</td> | ||
| + | <td>Water loco when required. Collect wagons from stockyard</td> | ||
| + | </tr> | ||
| + | <tr valign="top"> | ||
| + | <td>'''Peechara Loop'''</td> | ||
| + | <td align="right"> </td> | ||
| + | <td align="right"> </td> | ||
| + | <td> </td> | ||
| + | <td align="center">'''..'''</td> | ||
| + | <td> </td> | ||
| + | </tr> | ||
| + | <tr valign="top"> | ||
| + | <td>'''Oodla Wirra'''</td> | ||
| + | <td align="right"> </td> | ||
| + | <td align="right">'''arr'''</td> | ||
| + | <td> </td> | ||
| + | <td align="center">'''hh:mmW'''</td> | ||
| + | <td>Water loco when required. Collect wagons from stockyard</td> | ||
| + | </tr> | ||
| + | <tr valign="top"> | ||
| + | <td>'''Ucolta'''</td> | ||
| + | <td align="right"> </td> | ||
| + | <td align="right">'''arr'''</td> | ||
| + | <td> </td> | ||
| + | <td align="center">'''hh:mmW'''</td> | ||
| + | <td>Water loco when required. Collect wagons from stockyard</td> | ||
| + | </tr> | ||
| + | <tr valign="top"> | ||
| + | <td>'''Peterborough Yard'''</td> | ||
| + | <td align="right">'''CEFJOWX'''</td> | ||
| + | <td align="right">'''arr'''</td> | ||
| + | <td> </td> | ||
| + | <td align="center">'''hh:mm'''</td> | ||
| + | <td> </td> | ||
| + | </tr> | ||
| + | <tr valign="top"> | ||
| + | <td colspan=2 align="right">'''Stockyard'''</td> | ||
| + | <td> </td> | ||
| + | <td> </td> | ||
| + | <td align="center">'''N'''</td> | ||
| + | <td>uNload livestock</td> | ||
| + | </tr> | ||
| + | <tr valign="top"> | ||
| + | <td>'''Peterborough Yard'''</td> | ||
| + | <td align="right">'''CEFJOWX'''</td> | ||
| + | <td align="right">'''arr'''</td> | ||
| + | <td> </td> | ||
| + | <td align="center">'''hh:mmCW'''</td> | ||
| + | <td>Coal and Water loco when required. Turn and run loco around train or swap loco</td> | ||
| + | </tr> | ||
| + | <tr> | ||
| + | <td colspan=10 bgcolor="black"></td> | ||
| + | </tr> | ||
| + | <tr valign="top"> | ||
| + | <td colspan=3 align="right">'''Frequency'''<br>'''Train №'''</td> | ||
| + | <td align="center">'''(M F)'''<br>'''TL17'''</td> | ||
| + | <td align="center">'''W'''<br>'''TL19'''</td> | ||
| + | <td>'''(when required)'''</td> | ||
| + | </tr> | ||
| + | <tr> | ||
| + | <td colspan=10 bgcolor="black"></td> | ||
| + | </tr> | ||
| + | <tr valign="top"> | ||
| + | <td colspan=2>'''Peterborough Yard'''</td> | ||
| + | <td align="center">'''dep'''</td> | ||
| + | <td align="center">'''hh:mm'''</td> | ||
| + | <td align="center">'''hh:mm'''</td> | ||
| + | <td> </td> | ||
| + | </tr> | ||
| + | <tr valign="top"> | ||
| + | <td colspan=3>'''Gumbowie'''</td> | ||
| + | <td align="center">'''..'''</td> | ||
| + | <td align="center">'''..'''</td> | ||
| + | <td> </td> | ||
| + | </tr> | ||
| + | <tr valign="top"> | ||
| + | <td colspan=2>'''Terowie Livestock Transfer'''</td> | ||
| + | <td align="center">'''arr'''</td> | ||
| + | <td align="center">'''hh:mm'''</td> | ||
| + | <td align="center">'''hh:mm'''</td> | ||
| + | <td>Unload wagons. Stable wagons in siding</td> | ||
| + | </tr> | ||
| + | <tr valign="top"> | ||
| + | <td colspan=2 align="right">'''Depot'''</td> | ||
| + | <td align="center">'''arr'''</td> | ||
| + | <td align="center">'''hh:mm'''</td> | ||
| + | <td align="center">'''hh:mm'''</td> | ||
| + | <td>Coal, water and stable loco</td> | ||
| + | </tr> | ||
| + | </table> <!-- END Working Timetable contents Table --> | ||
| + | </td> | ||
| + | </tr> | ||
| + | </table> <!-- END Working Timetable black border Table --> | ||
| + | </td> | ||
</tr> | </tr> | ||
</table> <!-- END Orders and Logo Table --> | </table> <!-- END Orders and Logo Table --> | ||
| Line 143: | Line 425: | ||
</tr> | </tr> | ||
</table> <!-- END Black Border for Orders Table --> | </table> <!-- END Black Border for Orders Table --> | ||
| − | + | <table width=820> <!-- BEGIN Symbol Table --> | |
| − | <table | + | |
<tr valign="top"> | <tr valign="top"> | ||
| − | <td | + | <td colspan=4>'''Location Symbols:'''</td> |
| − | < | + | </tr> |
<tr valign="top"> | <tr valign="top"> | ||
| − | <td> | + | <td>'''Δ = Turning Triangle'''</td> |
| − | + | <td>'''C = Loco Coal Loader'''</td> | |
| − | + | <td>'''E = Engine Depot'''</td> | |
| − | + | <td>'''F = Fixed Signals'''</td> | |
| − | + | <td>'''J = Junction'''</td> | |
| − | + | ||
| − | + | ||
| − | </td> | + | |
</tr> | </tr> | ||
| − | </ | + | <tr valign="top"> |
| − | </td> | + | <td>'''O = Loco Turntable'''</td> |
| + | <td>'''U = Unattended'''</td> | ||
| + | <td>'''W = Loco Water Tank'''</td> | ||
| + | <td colspan=2>'''X = Crossing Loop'''</td> | ||
| + | </tr> | ||
| + | <tr valign="top"> | ||
| + | <td colspan=5 bgcolor="black"></td> | ||
</tr> | </tr> | ||
| − | </table> | + | </table> <!-- END Symbol Table --> |
</td> | </td> | ||
<td> | <td> | ||
<table width=180> <!-- BEGIN Strip Map Table --> | <table width=180> <!-- BEGIN Strip Map Table --> | ||
<tr valign="top"> | <tr valign="top"> | ||
| − | + | <td align="center">[[image:SAR Terowie-Paratoo Strip Map.png|link=|alt=Strip Map]]<br>[[image:SAR Scenario Route.png|link=|alt=Route Key]]</td> | |
| − | <td align="center">[[image:SAR | + | |
</tr> | </tr> | ||
</table> <!-- END Strip Map Table --> | </table> <!-- END Strip Map Table --> | ||
</td> | </td> | ||
</tr> | </tr> | ||
| − | </table> | + | </table> <!-- END Yard, Orders, Strip Map tables --> |
| + | <table cellpadding="2" bgcolor="black" width=1000> <!-- BEGIN Black border for Driving Notes table --> | ||
| + | <tr valign="top"> | ||
| + | <td><span style="font-size: 15px; font-weight: 700; color: white">Driving Notes:</span><br> | ||
| + | <table bgcolor="lightyellow" width=996> <!-- BEGIN Driving Notes table --> | ||
| + | <tr valign="top"> | ||
| + | <td> | ||
| + | A summary of the facilities and product loads at all locations along the lines is provided in the links<br> | ||
| + | :[[Image:SAR_PortPirie-BrokenHill_Line.png|link=SAR Port Pirie-Broken Hill|alt=Port Pirie-Broken Hill Line|Show Port Pirie-Broken Hill Line]] and [[Image:SAR_Peterborough-Terowie_Line.png|link=SAR Peterborough-Terowie|alt=Peterborough-Terowie Line|Show Peterborough-Terowie Line]] | ||
| + | *The approaches to all locations are protected by invisible signals to prevent the '''AI Half Speed Slowdown Problem''' when approaching a signal at stop. | ||
| + | *Trackmarks and industries have been provided for AI '''Drive To Trackmark''', '''Drive via Trackmark''' and '''Drive to <span style="background-color: yellow;"> Industry </span>''' commands. Click [[image:Line_Index_Label.png|link=SAR_Index|Location Index]] for details. | ||
| + | *Industry active stations (where you can use the '''Drive To''' industry command) are only at '''Gladstone''', '''Jamestown''', '''Peterborough''' and '''Terowie'''. Industry active stations will have a longer than expected wait time. | ||
| + | *Manual (no AI) driving is possible. As a visual driving aid, a '''Caution''' warning sign has been placed at the location of the '''Main Approach Dn''' and '''Main Approach Up''' trackmarks. Click [[image:Line_Index_Label.png|link=SAR_Index|Location Index]] for details. | ||
| + | *If driving manually in yards, you are responsible for correctly setting any '''catch points'''. | ||
| + | </td> | ||
| + | </tr> | ||
| + | </table> <!-- END Driving Notes table --> | ||
| + | </td> | ||
| + | </tr> | ||
| + | </table> <!-- END Black border for Driving Notes table --> | ||
----- | ----- | ||
<table width=1000> <!-- BEGIN End Links Table --> | <table width=1000> <!-- BEGIN End Links Table --> | ||
Revision as of 07:24, 20 October 2022
| 21 Peterborough Livestock Shuttle | ||
| A scenario in the SAR Peterborough Base Session v2.0 | ||
| Livestock movements to Peterborough from Terowie and other locations from Paratoo to Ucolta. |
 |
|
|
|
Each location in the layout has a detailed set of track diagrams that provide a variety of useful information The Getting Started guide below gives a summary of what is available. |
Getting Started:
|
Tutorial:
|
|
|
|||||||||||||||||||||||||||||||||||||||||||||||||||||||||||||||||||||||||||||||||||||||||||||||||||||||||||||||||||||||||||||||||||||||||||||||||||||||||||||||||||||||||||||||||||||||||||||||||||||||||||||||||||||||||||||||||||||||||||||||||||||||||||||||||||||||||||||||||||||||||||||||||||||||||||


Driving Notes:
|
| Links: All links will open in this window | ||||||||
 Session Scenarios |
 Location List |
 Drive Tutorial |
 Rolling Stock |
 Loco Roster |
 Active Industries |
|||
This page was created by Trainz user pware in June 2022 and was last updated as shown below.