SAR Scenario Livestock Shuttle
From TrainzOnline
(Difference between revisions)
m |
m |
||
| Line 32: | Line 32: | ||
<tr valign="top"> | <tr valign="top"> | ||
<td><span style="font-size: 15px; font-weight: 700; color: white; background-color: black;"> Loco: </span></td> | <td><span style="font-size: 15px; font-weight: 700; color: white; background-color: black;"> Loco: </span></td> | ||
| − | <td>'''[[SAR_Scenario_Rolling_Stock#SAR_T_Class|SAR T | + | <td>'''Locos Available at Terowie''' from the '''[[image:Loco_Roster_Label.png|link=SAR Peterborough Division Loco Roster]]''':- |
| − | ''' | + | *'''[[SAR_Scenario_Rolling_Stock#SAR_T_Class|SAR T 198]]''' at <span style="font-weight: 700;">Terowie <span style="color: white; background-color: black;"> Loco </span> Depot</span><br> |
| − | *'''[[SAR_Scenario_Rolling_Stock#SAR_T_Class|SAR T | + | *'''[[SAR_Scenario_Rolling_Stock#SAR_T_Class|SAR T 231]]''' at <span style="font-weight: 700;">Terowie <span style="color: white; background-color: black;"> Loco </span> Depot</span> |
| + | '''At Peterborough''' for a loco swap:- | ||
| + | *'''[[SAR_Scenario_Rolling_Stock#SAR_T_Class|SAR T 23]]''' on <span style="font-weight: 700;">Peterborough Depot <span style="color: white; background-color: black;"> Siding 1 </span></span> | ||
| + | *'''[[SAR_Scenario_Rolling_Stock#SAR_T_Class|SAR T 233]]''' on <span style="font-weight: 700;">Peterborough Depot <span style="color: white; background-color: black;"> Loco Road 1 </span></span> | ||
| + | *'''[[SAR_Scenario_Rolling_Stock#SAR_400_Class|SAR 407]]''' on <span style="font-weight: 700;">Peterborough Depot <span style="color: white; background-color: black;"> Repair Shop Road 4 </span></span> | ||
| + | </td> | ||
</tr> | </tr> | ||
<tr valign="top"> | <tr valign="top"> | ||
| Line 68: | Line 73: | ||
# Next locate your loco. '''Either''':- | # Next locate your loco. '''Either''':- | ||
## Open the '''Finder Tool''' (press <span style="font-weight: 700; font-size: 15px; color: white; background-color: black;"> Ctrl </span> <span style="font-weight: 700; font-size: 15px; color: white; background-color: black;"> F </span>) and type, in the '''Name''' field, the name of the loco. For example '''SAR T 231''' (or just '''T 231''' should be enough). Click the '''tick''' icon, '''OR''' | ## Open the '''Finder Tool''' (press <span style="font-weight: 700; font-size: 15px; color: white; background-color: black;"> Ctrl </span> <span style="font-weight: 700; font-size: 15px; color: white; background-color: black;"> F </span>) and type, in the '''Name''' field, the name of the loco. For example '''SAR T 231''' (or just '''T 231''' should be enough). Click the '''tick''' icon, '''OR''' | ||
| − | ## Open the '''Driver List''' (bottom left of the screen) and | + | ## Open the '''Driver List''' (bottom left of the screen) and scroll through the driver names to find the driver of your selected loco (e.g. '''Driver 231''' for '''SAR T 231'''). Click the '''Eye''' icon for the selected driver to jump to the loco. |
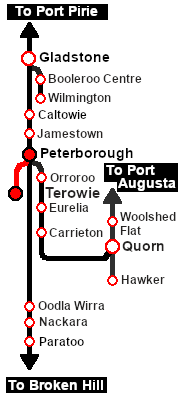
# Take a few moments to get your bearings. Click [[image:Line_Index_Terowie.png|link=SAR_Terowie|Terowie Data]] (this link will open in this window) to show the location details and track plans for '''Terowie'''. In each location details page:- | # Take a few moments to get your bearings. Click [[image:Line_Index_Terowie.png|link=SAR_Terowie|Terowie Data]] (this link will open in this window) to show the location details and track plans for '''Terowie'''. In each location details page:- | ||
#*the [[image:Tab_HM_White.png|link=|75px]] tab gives an overall summary of each location with a "potted" history (where available). | #*the [[image:Tab_HM_White.png|link=|75px]] tab gives an overall summary of each location with a "potted" history (where available). | ||
Revision as of 18:18, 21 August 2022
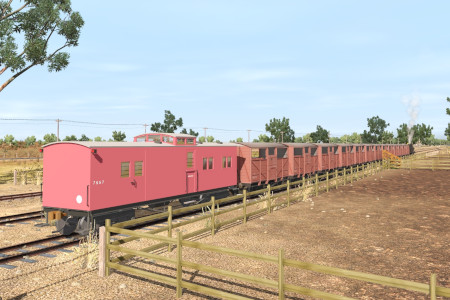
| 23 Peterborough Livestock Shuttle | ||
| A scenario in the SAR Peterborough Base Session v2.0 | ||
| Livestock transfers between the stockyards at Terowie and Peterborough. |
 |
|
||||||||||||
Getting Started:
|
Tutorial:
|
|
|


| Links: All links will open in this window | ||||||||
 Session Scenarios |
 Location List |
 Drive Tutorial |
 Rolling Stock |
 Loco Roster |
 Active Industries |
|||
This page was created by Trainz user pware in June 2022 and was last updated as shown below.