HowTo/Build a simple animated scenery asset in Blender
Contents
|
Caveat
Blender is not currently supported by N3V as a modeling source for Trainz, however third-party tools exist for this purpose.
However, as of trainz-build 4.5, Trainz uses FBX as a mesh import format (which Blender can export).
Introduction
This tutorial demonstrates how to animate a simple ball scenery asset to make it bounce one metre and rotate through 360 degrees. The asset has no practical purpose in Trainz other than to demonstrate how animation can be used on scenery objects.
 Updated and rebuilded tutorial files: File:Tutorial Rebuild Blender Jumping BeachBall.zip
 Beside some adjustments the main update was to move, add and amend animation tags to a effects sub container.
 Informations about Blender 3.x fbx export settings as picture one will find in Prequel for this tutorial series: Blender to Trainz (with the full script)
Requirements
To export an animated scenery asset to Trainz, you need the following:
- Trainz (TS09 or later preferred)
- TrainzMeshImporter.exe. This is provided by N3V.
- Blender V2.57 or later.
- The Blender Exporter.
- Windows Vista or Windows 7 (32 or 64 bit).
- Some experience in the use of Blender to create assets for Trainz.
Animating meshes in Blender
Blender will allow the direct animation of meshes but that will not work for Trainz purposes. Meshes to be animated must be linked to lattices or armatures and bones. You must rotate or position the lattices or pose the armatures and bones to enable animation. Animation in Blender, and particularly for armatures and bones, can be complex. However, lattice animation is much simpler and a good place to start.
This tutorial animates a beachball mesh by rotating and locating a lattice that is a parent of the beachball.
Process
Create the mesh
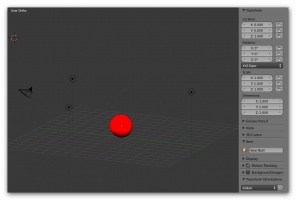
- In Blender create a new sphere object and name it Beachball.
- Create a simple material called "beachball.m.onetex".
- Allocate a simple texture and UV map the sphere to the texture. This example uses a red 16*16 pixel TGA file.
- Position the beachball so it just touches the ground.
Create the lattices
This asset requires two lattices. The main lattice, appropriately called b.r.main, is the parent lattice and is not animated. The second lattice, b.r.beachball will be the parent of the beachball mesh and will be animated.
Create the b.r.main lattice
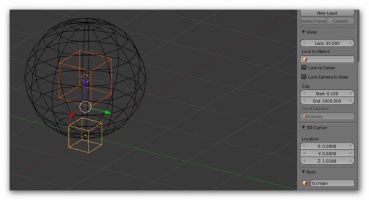
The most important lattice is one called b.r.main. This should be positioned at grid centre (X=0, Y=0, Z=0).
- Position the cursor at the centre using Shift S ->Cursor to center.
- Add a lattice and name it b.r.main. The name is important and it should be in lowercase. You can resize to whatever size suits you.
Create the b.r.beachball lattice
- Select the beachball object and position the cursor at the centre of the beachball using Shift S >Cursor to selected.
(Note: In this case the origin of the beachball will be at the centre of the beachball, but if it is not then you can position the origin by selecting the beachball, select Object from the menu bar, then Transform ->Origin to geometry. Sometimes it is useful to have the origin elsewhere but for this example we need it at the centre of the beachball.)
- Add a lattice and call it b.r.beachball. The name can be anything but must be preceded by "b.r." and should be in lowercase. The centre of the lattice should be at the centre of the beachball.
Set up the parent-child relationships
Make the beachball a child of b.r.beachball
- Select the beachball and, while holding down the ShiftKey, select b.r.beachball.
- Press Ctrl P and then select the Object option. This makes the beachball mesh a child of b.r.beachball. This is important because when we animate b.r.beachball, the beachball mesh will animate as well.
Make the b.r.beachball lattice a child of b.r.main
All lattices and their children must be a child of b.r.main for the exporter to work.
- Now select b.r.beachball and while holding down the ShiftKey select b.r.main.
- Press Ctrl P and then select the Object option. This makes the b.r.beachball lattice a child of b.r.main.
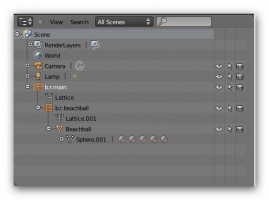
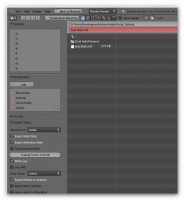
The Outliner Window in Blender will show the parent-child relations as well as other attibutes. It should look like the following:
Set up the animation period
Now we are ready to animate the beachball. Our animation consists of the ball bouncing up and down and spinning at the same time.
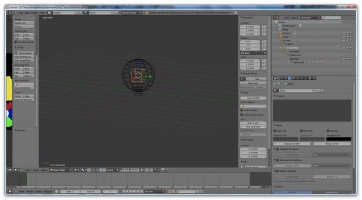
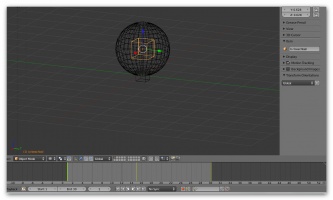
- Arrange the screen layout as you wish but make sure you include a Timeline window. This is my layout for this session that has the Timeline Window at the bottom.
- In the Timeline window, change the End frame to 30 and set the current frame to 1. For Trainz the animation rate is 30 frames per second.
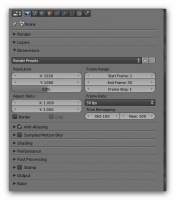
- Go to the Render window and set the playback rate to 30 fps.
Animate the lattices
Animation uses what are called I frames to make a "snapshot" of the rotation and position of lattices. This sequence creates those I frames in order from the first to last frame. The last frame, 30 in our case, is also deemed to be frame 0 (zero). This makes the animation loop.
This is the tricky bit. Read through the sequence first so you have an idea of what is to be done. The sequence is important. If you make a mistake then delete I frames so that the last I frame is at frame 1. Creating I frames is done by using the letter i key on the keyboard. This brings up a menu.
- Go back to the 3D View.
- Select the lattice b.r.beachball.
- Move the cursor to that lattice by pressing Shift S ->Cursor to selected.
- Bring up the Properties menu by pressing or toggling N (the cursor has to be in the 3D View for this to work).
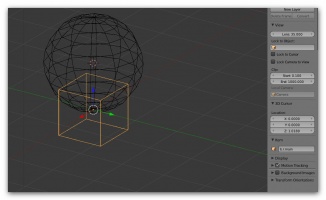
In the Transform area of the Properties menu, the Z location of the selected object (b.r.beachball) should be 1.0. If it slightly out then just change it manually.
Similarly in the 3D Cursor location in the Properties menu the Z location should also be 1.0.
We are now going to insert the animation keyframes and for this to work the mouse cursor must be in the 3D View window.
- With b.r.beachball selected, press I to bring up the Insert Keyframe Menu.
- Select LocRot (location, rotation). You may notice the transform location windows changing to a yellow colour and the name of the selected object changing to an orange colour. This means that an I frame exists for that object at this particular frame. Frame 1 in this case.
- In the Timeline window, change the frame position from frame 1 to frame 15 by typing the number in the Current Frame position.
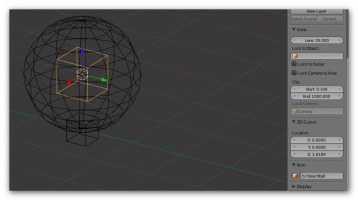
- With b.r.beachball still selected, in the Properties -> Transform -> Location menu, change the Z location from 1.0 to 2.0. You can just click on the 1.0 value and type the change.
- Press the Enter key and you will see the lattice and the beachball mesh move upwards. Note you can also move the lattice by pressing G and then Z and dragging it upwards in the Z axis.
- With b.r.beachball still selected, in the Properties -> Transform -> Rotation menu, change the Z rotation value from 0 to 180. You will not see any visible change but that's OK.
- Back in the 3D Window press I and select LocRot. This inserts our second I frame at frame 15.
- In the Timeline Window, change the frame position from frame 15 to frame 30 by typing the number in the Current Frame position or by clicking on the Jump to Last Frame button ( >>| ).
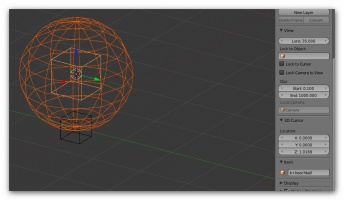
- In the Transform Window change the b.r.beachball Z location back to 1.0 and the Z rotation to 360.
- Back in the 3D Window press I and select LocRot. This inserts our last I frame at frame 30.
The following shows the frames for the beachball lattice. The frames at 1, 15 and 30 are in yellow.
Running the animation
To test the animation click on the right pointing arrow (Play) key in the Timeline Window. You might want to change to solid or texture view to see it better. The ball should bounce every second and do a full rotation.
Exporting
- Save the Blender file.
- To export, select File ->Export -> Trainz Mesh and Animation. In the dialog box make sure the Export Animation Data checkbox is checked.
CONFIG.TXT
The config.txt for the asset should look something like this:
kuid                                    <kuid:xxx:xxx>
username                                "AAA Bouncing Beachball"
description                             "Beachball animation scenery asset"
trainz-build                            3.5
kind                                    "scenery"
category-era                            "1800s"
category-class                          "XVG"
category-region                         "00"

mesh-table
{
  default
  {
    mesh                                "beachball.im"
    light                               1
    auto-create                         1
    anim                                "beachball.kin"
    animation-loop-speed                1.00
  }
}

thumbnails
{
  0
  {
    image                               "$screenshot$.jpg"
    width                               240
    height                              180
  }
}
Note the use of the tags "anim" and "animation-loop-speed". A value of 1 for animation-loop-speed gives normal animation. You can slow or speed up the animation with different values.
Conclusion
This has been a very simple introduction to animation for Trainz with Blender. The key points to remember are:
- Meshes cannot be animated for Trainz. Create a lattice for each mesh, make the mesh a child of the lattice and animate the lattice.
- Lattices must be identified with the "b.r." naming convention.
- All lattices must be a child of b.r.main.
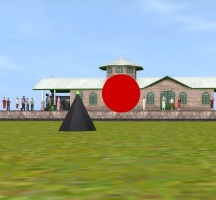
The beachball in Trainz Surveyor
Here is the beachball in Trainz Surveyor bouncing next to another test asset of a simple lighthouse with a flashing cursor.
See Also
HowTo/Export_from_Blender_using_FBX FBX_file_format
