Prequel Blender to Trainz
Prequel to Andi Smith's wiki tutorial shed house Blender to Trainz
 TBD: Some issue I didn't found the reason for:

 [*] SetFXAnimationState("doors", true); works fine and opens the doors immediately. (script lines 175ff.)
     SetFXAnimationState("doors", false); does not work as expected and closes the doors not immediately.
     They will be closed not before the next open call with SetFXAnimationState("doors", true);.
     [+] A Trainz Support ticket [UIT-837-15571] was generated and is now closed..
     [+] A Trainz Bug Report was generated at 17.08.2023, 20:07.
     [+] P.S. August 17, 2023: Workaround (Solution?) is to use a second animation closing the door.
         The animations where deactivated and activated antipodal.
     [+] P.S. August 19, 2023: This tutorial site, the ZIP-file as well as the config and the script pages where updated.

 [*] A small not critical bug: The fascia name won't be shown immediatly right after the first propertie change.
     This may be caused by the not existing soup-value. Didn't found yet the location to fix it.
     Workaround is to save the asset properties, reopen it and do a small change to the text.
Intro
This tutorial uses informations, texts and files of the original tutorial from Andi Smith. The attached script file is upgraded to the current Trainz version TRS22 SP2 and is commented according to the steps of the original tutorial. The tutorial files (asset and texture-group) as well as the source codes for config.txt and .gs-script one will find in this zip-file respectively this wiki pages:
- Engineshed Tutorial Asset Prequel Blender: files.zip
- Engineshed Tutorial Asset Prequel Blender: engineshed_tuorial_full.gs
- Engineshed Tutorial Asset Prequel Blender: config.txt
 Author: Ekkehard Skirl (ek.skirl)
 No warranty for anything.
What the shed house asset shell do
The all at all destination is to have loco-shed where while entering or leaving the shed house the doors open and close automatic
- A light on top of the door gable shows optically that doors are open.
- A bell shows acoustically that doors are open.
- A fascia with customisable text is shown on top of the door gable.
- The roof is hideable.
- The walls may have different skins
Of course, the train shell automatically stops inside the shed house. For this additionally one needs a trackmark and an invisible signal.
How this shell work
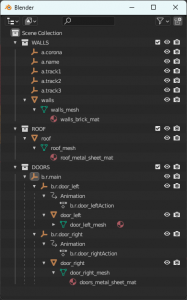
- The doors will be animated with help of some empties with Trainz special names.
- The fascia text is shown at an attachment point, realized by an empty.
- The roof will be hidden by script methods.
- The doors open when a loco inner enters a scenery trackmark.
- The doors close when the loco inner leaves this scenery trackmark.
- The bell ringing starts with the help of special messages and stops if doors are closed.
- The light blinking is realized with a corona asset and starts and stops the same way as the bell.
- The visibility of the roof, the fascia text and the walls textures are customisable within the property browser menu of the asset.
Parts of this prequel tutorial
- Intro
- The config.txt file
- The Blender steps to create the asset
- The files in the Blender to Trainz folder
- FBX export from Blender and import to Trainz
The original tutorial and files one may found (last visit Aug 9, 2023) at:
https://online.ts2009.com/mediaWiki/index.php/Getting_Started_in_TrainzScript
(State: August 19, 2023, 11:30)
The config.txt file
Every asset needs a text file containing their configuration information. We will now have a small walk through it.
System tags and containers
 kuid               "<kuid2:0:2154891:1>"
 username           "Engine Shed Tutorial Asset Blender"
 kind               "buildable"
 trainz-build       4.6

 category-region            "00"
 category-era               "2000s"
 category-class             "TF"

 thumbnails {
   0 {
     image          "engineshed_tutorial_thumbnail.jpg"
     width          240
     height         180
   }
 }
This first part is mandatory or common and the Trainz wiki tells you enough about it. One additional thing we need is a thumbnail used to preview the asset. It’s a small jpg picture with the listed dimensions. How to create it isn’t focused here.
 mesh-table-lod-transition-distances    1000
 mesh-detail-level-count                1
Using lods is mandatory and meaningful for performance. Because we focus on the functionality we only use one lod that will be faded out at a distance of 1000m.
 script                     "engineshed_tutorial.gs"
 class                      "Tutorial"
The asset will be scripted. The filename of the script is "engineshed_tutorial.gs" and the asset’s script class name is "Tutorial". So we say Trainz, which code is to use and how to call it. If you have a look into the script you will find the fitting class declaration.
class Tutorial isclass Buildable { ... }
The script will be precompiled while importing the asset to the content manager.
mesh-table container
 mesh-table {

   shed-lod0 {
     mesh                 "shed.trainzmesh"
     auto-create          1
     lod-level            0
     ...
     }

   doors-lod0 {
     mesh                 "doors.trainzmesh"
     auto-create          1
     lod-level            0
     ...
     }

   roof-lod0 {
     mesh                 "roof.trainzmesh"
     auto-create          0
     lod-level            0
   }

 }
The mesh-table container tells Trainz which meshes we want to use. There are the walls with doors described in the sub container default-lod0 and apart from the walls the roof, that's visibility she'll be switching. The mesh tag holds the name of the Trainz mesh file that is created while the asset’s import. The auto-create tag tells Trainz if the mesh is visible (1) or not (0). The visibility may be changed within the script. To see the things inside the shed house the roof is invisible after session loading. And the lod-level tag is set to 0, the lod-stage with the most count of mesh triangles.
effects sub containers
First effects container is part of the mesh-table sub-container shed-lod0:
 effects {

   corona {
     kind               "corona"
     att                "a.corona"
     texture-kuid       <kuid:-3:10110>
     frequency          2
     directional        0
     object-size        0.15
   }

   fascia {
     kind               "name"
     fontsize           0.5
     fontcolor          160,160,160
     att                "a.name"
     name
   }

   masonry {
     kind               "texture-replacement"
     texture            "engineshed_textureimage.texture"
   }

 }
Second effects container is part of the mesh-table sub-container doors-lod0:
 effects {

   opendoors {
     kind            "animation"
     anim            "opendoors_scene.kin"
     speed           1.0
     looped          0
     animation-starts-active               0
     animation-has-random-start-position   0
   }

   closedoors {
     kind            "animation"
     anim            "closedoors_scene.kin"
     speed           1.0
     looped          0
     animation-starts-active               0
     animation-has-random-start-position   0
   }

 }
Four of the five functionalities need to be assigned to parts of a mesh or other asset. These assignments are described in the effects container. The doors container describes the animation properties. We don’t want the animation to be looped and immediately start. The corona sub container assigned an additional asset (corona asset with the noticed kuid) that is our light over the door (attachment point a.corona). The fascia container describes the text format and where the text is to be shown (attachment point a.name). The masonry container tells Trainz with which texture the original imported texture is to be static replaced. The container name later will be used within the script too to make texture replacement dynamically.. But where does Trainz know about the texture library to use?
attachment containers
 kuid-table {
   skinskuid               <kuid2:XXXXXX:2154890:1>
 }
The kuid-table container tells Trainz about the additional used asset. The name of the kuid tag will be used within the script to connect to the fitting asset.
 attached-track {

   track1 {
     track                  <kuid:-10:137>
     useadjoiningtracktype  1
     vertices {
       0                    "a.tracka1"
       1                    "a.tracka2"
     }
   }

   track2 {
     track                  <kuid:-10:137>
     useadjoiningtracktype  0
     vertices {
       0                    "a.tracka2"
       1                    "a.tracka3"
     }
   }

 }
Of course to drive locos into the shed it will need a track. This is described in the attached-track container. Because of the behavior of consists and signals at track ends the asset contains two tracks. The first will be visible and starts 12m outside the door gable (attachment point a.track1) of the shed house and ends 1m apart from the back gable (attachment point a.track2). There is the second invisible track connected that ends 13m outside the back gable (attachment point a.track3). As the original attached track we use the invisible track with the noted kuid. The seadjoiningtracktype tag tells Trainz in the case of value 1 to exchange this track with the first in-game connected track-kind. The value 0 lets the track-kind stay as noted. The vertices sub container described at which attachment points the attached track starts (0) end ends (1).
 attached-trigger {

   trigger1 {
     att                    "a.tracka1"
     radius                 26
     track                  "track1"
   }

 }
To know that a loco arrives at the shed house we use the first attachment point additionally as a scenery trigger to signal that event. This is in-game an invisible not direct editable trigger. The att tag tells the attachment point to use and the radius tag tells the trigger's inner radius at which the trigger signals inner-enter, inner-leave and train-stop events. One may ask what is the track tag (a name of a track container defined in an attached-track container) for? Because the trigger needs not to be necessarily a direct part of the attached track and/or another track may lay inside of the trigger radius this notes the track the trigger is for.
TBD: Idea to proof: As a little improvement one may think about if the second invisible track is really necessary? May one use the second attachment point as a scenery trackmark and additionally connect an invisible signal with a very small radius to it? Maybe or maybe not.
The Blender steps to create the asset
 ==== Update in progress. ====
 * Temporary importing second asset with the revers animatin. Copy the *.kin files and rename them usable.
 * Cutting the shed fbx export into shed walls with attachment empties and doors with animation empties.
 * The zip-file as well as the config and script pages where updated.
- Creating the shed house model consisting of the four parts: walls, two doors and roof.
- Adding materials to the parts of the shed house model.
- UV-mapping of the model as a whole.
- Texture baking for the model as a whole.
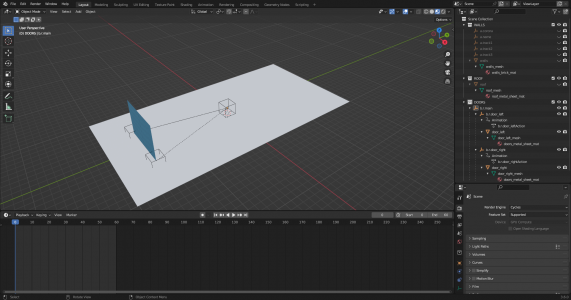
- Adding five attachment points as empties:
- Adding three more empties as animation points and animate it.
The FBX-Export and the Trainz import preliminaries of the roof and the shed with its two doors and the walls get their own chapter.
Creating the shed house model consisting of the parts walls, doors and roof
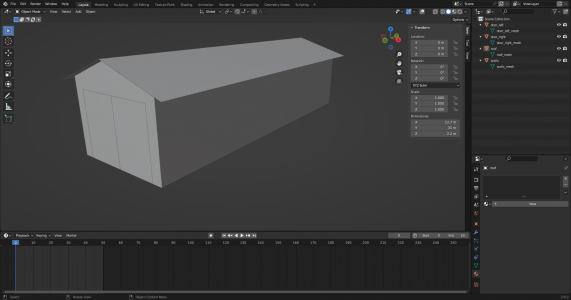
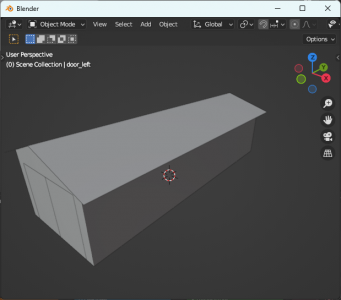
As a starting point there is the Blender file “shed house A blender model raw version.blend”. The y-dimension (length) of the shed house is 30m. The width is 10m. The roof ridge height is somewhat near 8.75m and sidewall height is 6m. The origin of the walls is the world's origin. The doors' x to z dimension is 4m to 6m and the thickness is 0.01m. The doors open in z direction, the frame joint bottom and the door's origin lies at x = 4m, y = 15m and z = 0m. The roof protrudes a little bit out of the walls.
Adding materials to the parts of the shed house model
Starting with the Blender file “shed house tutorial A model.blend” we will add materials to the four parts of our model.
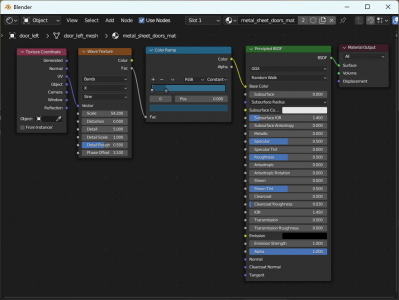
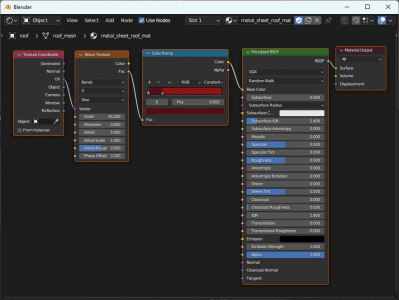
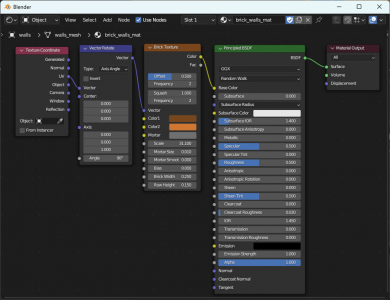
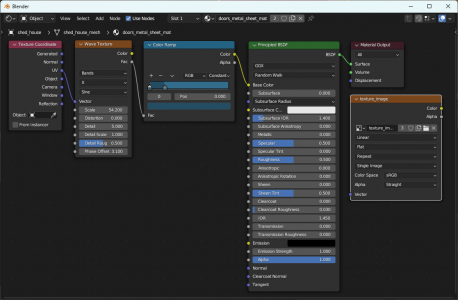
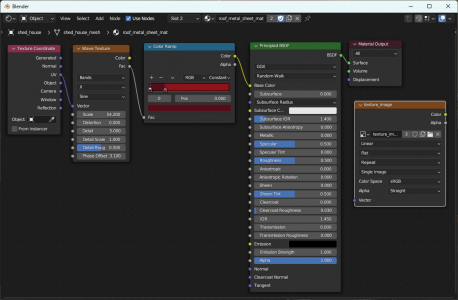
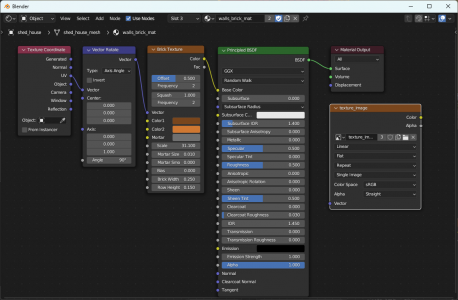
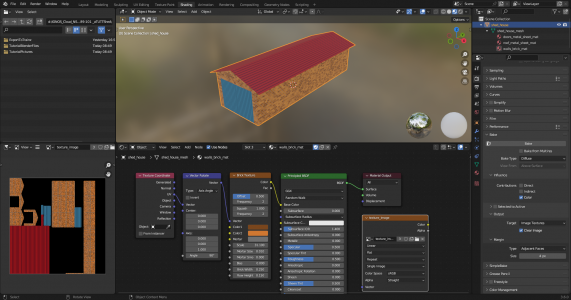
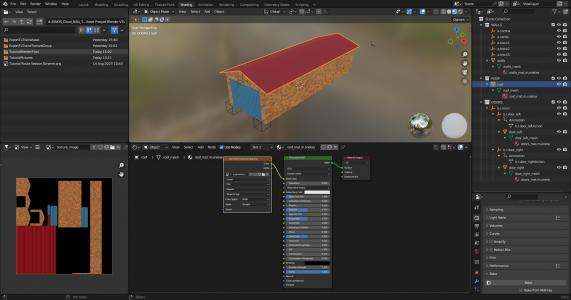
We will do that with the Blender shading workspace by adding a principled BSDF node connected to a material output node. Please don’t forget to mark every material as assigned to a fake user. This may be realized by marking the small coat of arms symbol as active. Marking the Blender material this way protects losing unused materials while saving the Blender file. The base color (also called diffuse and in Trainz albedo) is generated as a procedural shader with some connected shader nodes. Mark the part one wants to assign a material and add a new material. The Shader Area shows two nodes: Principled BSDF node and Material Output node. Connect the node-group of your choice to the Base-Color input of the BSDF node. The next pictures show the three shaders for the three materials. Remember the marked little coat of arms symbol in each picture.
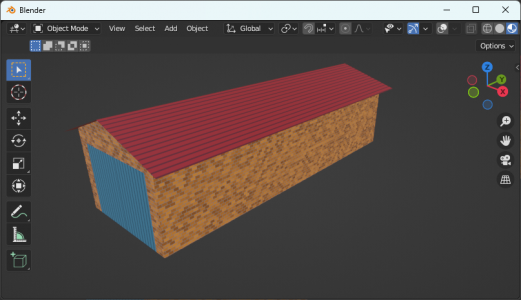
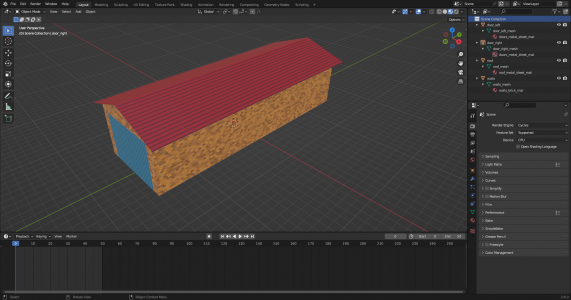
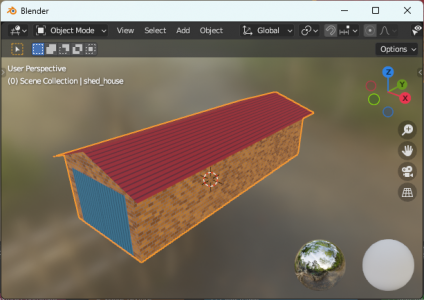
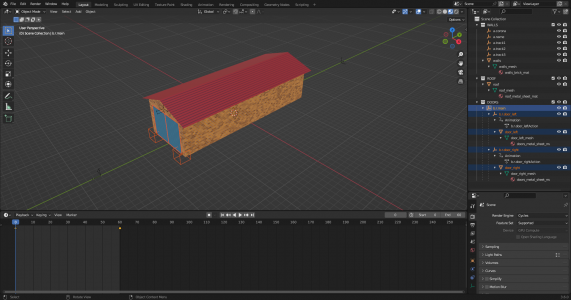
The next picture shows the 3D View of the textured model.
The result is the Blender file “shed house B materials added.blend”.
UV-mapping of the model as a whole
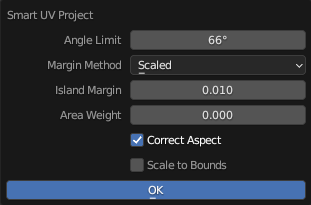
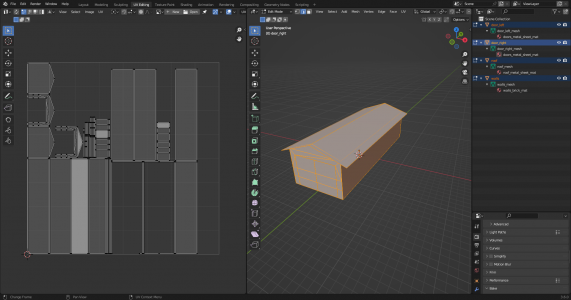
We need a mapping of the whole asset model to bake the textures in the next step. To have a rough imagination, UV-mapping is to lay every face of the model over a quadratic picture that holds the colors (called texture) of every point of the face. We use the UV-mapping workspace of Blender. In the right 3D View area we change to Object Mode if necessary and with the cursor there in press A to mark all object parts. Then change (back) to the Edit Mode. While the cursor is in this area, the edit mode is entered and edges are chosen, press A to mark all edges. We then use the “UV” entry from the menu bar and the “Smart UV project” entry. Set the values to that in the following picture.
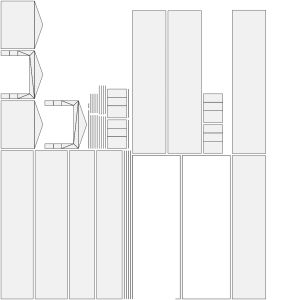
The next picture shows the exported layout of the uv mapping.
This is one of the possible ways. If the model parts are more complex this all faces method leads to overwhelming margin space. So one may use the seam edge method or others to get more connected face areas. An important value is the margin between the faces in the mapping. this shell fitting to the baking margin around the mapped faces later down. In different circumstances the margins may alter. It's yours to test different values in your projects. Same is to the dimension of the mapping area. This should be quadratic in the pixel width of power of two or some other values that consist of such equal quadratic fields. Trainz loves quadratic dimensions of that. The result of the uv mapping one will be found in the Blender file “shed house C uv mapping.blend”.
Texture baking for the model as a whole
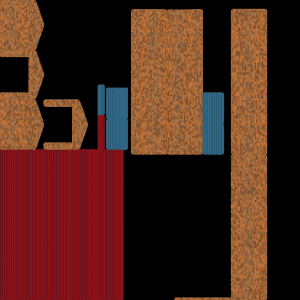
Now we will bring the colors to the mapping. We start with the copy of the Blender file “shed house C uv mapping.blend”. The result to handle the baking will be the Blender file “shed house D baking texture.blend”. With the settings we will bake a texture picture ”engineshed_textureimage.png”. The result shell looks like in the next picture.
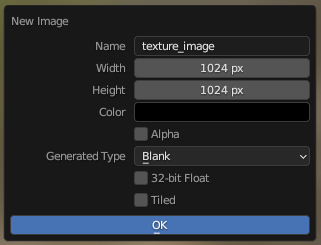
We use the Shading workspace of Blender. Add a new picture into the Image Editor left bottom. Here we call it “texture_image” and use 1024 as the dimensions and no Alpha. This picture we will later, after baking, save as the texture image. For now it is black.
To use the texture for all the parts, we bake the texture from the shed house model as a whole. In the 3D-Viewport window top middle press in object mode A and then in the Object menu the join option. Then rename the object (shed_house) and the mesh (shed_house_mesh). The object has to be marked.
In the shader editor (middle bottom area) we add to every of the three materials (slots 1 to 3) an unconnected image texture node with the color space sRGB and connect it to the “texture_image” image in the picture editor. Use the left small squared button with the tiptool hint “Browse Image to be linked”. The color space is sRGB. Important is that the image texture nodes are marked (white bordered in all slots) as well as the model in the 3D View area.
In the render properties menu (right bottom area) we set the render engine to cycles and open the bake context. Adjust the bake properties to that shown in the next picture and then press the bake button.
If baking is finished save the image as our texture image “engineshed_textureimage.png”. The result one may find in the Blender file “shed house D baking texture.blend”.
Adding five attachment points as empties
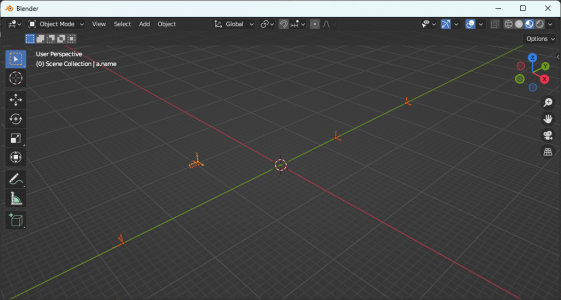
From a copy of the Blender file “shed house D baking texture.blend” we went on adding five empties (as arrows) to the model. The table contains their name, position and rotation.
 Name       Position                Rotation
 a.corona   (0.0m, -15.0m,  6.5m)   ( 0.0°, 0.0°, 180.0°)
 a.name     (0.0m, -15.05m, 7.0m)   (90.0°, 0.0°,   0.0°)
 a.track1   (0.0m, -27.0m,  0.0m)   ( 0.0°, 0.0°, 180.0°)
 a.track2   (0.0m,  14.0m,  0.0m)   ( 0.0°, 0.0°,   0.0°)
 a.track3   (0.0m,  38.0m,  0.0m)   ( 0.0°, 0.0°,   0.0°)
The view kind of the empties is a matter of taste and the things look like that, while the shed house is hidden:
The result one may find in the Blender file “shed house E attachments.blend”.
Adding three more empties as animation points and animate it
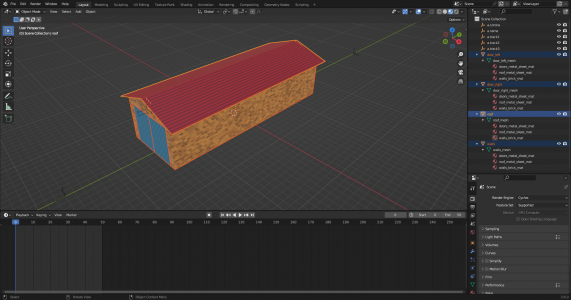
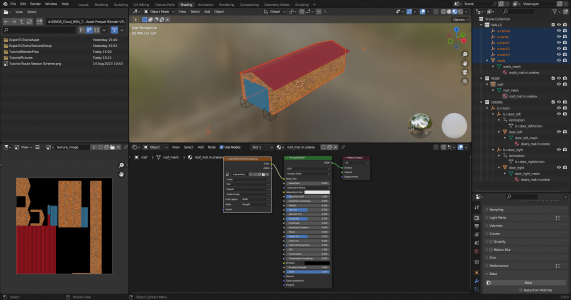
Thinking a little bit forward we now need the four parts roof, doors and walls apart from each other. Remember,we joined the object parts. To separate the parts we mark in Object Mode the joined object, change to Edit Mode and separate the loose parts of the joined mesh (Menu Mesh, Menuentry Separate, Option By Loose Parts). Then return to Object Mode, rejoin the two roof parts and rename the resulting parts useful.
If one wishes, clear the material assignments for the parts and reorganize the components. This is more a matter of form but very usefull in my eyes.
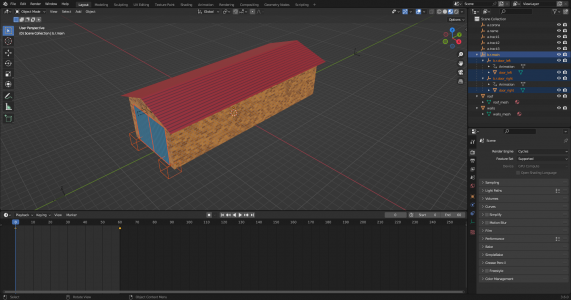
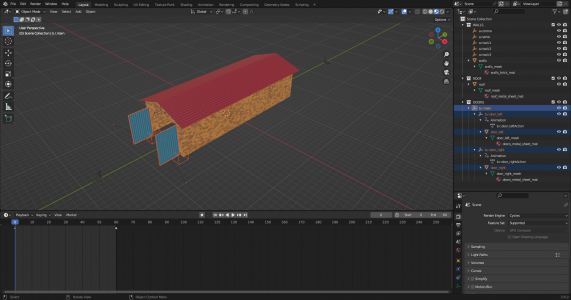
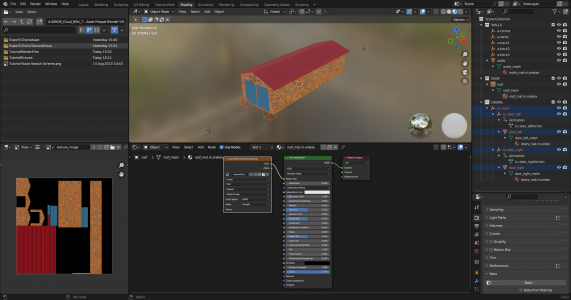
After that we add three more empties. The view kind of the entries is a matter of taste but the cube form visually shows the different tasks. The first empty is the main animation point with the name “b.r.main” and resides at the model's origin, 1m above the world's origin (0.0m, 0.0m, 1.0m). The two other empties are named “b.r.door_left” and “b.r.door_right” and reside at the bottom of the rotating axis of the doors at (4.0m, -15.0m, 0.0m) and (-4.0m, -15.0m, 0.0m). The two doors have now to be parented to their fitting empties. And these two door empties have then to be parented to the main empty. The next picture shows this, while the roof is hidden.
And now it's time to animate. Set the timeline starting with frame 0 and having 60 frames. The animation in Trainz will then have a duration of two seconds with 30 fps (frames per second).
Mark frame 0 in the timeline, mark the two door empties and with the mouse cursor in 3D View press “i” and select Rotation. This adds a keyframe to the timeline. Mark frame 60 in the timeline, rotate around Z the empties (not the doors) at 90° (right door empty) and -90° (left door empty) and with the mouse cursor in 3D View press “i” and select Rotation to add the current keyframe to the timeline. After checking the animation loop stop it and set it to startframe 0. The result one will find in the Blender file “shed house F1 animation opendoors.blend”.
Now we setup a second file from this Blender file “shed house F2 animation closedoors.blend” with the only change to reverse the animation.
 While writing this tutorial I found that it is more effectiv to do this later down and not here. But one may use it as a small exercise.
 This file is never more used. The only background of the second file is to get the second animation (.kin) file for closing the doors.
The files in the Blender to Trainz folder
We pack some files into a folder (ExportToTrainz) that we then import with drag and drop into the content manager. The name of this folder one may select self. Let's collect the files.
- bell.wav (see sub chapter Sound file, copied from the original shed house tutorial)
- config.txt (see part 2)
- engineshed_brick_metal_sheet.png (a copy of the baked texture image file)
- engineshed_textureimage.texture.txt (see sub chapter Texture.txt file)
- engineshed_tutorial.gs (see the in 2023 updated shed house tutorial in the “HowTo” guide “Getting Started in TrainzScript” steps 1 to 11)
- engineshed_tutorial_thumbnail.jpg (generated from a picture from the original shed house tutorial)
- roof.fbx (see sub chapter Blender export files)
- shed.fbx (see sub chapter Blender export files)
- doors.fbx (see sub chapter Blender export files)
- closedoors.fbx (see sub chapter Blender export files, only temporary, may be deleted later)
- opendoors_scene.kin (copied and renamed from the open for edit folder of the asset, will be added later)
- closedoors_scene.kin (copied and renamed from the open for edit folder of the asset, will be added later)
Five of twelf files we explained earlier or we may copy and rename them from the original tutorial. But now let's explain the other remaining files.
Sound file bell.wav
The sound file will play repeatedly while doors are open. We use the file of the original tutorial. It's a short bell-sound.
Texture text file engineshed_textureimage.texture.txt and the texture image file engineshed_brick_metal_sheet.png
All used textures need some text files as a bridge between texture file names and names used in the config.txt. These files tell Trainz some additional information about use cases of the image files. We here only use the .m.onetex materials type that only needs an albedo/diffuse texture file. We use the same for all three materials. While fbx-export from blender we use the in Part 2 D exported texture image “engineshed_textureimage.png” with the help of a Texture Image node. The name of the used texture image file without the ending “.png” we have to use for the first part of the .texture.txt file. And in the texture-replacement container we use this name too. The plain text file “engineshed_textureimage.texture.txt” contains two lines of information:
 Primery=engineshed_brick_metal_sheet.png
 Tile=st
Here we only use an albedo texture image file. But for the sake of PBR-materials there are three texture image files to use: albedo, normal and parameter. The image files it self may have any name, because this name is used inside the *.texture.txt to know about which files are to use. But to have a connection between Blender and Trainz, the mandatory *.texture.txt files have a special prearranged name structure. While Blender fbx-export we use a special export material that uses the baked and special arranged texture image files in a Texture Image node. The name of those files are to be used as the prefix name for fitting .texture.tx files. There are three image files:
- For albedo the diffuse texture image (RGB color with possibly transparency in the alpha channel if it exists, or as an extra file).
- For normal the normal texture image (non color, XYZ direction in RGB channels and optional with fitting bumping/height information in the alpha channel).
- For parameter a combined texture image (emission in the red color channel, roughness in the green color channel, ambient occlusion in the blue color channel and metallness in the alpha channel.
Thus far some background information. In our case we want to finally use Trainz materials named with the ending .m.onetex which tells that there will be only one albedo (diffuse) texture file. The .m.onetex convention we will use when we FBX export the model later down.
Blender export files shed.fbx, roof.fbx, doors.fbx and closedoors.fbx
The creation of these two files is the focus of the fourth part.
Generating the animation files opendoors_scene.kin and closedoors_scene.kin
The creation of these two files is the focus of the fourth part.
FBX export from Blender and import to Trainz
Starting from the Blender file ”shed house F1 animation opendoors.blend” we arrange some preparation for the FBX export. First we need Trainz fitting material adjustments and second we have to prepare some settings of the export dialog. Because one will use these export settings more than one time, one shell will use the possibility of Blender to create a template for these Trainz settings. As explained in part 3 finally we use a Trainz material named with the ending .m.onetex which tells that there will be only one albedo (diffuse) texture image. And we have finally only one material to export within the fbx-file. An fbx-file contains the meshes, the name of the material, the uv-mapping to it, the names and transformation data of the empties, the animation keyframes and the name of the source texture image files used creating the export material. Since we baked the texture from the whole model and with the premise that the mapping and model mesh were unchanged from that on, the textures fit to parts of the model too. The roof alone, the walls (with the attachment empties) and the doors (with the animation empties) she'll be exported apart but we will ever use the same texture image for the materials. We use the “engineshed_textureimage.png” while exporting. If your file has another name so you have to exchange it with that here used “engineshed_textureimage” name in the fitting “engineshed_textureimage.texture.txt” file name. It is recommended to use a copy of the starting Blender file ”shed house F1 animation opendoors.blend”.
Export settings of the FBX export dialog
There are some settings to deal with and it is strongly advised you to use a copy of the Blender file “shed house F1 animation opendoors.blend” because we have to change models material shader. And that’s why the model in this phase does not ever look as real, especially for PBR materials. The Trainz import needs some special material conventions to make the things possible. This is some kind of workaround for some problems. In our onetex case this doesn't happen. We use here the to “shed house G1 fbx export opendoors.blend” copied Blender file F1. If we start the fbx export dialog, we will get a properties window. The right panel there is to set the export properties. It offers on top the possibility to save Operator Presets as templates. There one may save a Trainz export settings preset. Use menu File, entry Export, option FBX to reach this window. The following settings are useful property values.
FBX export of roof-part object (roof.fbx)
Enter the Shading workspace in Blender and mark the roof. Then in the Shader area unlink the material (x) and create a new one with the name “roof_mat.m.onetex”. Add a new Texture Image node to the left of the BSDF principled shader node and connect the Color output with the Base Color input. Inside the Image Texture node we use the right sided folder symbol to connect our baked and saved texture image “engineshed_textureimage.png” to it. The roof in the 3D View should now again look fine. With the marked roof call the fbx export dialog (menu File, entry Export with option FBX). Now set the export settings in the right panel (see chapter Export settings of the FBX export dialog). Choose the ExportToTrainz folder, the filename as „roof.fbx“ and start exporting. That’s it for the roof. To save a little bit time one may copy the texture image node to insert it to the other materials.
FBX export of walls and attachment empties (shed.fbx)
Enter the Shading workspace in Blender and mark the walls. Then in the Shader area unlink the material (x) and create a new one with the name “walls_mat.m.onetex”. Add a new Texture Image node to the left of the BSDF principled shader node and connect the Color output with the Base Color input. Inside the Image Texture node we use the right sided folder symbol to connect our baked and saved texture image “engineshed_textureimage.png” to it. Or shorter insert the copied texture image node. The roof in the 3D View should now again look fine. In the outliner right top area mark the walls and the five attachment empties. This may be done also by hiding the roof, the doors as well as the three animation empties and with the cursor in the 3D View pressing A. Then with only marked walls and the five attachment empties call the fbx export dialog (menu File, entry Export with option fbx), proof the export settings in the right panel (see chapter Export settings of the FBX export dialog), choose the ExportToTrainz folder, the filename as “shed.fbx“ and start exporting. That’s it for the shed walls and the five attachment empties.
FBX export of doors and animation empties for opendoors (doors.fbx)
And now the same for the two doors and the three animation empties and the output file name „doors.fbx“. This will include the animation keyframes for opening the doors. The material adding process is a little bit different and consists of two parts. First mark one door and add the new material “doors_mat.m.onetex“ as described. Second mark the other door and now one may append the same material again by choosing it from the list of the exiating materials. One will find it behind the small beachball icon.
Save the used Blender file G1 and then again as a copy “shed house G2 fbx export closedoors.blend”
FBX export of doors and animation empties (closedoors.fbx)
Using copied Blender file G2 the only change we do is to reverse the animation of the two door empties (not the doors itself). Than save the Blender file G2 and export with again marked doors and three animation empties. Remember that the third animation emptie is the b.r.main named empty, that has the two door empties as children and that the doors are children of their animation empties. The exported fbx file is closedoors.fbx.
Creating the second animation file closedoors.kin
With the files (excluded the two .kin files) we now may start the first Trainz import run. Did you thought about the kuids? Ok. Import the ExportToTrainz folder to Trainz, possibly submit the edits and open the asset again in explorer. One will find two .kin files. We copy the „closedoors_scene.kin“ file into the EportToTrainz folder as ouer second .kin file. The closedoors.fbx file in the BlenderToTrainz folder may be deleted or saved other where as well as the closedoors.trainzmesh file and the closedoors.fbx in the submitted asset folder. The second Trainz import run with the eleven files will bring the shedhouse asset to Trainz.
Suggestion for a session test layout
That's it. ...
... If you have all your files in the ExportToTrainz folder and setted YOUR kuid, you may drag and drop it to the content manager, possibly submit the edits and then use the asset in Trainz.
