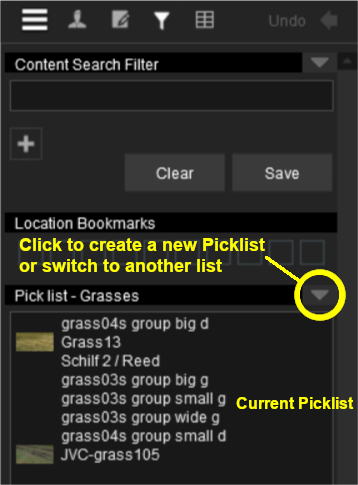
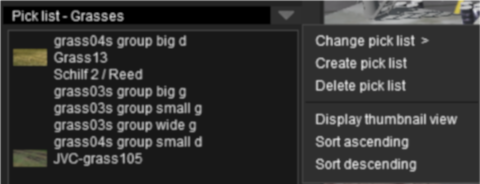
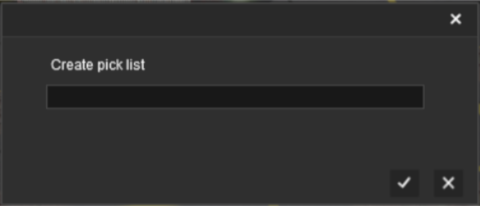
This guide will show you how to create a Picklist in TRS19 or TANE (both programs use identical methods). For instructions on how to move a Picklist, see the wiki page How to Move a Picklist
Both programs provide you with two different methods of creating Picklists, using either Content Manager (or Manage Content from the TANE/TRS19 Launcher) or in Surveyor.
Using Content Manager (CM)
From the TRS19 or TANE Launcher, select Manage Content
 |
Step 1: Select the assets
From the TRS19/TANE Launcher
- select Manage Content
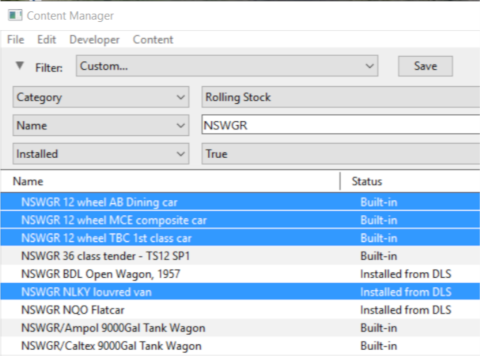
- in Content Manager select a filter or create a custom filter to show the assets you want in the Picklist
- use the left mouse button and either the Ctrl or Shift key to click on each asset that is to be added to the Picklist
 |
|
 |
Step 2: Add the assets to the Picklist
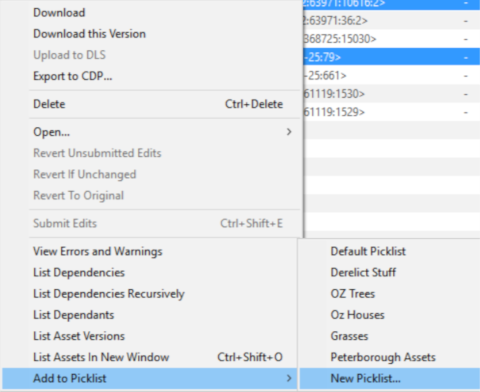
- right mouse click on any one of the highlighted assets
- select Add to Picklist from the popup menu
- select either:-
- an existing Picklist (if any) to add the assets to that Picklist, or
- New Picklist to create a new list
 |
|
 |
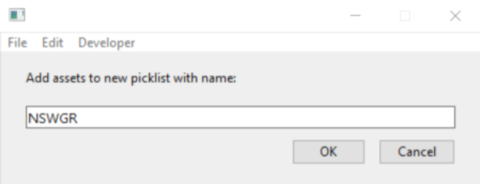
Step 3: Enter Picklist Name (for New Picklist option only)
- type a name for the new Picklist and click OK
 |
|
Using Surveyor
In Surveyor in either TRS19 or TANE.
 |
Step 1: Open the Picklist Window
From the TRS19/TANE Surveyor...
- press Ctrl-Shift-F to open the full Search tool (Note: pressing Ctrl-F will only open the find named asset tool)
|
|
 |
Step 2: Add the assets to the Picklist
- open the tool selection window for the types of assets to be added. For example: the Object Tool Window (F3 key)
- scroll down the selection window to an asset that is to be added to the Picklist
- Drag & Drop the asset from the selection window to the Picklist window
- repeat as required
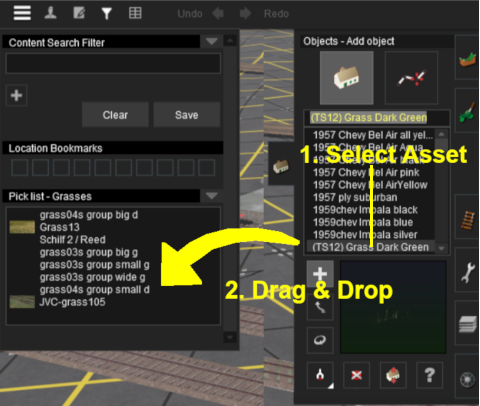
Each item is automatically added and saved to the Picklist as it is "dropped". To remove an item from the list simply drag it out of the Picklist window onto the Surveyor screen. |
|
Trainz Wiki
 |
More Tutorials and Guides to Using Trainz
|


