This guide will show you how to create a Picklist in TRS19 or TANE (both programs use identical methods). For instructions on how to move a Picklist, see the wiki page How to Move a Picklist
Both programs provide you with two different methods of creating Picklists, using either Content Manager (or Manage Content from the TANE/TRS19 Launcher) in Surveyor.
Using CM
From the TRS19 or TANE Launcher, select Manage Content
 |
Step 1: Select the assets
From the TRS19/TANE Launcher
- select Manage Content
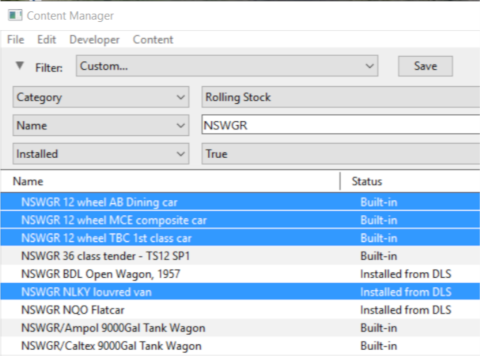
- in Content Manager select a filter or create a custom filter to show the assets you want in the Picklist
- use the left mouse button and either the Ctrl or Shift key to click on each asset that is to be added to the Picklist
 |
|
|
Step 2: Add the assets to the Picklist
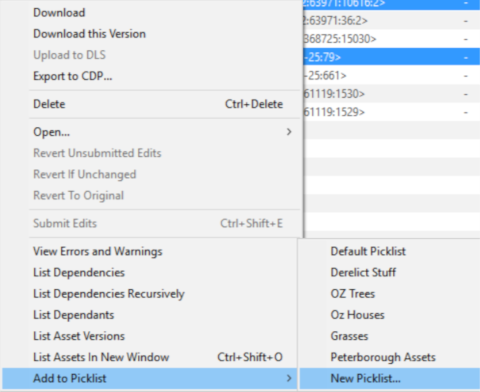
- right mouse click on any one of the highlighted assets
- select Add to Picklist from the popup menu
- select either:-
- an existing Picklist (if any) to add the assets to that Picklist, or
- New Picklist to create a new list
 |
|
|
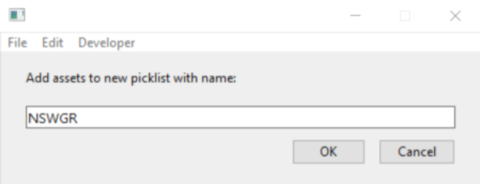
Step 3: Enter Picklist Name (for New Picklist option only)
- type a name for the new Picklist and click OK
 |
|
Using Surveyor
In Surveyor in either TRS19 or TANE.
|
Step 1: Open the Picklist Window
From the TRS19/TANE Surveyor...
- press Ctrl-Shift-F to open the full Search tool (Note: pressing Ctrl-F will only open the find named asset tool)
|
|
|
Step 2: Add the assets to the Picklist
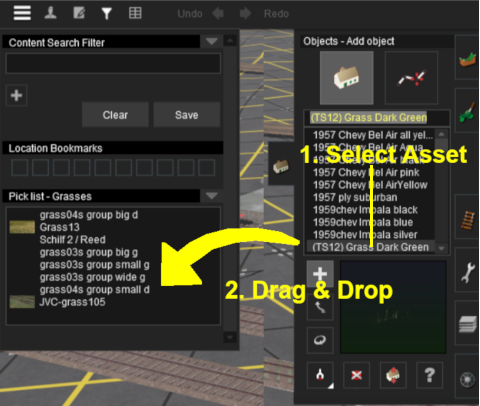
- open the tool selection window for the types of assets to be added. For example: the Object Tool Window (F3 key)
- scroll down the selection window to an asset that is to be added to the Picklist
- Drag & Drop the asset from the selection window to the Picklist window
- repeat as required
 |
|
Trainz Wiki
 |
More Tutorials and Guides to Using Trainz
|


