HowTo/Create your first Session
This is a beginner level tutorial designed to teach new users how to get Trains onto the Tracks and driving around a Route.
Contents |
Routes and Sessions
You may like to first learn about the differences between Routes and Sessions. One way of thinking about this is that the Route is the "world" comprised of terrain, scenery and tracks, and the Session is "what happens inside the world" such as trains on the tracks, and Rules that govern the operation of the Session. Beginners may find the HowTo/Create_your_first_Route tutorial useful prior to starting this Tutorial.
Note for TRS19: If you create a session for a route created in TANE or earlier, then the route will need to be re-saved in TRS19 before you can create sessions for it.
If you intend to create a session on another person's route, then you will need to keep this in mind.Editing a Session
To load your selected Route into Surveyor.
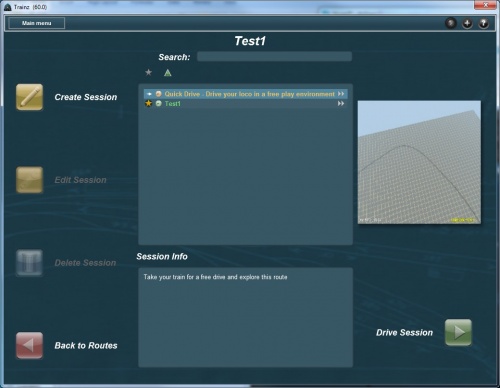
- Select a Route from the Routes menu (In this case route "Test1")
- Click on View Sessions
- From the Session Menu, select Create Session
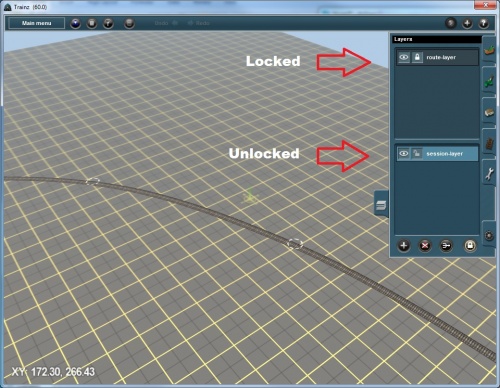
- Open the "Layers" Tab and notice that the Route Layer is locked, while the Session Layer is unlocked.
Finding a Loco
Next we need to find which train to drive.
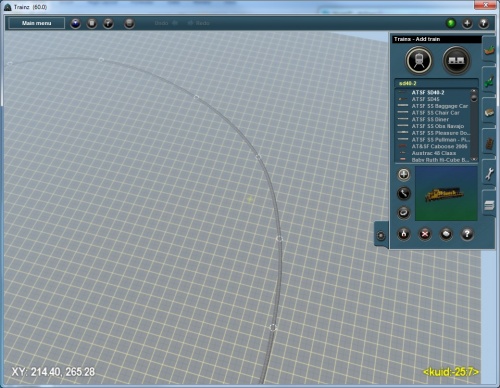
- Click on the Train Tab (F7 is the hotkey). A list of all the installed locos and rolling stock is shown.
- Scroll down the list to find a loco you would like to drive, or type part of the loco name to jump to that position in the list
- Tip: The Help:Surveyor Filters tool enables more powerful search options
- The selected loco is highlighted in white text.
Adding a Loco to the Track
- Ensure the '+' (Add) tool is selected
- Click on the track to place the loco
- Select the Move tool to drag the loco to a new position on the track (or to a nearby track)
For information on other Train Tab tools, please read: Help:Surveyor_Trains_Tools
Driving your Loco
With a track and a train, you are now ready to begin driving.
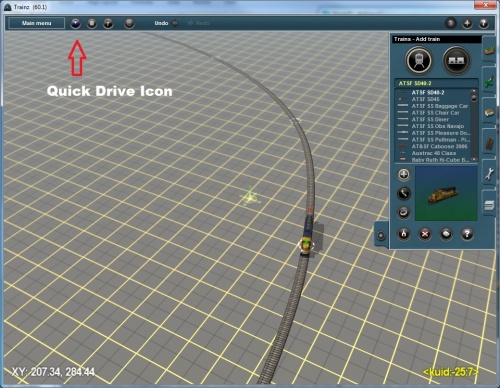
- Starting your first Driver Session is as simple as clicking the Quick Drive icon on the top menubar
- You will be prompted to Save the Route - click Ok
- Next you will be asked to overwrite the Session (since we have now added a loco, the session has changed and needs to be resaved) - click ok
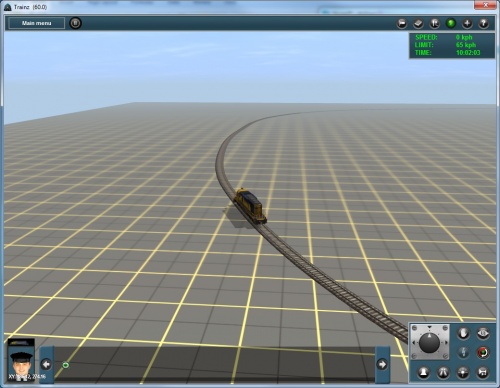
You are now taken into the Driver Module.
- Choose Easy Mode and click the Tick to close the Quickdrive window.
The train and driving controls appear on screen - use the simple speed controls to get your loco moving.
For information on Driving, read HowTo/DCC_Mode and HowTo/Cab_Mode
To create a more advanced Session, read the tutorial HowTo/Create_an_Interactive_Session
