HowTo/Cab Mode
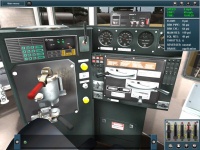
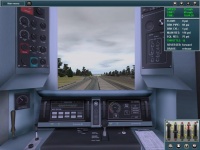
Cab Mode provides a more realistic driving experience taking into account much more detailed aspects of locomotive performance, the length and weight of the train, and the gradient. Each of the levers, switches and dials in the 3D cab can be used to operate the locos or you can use the Hotkeys or HUD to carry out the same function. (This lets you control the locos from outside, even in Cab Mode). It is recommended that you finish the tutorials to fully understand how to drive in Cab mode.
Cab controls (Diesel or Electric locos)
To start a locomotive in cab mode, first release the train brakes (“Q”). If the brake cylinder has not emptied, you may need to also release the independent brake or IND BR on the control corner (“D”). Put the reverser into forward pressing “F” (make sure you have not increased the throttle before altering the reverser). Increase the throttle (“W”) slowly and the train will begin to move forward. Don’t increase it too far too quickly, or the wheels will begin to spin. If they do, use “X” to decrease the throttle and/or “S” to set the throttle to idle. If you are having difficulty pulling away, applying sand (“V”) will increase the level of traction slightly. Turn off the sanders when you are under way.
Slowing and/or stopping a train can be quite a challenge in cab mode. There are three different brake systems available.
The Independent brake, IND BR on the control corner, is simple to use (one handle progressively applies and releases the brake) and fast to act, but it will apply the brakes on the locomotive only. This provides effective stopping power for a locomotive without a train, or for a light train moving slowly. It will not be effective for a heavy train.
The train air brake, TRN BR on the control corner, applies brakes down the entire train - but is more complicated and slower to take effect. There are two types - standard and self-lapping. A standard air brake handle has ‘release’, ‘lap’ and ‘apply’ positions. Move the handle to ‘Apply’ (“A”), wait for a period to allow the brake pipe pressure to reduce, and then move the handle to ‘Lap’ (“Z”). The brakes will slowly apply down the train to the requested level. How hard the brakes apply is controlled by how long the lever was in the ‘Apply’ notch. Think of filling up a bucket to store power (apply) and then pouring it out to apply the brakes (lap); the more water you put in the bucket, the more you have to use. You can apply the brakes further - simply move the handle back to ‘Apply’, and then back to ‘Lap’ again. Though you cannot partially release the brakes - you can only fully release the brakes by moving the handle to ‘release’. You must then wait for the brakes to fully release before you can apply them again. A self-lapping brake handle has a range of ‘Apply’ notches - which will automatically lap the brakes at specific braking levels. This means you don’t have to wait in ‘Apply’ for a set period of time - you just move the lever to the level of braking you want. Just like the standard air brake, you can apply the brakes further - this time by moving the lever further, but you cannot partially release the brakes. If the breakes are repeatedly released and re-applied in quick succession, they can run out of air and the brakes will no longer apply properly. The air will return over time, increasing with the size of the train.
The dynamic (or regenerative) break, DYN BR on the control corner, use the locomotive’s own engine to power their application which means that they are quick to respond, and will generate a lot of force to slow the train, but they become ineffective at low speed. They are ideally suited for descending hills. Not all locomotives have a dynamic brake fitted, but for locomotives that are fitted, you can move the dynamic braking lever into the ‘brake’ position (“E”), and control the level of braking with the throttle lever (“W”/”S”/”X”).
Return To How To Guides

