How to Use Environment Tools
m |
m |
||
| Line 82: | Line 82: | ||
</table> | </table> | ||
<br> | <br> | ||
| − | <table width=1000> <!-- BEGIN Nav Buttons Table --> | + | |
| + | <table width=1000> <!-- BEGIN Nav Buttons Table NO SKIPS --> | ||
<tr valign="top"> | <tr valign="top"> | ||
| − | <td width= | + | <td width=629><span id="stepLoadSave"></span> |
| + | ='''Loading and Saving Environmental Settings'''= | ||
| + | </td> | ||
| + | <td width=50> </td> | ||
| + | <td width=50> </td> | ||
<td width=46>[[image:BackToTop.png|link=#top|alt=Top|Top]]</td> | <td width=46>[[image:BackToTop.png|link=#top|alt=Top|Top]]</td> | ||
<td width=75> </td> | <td width=75> </td> | ||
| Line 92: | Line 97: | ||
</table> <!-- END Nav Buttons Table --> | </table> <!-- END Nav Buttons Table --> | ||
| − | |||
<table width=1000 bgcolor="lightcyan" cellpadding=2> | <table width=1000 bgcolor="lightcyan" cellpadding=2> | ||
<tr valign="top"> | <tr valign="top"> | ||
| Line 154: | Line 158: | ||
</tr> | </tr> | ||
</table> | </table> | ||
| − | |||
<br> | <br> | ||
| − | <table width=1000> <!-- BEGIN Nav Buttons Table --> | + | |
| + | <table width=1000> <!-- BEGIN Nav Buttons Table NO SKIPS --> | ||
<tr valign="top"> | <tr valign="top"> | ||
| − | <td width= | + | <td width=629><span id="stepTool"></span> |
| + | ='''The Environment Tool'''= | ||
| + | </td> | ||
| + | <td width=50> </td> | ||
| + | <td width=50> </td> | ||
<td width=46>[[image:BackToTop.png|link=#top|alt=Top|Top]]</td> | <td width=46>[[image:BackToTop.png|link=#top|alt=Top|Top]]</td> | ||
<td width=75>[[image:NextUp.png|link=#stepLoadSave|alt=Next Up|Next Up]]</td> | <td width=75>[[image:NextUp.png|link=#stepLoadSave|alt=Next Up|Next Up]]</td> | ||
| Line 165: | Line 173: | ||
</tr> | </tr> | ||
</table> <!-- END Nav Buttons Table --> | </table> <!-- END Nav Buttons Table --> | ||
| − | |||
| − | |||
<table width=1000> | <table width=1000> | ||
| Line 204: | Line 210: | ||
</tr> | </tr> | ||
</table> | </table> | ||
| + | <br> | ||
| − | <table width=1000> <!-- BEGIN Nav Buttons Table --> | + | <table width=1000> <!-- BEGIN Nav Buttons Table NO SKIPS --> |
<tr valign="top"> | <tr valign="top"> | ||
| − | <td width= | + | <td width=629><span id="stepLighting"></span> |
| + | ='''Lighting'''= | ||
| + | </td> | ||
| + | <td width=50> </td> | ||
| + | <td width=50> </td> | ||
<td width=46>[[image:BackToTop.png|link=#top|alt=Top|Top]]</td> | <td width=46>[[image:BackToTop.png|link=#top|alt=Top|Top]]</td> | ||
<td width=75>[[image:NextUp.png|link=#stepTool|alt=Next Up|Top]]</td> | <td width=75>[[image:NextUp.png|link=#stepTool|alt=Next Up|Top]]</td> | ||
| Line 214: | Line 225: | ||
</tr> | </tr> | ||
</table> <!-- END Nav Buttons Table --> | </table> <!-- END Nav Buttons Table --> | ||
| − | |||
| − | |||
<table width=1000 bgcolor="lightcyan" cellpadding=2> | <table width=1000 bgcolor="lightcyan" cellpadding=2> | ||
| Line 1,308: | Line 1,317: | ||
</tr> | </tr> | ||
</table> | </table> | ||
| − | + | <br> | |
| − | <table width=1000> <!-- BEGIN Nav Buttons Table --> | + | <table width=1000> <!-- BEGIN Nav Buttons Table NO SKIPS --> |
<tr valign="top"> | <tr valign="top"> | ||
| − | <td width= | + | <td width=629><span id="stepLocation"></span> |
| + | ='''Location'''= | ||
| + | </td> | ||
| + | <td width=50> </td> | ||
| + | <td width=50> </td> | ||
<td width=46>[[image:BackToTop.png|link=#top|alt=Top|Top]]</td> | <td width=46>[[image:BackToTop.png|link=#top|alt=Top|Top]]</td> | ||
<td width=75>[[image:NextUp.png|link=#stepLighting|alt=Next Up|Top]]</td> | <td width=75>[[image:NextUp.png|link=#stepLighting|alt=Next Up|Top]]</td> | ||
| Line 1,318: | Line 1,331: | ||
</tr> | </tr> | ||
</table> <!-- END Nav Buttons Table --> | </table> <!-- END Nav Buttons Table --> | ||
| − | |||
| − | |||
<table width=1000 bgcolor="lightcyan" cellpadding=2> | <table width=1000 bgcolor="lightcyan" cellpadding=2> | ||
| Line 1,836: | Line 1,847: | ||
</tr> | </tr> | ||
</table> | </table> | ||
| − | + | <br> | |
| − | <table width=1000> <!-- BEGIN Nav Buttons Table --> | + | <table width=1000> <!-- BEGIN Nav Buttons Table NO SKIPS --> |
<tr valign="top"> | <tr valign="top"> | ||
| − | <td width= | + | <td width=629><span id="stepWeather"></span> |
='''Weather and Water'''= | ='''Weather and Water'''= | ||
| − | </td><td width=46>[[image:BackToTop.png|link=#top|alt=Top|Top]]</td> | + | </td> |
| + | <td width=50> </td> | ||
| + | <td width=50> </td> | ||
| + | <td width=46>[[image:BackToTop.png|link=#top|alt=Top|Top]]</td> | ||
<td width=75>[[image:NextUp.png|link=#stepLocation|alt=Next Up|Top]]</td> | <td width=75>[[image:NextUp.png|link=#stepLocation|alt=Next Up|Top]]</td> | ||
<td width=75> </td> | <td width=75> </td> | ||
| Line 2,083: | Line 2,097: | ||
<table width=1000> <!-- BEGIN Nav Buttons Table --> | <table width=1000> <!-- BEGIN Nav Buttons Table --> | ||
<tr valign="top"> | <tr valign="top"> | ||
| − | <td width= | + | <td width=629><span id="bottom"></span> </td> |
| + | <td width=50> </td> | ||
| + | <td width=50> </td> | ||
<td width=46>[[image:BackToTop.png|link=#top|alt=Top|Top]]</td> | <td width=46>[[image:BackToTop.png|link=#top|alt=Top|Top]]</td> | ||
<td width=75>[[image:NextUp.png|link=#stepWeather|alt=Next Up|Top]]</td> | <td width=75>[[image:NextUp.png|link=#stepWeather|alt=Next Up|Top]]</td> | ||
Revision as of 08:48, 23 August 2023
| The information in this Wiki Page applies to TANE, TRS19, Trainz Plus and TRS22. A video tutorial specific to setting the environmental controls in TRS19, Trainz Plus and TRS22 can be found at TRS19 Environment and Lighting Tutorial |
|
|
Loading and Saving Environmental Settings |
| A newly created Route will have its environmental settings set to their default values | |
| A newly created Session will have its environmental settings set to those of the Route | |
| Where the Route and Session have different saved environmental settings, those in the Session will be used |
| In Routes | |
| When you create a new Route, or load an existing Route with NO saved Environmental settings, then the settings used will be the default values. | |
| If you change any of the Environmental settings of a Route then you must also edit the Route (e.g. change or edit a Route asset or feature) and save it for those settings to become part of the Route. | |
| In Sessions | |
| When you create a new Session, or load an existing Session with NO saved Environmental settings, then the Session will use the settings that are part of the Route. These could also be the default settings. | |
| When you load an existing Session with saved Environmental settings, then the settings from the Session will take priority over any settings that have been saved in the Route. | |
| If you change any of the Environmental settings of a Session then you must also edit the Session (e.g. change or edit a Session asset or property) and save it for those settings to become part of the Session. | |
|
The Environment Tool |
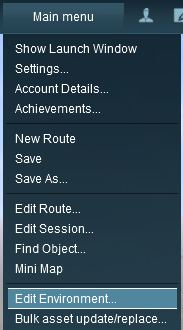
| Open the Environment Tools Editor from the Surveyor Main Menu in TANE as shown below left or from the Surveyor Edit Menu in TRS19 and later versions as shown below right. |
 |
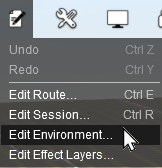 |
In all versions select Edit Environment |
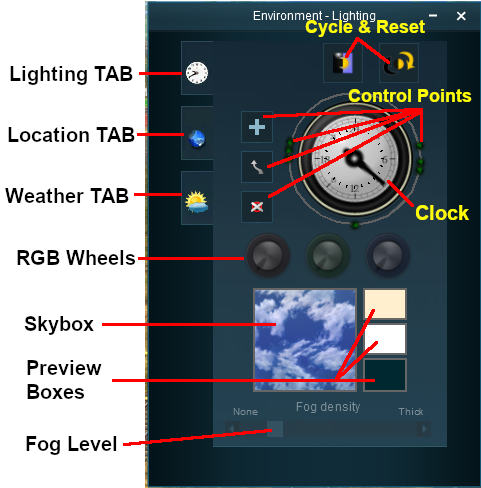
This will open the Environment Properties Window as shown below.
| The Clock Dial shown in this tool does NOT set the game time. It sets the times at which lighting conditions change | |
| To set the Game Time add the Startup Options Rule or the Time and Rate Rule in the Session Editor |
|
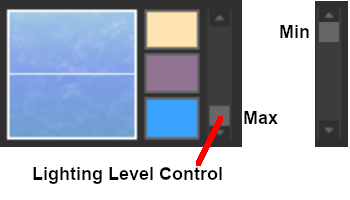
TRS19 and later Trainz versions have an additional control that adjusts the lighting level, as shown below |
Lighting |
| The Lighting Tools control the ambient, sun and water colours. This tool tab is opened by default whenever the Environment Editor is opened |
Light and Time
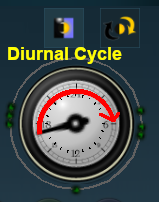
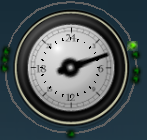
| The dial shown is a 24 hour clock that sets the lighting conditions at selected times of the day and night |
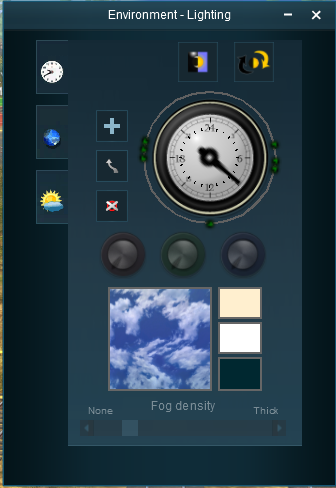 |
The Time of Day
|
|||||||||||||||
Setting the Lighting Conditions
Colour Control Points
The ring around the dial contains a number of green dots.
| Each dot is a Control Point that sets the specific Red, Green and Blue colour values, and other lighting features, at the time shown on the clock | |
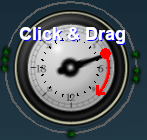
| Each of the RGB colour value can be altered by dragging its needle point to a new position around the dial |
 |
The control point will be highlighted and the RGB Wheels will display the Red Green and Blue values that have been set at that point
 |
|||||
|
||||||||||||
Types of Lighting
|
||||||||||
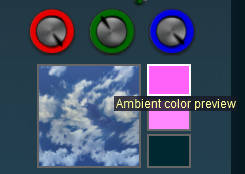
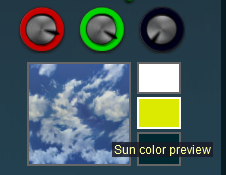
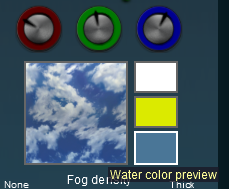
The 3 boxes below the colour wheels and next to the Sky box show the colour effects created for each type of lighting at the selected time.
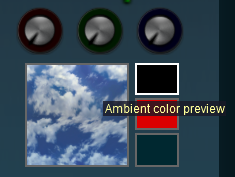
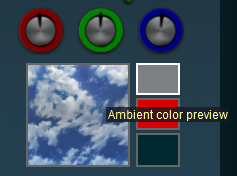
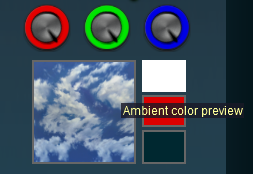
Ambient Colour
Sun Colour
 |
|
|||||||||||||
Water Colour
|
 |
|
||||||||||||||||
Water Effect Layer
| In TRS19 SP4 and later a new method of adding water to a route was introduced - as an Effect Layer. The original method, now called Legacy Water, can still be used in a route but it is NOT recommended that both water methods (Legacy and Effect Layer) are used in the same route. |
TRS19 SP4
The water colour for the Water Effect Layer is set by altering the colour for the Top Skybox.
|
||||||||||
See The Skybox below for more details.
Trainz Plus and TRS22
|
||||||||
Mixing Colours
|
|
||||||||||||||||
|
||||||||||||||||||||||||||||||||||||||||||||||||||||||||
|
|||||||||||||||||
Lighting Level Control
| TRS19 and later Trainz versions have an additional control that is placed next to the Ambient, Sun and Water colour boxes. This sets the overall brightness or lighting level for each control point. |
|
|
|
|||||||||||||
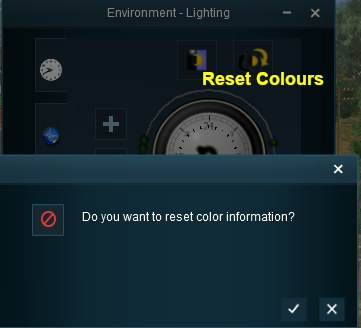
Resetting the Lighting Conditions
| All the lighting colour settings can be reset back to the Trainz default colours. |
 |
|
|||||||||
Adding a New Control Point
| New control points can be added to the clock dial |
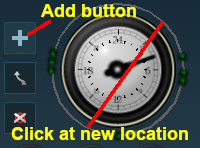 |
|
|
||||||||||||||
|
Deleting a Control point
| Existing control points can be deleted |
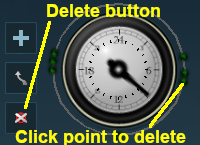 |
|
|
||||||||||||||
Moving a Control point
| Existing control points can be moved |
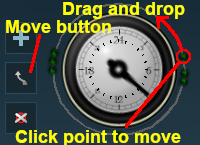 |
|
|
||||||||||||||||||
The Skybox
| The Skybox sets the sky colours in three different regions of the sky at the selected time of day, as shown in the extreme example below |
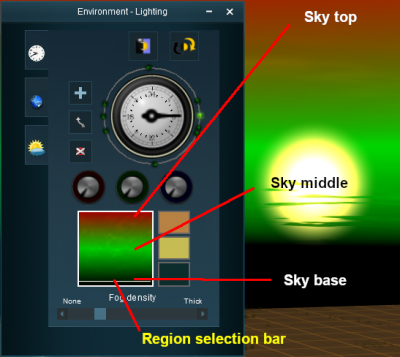 |
|
|||||||||||||||||
|
||||||||
Fog Control
| This controls the level of "fog" in the scene |
|
|
|||||||||||||||||||
Location |
| The Location Tools control the geographic and date (season) data for the Route and Session. Left Click on the Location tab icon to open the Location Tool Controls |
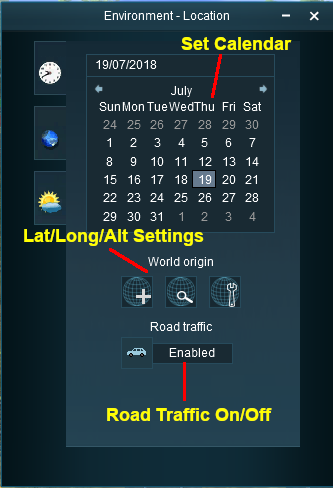 |
Set Date
|
||||||||||||||||
|
|
|
|
||||||||||||||||||||||||||||||||||||||
Set World Origin
The middle section is the World Origin Tool and sets the geographic location, including the altitude, of the route using a World Origin marker that is only visible in Surveyor.
| Setting the World Origin does NOT set regional features such as which side of the road the cars drive on. Use the Route Editor - Region setting for that | |
| The World Origin is always part of a Route, not part of a Session |
 |
|
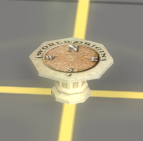 The World Origin marker |
|||||||||||
| Once it has been placed, the marker can be moved by a Left Click and Drag or a Left Click. After adding the marker it should be edited to add geographic data. |
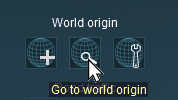 |
Left Click on the Go to world origin icon to move the Surveyor screen so that it is centred on the World Origin marker. |
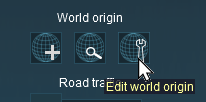 |
Left Click on the Edit world origin icon to set or edit the World Origin data. See Editing the World Origin below. |
Editing the World Origin
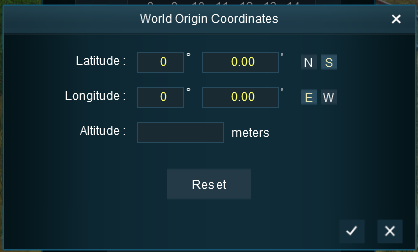
|
Enter the geographic data for the world origin
|
Deleting the World Origin
| There is no delete button for the World Origin marker, but you can still delete it |
|
|
||||||||||||||||||||
Traffic Control
| This tool simply turns the road traffic ON and OFF |
|
 |
|
||||||
Weather and Water |
| The Weather and Water Tools control the weather (sky, weather type, wind, snow) and water surface data for the Route and Session. Left Click on the Weather and Water tab icon to open the Weather and Water Tool Controls | |
| To set the Water Colour, refer to the |
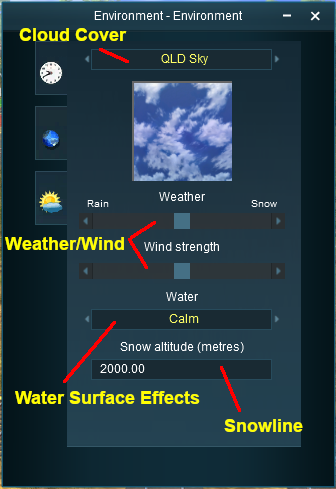 |
Set the Sky
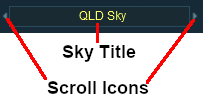
The box below the sky title will give a preview of the selected sky. Set the Weather
|
|||||||||||||||||||||||||||
Wind Strength
| This setting only effects SpeedTrees |
|
|
|
| Settings:
|
|
|
|
|
Set the Water Surface
| This sets the water surface effects for Legacy Water only. It does not apply to Water Effect Layers |
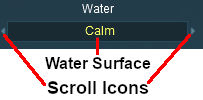 |
|
||||||
Set the Snow Altitude
| This sets the altitude at which objects built with snow effects will display snow in winter. It has no effect on objects created without this feature |
|
| ||||||||||||||||
Trainz Wiki
 |
More Tutorials and Guides to Using Trainz |
This page was created by Trainz user pware in July 2018 and was last updated as shown below.
