| The information in this Wiki Page applies to TANE, TRS19, Trainz Plus and TRS22. A video tutorial specific to setting the environmental controls can be found at TRS19 Environment and Lighting Tutorial |
| |
|
|
|
|
 |
 |
|
|
 |
The Environmental Tools give you access to settings that control the season of the year, basic weather conditions, lighting, geographic location, etc |
The Environment Tools are used to set:-
 |
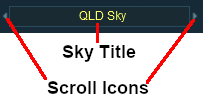
the skybox - to configure the cloud cover |
|
the weather - from rain to snow to clear. Weather can also be set from the Main Menu - Settings options and by using Session rules |
|
the wind speed - which will only affect the swaying motion of Speedtrees |
|
the snowline - the minimum snow altitude for assets that have a snow effect layer. Used with the world origin altitude setting |
|
the date - for assets that have different seasonal options. Used with the world origin to set the season of the year |
|
the lighting - the light levels and colours through a 24 hour period |
|
the water colour and water surface effects (smooth, rough, etc) for Legacy Water only |
|
the road traffic - enabled/disabled |
|
the world origin - geographic coordinates (used with the date to set the season of the year) and altitude (used with the snowline to set snow effects) |
To set the Session Start Time use the  Startup Options Rule or the Time and Rate Rule in the Session Editor Startup Options Rule or the Time and Rate Rule in the Session Editor |
|
 |
Notes:
|
|
There is no Save or OK button on the Environment Tools Window. As soon as you enter or select a setting it will be set. When finished editing simply Left Click the window Off button BUT make sure you SAVE before exiting Trainz |
|
Seasons (for those assets that show seasons - e.g. snow, leaf colours, etc) are controlled by the  Date, Snow Altitude (for snow effects) and Location (World Origin) settings Date, Snow Altitude (for snow effects) and Location (World Origin) settings |
|
The dates at which the seasons change in Trainz are:-
 |
March 1st - Southern Hemisphere Fall (Autumn), Northern Hemisphere Spring |
|
July 1st - Southern Hemisphere Winter, Northern Hemisphere Summer |
|
October 1st - Southern Hemisphere Spring, Northern Hemisphere Fall (Autumn) |
|
December 1st - Southern Hemisphere Summer, Northern Hemisphere Winter |
|
|
|
Loading and Saving Environmental Settings
|
|
|
 |
|
|
|
|
A newly created Route will have its environmental settings set to their default values |
|
A newly created Session will have its environmental settings set to those of the Route |
|
Where the Route and Session have different saved environmental settings, those in the Session will be used |
| In Routes |
|
When you create a new route, or load an existing one with NO saved Environmental settings, then all those settings will be set to their default values |
|
If you change any of the Environmental settings of a route then you must also edit the route (e.g. move a route asset) and save it for those settings to become part of the route |
|
|
|
| In Sessions |
|
When you create a new session, or load an existing one with NO saved Environmental settings, then the session will use the settings that are part of the route which will be the default settings if none have been set for the route |
|
When you load an existing session with saved Environmental settings, then those settings will take priority over the same settings that have been saved in the route |
|
If you change any of the Environmental settings of a session then you must also edit the session (e.g. move a session asset or change a session property) and save it for those settings to become part of the session |
|
|
|
|
 |
There is an order of priority with the Environmental Settings in Routes and Sessions |
 |
If an Environmental Control (e.g. Weather or Date) is set in both the Route and the Session, then the Session setting will take priority over the setting in the Route |
 |
If an Environmental Control is set in the Route but NOT in the Session, then the Route setting will take priority over the setting in the Session |
 |
if an Environmental Control is NOT set in both the Route and the Session, then the default value for that setting will be used. The default value for the Date is today's date |
| The World Origin is only found in a Route. If the World Origin is not set in the Route then its default setting of 52.45°N 13.3°E (Berlin, Germany) will be used |
|
|
|
 |
Because a Session can have its own environmental settings you are able to create Sessions set in different conditions - some examples:-
|
separate summer and winter sessions or for any season - see the Set Date and Set World Origin sections below |
|
a session set in an early morning winter fog - see the Fog Control section below |
|
spring rain shower and cool overcast autumn (fall) sessions - see the Set the Weather and Set the Sky sections below |
|
|
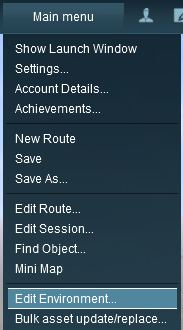
| Open the Environment Tools Editor from the Surveyor Main Menu in TANE as shown below left or from the Surveyor Edit Menu in TRS19 and later versions as shown below right. |
 |
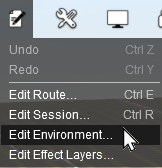 |
In all versions select the option Edit Environment... |
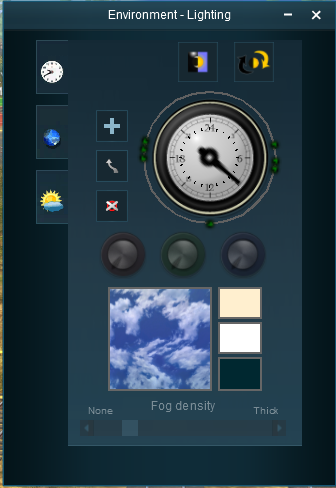
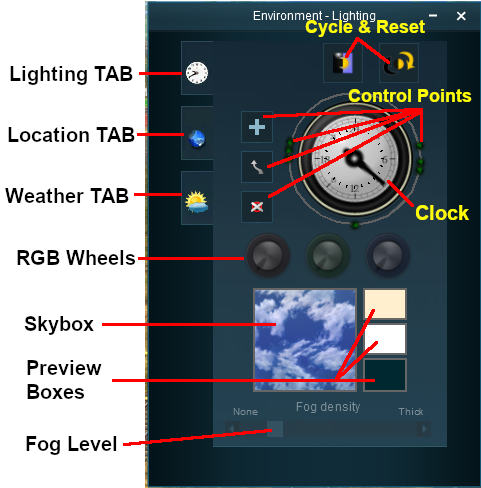
| This will open the Environment Properties Window as shown below. |
|
TRS19 and later Trainz versions have an additional control that adjusts the lighting level, as shown below
|
|
The Lighting Tools control the ambient, sun and water colours. This tool tab is opened by default whenever the Environment Editor is opened |
Light and Time
|
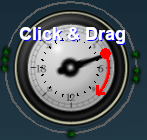
The dial shown is a 24 hour clock that sets the lighting conditions at selected times of the day and night |
Setting the Lighting Conditions
|
 |
 |
|
 |
|
|
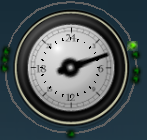
Colour Control Points
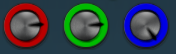
The ring around the dial contains a number of green dots.
|
Each dot is a Control Point that sets the specific Red, Green and Blue colour values, and other lighting features, at the time shown on the clock |
|
Each of the RGB colour value can be altered by dragging its needle point to a new position around the dial |
| Steps: To alter the colour settings for a particular time control point:- |
 |
select an RGB colour wheel and either:-
 |
Left Click on the required value spot on its colour dial, OR |
 |
Left Click and Drag the pointer to the new value on its colour dial |
|
|
To set all 3 colour wheels to the same value hold the down Shift key while performing option or above
|
|
|
Types of Lighting
|
Notes:
|
| Each control point stores the RGB values for three different types of lighting in the scene. |
|
The Ambient Colour which is the directional lighting and mostly affects the hue of buildings and other scenery objects |
|
The Sun Colour which affects the colour of the sunlight and mostly affects the hue of the terrain |
|
The Water Colour (for Trainz versions before TRS19 SP4) which affects the colours reflected by water surfaces |
|
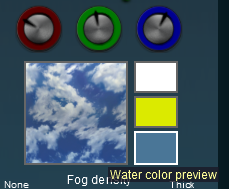
The 3 boxes below the colour wheels and next to the Sky box show the colour effects created for each type of lighting at the selected time.
Ambient Colour
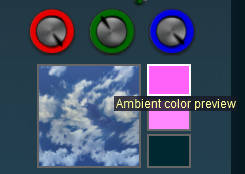 |
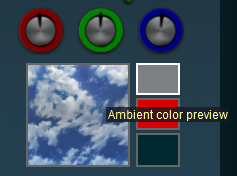
| Steps: To set the Ambient Color:- |
|
Left Click on the control point for the time that you want to edit |
 |
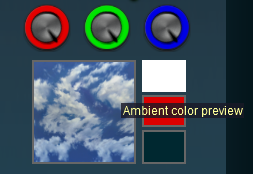
Left Click on the top box of the three. This is the Ambient Colour.
The 3 dials will show the RGB values for the Ambient Colour at the selected time and the Ambient color preview box will show the colour produced by the RGB settings |
 |
You can then change the RGB settings for the Ambient Colour by either:-
|
Left Click and Drag the pointers to new positions on the coloured rims of each dial, OR |
|
Left Click on a new position on the coloured rims of each dial |
|
|
|
Sun Colour
 |
| Steps: To set the Sun Colour:- |
|
Left Click on the control point for the time that you want to edit |
|
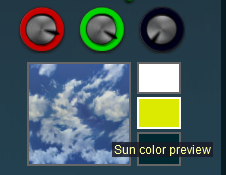
Left Click on the middle box of the three. This is the Sun Colour.
The 3 dials will show the RGB values for the Sun Colour at the selected time and the Sun color preview box will show the colour produced by the RGB settings |
|
You can then change the RGB settings for the Sun Colour by either:-
|
Left Click and Drag the pointers to new positions on the coloured rims of each dial, OR |
|
Left Click on a new position on the coloured rims of each dial |
|
|
|
Water Colour
|
This Water Colour control only affects the colour of the water created using the Add Water tools (for Classic or Legacy Water) in the Topology menu (the F1 key in Surveyor Classic). It has no effect on the colour of water created as Water Layers used in TRS19 SP4 and later versions. |
|
Water Effect Layer
| In TRS19 SP4 and later a new method of adding water to a route was introduced - as an Effect Layer. The original method, now called Legacy Water, can still be used in a route but it is NOT recommended that both water methods (Legacy and Effect Layer) are used in the same route. |
 TRS19 SP4
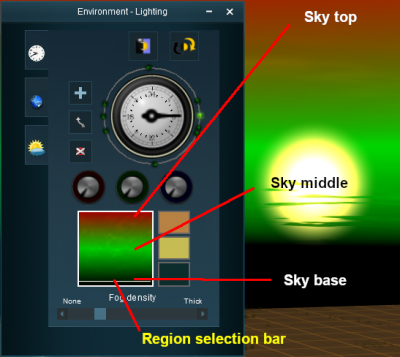
The water colour for the Water Effect Layer is set by altering the colour for the Top Skybox.
| Steps: To set the Water Colour in TRS19 SP4:- |
|
select a time control point for a specific time of day |
|
Left Click in the top region of the Skybox - a while line or bar will appear across the region
|
|
Set the RGB color wheels for the Top Skybox region for the selected time |
 |
Repeat for each time control point as required (the Water Effect Layer can have its colour changed at different times of the day/night)
|
|
See The Skybox below for more details.
Trainz Plus and TRS22
| The major changes to water introduced in these versions are:- |
|
multiple water layers can be added to a route |
|
each water layer has its own colour controls built into its properties (i.e. the colours are not part of the Skybox) |
|
Legacy Water is NOT compatible with the Water Effect Layers in Trainz Plus and TRS22 |
|
Mixing Colours
|
Notes:
Getting the "right colours" can be more of an art than a science. To set the exact colour you want means mixing the correct quantities of Red, Green and Blue. Each of these colours has 256 different values from 0 to 255 that, when combined, produce over 16 million different possible colours - but many monitors and most eyeballs will not be able to tell the differences between many of those 16 million colours.
|
|
|
Setting all three colours to the same values will produce monotones from Black to White with 254 different shades of gray between those two tones.
|
You can quickly set all three dials to the exact same value by a Shift Left Click on a dial position on any one of the three dials. |
Note that in the examples below, the "tyre" around each dial shows the exact quantity of colour that is being added. |
|
Example 2: Setting a Water Colour
|
For Legacy Water only:-
Creating a colour suitable for water (RGB values are approximate) |
|
Shadows
|
The tone of shadows cast by objects is controlled by the combined effects of the Ambient Color and the Sun Color settings |
|
These settings are examples only
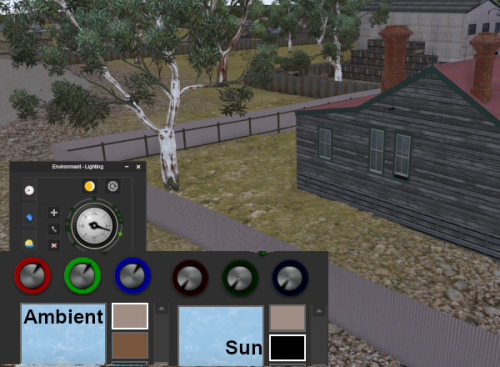
Initial settings for the Ambient and Sun colours are shown in the image below with the resulting shadow effects. Lighting conditions are set for mid to late afternoon
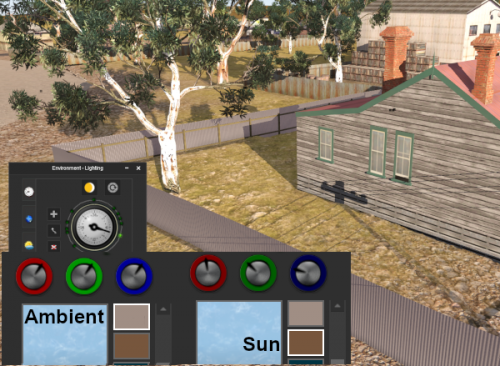
| Shadows and lighting are "normal" for the time shown |
|
Ambient colours set to 0. Sun colours unchanged
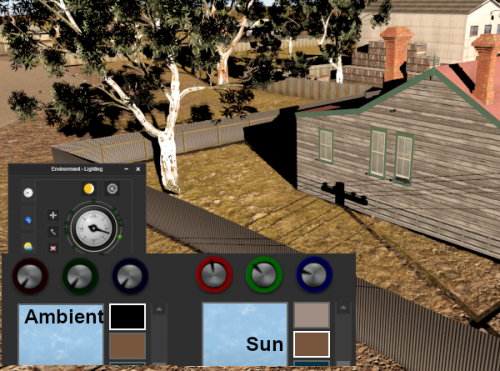
| The overall lighting is noticeably darker. Shadows are black |
|
|
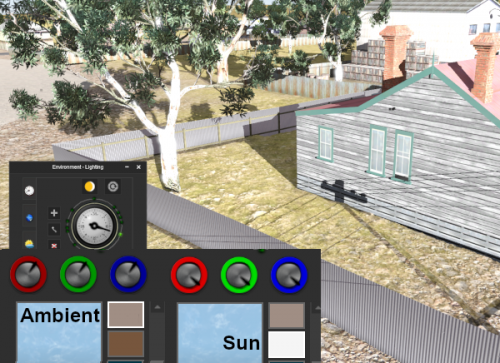
Ambient colours set to Maximum. Sun colours unchanged
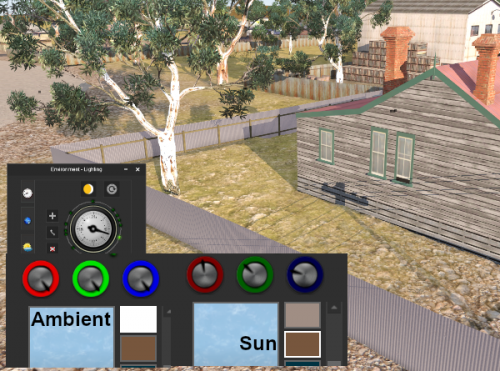
| The overall lighting is noticeably lighter. Shadows are lighter |
|
|
|
Ambient colours unchanged. Sun colours set to 0
| Scene is evenly lit but much darker. No shadows. A heavily overcast late afternoon? |
|
|
Ambient settings unchanged. Sun settings set to Maximum
| Scene lighting is noticeably brighter. Shadows are darker but not black. A summer afternoon? |
|
|
|
Moving the Ambient and Sun colour controls to values between 0 and Maximum will alter the results. Experimentation is a good idea.
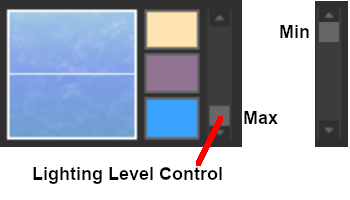
Lighting Level Control
| TRS19 and later Trainz versions have an additional control that is placed next to the Ambient, Sun and Water colour boxes. This sets the overall brightness or lighting level for each control point. |
Resetting the Lighting Conditions
|
|
|
|
|
|
|
|
All the lighting colour settings can be reset back to the Trainz default colours. |
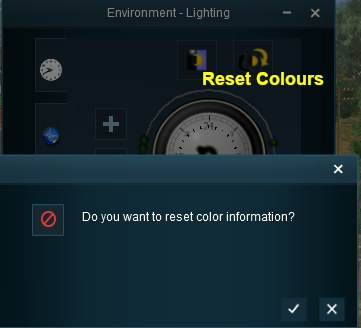 |
| Steps: To reset ALL the lighting conditions to their default values:- |
|
Left Click on the Color Reset button, then either:-
|
Left Click on the  icon to accept the reset, OR icon to accept the reset, OR |
|
Left Click on the  icon to reject the reset icon to reject the reset |
|
|
|
Adding a New Control Point
|
|
|
|
|
|
|
|
New control points can be added to the clock dial |
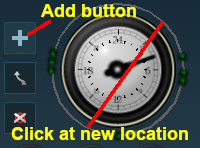 |
| Steps: To add a new time control point:- |
|
Left Click on the Add button  |
|
Left Click on the ring at the place where the new control point is to be located |
|
|
|
Notes:
|
|
the Add button will remain active (selected) until it is deactivated so each Left Click can add another control point. |
|
The button can be deactivated by a Left Click on it again or by selecting another button. |
|
|
|
Existing control points can be deleted |
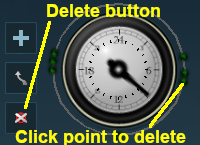 |
| Steps: To delete an existing time control point:- |
|
Left Click on the Delete button  |
|
Left Click on the control point to be deleted |
|
|
|
Notes:
|
|
the Delete button will remain active (selected) until it is deactivated so each Left Click can delete another control point. |
|
The button can be deactivated by a Left Click on it again or by selecting another button. |
|
|
|
Existing control points can be moved |
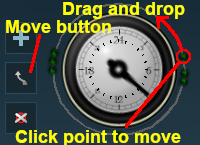 |
| Steps: To move a control point:- |
|
Left Click on the Move button  |
|
Left Click on the control point to be moved and either:-
|
Left Click and Drag the point to its new position around the ring, OR |
|
Left Click on the ring at the spot where the point is to be placed |
|
|
|
|
Notes:
|
|
the Move button will remain active (selected) until it is deactivated so each Left Click and Drag can move another control point. |
|
The button can be deactivated by a Left Click on it again or by selecting another button. |
|
|
|
The Skybox sets the sky colours in three different regions of the sky at the selected time of day, as shown in the extreme example below |
|
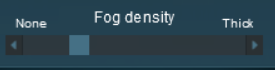
This controls the level of "fog" in the scene |
|
|
|
Note:
Each control point also stores the Fog setting for that particular time
|
|
Increasing the fog level can also increase the brightness level (real fog does scatter light causing the background to appear brighter). In TANE you may need to reduce the RGB levels to compensate. In TRS19/Trainz Plus/TRS22 you can reduce the Brightness level to compensate.
|
|
|
|
|
The Location Tools control the geographic and date (season) data for the Route and Session. Left Click on the Location tab icon to open the Location Tool Controls |
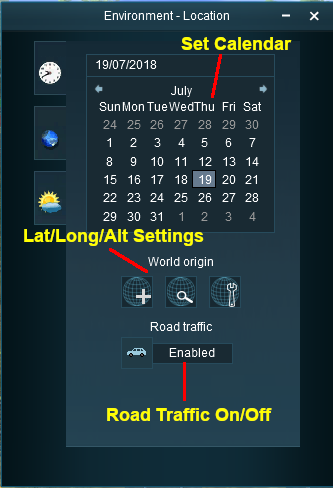 |
Set the Date
| The top section is a standard calendar selection tool that allows you to set the month and the day of the month. The only effect this has in Trainz is to set, with the geographic coordinates, the season of the year. |
|
You can also set a date by typing it directly in the text entry box above the calender |
|
|
The entered date can be saved in the Route, the Session or both depending on whether you are editing the Route or the Session or both |
|
You must make a change to an object in a Route Layer or a Session Layer for the date change to be recorded as part of the Route or the Session (or both)
|
|
Sick of it always being winter in your Session during winter? Want it to always be summer instead?
Set the date to a Summer month. This will be saved when you edit and save the Session - BUT make sure that you have set the World Origin to the correct hemiphere. |
|
|
|
Notes:
It is possible to set a date to a particular Year but this will have no effect on the operation of the Route or Session. Essentially only the Month is important.
Setting the year to 1900, for example, will not recreate an early 20th Century railroad. Time periods have to be recreated by carefully selecting scenery and rolling stock assets that belong to that particular time period. |
|
|
|
|
In Trainz Plus and TRS22 the Month and therefore, the Season of the Year can be set "on the fly" in Driver from the Session Options Window. The North/South Hemisphere must also be correctly set in the World Origin or Region |
|
|
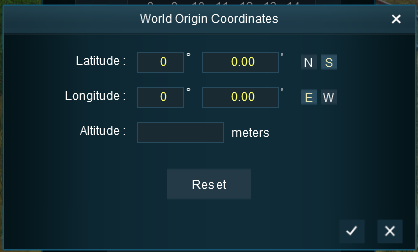
The middle section is the World Origin Tool and sets the geographic location, including the altitude, of the route using a World Origin marker that is only visible in Surveyor.
|
Setting the World Origin does NOT set regional features such as which side of the road the cars drive on. Use the Route Editor - Region setting for that |
|
The World Origin is always part of a Route, not part of a Session |
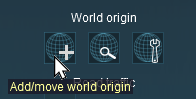 |
| Steps: To set the World Origin:- |
|
Move the Surveyor view to the location where you want the origin marker to be placed |
|
Left Click on the Add world origin button |
|
Left Click the selected location in the layout to place the marker |
| Another Left Click will simply move the marker, it will not add a new one |
|
|
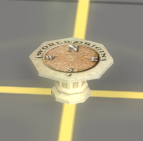
The World Origin marker |
| Once it has been placed, the marker can be moved by a Left Click and Drag or a Left Click. After adding the marker it should be edited to add geographic data. |
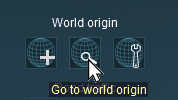 |
Left Click on the Go to world origin icon to move the Surveyor screen so that it is centred on the World Origin marker.
|
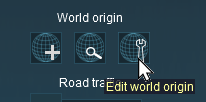 |
Left Click on the Edit world origin icon to set or edit the World Origin data. See Editing the World Origin below.
|
Deleting the World Origin
|
|
|
|
|
|
|
|
There is no delete button for the World Origin marker, but you can still delete it |
|
|
|
Notes:
|
|
All routes MUST have a World Origin |
|
If you delete the World Origin marker then it will be hidden and will take the default coordinates of latitude 52.45°N, longitude 13.3°E, altitude 0 metres - which places it in Berlin Germany
|
|
|
|
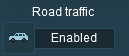
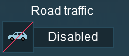
This tool simply turns the road traffic ON and OFF |
 |
|
 |
Settings:
 Left Click on the car icon to enable and disable traffic Left Click on the car icon to enable and disable traffic |
|
|
|
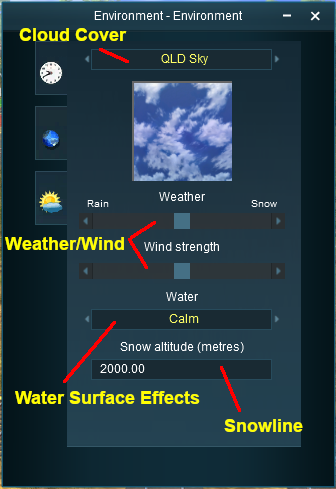
The Weather and Water Tools control the weather (sky, weather type, wind, snow) and water surface data for the Route and Session. Left Click on the Weather and Water tab icon to open the Weather and Water Tool Controls |
|
To set the Water Colour, refer to the Setting the Lighting Conditions section above |
Trainz Plus/TRS22 Platinum Driver Weather Controls
In Trainz Plus and TRS22 when in Driver mode open the  Window Menu and Session Options and you will have access to Weather Controls to change the weather "on-the-fly". Window Menu and Session Options and you will have access to Weather Controls to change the weather "on-the-fly".
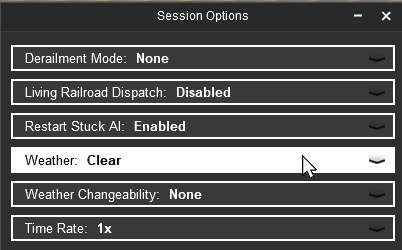 |
| Weather |
this drop down list will show all the different weather conditions from Clear to Heavy Snow. Left Click on the required setting |
|
| Weather Changeability |
this drop down list will set the rate and range of the weather changeability. Left Click on None, Periodic or Extreme |
|
|
|
|
Wind Strength
|
This setting only effects SpeedTrees |
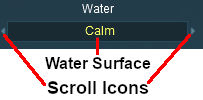
Set the Water Surface
|
This sets the water surface effects for Legacy Water only. It does not apply to Water Effect Layers |
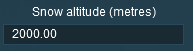
Set the Snow Altitude
|
This sets the altitude at which objects built with snow effects will display snow in winter. It has no effect on objects created without this feature |
|
|
|
Notes:
|
|
The snow effects will only appear in winter if the altitude of the terrain is at or above the Snow Altitude‡ |
|
Only those assets that were created with snow effects will be affected by this setting
|
| ‡ a few assets may display snow even if they are placed below the set Snow Altitude. This is usually the result of an error by the asset creator. |
|
|
Trainz Wiki
 |
More Tutorials and Guides to Using Trainz
|
This page was created by Trainz user pware in July 2018 and was last updated as shown below.