How to Use Track Triggers
m (→Giving the Trigger Event a Purpose) |
m (→Adding an Instruction to the Trigger Event) |
||
| Line 155: | Line 155: | ||
<td rowspan="2">[[file:SessionRuleIndent.JPG]]</td> | <td rowspan="2">[[file:SessionRuleIndent.JPG]]</td> | ||
<td><br> | <td><br> | ||
| − | + | With the '''Message Popup Rule''' highlighted (shown left):- | |
| − | This should indent the '''Message Popup''' rule one level in (below).<br> | + | *Click the '''''Indent''''' (''right arrow'') button. |
| + | This should indent the '''Message Popup''' rule one level in (shown below).<br> | ||
</td> | </td> | ||
</tr> | </tr> | ||
| Line 167: | Line 168: | ||
<br>The '''Message Popup Rule''' is now controlled by the '''Trigger Check Rule''' but it still has to be configured to show a message. | <br>The '''Message Popup Rule''' is now controlled by the '''Trigger Check Rule''' but it still has to be configured to show a message. | ||
| − | + | With the '''Message Popup Rule''' highlighted (shown below):- | |
| + | *Click the '''Edit''' button. | ||
<table> | <table> | ||
| Line 175: | Line 177: | ||
[[file:MessagePopupStop.JPG]] | [[file:MessagePopupStop.JPG]] | ||
</td> | </td> | ||
| − | <td><br> | + | <td><br>In the Message Popup properties window, set the properties as shown:- |
*Check '''ON''' ''Close previous message popup windows'' | *Check '''ON''' ''Close previous message popup windows'' | ||
*Select '''Option Button''' ''Custom text'' | *Select '''Option Button''' ''Custom text'' | ||
| Line 181: | Line 183: | ||
<br> | <br> | ||
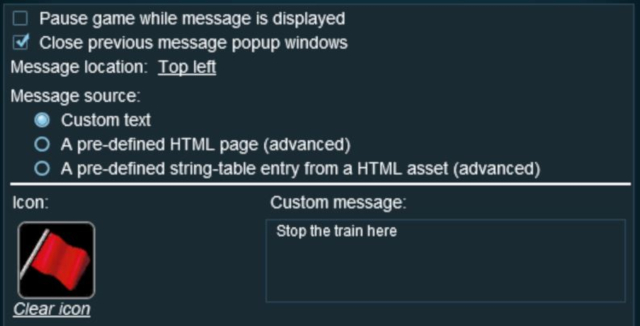
To add an icon to the message:- | To add an icon to the message:- | ||
| − | * | + | *Click the link ''click here to set'' (shown left) and either |
| − | **(below) | + | **Scroll down the Texture Asset Selection List (shown below) to find a suitable icon, or |
| − | ** | + | **Simply type "icon stop" in the text box to use one of the builtin icons. |
| − | * | + | *Click the '''Tick''' icon.<br> |
[[file:IconStop.JPG]] | [[file:IconStop.JPG]] | ||
</td> | </td> | ||
Revision as of 12:12, 21 May 2018
Contents |
What are Triggers?
Triggers are invisible markers (invisible in Driver Mode but visible in Surveyor Mode) that are placed on a track. They can be programmed to "trigger an event" when a train (any train or a specific train) passes over them in Driver Mode.
The "event" is a message that is transmitted by the trigger to certain Session Rules that have been programmed to "listen" for the message. When one of those listening rules detects the message, it can be forced into action by executing preset instructions.
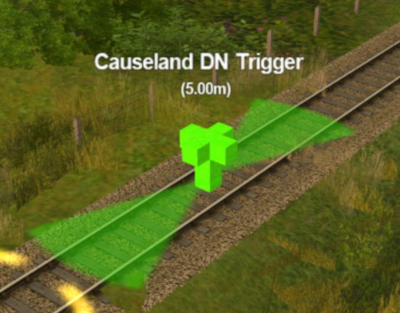 |
(left) A Track Trigger in place on a track visible in Surveyor Mode. The "5.00m" is the trigger detection radius |
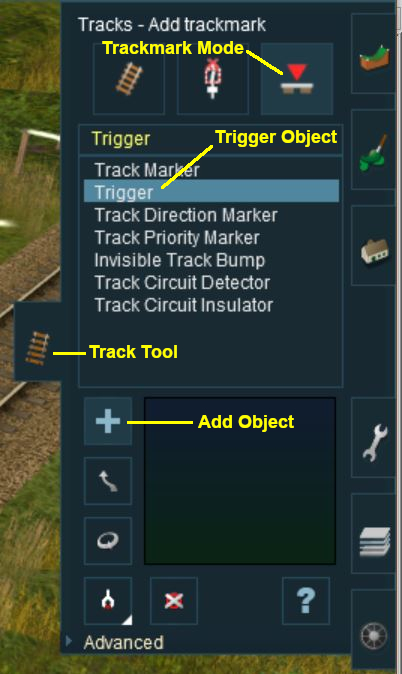
Adding a Trigger
Configuring a Trigger
As soon as a new trigger has been placed, its properties window will open on the screen. It will be given a default name and assigned to the currently active layer.
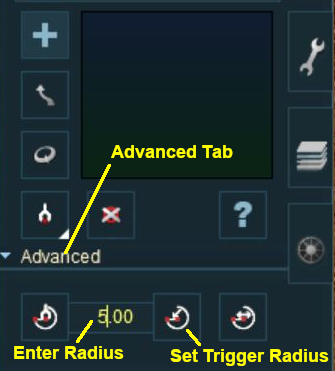
Triggers have a "detection radius" that controls how close a train has to approach to trigger the event. The smaller the radius the closer the train. This radius is set in the Advanced Properties section of the Tools window.
Creating a Trigger Event
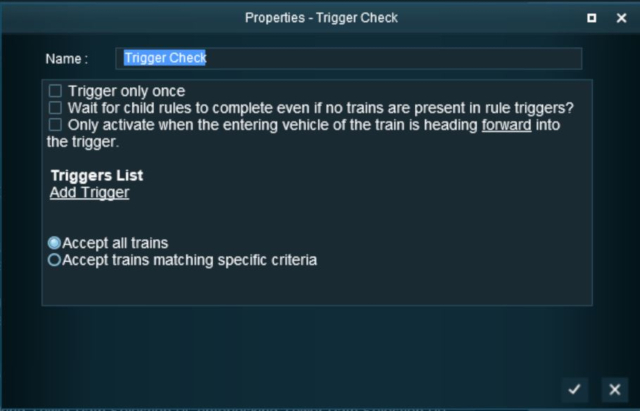
Trigger events are handled by the Trigger Check Rule which is added to a session in the Session Editor.
The Trainz Wiki Link Trigger Check Rule contains detailed information on this rule.
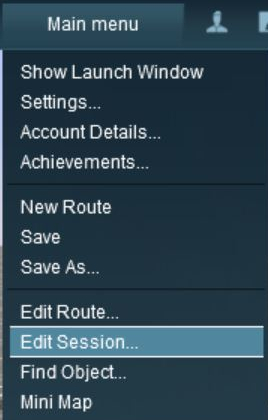 |
To add the Trigger Check Rule to a session:-
|
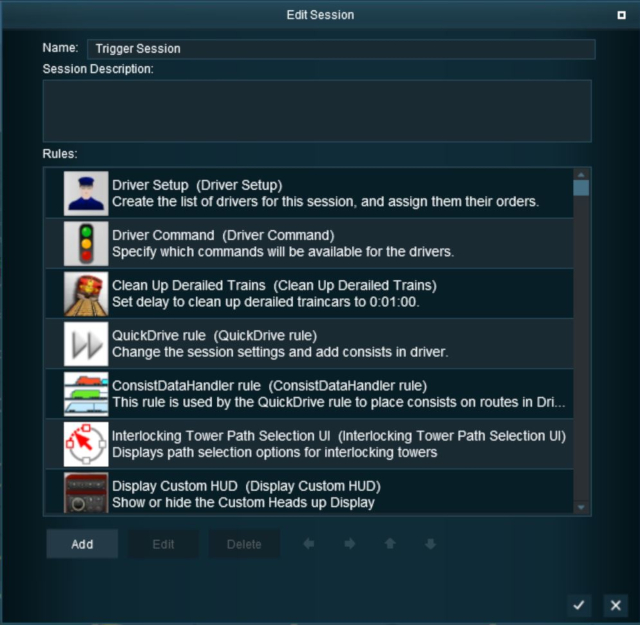 |
In the Edit Session window (shown left):-
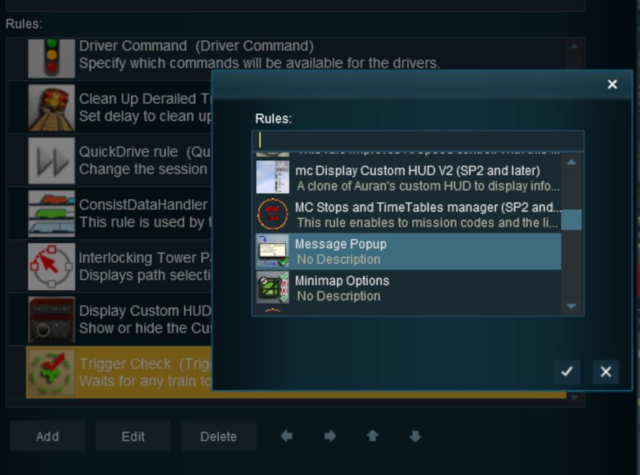
In Rule Selection window (shown below):-
|
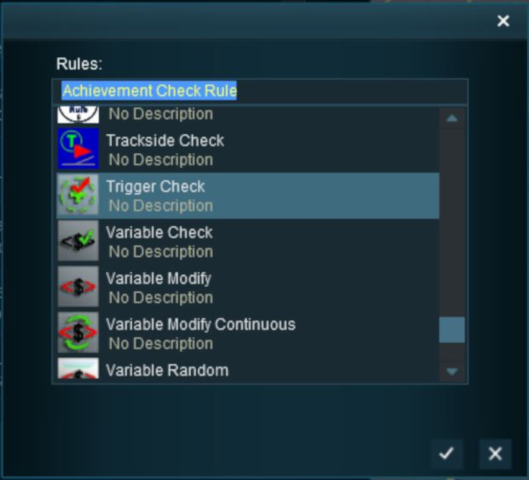 |
This will add the Trigger Check rule to the session.
 |
With the Trigger Check rule highlighted (shown left):-
|
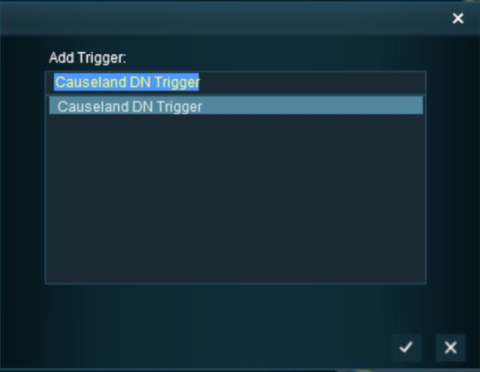
For this example we will leave all settings unchanged and simply identify the trigger to be used.
Adding an Instruction to the Trigger Event
To test your trigger event you will need to add at least one rule.
The Message Popup Rule has to be indented so that it becomes a Child of the Trigger Check Rule.
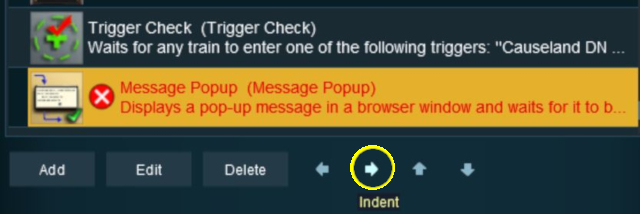 |
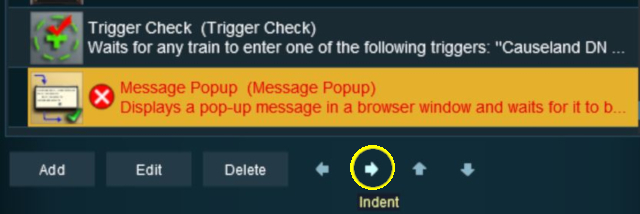
With the Message Popup Rule highlighted (shown left):-
This should indent the Message Popup rule one level in (shown below). |

|
The Message Popup Rule is now controlled by the Trigger Check Rule but it still has to be configured to show a message.
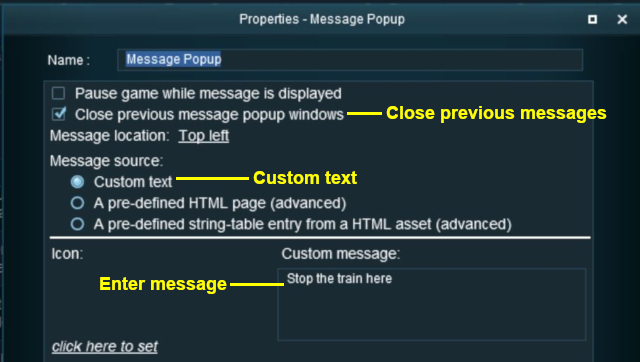
With the Message Popup Rule highlighted (shown below):-
- Click the Edit button.
Again, click the Tick icon to exit the Message Popup Rule then exit the Session Editor.
Add a consist to your layout a short distance from the trigger (but further away than its radius), save the surveyor session, and then test in Driver Mode.
Another example of using the Trigger Check Rule can be found in the Message Popup Rule Applications link below.
