How to Create a Clean Install
m |
m |
||
| Line 424: | Line 424: | ||
<table bgcolor=#ffffff cellpadding=2> | <table bgcolor=#ffffff cellpadding=2> | ||
<tr valign="top"> | <tr valign="top"> | ||
| − | <td>On starting '''Trainz''' will open the '''User Data Folder''' (you may see a '''Database Repair''' scan) and | + | <td>On starting '''Trainz''' will open the '''User Data Folder''' (you may see a '''Database Repair''' scan) and you will have normal access to all of its installed assets. This access includes installing new assets (from '''DLS''', '''DLC''', '''.cdp''' files or creating new assets yourself), deleting assets and modifying/cloning existing assets. The changes you make will not affect any other '''User Data Folders''' that you may have created.</td> |
</tr> | </tr> | ||
</table> | </table> | ||
Revision as of 10:48, 17 November 2023
| The information in this Wiki Page applies to T:ANE, TRS19, TRS22 and Trainz Plus. It describes how to set up one (or more) alternative User Data Folders that can contain different sets of installed assets from a bare minimum (built-in and base assets only) to various specialist installs. |
What is a "Clean Install"
| A Clean Install is a User Data Folder that contains only those assets that were originally installed with your version of Trainz | |
| There will be no assets that are Installed from DLS, Payware, Packaged or Modified but these can be added |
| A Clean Install will create a User Data Folder that is identical to the one that existed immediately after you first installed your current version of Trainz. | ||||||||||||||||||||||||||||
|
|
|||||||||||||||||||||||||||
Setting Up the New User Data Folder |
| Steps: | |||||||||||||
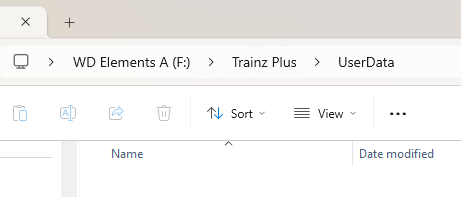
| 1 | Create a Destination Folder for the New User Data Install
|
||||||||||||
| 2 | Start Trainz |
||||||||||||
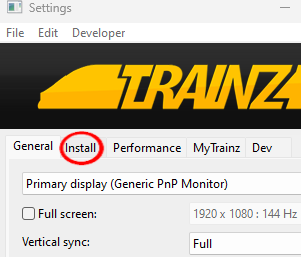
| 3 | Open Trainz Settings From the Trainz Launcher select Trainz Settings 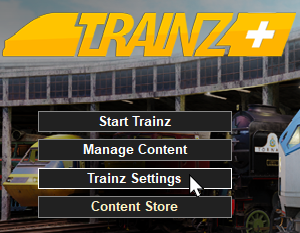 |
||||||||||||
| 4 | Open Install Left Click on the Install tab 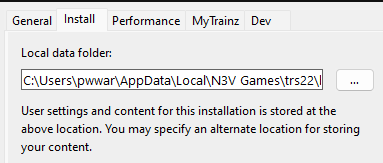 |
||||||||||||
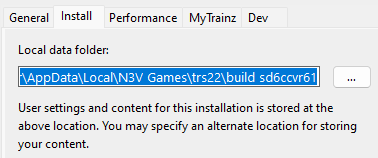
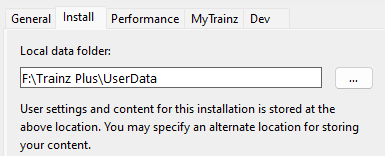
| 5 | Copy and Save the Current Folder Address Left Click inside the box containing the address details then highlight and copy (press the Ctrl + A keys then the Ctrl + C keys). The address will be copied to your systems clipboard.
|
||||||||||||
| 6 | Point Trainz to the New User Data Folder
|
||||||||||||
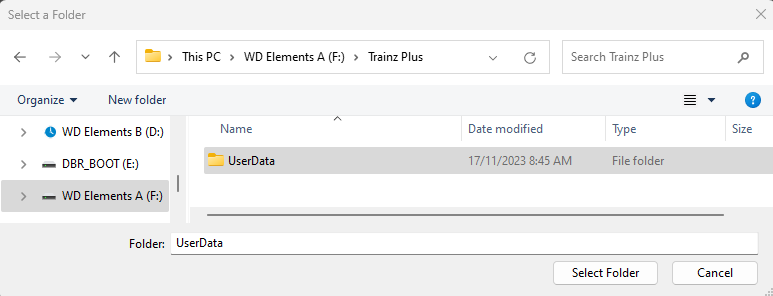 |
|||||||||||||
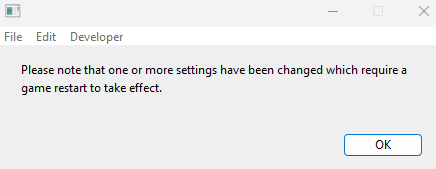
| 7 | Close the Trainz Settings Window You will be shown a message asking for a restart.
|
||||||||||||
| 8 | Close the Trainz Launcher Dropping you back to the Windows desktop. |
||||||||||||
| 9 | Restart Trainz Launcher You may get a dialogue window asking you to set your display options (Ultra, etc). If so select one to suit. |
||||||||||||
| 10 | Start Trainz Select the Start Trainz option from the Launcher |
||||||||||||
|
Switching Between User Data Folders |
| You can switch Trainz between your seperate User Data Folders at any time | |
| Only those assets installed in your currently selected User Data Folder will be available for use in Trainz |
Once you have set up an alternative User Data Folder or Folders you can easily switch between them and the original at any time.
| Steps: | |||||||||||||||||
| 1 | Open the Trainz Settings Install Tab (A repeat of Steps 2 , 3 and 4 in the section above)
|
||||||||||||||||
| 2 | Navigate to the Alternative User Data Folder
|
||||||||||||||||
| 3 | Close the Trainz Settings Window You will be shown a message asking for a restart.
|
||||||||||||||||
| 4 | Close the Trainz Launcher Dropping you back to the Windows desktop. |
||||||||||||||||
| 5 | Restart Trainz Launcher You may get a dialogue window asking you to set your display options (Ultra, etc). If so select one to suit. |
||||||||||||||||
| 6 | Start Trainz Select the Start Trainz option from the Launcher |
||||||||||||||||
|
This page was created by Trainz user pware in November 2023 and was last updated as shown below.

