How to Use S20 Palettes
m |
m |
||
| (33 intermediate revisions by one user not shown) | |||
| Line 374: | Line 374: | ||
<tr valign="top"> | <tr valign="top"> | ||
<td width=20>[[image:DotPoint1.JPG|link=]]</td> | <td width=20>[[image:DotPoint1.JPG|link=]]</td> | ||
| − | <td>Move the mouse pointer onto | + | <td>Move the mouse pointer onto any '''corner''' or onto an '''edge''' (left, right or bottom) of the palette. When it is in the correct position the pointer "mouse" arrow will change to a "two headed" arrow</td> |
</tr> | </tr> | ||
<tr> | <tr> | ||
| Line 490: | Line 490: | ||
</tr> | </tr> | ||
</table> | </table> | ||
| + | |||
<table width=1000> | <table width=1000> | ||
<tr valign="top"> | <tr valign="top"> | ||
| Line 497: | Line 498: | ||
<tr valign="top"> | <tr valign="top"> | ||
<td> | <td> | ||
| − | <table width=796 bgcolor=# | + | <table width=796 bgcolor=#ffffb0 cellpadding=2> |
<tr valign="top"> | <tr valign="top"> | ||
| − | <td | + | <td width=25>[[image:NotePad.PNG|link=]]</td> |
| + | <td><span style="font-size: 17px; font-weight: 700;">Notes:'''</span><br> | ||
| + | ---- | ||
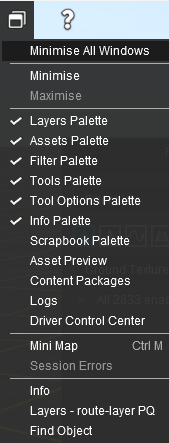
| + | A <span style="font-weight: 700; font-size: 15px; background-color: lightcyan;">Left Click</span> on the [[image:SurveyorWindowIcon.png|link=]] '''Surveyor Window Menu''' will list all the palettes, visible and hidden, plus any minimised palettes and windows.</td> | ||
</tr> | </tr> | ||
<tr valign="top"> | <tr valign="top"> | ||
| Line 510: | Line 514: | ||
</tr> | </tr> | ||
<tr valign="top"> | <tr valign="top"> | ||
| − | <td colspan=2>To '''Maximise''' a palette or window:-</td> | + | <td colspan=2> |
| + | <table bgcolor=#ffffff> | ||
| + | <tr valign="top"> | ||
| + | <td colspan=2><span style="font-weight: 700; font-size: 15px;">Steps:</span> To '''Maximise''' a palette or window:-</td> | ||
</tr> | </tr> | ||
<tr valign="top"> | <tr valign="top"> | ||
| − | <td>[[image: | + | <td width=25>[[image:DotPoint1.JPG|link=]]</td> |
<td><span style="font-weight: 700; font-size: 15px; background-color: lightcyan;">Left Click</span> on its name or title in the '''Minimised Windows Area''' at the bottom of the list.</td> | <td><span style="font-weight: 700; font-size: 15px; background-color: lightcyan;">Left Click</span> on its name or title in the '''Minimised Windows Area''' at the bottom of the list.</td> | ||
</tr> | </tr> | ||
<tr valign="top"> | <tr valign="top"> | ||
| − | <td>[[image: | + | <td> </td> |
| − | <td>'''<u>DO NOT</u>''' click on the name of the palette shown with the [[image:BulletTick.png|link=]] icon - this will reset it so it will become hidden (not just minimised) and it will lose its size and position data.</td> | + | <td> |
| + | <table bgcolor=#fcbcbc> | ||
| + | <tr valign="top"> | ||
| + | <td>[[image:Stop.PNG|link=]]</td> | ||
| + | <td><span style="font-size: 15px; font-weight: 700;">Warning:</span><br> | ||
| + | '''<u>DO NOT</u>''' click on the name of the palette shown with the [[image:BulletTick.png|link=]] icon in the upper '''Palettes''' section - this will reset it so it will become hidden (not just minimised) and it will lose its size and position data.</td> | ||
| + | </tr> | ||
| + | </table> | ||
| + | </td> | ||
| + | </tr> | ||
| + | </table> | ||
| + | </td> | ||
</tr> | </tr> | ||
</table> | </table> | ||
| Line 779: | Line 797: | ||
<tr valign="top"> | <tr valign="top"> | ||
<td width=370>[[image:InfoPaletteMenu_S20.png|link=]]</td> | <td width=370>[[image:InfoPaletteMenu_S20.png|link=]]</td> | ||
| − | <td width=630> | + | <td width=630> |
<table width=630 bgcolor=#000000 cellpadding=2> | <table width=630 bgcolor=#000000 cellpadding=2> | ||
<tr valign="top"> | <tr valign="top"> | ||
<td> | <td> | ||
<table width=626 bgcolor=#ffffff cellpadding=2> | <table width=626 bgcolor=#ffffff cellpadding=2> | ||
| + | <tr valign="top"> | ||
| + | <td colspan=2><span style="font-weight: 700; font-size: 17px;">Asset Name Menu Options:</span></td> | ||
| + | </tr> | ||
<tr valign="top"> | <tr valign="top"> | ||
<td width=200><span style="font-weight: 700; font-size: 15px; color: white; background-color: black;"> Copy </span></td> | <td width=200><span style="font-weight: 700; font-size: 15px; color: white; background-color: black;"> Copy </span></td> | ||
| Line 966: | Line 987: | ||
<tr valign="top"> | <tr valign="top"> | ||
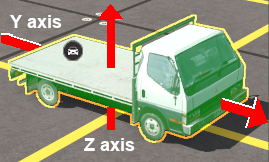
<td width=20><span style="font-weight: 700; font-size: 17px; color: white; background-color: black;"> r </span></td> | <td width=20><span style="font-weight: 700; font-size: 17px; color: white; background-color: black;"> r </span></td> | ||
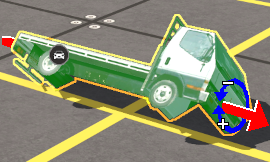
| − | <td>'''ALWAYS''' rotates in the '''vertical plane''' around the selected objects | + | <td>'''ALWAYS''' rotates in the '''vertical plane''' around the <span style="font-weight: 700; text-decoration: underline;">selected objects</span> '''Y''' axis (which was defined when it was created).<br> |
| + | This is the same as the <span style="font-weight: 700; font-size: 15px; color: white; background-color: red;"> Red </span> '''Rotational Anchor''' in the '''Fine Adjustment Tool'''</td> | ||
</tr> | </tr> | ||
<tr valign="top"> | <tr valign="top"> | ||
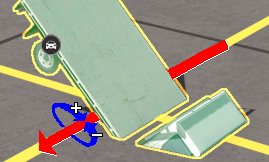
<td><span style="font-weight: 700; font-size: 17px; color: white; background-color: black;"> p </span></td> | <td><span style="font-weight: 700; font-size: 17px; color: white; background-color: black;"> p </span></td> | ||
| − | <td>'''ALWAYS''' rotates in the '''vertical plane''' around the selected objects | + | <td>'''ALWAYS''' rotates in the '''vertical plane''' around the <span style="font-weight: 700; text-decoration: underline;">selected objects</span> '''Y''' axis '''PLUS''' '''90°'''.<br> |
| + | This is the same as the <span style="font-weight: 700; font-size: 15px; color: white; background-color: green;"> Green </span> '''Rotational Anchor''' in the '''Fine Adjustment Tool'''</td> | ||
</tr> | </tr> | ||
<tr valign="top"> | <tr valign="top"> | ||
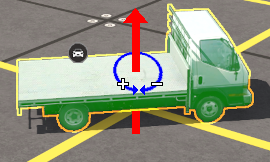
<td><span style="font-weight: 700; font-size: 17px; color: white; background-color: black;"> y </span></td> | <td><span style="font-weight: 700; font-size: 17px; color: white; background-color: black;"> y </span></td> | ||
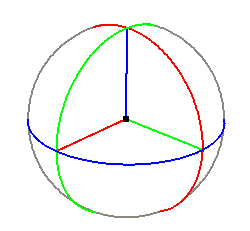
| − | <td>'''ALWAYS''' rotates in the '''horizontal plane''' around the | + | <td>'''ALWAYS''' rotates in the '''horizontal plane''' around the <span style="font-weight: 700; text-decoration: underline;">compass</span> '''Z''' or <span style="font-weight: 700; font-size: 15px;">Vertical</span> axis regardless of how the object has been rolled or pitched.<br> |
| + | This is similar to but <span style="font-weight: 700; text-decoration: underline;">NOT exactly the same</span> as the <span style="font-weight: 700; font-size: 15px; color: white; background-color: blue;"> Blue </span> '''Rotational Anchor''' in the '''Fine Adjustment Tool''' | ||
<table> | <table> | ||
<tr> | <tr> | ||
| Line 997: | Line 1,021: | ||
<td align="center"><span style="font-weight: 700; font-size: 15px;">Pitch: <span style="color: white; background-color: black;"> p = 45 </span></span><br>[[image:RotationAxisPitch_S20.png|link=]]</td> | <td align="center"><span style="font-weight: 700; font-size: 15px;">Pitch: <span style="color: white; background-color: black;"> p = 45 </span></span><br>[[image:RotationAxisPitch_S20.png|link=]]</td> | ||
<td align="center"><span style="font-weight: 700; font-size: 15px;">Yaw: <span style="color: white; background-color: black;"> y = 45 </span></span><br>[[image:RotationAxisYaw_S20.png|link=]]</td> | <td align="center"><span style="font-weight: 700; font-size: 15px;">Yaw: <span style="color: white; background-color: black;"> y = 45 </span></span><br>[[image:RotationAxisYaw_S20.png|link=]]</td> | ||
| − | |||
| − | |||
| − | |||
</tr> | </tr> | ||
</table> | </table> | ||
| Line 1,167: | Line 1,188: | ||
<tr valign="top"> | <tr valign="top"> | ||
<td>[[image:Stop.PNG|link=]]</td> | <td>[[image:Stop.PNG|link=]]</td> | ||
| − | <td><span style="font-size: 15px; font-weight: 700;"> | + | <td><span style="font-size: 15px; font-weight: 700;">Warning:</span> |
<table> | <table> | ||
<tr valign="top"> | <tr valign="top"> | ||
<td width=10>[[image:DotPoint.JPG|10px|link=]]</td> | <td width=10>[[image:DotPoint.JPG|10px|link=]]</td> | ||
| − | <td>Setting a layer for multiple objects that are in different layers will move ALL those objects to that layer</td> | + | <td>Setting a layer for multiple objects that are in different layers will move '''ALL''' those objects to that layer</td> |
</tr> | </tr> | ||
<tr valign="top"> | <tr valign="top"> | ||
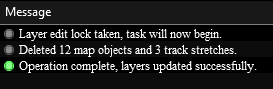
| Line 1,229: | Line 1,250: | ||
<td>[[image:DotPoint3.JPG|link=]]</td> | <td>[[image:DotPoint3.JPG|link=]]</td> | ||
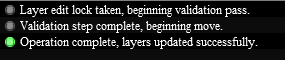
<td>If you see a '''Debugging Window''' on the screen as the task is processed, it will inform you when the task has been completed. You can then close the window</td> | <td>If you see a '''Debugging Window''' on the screen as the task is processed, it will inform you when the task has been completed. You can then close the window</td> | ||
| + | </tr> | ||
| + | </table> | ||
| + | </td> | ||
| + | </tr> | ||
| + | </table> | ||
| + | <br> | ||
| + | <table bgcolor=#000000 cellpadding=2> | ||
| + | <tr valign="top"> | ||
| + | <td> | ||
| + | <table bgcolor=#ffffb0 cellpadding=2> | ||
| + | <tr valign="top"> | ||
| + | <td width=25>[[image:NotePad.PNG|link=]]</td> | ||
| + | <td>Once a target layer has been selected then the <span style="font-weight: 700; font-size: 15px; color: white; background-color: black;"> Select Layer </span> button, which sets the '''Active Layer''', will become active '''IF''' the target layer is not the '''Active Layer'''. A <span style="font-weight: 700; font-size: 15px; background-color: lightcyan;">Left Click</span> on this button will set it as the '''Active Layer'''.</td> | ||
</tr> | </tr> | ||
</table> | </table> | ||
| Line 1,238: | Line 1,272: | ||
</table> | </table> | ||
<br> | <br> | ||
| − | |||
| − | |||
| − | |||
| − | |||
<table width=1000 bgcolor="lightcyan" cellpadding=2> | <table width=1000 bgcolor="lightcyan" cellpadding=2> | ||
<tr valign="top"> | <tr valign="top"> | ||
| Line 1,256: | Line 1,286: | ||
<td>[[image:PencilTips.PNG|link=]]</td> | <td>[[image:PencilTips.PNG|link=]]</td> | ||
<td>You can also set the '''Active Layer''' by selecting its name from the list in the '''Layers Palette'''.</td> | <td>You can also set the '''Active Layer''' by selecting its name from the list in the '''Layers Palette'''.</td> | ||
| − | |||
| − | |||
| − | |||
</tr> | </tr> | ||
</table> | </table> | ||
| Line 1,382: | Line 1,409: | ||
</tr> | </tr> | ||
</table> | </table> | ||
| − | <table bgcolor=#000000 | + | <table bgcolor=#000000 cellpadding=2> |
<tr valign="top"> | <tr valign="top"> | ||
<td> | <td> | ||
| − | <table bgcolor=#ffffb0 | + | <table bgcolor=#ffffb0 cellpadding=2> |
<tr valign="top"> | <tr valign="top"> | ||
<td width=25>[[image:NotePad.PNG|link=]]</td> | <td width=25>[[image:NotePad.PNG|link=]]</td> | ||
| Line 1,737: | Line 1,764: | ||
<tr valign="top"> | <tr valign="top"> | ||
<td>[[image:PencilTips.PNG|link=]]</td> | <td>[[image:PencilTips.PNG|link=]]</td> | ||
| − | <td>The '''Eyedropper''' is also inside all the tools in this palette so you can quickly identify any object without having to switch to the '''Eyedropper Tool''' and back again. | + | <td>The '''Eyedropper''' is also inside all the tools in this palette so you can quickly identify any object without having to switch to the '''Eyedropper Tool''' and back again. Hold down the <span style="font-weight: 700; font-size: 15px; color: white; background-color: black;"> Alt </span> key to activate this feature in other tools |
</td> | </td> | ||
</tr> | </tr> | ||
| Line 1,827: | Line 1,854: | ||
<td width=200>[[image:FineAdjustmentTools_S20.png|link=|alt=Fine Adjustment Tools]]</td> | <td width=200>[[image:FineAdjustmentTools_S20.png|link=|alt=Fine Adjustment Tools]]</td> | ||
<td> | <td> | ||
| + | <table bgcolor=#000000 width=800 cellpadding=2> | ||
| + | <tr valign="top"> | ||
| + | <td> | ||
| + | <table bgcolor=#ffffb0 width=796 cellpadding=2> | ||
| + | <tr valign="top"> | ||
| + | <td width=25>[[image:NotePad.PNG|link=]]</td> | ||
| + | <td><span style="font-size: 17px; font-weight: 700;">Notes:'''</span><br> | ||
| + | ---- | ||
| + | The '''Fine Adjustment Tool''' can move any selected object or objects (except '''Ground Textures''' and '''Effect Layers''') in any direction horizontally and vertically. It can also rotate those objects through 3 different axes of rotation. | ||
| + | </td> | ||
| + | </tr> | ||
| + | </table> | ||
| + | </td> | ||
| + | </tr> | ||
| + | </table> | ||
| + | |||
<table width=800> | <table width=800> | ||
<tr valign="top"> | <tr valign="top"> | ||
| Line 1,843: | Line 1,886: | ||
<tr valign="top"> | <tr valign="top"> | ||
<td width=150><span style="font-weight: 700; font-size: 15px; color: white; background-color: red;"> Red </span> <span style="font-weight: 700; font-size: 15px; color: white; background-color: green;"> Green </span> <span style="font-weight: 700; font-size: 15px; color: white; background-color: blue;"> Blue </span></td> | <td width=150><span style="font-weight: 700; font-size: 15px; color: white; background-color: red;"> Red </span> <span style="font-weight: 700; font-size: 15px; color: white; background-color: green;"> Green </span> <span style="font-weight: 700; font-size: 15px; color: white; background-color: blue;"> Blue </span></td> | ||
| − | <td>move the object (forward and back) in the direction of the '''Anchor''' line</td> | + | <td>move the object (forward and back, or up and down) in the direction of the '''Anchor''' line</td> |
</tr> | </tr> | ||
<tr valign="top"> | <tr valign="top"> | ||
| Line 1,881: | Line 1,924: | ||
</table> | </table> | ||
<br> | <br> | ||
| − | |||
=='''The Marquee Tool'''== | =='''The Marquee Tool'''== | ||
| Line 2,170: | Line 2,212: | ||
</table> | </table> | ||
<br> | <br> | ||
| − | |||
| − | |||
<table width=1000> | <table width=1000> | ||
<tr valign="top"> | <tr valign="top"> | ||
| Line 2,180: | Line 2,220: | ||
<td> | <td> | ||
<table width=896 bgcolor=#ffffff cellpadding=2> | <table width=896 bgcolor=#ffffff cellpadding=2> | ||
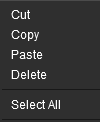
| + | <tr valign="top"> | ||
| + | <td colspan=2><span style="font-weight: 700; font-size: 17px;">Tool Popup Common Options</span> <span style="font-weight: 700; font-size: 15px;">for <span style="color: gold; background-color: black;"> Radius </span> <span style="color: gold; background-color: black;"> Angle </span> <span style="color: gold; background-color: black;"> Sensitivity </span> <span style="color: gold; background-color: black;"> Rotation </span> <span style="color: gold; background-color: black;"> Scale </span> <span style="color: gold; background-color: black;"> Intensity </span></span></td> | ||
| + | </tr> | ||
<tr valign="top"> | <tr valign="top"> | ||
<td><span style="font-weight: 700; font-size: 15px; color: white; background-color: black;"> Cut </span></td> | <td><span style="font-weight: 700; font-size: 15px; color: white; background-color: black;"> Cut </span></td> | ||
| − | <td>copies and deletes the '''highlighted''' value in the data entry box into | + | <td>copies and deletes the '''highlighted''' value in the data entry box into your Operating System clipboard</td> |
</tr> | </tr> | ||
<tr valign="top"> | <tr valign="top"> | ||
<td><span style="font-weight: 700; font-size: 15px; color: white; background-color: black;"> Copy </span></td> | <td><span style="font-weight: 700; font-size: 15px; color: white; background-color: black;"> Copy </span></td> | ||
| − | <td>copies the '''highlighted''' value in the data entry box to | + | <td>copies the '''highlighted''' value in the data entry box to your Operating System clipboard</td> |
</tr> | </tr> | ||
<tr valign="top"> | <tr valign="top"> | ||
<td><span style="font-weight: 700; font-size: 15px; color: white; background-color: black;"> Paste </span></td> | <td><span style="font-weight: 700; font-size: 15px; color: white; background-color: black;"> Paste </span></td> | ||
| − | <td>copies the value from | + | <td>copies the value from your Operating System clipboard into the data entry box</td> |
</tr> | </tr> | ||
<tr valign="top"> | <tr valign="top"> | ||
| Line 2,221: | Line 2,264: | ||
</table> | </table> | ||
<br> | <br> | ||
| − | |||
| − | |||
<table width=1000> | <table width=1000> | ||
<tr valign="top"> | <tr valign="top"> | ||
| Line 2,231: | Line 2,272: | ||
<td> | <td> | ||
<table width=826 bgcolor=#ffffff cellpadding=2> | <table width=826 bgcolor=#ffffff cellpadding=2> | ||
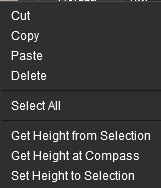
| + | <tr valign="top"> | ||
| + | <td colspan=2><span style="font-weight: 700; font-size: 17px;">Tool Popup Options</span> <span style="font-weight: 700; font-size: 15px;">for <span style="color: gold; background-color: black;"> Height </span></span></td> | ||
| + | </tr> | ||
<tr> | <tr> | ||
| − | <td colspan=2>'''All of the Common Options above plus ...'''</td> | + | <td colspan=2>'''All of the Tool Popup Common Options above plus ...'''</td> |
</tr> | </tr> | ||
<tr valign="top"> | <tr valign="top"> | ||
| Line 2,254: | Line 2,298: | ||
</table> | </table> | ||
<br> | <br> | ||
| − | |||
| − | |||
<table width=1000> | <table width=1000> | ||
<tr valign="top"> | <tr valign="top"> | ||
| Line 2,264: | Line 2,306: | ||
<td> | <td> | ||
<table width=826 bgcolor=#ffffff cellpadding=2> | <table width=826 bgcolor=#ffffff cellpadding=2> | ||
| + | <tr valign="top"> | ||
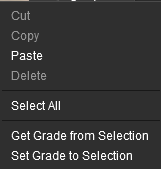
| + | <td colspan=2><span style="font-weight: 700; font-size: 17px;">Tool Popup Options</span> <span style="font-weight: 700; font-size: 15px;">for <span style="color: gold; background-color: black;"> Grade </span></span></td> | ||
| + | </tr> | ||
<tr> | <tr> | ||
| − | <td colspan=2>'''All of the Common Options above plus ...'''</td> | + | <td colspan=2>'''All of the Tool Popup Common Options above plus ...'''</td> |
</tr> | </tr> | ||
<tr valign="top"> | <tr valign="top"> | ||
| Line 2,298: | Line 2,343: | ||
</table> | </table> | ||
<br> | <br> | ||
| − | |||
| − | |||
<table width=1000> | <table width=1000> | ||
<tr valign="top"> | <tr valign="top"> | ||
| − | <td width= | + | <td width=180>[[image:ToolOptionsPopupCondition.png|link=]]</td> |
<td> | <td> | ||
<table width=815 bgcolor=#000000 cellpadding=2> | <table width=815 bgcolor=#000000 cellpadding=2> | ||
| Line 2,308: | Line 2,351: | ||
<td> | <td> | ||
<table width=811 bgcolor=#ffffff cellpadding=2> | <table width=811 bgcolor=#ffffff cellpadding=2> | ||
| + | <tr valign="top"> | ||
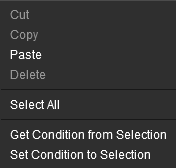
| + | <td colspan=2><span style="font-weight: 700; font-size: 17px;">Tool Popup Options</span> <span style="font-weight: 700; font-size: 15px;">for <span style="color: gold; background-color: black;"> Condition </span></span></td> | ||
| + | </tr> | ||
<tr> | <tr> | ||
| − | <td colspan=2>'''All of the Common Options above plus ...'''</td> | + | <td colspan=2>'''All of the Tool Popup Common Options above plus ...'''</td> |
</tr> | </tr> | ||
<tr valign="top"> | <tr valign="top"> | ||
| − | <td width= | + | <td width=220><span style="font-weight: 700; font-size: 15px; color: white; background-color: black;"> Get Condition from Selection </span></td> |
<td>copies the '''Condition''' value of the '''Selected Track Spline''' and places it into the data entry box</td> | <td>copies the '''Condition''' value of the '''Selected Track Spline''' and places it into the data entry box</td> | ||
</tr> | </tr> | ||
<tr valign="top"> | <tr valign="top"> | ||
| − | <td><span style="font-weight: 700; font-size: 15px; color: white; background-color: black;"> Set | + | <td><span style="font-weight: 700; font-size: 15px; color: white; background-color: black;"> Set Condition to Selection </span></td> |
<td>applies the '''Condition''' value to the '''Selected Track Spline'''</td> | <td>applies the '''Condition''' value to the '''Selected Track Spline'''</td> | ||
</tr> | </tr> | ||
| Line 2,602: | Line 2,648: | ||
<tr valign="top"> | <tr valign="top"> | ||
<td>[[image:Stop.PNG|link=]]</td> | <td>[[image:Stop.PNG|link=]]</td> | ||
| − | <td><span style="font-size: 15px; font-weight: 700;"> | + | <td><span style="font-size: 15px; font-weight: 700;">Warning:</span><br> |
Setting both a large <span style="font-weight: 700; font-size: 15px; color: gold; background-color: black;"> Radius </span> and a small <span style="font-weight: 700; font-size: 15px; color: gold; background-color: black;"> Scale </span> will cause performance issues</td> | Setting both a large <span style="font-weight: 700; font-size: 15px; color: gold; background-color: black;"> Radius </span> and a small <span style="font-weight: 700; font-size: 15px; color: gold; background-color: black;"> Scale </span> will cause performance issues</td> | ||
</tr> | </tr> | ||
| Line 2,665: | Line 2,711: | ||
<br> | <br> | ||
<span style="font-weight: 700; font-size: 15px;">Steps:</span><br> | <span style="font-weight: 700; font-size: 15px;">Steps:</span><br> | ||
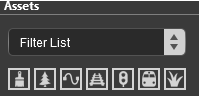
| + | [[image:DotPoint1.JPG|link=]] The first filter option controls where the filters are applied. | ||
<table width=1000> | <table width=1000> | ||
<tr valign="top"> | <tr valign="top"> | ||
| Line 2,670: | Line 2,717: | ||
<td> | <td> | ||
<table width=785> | <table width=785> | ||
| − | |||
| − | |||
| − | |||
<tr valign="top"> | <tr valign="top"> | ||
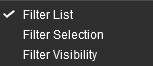
<td width=350>The top drop down box will provide three actions:-<br> | <td width=350>The top drop down box will provide three actions:-<br> | ||
| Line 2,705: | Line 2,749: | ||
<table width=781 bgcolor=#ffffff> | <table width=781 bgcolor=#ffffff> | ||
<tr valign="top"> | <tr valign="top"> | ||
| − | <td | + | <td><span style="font-weight: 700; font-size: 17px;">Asset Filter Options:</span></td> |
| + | </tr> | ||
| + | <tr valign="top"> | ||
| + | <td> | ||
| + | <table> | ||
| + | <tr valign="top"> | ||
| + | <td><span style="font-weight: 700; font-size: 15px; color: white; background-color: black;"> Filter List </span></td> | ||
<td>this action will have no effect on the operation of the tool selected in the '''Tool Palette''' or on the objects displayed on the screen in the '''Trainz World'''. It is the default setting and the search results of the entered filters will be shown in the '''Assets Palette''' asset name list below the filters.</td> | <td>this action will have no effect on the operation of the tool selected in the '''Tool Palette''' or on the objects displayed on the screen in the '''Trainz World'''. It is the default setting and the search results of the entered filters will be shown in the '''Assets Palette''' asset name list below the filters.</td> | ||
| + | </tr> | ||
| + | </table> | ||
| + | </td> | ||
</tr> | </tr> | ||
<tr valign="top"> | <tr valign="top"> | ||
| − | <td><span style="font-weight: 700; font-size: | + | <td> |
| + | <table> | ||
| + | <tr valign="top"> | ||
| + | <td><span style="font-weight: 700; font-size: 15px; color: white; background-color: black;"> Filter Selection </span></td> | ||
<td>this action will restrict the selected tool (e.g. '''The Placement Tool''') to only working on those objects that are in the filtered list. Objects that are not in the filtered list will still be visible in the '''Trainz World''' but cannot be selected.</td> | <td>this action will restrict the selected tool (e.g. '''The Placement Tool''') to only working on those objects that are in the filtered list. Objects that are not in the filtered list will still be visible in the '''Trainz World''' but cannot be selected.</td> | ||
</tr> | </tr> | ||
| + | </table> | ||
| + | </td> | ||
| + | </tr> | ||
| + | <tr valign="top"> | ||
| + | <td> | ||
| + | <table> | ||
<tr valign="top"> | <tr valign="top"> | ||
| − | <td><span style="font-weight: 700; font-size: | + | <td><span style="font-weight: 700; font-size: 15px; color: white; background-color: black;"> Filter Visibility </span></td> |
<td>this action will '''hide''' all objects in the '''Trainz World''' that are not in the filtered list. The only exceptions are '''Ground Textures''' and '''Effect Layers''' which will be visible but, unless they are also in the filtered list, cannot be selected.</td> | <td>this action will '''hide''' all objects in the '''Trainz World''' that are not in the filtered list. The only exceptions are '''Ground Textures''' and '''Effect Layers''' which will be visible but, unless they are also in the filtered list, cannot be selected.</td> | ||
| + | </tr> | ||
| + | </table> | ||
| + | </td> | ||
</tr> | </tr> | ||
</table> | </table> | ||
| Line 2,744: | Line 2,809: | ||
</table> | </table> | ||
<br> | <br> | ||
| − | + | <span style="font-weight: 700; font-size: 15px;">Options:</span> Choose from:-<br> | |
| − | <table width= | + | <table width=650> |
<tr valign="top"> | <tr valign="top"> | ||
<td> | <td> | ||
| − | <table width= | + | <table width=300 bgcolor=#0000ff> |
<tr valign="top"> | <tr valign="top"> | ||
<td> | <td> | ||
| − | <table width= | + | <table width=296 bgcolor=#ffffff> |
<tr valign="top"> | <tr valign="top"> | ||
| − | <td width= | + | <td width=296>[[image:Ablue.png|link=]] <span style="font-weight: 700; font-size: 15px; background-color: lightcyan;">Left Click</span> on an asset selection icon</td> |
| − | [[image:FilterSelectIcons.png|link=|alt=Filter Icons]] | + | </tr> |
| + | <tr valign="top"> | ||
| + | <td align="center">[[image:FilterSelectIcons.png|link=|alt=Filter Icons]]</td> | ||
| + | </tr> | ||
| + | <tr valign="top"> | ||
| + | <td> | ||
<table> | <table> | ||
| − | <tr valign="top | + | <tr valign="top"> |
<td>[[image:GroundTextureFilter_S20.png|link=]]</td> | <td>[[image:GroundTextureFilter_S20.png|link=]]</td> | ||
<td>all ground textures</td> | <td>all ground textures</td> | ||
</tr> | </tr> | ||
| − | <tr valign="top | + | <tr valign="top"> |
<td>[[image:SceneryMeshFilter_S20.png|link=]]</td> | <td>[[image:SceneryMeshFilter_S20.png|link=]]</td> | ||
<td>all non-spline scenery assets</td> | <td>all non-spline scenery assets</td> | ||
</tr> | </tr> | ||
| − | <tr valign="top | + | <tr valign="top"> |
<td>[[image:ScenerySplineFilter_S20.png|link=]]</td> | <td>[[image:ScenerySplineFilter_S20.png|link=]]</td> | ||
<td>all spline scenery assets</td> | <td>all spline scenery assets</td> | ||
</tr> | </tr> | ||
| − | <tr valign="top | + | <tr valign="top"> |
<td>[[image:TrackSplineFilter_S20.png|link=]]</td> | <td>[[image:TrackSplineFilter_S20.png|link=]]</td> | ||
<td>all track spline assets</td> | <td>all track spline assets</td> | ||
</tr> | </tr> | ||
| − | <tr valign="top | + | <tr valign="top"> |
<td>[[image:TrackMeshFilter_S20.png|link=]]</td> | <td>[[image:TrackMeshFilter_S20.png|link=]]</td> | ||
<td>all track (non spline) assets (signals, etc)</td> | <td>all track (non spline) assets (signals, etc)</td> | ||
</tr> | </tr> | ||
| − | <tr valign="top | + | <tr valign="top"> |
<td>[[image:TrainFilter_S20.png|link=]]</td> | <td>[[image:TrainFilter_S20.png|link=]]</td> | ||
<td>all rolling stock assets</td> | <td>all rolling stock assets</td> | ||
</tr> | </tr> | ||
| − | <tr valign="top | + | <tr valign="top"> |
<td>[[image:PresetFilter_S20.png|link=]]</td> | <td>[[image:PresetFilter_S20.png|link=]]</td> | ||
<td>all '''Effect Layer''' presets</td> | <td>all '''Effect Layer''' presets</td> | ||
| Line 2,794: | Line 2,864: | ||
<td width=50 align="center"><span style="font-size: 17px; font-weight: 700;">OR</span></td> | <td width=50 align="center"><span style="font-size: 17px; font-weight: 700;">OR</span></td> | ||
<td> | <td> | ||
| − | <table width= | + | <table width=300 bgcolor=#0000ff> |
<tr valign="top"> | <tr valign="top"> | ||
<td> | <td> | ||
| − | <table width= | + | <table width=396 bgcolor=#ffffff> |
<tr valign="top"> | <tr valign="top"> | ||
| − | <td | + | <td>[[image:Bblue.png|link=]] <span style="font-weight: 700; font-size: 15px; background-color: lightcyan;">Left Click</span> the '''Content Drop-down Box'''<br> |
[[image:FilterSelect.png|link=|alt=Filter List]]<br> | [[image:FilterSelect.png|link=|alt=Filter List]]<br> | ||
Then select the asset type you want<br> | Then select the asset type you want<br> | ||
| Line 2,816: | Line 2,886: | ||
<tr valign="top"> | <tr valign="top"> | ||
<td width=25>[[image:DotPoint3.JPG|link=]]</td> | <td width=25>[[image:DotPoint3.JPG|link=]]</td> | ||
| − | <td>The third filter is also optional. You can enter a string of text characters that will be used to search the asset names and their descriptions for a match. Those assets that return a positive match, together with a positive asset type, will be shown in the filter name list.</td> | + | <td>The third filter is also '''optional'''. You can enter a string of text characters that will be used to search the asset names and their descriptions for a match. Those assets that return a positive match, together with a positive asset type, will be shown in the filter name list.</td> |
</tr> | </tr> | ||
</table> | </table> | ||
| Line 2,826: | Line 2,896: | ||
<tr valign="top"> | <tr valign="top"> | ||
<td>[[image:PencilTips.PNG|link=]]</td> | <td>[[image:PencilTips.PNG|link=]]</td> | ||
| − | <td>The '''String Search''' will accept a list of '''<kuid> codes''' seperated by commas. This list can be created by '''Content Manager''' by selecting the assets followed by | + | <td>The '''String Search''' will accept a list of '''<kuid> codes''' seperated by commas. This list can be created by '''Content Manager''' by selecting the assets followed by the '''List Assets in New Window''' option. Copy the assets list into your clipboard and paste it into the '''Assets Palette''' search box</td> |
</tr> | </tr> | ||
</table> | </table> | ||
| Line 2,969: | Line 3,039: | ||
</tr> | </tr> | ||
<tr valign="top"> | <tr valign="top"> | ||
| − | <td width= | + | <td width=20>[[image:DotPoint1.JPG|link=]]</td> |
<td>'''To Move:''' <span style="font-weight: 700; font-size: 15px; background-color: lightcyan;">Left Click and Drag</span> the column heading left or right to a new position</td> | <td>'''To Move:''' <span style="font-weight: 700; font-size: 15px; background-color: lightcyan;">Left Click and Drag</span> the column heading left or right to a new position</td> | ||
| − | </tr><tr valign="top"> | + | </tr> |
| − | <td >[[image: | + | <tr valign="top"> |
| + | <td width=20>[[image:DotPoint2.JPG|link=]]</td> | ||
<td>'''To Resize:''' <span style="font-weight: 700; font-size: 15px; background-color: lightcyan;">Left Click and Drag</span> the dividing line between two column headings left or right to a reduce or increase the column width</td> | <td>'''To Resize:''' <span style="font-weight: 700; font-size: 15px; background-color: lightcyan;">Left Click and Drag</span> the dividing line between two column headings left or right to a reduce or increase the column width</td> | ||
</tr> | </tr> | ||
| Line 2,986: | Line 3,057: | ||
<table width=371 bgcolor=#ffffff cellpadding=2> | <table width=371 bgcolor=#ffffff cellpadding=2> | ||
<tr valign="top"> | <tr valign="top"> | ||
| − | <td colspan=2><span style="font-weight: 700; font-size: 15px;">Steps:</span></td> | + | <td colspan=2><span style="font-weight: 700; font-size: 15px;">Steps:</span> To sort the data in a column:-</td> |
</tr> | </tr> | ||
<tr valign="top"> | <tr valign="top"> | ||
| Line 3,133: | Line 3,204: | ||
<tr valign="top"> | <tr valign="top"> | ||
<td width=10>[[image:DotPoint.JPG|10px|link=]]</td> | <td width=10>[[image:DotPoint.JPG|10px|link=]]</td> | ||
| − | <td>The | + | <td>The <span style="font-weight: 700; font-size: 15px; color: white; background-color: black;"> Route Layers </span> group, along with the '''Ground Height''', '''Ground Textures''' and '''Effect Layers''', are saved and loaded with the Route</td> |
</tr> | </tr> | ||
<tr valign="top"> | <tr valign="top"> | ||
<td>[[image:DotPoint.JPG|10px|link=]]</td> | <td>[[image:DotPoint.JPG|10px|link=]]</td> | ||
| − | <td>The '''Session | + | <td>The <span style="font-weight: 700; font-size: 15px; color: white; background-color: black;"> Session Layers </span> group, along with any '''Session Rules''' and '''commodity''' settings, is saved and loaded with the Session. A '''Session Layers''' group, but one without any stored objects and using the Session '''default settings''', will always be present when a Route is loaded without a Session</td> |
</tr> | </tr> | ||
</table> | </table> | ||
| Line 3,260: | Line 3,331: | ||
<tr valign="top"> | <tr valign="top"> | ||
<td>[[image:PencilTips.PNG|link=]]</td> | <td>[[image:PencilTips.PNG|link=]]</td> | ||
| − | <td>While you are free to rename any layers (but not the Layer | + | <td>While you are free to rename any layers (but not the '''Layer Group''' names), it is '''recommended''' that you '''DO NOT''' rename two specific layers:-<br> |
[[image:DotPoint.JPG|10px|link=]] '''route-layer'''<br> | [[image:DotPoint.JPG|10px|link=]] '''route-layer'''<br> | ||
[[image:DotPoint.JPG|10px|link=]] '''session-layer'''<br> | [[image:DotPoint.JPG|10px|link=]] '''session-layer'''<br> | ||
| − | These layers are used to store critical objects (track and track objects in the case of the '''route-layer''' and rolling stock in the case of the '''session-layer'''). Using these two layer names in every route and session can make it easier (and less confusing) to manage those assets. But this is a '''recommendation''' only. | + | These layers are used to store critical objects (track and track objects in the case of the '''route-layer''' and (optionally) rolling stock in the case of the '''session-layer'''). Using these two layer names in every route and session can make it easier (and less confusing) to manage those assets. But this is a '''recommendation''' only. |
</td> | </td> | ||
</tr> | </tr> | ||
| Line 3,280: | Line 3,351: | ||
<tr valign="top"> | <tr valign="top"> | ||
<td>[[image:Stop.PNG|link=]]</td> | <td>[[image:Stop.PNG|link=]]</td> | ||
| − | <td><span style="font-size: 15px; font-weight: 700;"> | + | <td><span style="font-size: 15px; font-weight: 700;">Warning:</span> '''Deleting a Layer will delete every object that has been assigned to that layer''' |
| − | '''Deleting a Layer will delete every object that has been assigned to that layer''' | + | |
</td> | </td> | ||
</tr> | </tr> | ||
| Line 3,362: | Line 3,432: | ||
<tr valign="top"> | <tr valign="top"> | ||
<td>[[image:Stop.PNG|link=]]</td> | <td>[[image:Stop.PNG|link=]]</td> | ||
| − | <td><span style="font-size: 15px; font-weight: 700;"> | + | <td><span style="font-size: 15px; font-weight: 700;">Warning:</span> Moving layers between the '''Session Layers''' and the '''Route Layers''' groups will move the contents of those layers from one group to the other. This will change where the layers and their contents are saved (in the '''route''' or in the '''session''') |
| − | Moving layers between the '''Session Layers''' and the '''Route Layers''' groups will move the contents of those layers from one group to the other. This will change where the layers and their contents are saved (in the '''route''' or in the '''session''') | + | |
</td> | </td> | ||
</tr> | </tr> | ||
| Line 3,448: | Line 3,517: | ||
<tr valign="top"> | <tr valign="top"> | ||
<td width=25>[[image:NotePad.PNG|link=]]</td> | <td width=25>[[image:NotePad.PNG|link=]]</td> | ||
| − | <td><span style="font-size: 17px; font-weight: 700;">Notes: Moving Layers - What Could Possibly Go Wrong?'''</span><br> | + | <td width=995><span style="font-size: 17px; font-weight: 700;">Notes: Moving Layers - What Could Possibly Go Wrong?''' 😀</span><br> |
---- | ---- | ||
</td> | </td> | ||
| Line 3,528: | Line 3,597: | ||
=='''Merging a Layer'''== | =='''Merging a Layer'''== | ||
| + | <table width=1000 bgcolor="lightcyan" cellpadding=2> | ||
| + | <tr valign="top"> | ||
| + | <td width=10>[[image:BlueDot10x10.png|link=]]</td> | ||
| + | <td>A layer can be merged with the layer immediately above it</td> | ||
| + | </tr> | ||
| + | </table> | ||
| + | <br> | ||
<table> | <table> | ||
<tr valign="top"> | <tr valign="top"> | ||
<td width=120>[[image:LayerMerge_S20.png|link=]]</td> | <td width=120>[[image:LayerMerge_S20.png|link=]]</td> | ||
| − | <td>< | + | <td> |
| − | + | <table bgcolor=#000000 cellpadding=2> | |
<tr valign="top"> | <tr valign="top"> | ||
| − | <td>[[image:DotPoint.JPG|10px|link=]]</td> | + | <td> |
| + | <table bgcolor=#ffffff cellpadding=2> | ||
| + | <tr valign="top"> | ||
| + | <td colspan=2><span style="font-weight: 700; font-size: 15px;">Steps:</span> To merge two layers:-</td> | ||
| + | </tr> | ||
| + | <tr valign="top"> | ||
| + | <td width=25>[[image:DotPoint1.JPG|link=]]</td> | ||
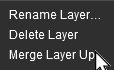
| + | <td><span style="font-weight: 700; font-size: 15px; background-color: lightcyan;">Right Click</span> on a layer name in the '''Layers Palette'''</td> | ||
| + | </tr> | ||
| + | <tr valign="top"> | ||
| + | <td>[[image:DotPoint2.JPG|link=]]</td> | ||
| + | <td>select the <span style="font-weight: 700; font-size: 15px; color: white; background-color: black;"> Merge Layer Up </span> option from the popup menu</td> | ||
| + | </tr> | ||
| + | </table> | ||
| + | </td> | ||
| + | </tr> | ||
| + | </table> | ||
| + | </td> | ||
| + | </tr> | ||
| + | </table> | ||
| + | <br> | ||
| + | <table bgcolor=#000000 width=1000 cellpadding=2> | ||
| + | <tr valign="top"> | ||
| + | <td> | ||
| + | <table bgcolor=#ffffb0 width=996 cellpadding=2> | ||
| + | <tr valign="top"> | ||
| + | <td width=25>[[image:NotePad.PNG|link=]]</td> | ||
| + | <td><span style="font-size: 17px; font-weight: 700;">Notes:'''</span><br> | ||
| + | ----</td> | ||
| + | </tr> | ||
| + | <tr valign="top"> | ||
| + | <td width=10>[[image:DotPoint.JPG|10px|link=]]</td> | ||
<td>the selected layer will be merged with the layer '''immediately above''' it</td> | <td>the selected layer will be merged with the layer '''immediately above''' it</td> | ||
</tr> | </tr> | ||
| Line 3,552: | Line 3,659: | ||
<tr valign="top"> | <tr valign="top"> | ||
<td>[[image:DotPoint.JPG|10px|link=]]</td> | <td>[[image:DotPoint.JPG|10px|link=]]</td> | ||
| − | <td>layers in the '''Effect Layers Group''' cannot be merged. In place of <span style="font-weight: 700; font-size: 15px; color: white; background-color: black;"> Merge Layer Up </span> the '''Effect | + | <td>layers in the '''Effect Layers Group''' cannot be merged. In place of <span style="font-weight: 700; font-size: 15px; color: white; background-color: black;"> Merge Layer Up </span> the popup menu for an '''Effect Layer''' will have an <span style="font-weight: 700; font-size: 15px; color: white; background-color: black;"> Edit Layer </span> option |
</td> | </td> | ||
</tr> | </tr> | ||
| Line 3,560: | Line 3,667: | ||
</table> | </table> | ||
<br> | <br> | ||
| − | |||
=='''Hiding Layers'''== | =='''Hiding Layers'''== | ||
<table width=1000 bgcolor="lightcyan" cellpadding=2> | <table width=1000 bgcolor="lightcyan" cellpadding=2> | ||
| Line 3,634: | Line 3,740: | ||
<td width=10>[[image:BlueDot10x10.png|link=]]</td> | <td width=10>[[image:BlueDot10x10.png|link=]]</td> | ||
<td>Each individual layer has a '''Padlock''' icon that controls the state ('''locked''' or '''unlocked''') of that layer</td> | <td>Each individual layer has a '''Padlock''' icon that controls the state ('''locked''' or '''unlocked''') of that layer</td> | ||
| + | </tr> | ||
| + | <tr valign="top"> | ||
| + | <td width=10>[[image:BlueDot10x10.png|link=]]</td> | ||
| + | <td>The '''Route Layers Group''' has a '''Padlock''' icon that controls the state ('''locked''' or '''unlocked''') of '''ALL''' the route layers</td> | ||
</tr> | </tr> | ||
</table> | </table> | ||
| Line 3,707: | Line 3,817: | ||
<tr valign="top"> | <tr valign="top"> | ||
<td>[[image:BlueDot10x10.png|link=]]</td> | <td>[[image:BlueDot10x10.png|link=]]</td> | ||
| − | <td>Only ''' | + | <td>Only '''Route''' and '''Session''' layers can be selected as the '''Active Layer'''</td> |
</tr> | </tr> | ||
</table> | </table> | ||
| Line 3,713: | Line 3,823: | ||
<table width=1000> | <table width=1000> | ||
<tr> | <tr> | ||
| − | <td>The active layer is shown in the palette with its name on a blue background. | + | <td>The active layer is shown in the palette with its name on a <span style="font-weight: 700; font-size: 15px; color: white; background-color: blue;"> Blue </span> or <span style="font-weight: 700; font-size: 15px; color: white; background-color: grey;"> Light Grey </span> background. The name of the current '''Active Layer''' is also shown in the '''Layer Palette Title Bar'''. In the images below the '''Rail Workers''' layer from the '''Session Layers Group''' is the current '''Active Layer'''.</td> |
</tr> | </tr> | ||
</table> | </table> | ||
<table width=1000> | <table width=1000> | ||
<tr valign="top"> | <tr valign="top"> | ||
| − | <td width=200>[[image:LayersPalette_S20_ActiveLayer.png|link=| | + | <td width=200>[[image:LayersPalette_S20_ActiveLayer.png|link=]]</td> |
| + | <td width=10> </td> | ||
| + | <td width=200>[[image:LayersPalette_S20_ActiveLayer2.png|link=]]</td> | ||
<td> | <td> | ||
| − | <table | + | <table bgcolor=#000000 cellpadding=2> |
<tr valign="top"> | <tr valign="top"> | ||
<td> | <td> | ||
| − | <table | + | <table bgcolor=#ffffff cellpadding=2> |
<tr valign="top"> | <tr valign="top"> | ||
<td colspan=2><span style="font-weight: 700; font-size: 15px;">Steps:</span> To set a new '''Active Layer''':-</td> | <td colspan=2><span style="font-weight: 700; font-size: 15px;">Steps:</span> To set a new '''Active Layer''':-</td> | ||
| Line 3,730: | Line 3,842: | ||
<td width=20>[[image:DotPoint1.JPG|link=]]</td> | <td width=20>[[image:DotPoint1.JPG|link=]]</td> | ||
<td><span style="font-weight: 700; font-size: 15px; background-color: lightcyan;">Left Click</span> on the layer name. | <td><span style="font-weight: 700; font-size: 15px; background-color: lightcyan;">Left Click</span> on the layer name. | ||
| + | </td> | ||
| + | </tr> | ||
| + | </table> | ||
</td> | </td> | ||
</tr> | </tr> | ||
| Line 3,737: | Line 3,852: | ||
</table> | </table> | ||
<br> | <br> | ||
| − | <table bgcolor=#000000 | + | <table bgcolor=#000000 cellpadding=2> |
<tr valign="top"> | <tr valign="top"> | ||
<td> | <td> | ||
| − | <table bgcolor=#ffffe0 | + | <table bgcolor=#ffffe0 cellpadding=2> |
<tr valign="top"> | <tr valign="top"> | ||
<td>[[image:PencilTips.PNG|link=]]</td> | <td>[[image:PencilTips.PNG|link=]]</td> | ||
<td>You can also use the '''Info Palette''' to set the layer occupied by a selected object as the '''Active Layer'''</td> | <td>You can also use the '''Info Palette''' to set the layer occupied by a selected object as the '''Active Layer'''</td> | ||
| − | |||
| − | |||
| − | |||
</tr> | </tr> | ||
</table> | </table> | ||
| Line 3,825: | Line 3,937: | ||
<tr valign="top"> | <tr valign="top"> | ||
<td>[[image:Stop.PNG|link=]]</td> | <td>[[image:Stop.PNG|link=]]</td> | ||
| − | <td><span style="font-size: 15px; font-weight: 700;"> | + | <td><span style="font-size: 15px; font-weight: 700;">Warning:</span> Setting a layer for multiple objects that are in different layers will move '''ALL''' those objects to that layer. If this moves any of them from one layer group to another (such as from the '''Route Layers''' to the '''Session Layers''') then it will change where those objects are saved (in the '''Route''' or in the '''Session''')</td> |
| − | Setting a layer for multiple objects that are in different layers will move ALL those objects to that layer. If this moves any of them from one layer group to another (such as from the '''Route Layers''' to the '''Session Layers''') then it will change where those objects are saved (in the '''Route''' or in the '''Session''')</td> | + | |
</tr> | </tr> | ||
</table> | </table> | ||
| Line 3,902: | Line 4,013: | ||
</tr> | </tr> | ||
<tr valign="top"> | <tr valign="top"> | ||
| − | <td | + | <td>[[image:DotPoint.JPG|10px|link=]]</td> |
| − | </td> | + | <td><span style="font-weight: 700; font-size: 15px;">But <span style="background-color: yellow;"> <span style="text-decoration: underline;">NOT</span> Rolling Stock (Trains) </span></span></td> |
</tr> | </tr> | ||
<tr valign="top"> | <tr valign="top"> | ||
| − | <td colspan=2>Ground heights, textures and effect layers are always included in a scrapbook but you can control which | + | <td colspan=2>Ground heights, textures and effect layers are always included in a scrapbook but you can control which scenery objects are added by manually selecting them or using the filter controls in the '''Assets Palette'''</td> |
</tr> | </tr> | ||
</table> | </table> | ||
| Line 4,019: | Line 4,130: | ||
</tr> | </tr> | ||
<tr> | <tr> | ||
| − | <td colspan=2><span style="font-weight: 700; font-size: 15px;">Steps:</span></td> | + | <td colspan=2> |
| + | <table bgcolor=#ffffff> | ||
| + | <tr valign="top"> | ||
| + | <td colspan=2><span style="font-weight: 700; font-size: 15px;">Steps:</span> To disable built-in scrapbooks</td> | ||
</tr> | </tr> | ||
<tr valign="top"> | <tr valign="top"> | ||
| Line 4,028: | Line 4,142: | ||
<tr valign="top"> | <tr valign="top"> | ||
<td>[[image:DotPoint2.JPG|link=]]</td> | <td>[[image:DotPoint2.JPG|link=]]</td> | ||
| − | <td>Highlight (select) the | + | <td>Highlight (select) the scrapbook assets individually or as a group</td> |
</tr> | </tr> | ||
<tr valign="top"> | <tr valign="top"> | ||
<td>[[image:DotPoint3.JPG|link=]]</td> | <td>[[image:DotPoint3.JPG|link=]]</td> | ||
| − | <td>Open the '''Content''' menu and select | + | <td>Open the '''Content''' menu and select the <span style="font-weight: 700; font-size: 15px; color: white; background-color: black;"> Disable </span> option</td> |
</tr> | </tr> | ||
| − | < | + | </table> |
| − | + | You can reverse this and enable any or all of these scrapbooks at any time if you need them.</td> | |
</tr> | </tr> | ||
</table> | </table> | ||
| Line 4,078: | Line 4,192: | ||
</tr> | </tr> | ||
<tr> | <tr> | ||
| − | <td colspan=2> | + | <td colspan=2>Then choose one of the following:-</td> |
| − | + | ||
| − | Then choose one of the following:- | + | |
| − | + | ||
| − | </td> | + | |
</tr> | </tr> | ||
<tr valign="top"> | <tr valign="top"> | ||
| Line 4,097: | Line 4,207: | ||
</tr> | </tr> | ||
<tr valign="top"> | <tr valign="top"> | ||
| − | <td | + | <td colspan=2> |
| − | + | <table width=796 bgcolor=#ffffb0 cellpadding=2> | |
| − | <table width= | + | |
<tr valign="top"> | <tr valign="top"> | ||
<td width=25>[[image:NotePad.PNG|link=]]</td> | <td width=25>[[image:NotePad.PNG|link=]]</td> | ||
| − | <td><span style="font-size: 17px; font-weight: 700;">Notes:'''</span><br> | + | <td width=645><span style="font-size: 17px; font-weight: 700;">Notes:'''</span><br> |
| − | ---- | + | ----</td> |
| − | '''Rolling Stock Objects''' cannot be added to a '''Scrapbook'''</td> | + | </tr> |
| + | <tr valign="top"> | ||
| + | <td width=10>[[image:DotPoint.JPG|10px|link=]]</td> | ||
| + | <td>'''Rolling Stock Objects''' cannot be added to a '''Scrapbook'''</td> | ||
| + | </tr> | ||
| + | <tr valign="top"> | ||
| + | <td>[[image:DotPoint.JPG|10px|link=]]</td> | ||
| + | <td>Regardless of how it is created, the ground height, ground textures and, if present, effect layers under the selected objects will always be added to the scrapbook.</td> | ||
</tr> | </tr> | ||
</table> | </table> | ||
| Line 4,153: | Line 4,269: | ||
<tr valign="top"> | <tr valign="top"> | ||
<td>[[image:PencilTips.PNG|link=]]</td> | <td>[[image:PencilTips.PNG|link=]]</td> | ||
| − | <td>The thumbnail image will be taken using the current camera '''POV''' (point of view). Move the cursor position and zoom in/out to get the best possible shot of the '''Scrapbook''' objects before giving the <span style="font-weight: 700; font-size: 15px; color: white; background-color: black;"> Cut </span> or <span style="font-weight: 700; font-size: 15px; color: white; background-color: black;"> Copy </span> | + | <td>The thumbnail image will be taken using the current camera '''POV''' (point of view). Move the cursor position and zoom in/out to get the best possible shot of the '''Scrapbook''' objects before giving the <span style="font-weight: 700; font-size: 15px; color: white; background-color: black;"> Cut </span> or <span style="font-weight: 700; font-size: 15px; color: white; background-color: black;"> Copy </span> options |
</td> | </td> | ||
</tr> | </tr> | ||
| Line 4,271: | Line 4,387: | ||
</tr> | </tr> | ||
</table> | </table> | ||
| − | + | <br> | |
| − | [[image:ScrapbookEntryCM_S20.png|link=]]<br> | + | <table width=1000> |
| − | + | <tr valign="top"> | |
| − | + | <td width=570>[[image:ScrapbookEntryCM_S20.png|link=]]</td> | |
| + | <td> | ||
| + | <table width=430 bgcolor=#000000 cellpadding=2> | ||
| + | <tr valign="top"> | ||
| + | <td> | ||
| + | <table width=426 bgcolor=#ffffb0 cellpadding=2> | ||
| + | <tr valign="top"> | ||
| + | <td> | ||
| + | <table> | ||
| + | <tr valign="top"> | ||
| + | <td width=25>[[image:NotePad.PNG|link=]]</td> | ||
| + | <td width=400><span style="font-size: 17px; font-weight: 700;">Notes:'''</span><br> | ||
| + | ---- | ||
| + | </td> | ||
| + | </tr> | ||
| + | </table> | ||
| + | <table> | ||
| + | <tr valign="top"> | ||
| + | <td width=10>[[image:DotPoint.JPG|10px|link=]]</td> | ||
| + | <td>If a '''Pinned''' scrapbook is deleted from the '''Scrapbook Palette''' then it will also be deleted as an asset from '''Content Manager'''</td> | ||
| + | </tr> | ||
| + | <tr valign="top"> | ||
| + | <td width=10>[[image:DotPoint.JPG|10px|link=]]</td> | ||
| + | <td>If a scrapbook asset is deleted (or disabled) in '''Content Manager''' then it will also be deleted from the '''Scrapbook Palette'''</td> | ||
| + | </tr> | ||
| + | </table> | ||
| + | </td> | ||
| + | </tr> | ||
| + | </table> | ||
| + | </td> | ||
| + | </tr> | ||
| + | </table> | ||
| + | </td> | ||
| + | </tr> | ||
| + | </table> | ||
| + | <br> | ||
| + | The scrapbook asset can be saved as a '''CDP''' file and uploaded to the '''DLS'''.<br> | ||
<br> | <br> | ||
<table bgcolor=#000000 width=900 cellpadding=2> | <table bgcolor=#000000 width=900 cellpadding=2> | ||
| Line 4,484: | Line 4,636: | ||
==='''Setting the Filters'''=== | ==='''Setting the Filters'''=== | ||
| + | <table bgcolor=#000000 width=1000 cellpadding=2> | ||
| + | <tr valign="top"> | ||
| + | <td> | ||
| + | <table bgcolor=#ffffe0 width=996 cellpadding=2> | ||
| + | <tr valign="top"> | ||
| + | <td width=25>[[image:PencilTips.PNG|link=]]</td> | ||
| + | <td>You will probably need to undock and resize the '''Scrapbook''' palette to make full use of its filters. Refer to [[image:PageLink.PNG|link=]] '''[[#Hiding and Showing Palettes|Hiding and Showing Palettes]]''' at the top of this document for undocking and resizing instructions</td> | ||
| + | </tr> | ||
| + | </table> | ||
| + | </td> | ||
| + | </tr> | ||
| + | </table> | ||
| + | <br> | ||
<table width=1000 bgcolor=#000000 cellpadding=2> | <table width=1000 bgcolor=#000000 cellpadding=2> | ||
<tr valign="top"> | <tr valign="top"> | ||
<td> | <td> | ||
| − | <table bgcolor=#ffffff | + | <table width=996 bgcolor=#ffffff cellpadding=2> |
<tr valign="top"> | <tr valign="top"> | ||
| − | <td colspan=2><span style="font-weight: 700; font-size: 15px;"> | + | <td colspan=2><span style="font-weight: 700; font-size: 15px;">Steps:</span> To Open the Scrapbook Filters</td> |
</tr> | </tr> | ||
<tr valign="top"> | <tr valign="top"> | ||
| − | <td width= | + | <td width=25>[[image:DotPoint1.JPG|link=]]</td> |
<td><span style="font-weight: 700; font-size: 15px; background-color: lightcyan;">Left Click</span> on the '''arrowhead''' next to the <span style="font-weight: 700; font-size: 15px; color: white; background-color: black;"> Filters: </span> label below the scrapbook image to open the scrapbook filters.</td> | <td><span style="font-weight: 700; font-size: 15px; background-color: lightcyan;">Left Click</span> on the '''arrowhead''' next to the <span style="font-weight: 700; font-size: 15px; color: white; background-color: black;"> Filters: </span> label below the scrapbook image to open the scrapbook filters.</td> | ||
</tr> | </tr> | ||
| Line 4,514: | Line 4,679: | ||
<td colspan=3> | <td colspan=3> | ||
<table bgcolor=#ffffe0 width=596 cellpadding=2> | <table bgcolor=#ffffe0 width=596 cellpadding=2> | ||
| − | <tr | + | <tr> |
<td>[[image:PencilTips.PNG|link=]]</td> | <td>[[image:PencilTips.PNG|link=]]</td> | ||
| − | <td>You can vary the appearance of the scrapbook when added to a route by painting or pasting it with different filter combinations | + | <td><span style="font-weight: 700; font-size: 15px;">Sample Filter Settings:-</span><br> |
| + | You can vary the appearance of the scrapbook when added to a route by painting or pasting it with different filter combinations</td> | ||
</tr> | </tr> | ||
</table> | </table> | ||
| Line 4,551: | Line 4,717: | ||
<tr valign="top"> | <tr valign="top"> | ||
<td>[[image:PencilTips.PNG|link=]]</td> | <td>[[image:PencilTips.PNG|link=]]</td> | ||
| − | <td>You can also add more variety when painting a '''Scrapbook''' by changing its '''Tool Options Palette''' <span style="font-weight: 700; font-size: 15px; color: gold; background-color: black;"> Scale </span> | + | <td>You can also add more variety when painting a '''Scrapbook''' by changing its '''Tool Options Palette''' <span style="font-weight: 700; font-size: 15px; color: gold; background-color: black;"> Scale </span> and <span style="font-weight: 700; font-size: 15px; color: gold; background-color: black;"> Rotation </span> settings in combination with different '''Filter''' selections (as shown above)</td> |
</tr> | </tr> | ||
</table> | </table> | ||
| Line 4,735: | Line 4,901: | ||
<table> | <table> | ||
<tr valign="top"> | <tr valign="top"> | ||
| − | <td width= | + | <td width=20>[[image:DotPoint1Blue.png|link=]]</td> |
<td>'''All Installed Content''' which covers all offline ('''non-MPS''') content, and</td> | <td>'''All Installed Content''' which covers all offline ('''non-MPS''') content, and</td> | ||
</tr> | </tr> | ||
<tr valign="top"> | <tr valign="top"> | ||
| − | <td>[[image: | + | <td width=20>[[image:DotPoint2Blue.png|link=]]</td> |
<td>'''multiplayersurveyor''' which includes all the default content on the live '''MPS Server'''</td> | <td>'''multiplayersurveyor''' which includes all the default content on the live '''MPS Server'''</td> | ||
</tr> | </tr> | ||
| Line 4,837: | Line 5,003: | ||
</table> <!-- END Section Nav Buttons --> | </table> <!-- END Section Nav Buttons --> | ||
| − | <table width= | + | <table width=700> |
<tr valign="top"> | <tr valign="top"> | ||
<td width=345>[[image:S20_PalettePackagesViewDetails.png|link=]]</td> | <td width=345>[[image:S20_PalettePackagesViewDetails.png|link=]]</td> | ||
<td> | <td> | ||
| − | <table bgcolor=#000000 cellpadding=2> | + | <table width=355 bgcolor=#000000 cellpadding=2> |
<tr valign="top"> | <tr valign="top"> | ||
<td> | <td> | ||
| − | <table bgcolor=#ffffff cellpadding=2> | + | <table width=351 bgcolor=#ffffff cellpadding=2> |
<tr valign="top"> | <tr valign="top"> | ||
<td colspan=2><span style="font-weight: 700; font-size: 15px;">Steps:</span> To view the details of a package:-</td> | <td colspan=2><span style="font-weight: 700; font-size: 15px;">Steps:</span> To view the details of a package:-</td> | ||
| Line 4,929: | Line 5,095: | ||
<tr valign="top"> | <tr valign="top"> | ||
<td>[[image:Stop.PNG|link=]]</td> | <td>[[image:Stop.PNG|link=]]</td> | ||
| − | <td><span style="font-size: 15px; font-weight: 700;"> | + | <td><span style="font-size: 15px; font-weight: 700;">Warning:</span><br> |
If you '''Uninstall''' a package you will also delete any '''Packaged''' assets it contains that may be needed by other assets on your system, such as routes. Packaged assets may (or may not) be found on the '''DLS''' - that is a decision made by the creator of the package. They are not '''Payware''' but come as part of an installed '''DLC''' package. Trainz has no way of knowing if a "packaged" asset it is about to delete had previously been "Installed from the DLS", and could therefore be needed elsewhere, or was only installed with the package.<br> | If you '''Uninstall''' a package you will also delete any '''Packaged''' assets it contains that may be needed by other assets on your system, such as routes. Packaged assets may (or may not) be found on the '''DLS''' - that is a decision made by the creator of the package. They are not '''Payware''' but come as part of an installed '''DLC''' package. Trainz has no way of knowing if a "packaged" asset it is about to delete had previously been "Installed from the DLS", and could therefore be needed elsewhere, or was only installed with the package.<br> | ||
| − | Uninstalling a package can leave you will some (or many) "Missing dependency" error messages. | + | Uninstalling a package can leave you will some (or many) "Missing dependency" error messages. The remedy is to use '''Content Manager''' to first perform a '''DBR''' (database repair) and then download the missing dependencies from the DLS.</td> |
| − | + | ||
| − | The remedy is to use '''Content Manager''' to first perform a '''DBR''' (database repair) and then download the missing dependencies from the DLS.</td> | + | |
</tr> | </tr> | ||
</table> | </table> | ||
| Line 4,962: | Line 5,126: | ||
</table> | </table> | ||
<br> | <br> | ||
| − | |||
With or without any packages enabled, <span style="font-weight: 700; font-size: 15px; background-color: lightcyan;">Left Click</span> on the icon showing 3 horizontal bars (bottom right) to open a menu.<br> | With or without any packages enabled, <span style="font-weight: 700; font-size: 15px; background-color: lightcyan;">Left Click</span> on the icon showing 3 horizontal bars (bottom right) to open a menu.<br> | ||
[[image:S20_PalettePackagesMenu.png|link=]]<br> | [[image:S20_PalettePackagesMenu.png|link=]]<br> | ||
| Line 5,140: | Line 5,303: | ||
The next step is to upload the new package to the live '''MPS Server'''. | The next step is to upload the new package to the live '''MPS Server'''. | ||
| − | <table bgcolor=#000000 | + | <table width=1000 bgcolor=#000000 cellpadding=2> |
<tr valign="top"> | <tr valign="top"> | ||
<td> | <td> | ||
| Line 5,147: | Line 5,310: | ||
<td colspan=2><span style="font-weight: 700; font-size: 15px;">Steps:</span></td> | <td colspan=2><span style="font-weight: 700; font-size: 15px;">Steps:</span></td> | ||
</tr> | </tr> | ||
| + | <tr valign="top"> | ||
| + | <td width=25>[[image:DotPoint1.JPG|link=]]</td> | ||
| + | <td>Open the [[image:SurveyorSharingIcon.png|link=]] '''Surveyor Sharing Menu''' from the '''Main Menu''' icons</td> | ||
| + | </tr> | ||
| + | <tr valign="top"> | ||
| + | <td colspan=2> | ||
| + | <table> | ||
<tr valign="top"> | <tr valign="top"> | ||
<td width=170>[[image:SocialMenu.png|link=]]</td> | <td width=170>[[image:SocialMenu.png|link=]]</td> | ||
<td> | <td> | ||
<table> | <table> | ||
| − | |||
| − | |||
| − | |||
| − | |||
<tr valign="top"> | <tr valign="top"> | ||
<td>[[image:DotPoint2.JPG|link=]]</td> | <td>[[image:DotPoint2.JPG|link=]]</td> | ||
| Line 5,177: | Line 5,343: | ||
<td>[[image:S20_PalettePackagesUploadCompleted.png|link=]]</td> | <td>[[image:S20_PalettePackagesUploadCompleted.png|link=]]</td> | ||
<td>A route that has been uploaded to the '''MPS Server''' will appear with a <span style="background-color: #848dff;">            </span> colour band in the '''Surveyor Select a Route/Session''' window.</td> | <td>A route that has been uploaded to the '''MPS Server''' will appear with a <span style="background-color: #848dff;">            </span> colour band in the '''Surveyor Select a Route/Session''' window.</td> | ||
| + | </tr> | ||
| + | </table> | ||
| + | </td> | ||
</tr> | </tr> | ||
</table> | </table> | ||
Revision as of 23:06, 9 June 2023
The information in this Wiki Page applies to Surveyor 2.0 (S20) as found in Trainz Plus. The original refernce material for this document can be found at ![]() Surveyor 2.0 Overview
Surveyor 2.0 Overview
|
 |
The Surveyor 2.0 World |
| When you start Trainz in Surveyor 2.0 the world presented will look something like the following image, but what you actually see can be highly customised to your own preferences. |
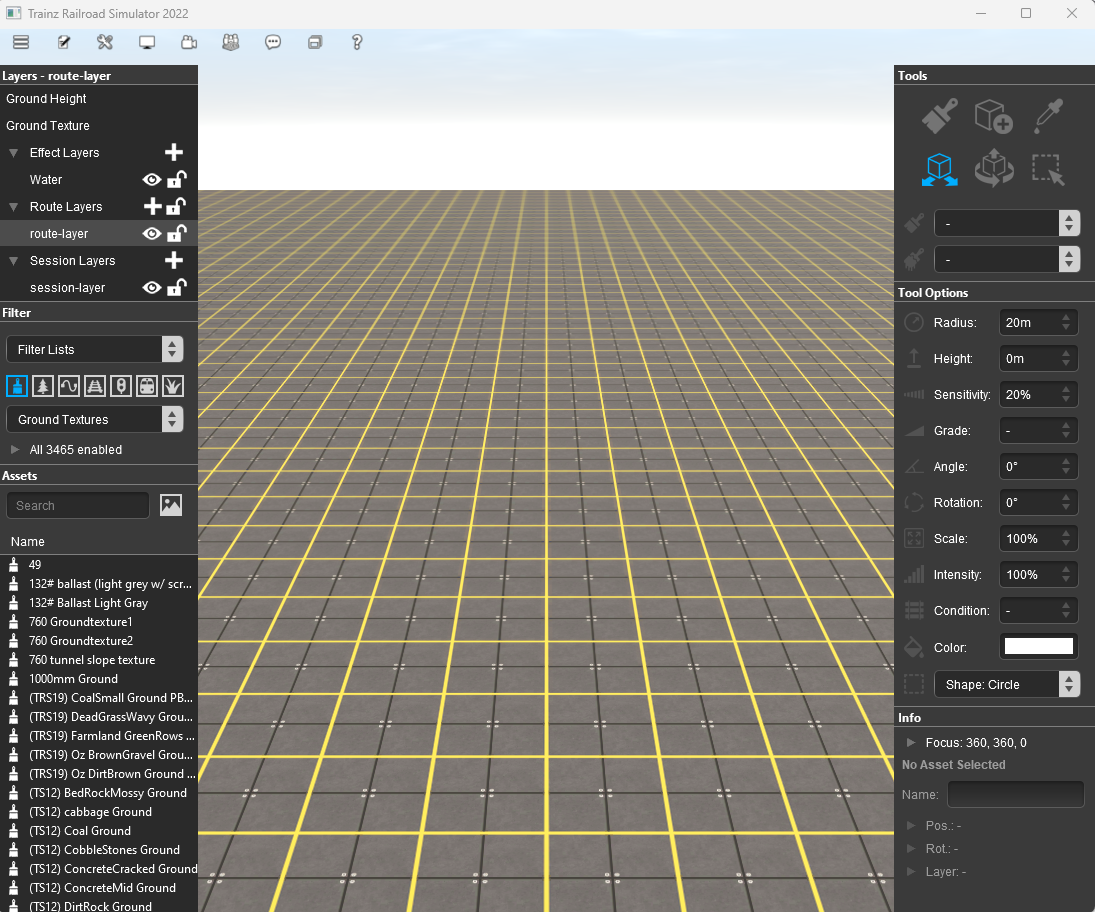
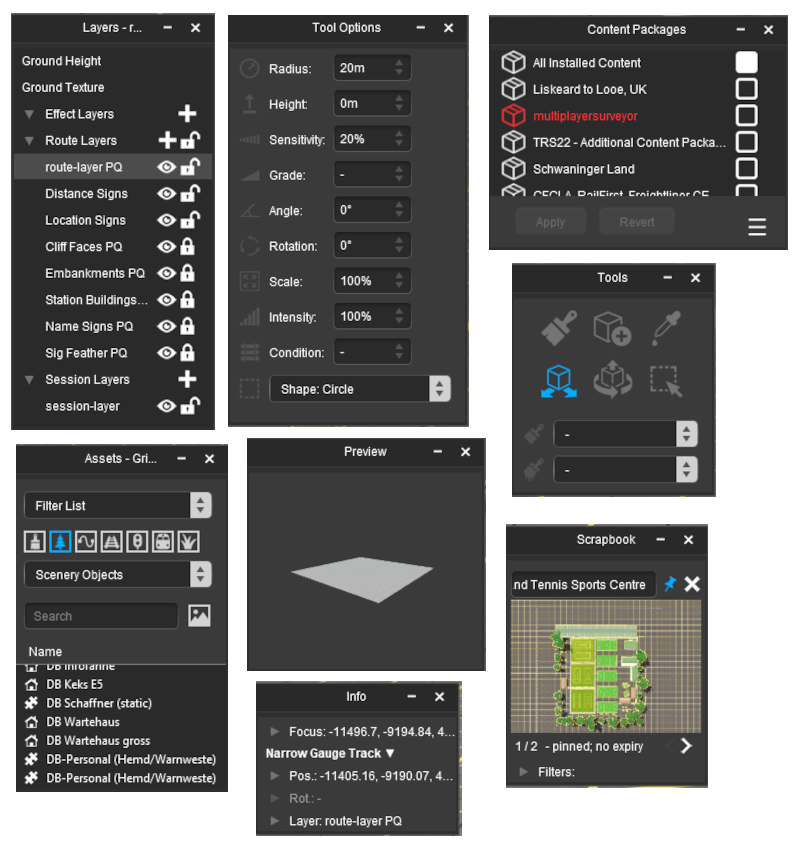
| The dark grey strips on the left and right of the screen contain Palettes that have been Docked into the positions shown. Palettes are where selections can be made, information displayed and controls set. |
|
|
||||||||||||||||||||||
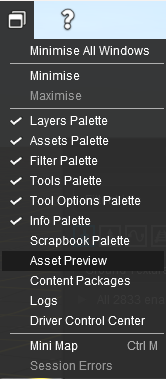
Hiding and Showing Palettes
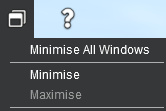
| Palettes are hidden and revealed using the Surveyor Window Menu. |
|
The 5 visible and 3 hidden Palettes in the screenshot shown above have had their visibility set by:-
|
|
||||||||||||||||||||
Docking and Undocking Palettes
| Palettes are normally Docked, locked into fixed positions on both sides of the Surveyor Screen. They can be Undocked and freed to move anywhere on the screen. |
|
Undocking a Palette
 |
|
||||||||||||||||||
Docking a Palette
 |
|
||||||||||||||||||||
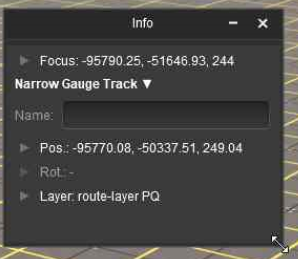
Resizing Palettes
| Only palettes that are Undocked can be resized. Some palettes have to be resized to display all their available information. |
|
 |
|
||||||||||||||||
|
|
||
Minimise Maximise Close
| Minimising will hide a palette or window but retain its size and position data. | |
| Maximising will return it to the screen using its last size and position data. | |
| Closing will hide it but its size and position data will be lost. When next displayed it will be shown docked to the side of the screen. |
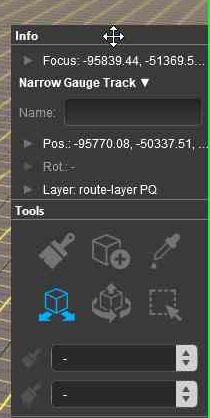
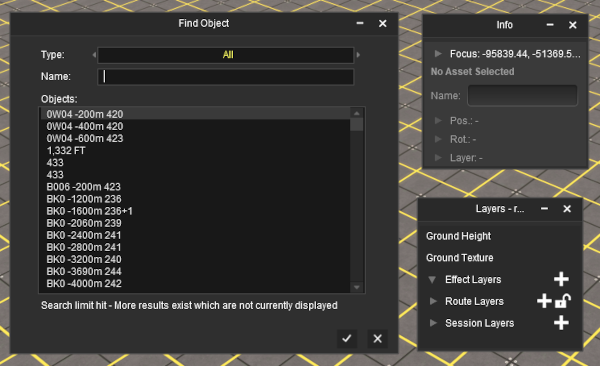
The image below shows a Surveyor 2.0 screen with an open window box (the Find Object Tool) and two Undocked palettes (Info and Layers)
 |
|
||||||||||||||||
 |
|
|||||||||||||||||
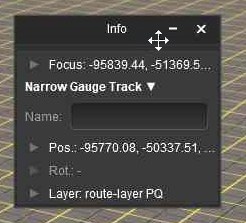
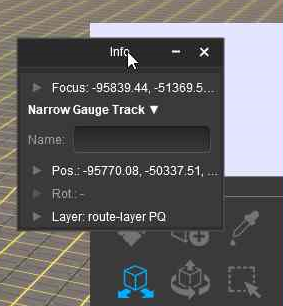
The Info Palette |
|
 |
|
||||||||||
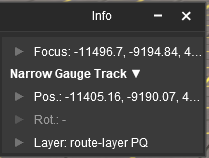
The components of the Info Palette are identified in the image below.
 |
Each of the small arrowhead icons will open the palette to display more information and some controls. |
|
||||||||||||||||||
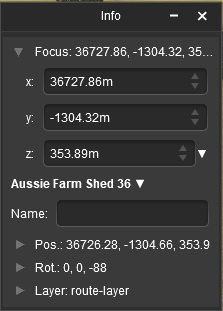
Focus Info and Controls |
| The Focus shows the current position and height of the Cursor object. |
Open up the Focus by a Left Click on its arrowhead icon.
|
 |
|
|
Next to the z co-ordinate is a small white down arrowhead. Left Click on the arrowhead to open its menu.
 |
There is only one option in the sub-menu. Use Height for Brush
|
Asset Name Menu |
You must have an object (or objects) selected for a name to be shown and for this menu to be available.
| If more than one object has been selected then the name and position data shown will be for the last selected object. If different objects (with different kuid codes) have been selected then a count of the additional objects will be added. The (+2) shown in the object name in the image on the left indicates that 2 additional different objects are in the group of selected objects. |
Next to the objects name is a small white Down Arrowhead. Left Click on the arrowhead to open its menu.
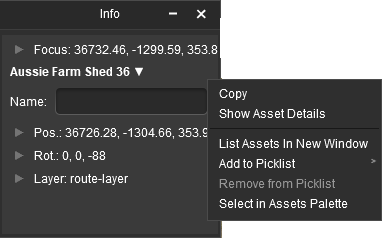 |
|
|||||||||||||||
Position Info and Controls |
You must have an object (or objects) selected for the position data to be shown and edited. Open up the position data by a Left Click on its Pos: arrowhead icon.
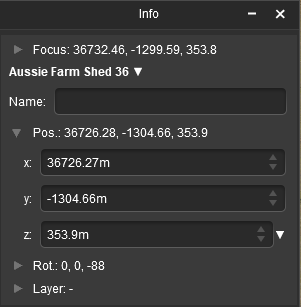 |
The position of the selected object (or the last object if more than one is selected) is shown in the x, y and z text boxes. These values can be edited to move the object or objects to a new position but CARE will be needed.
|
Next to the z co-ordinate is a small white down arrowhead. Left Click on the arrowhead to open its menu.
 |
There is only one option in the sub-menu. Use Height for Brush
|
Rotation Info and Controls |
You must have an object (or objects) selected for the rotation data to be shown and edited. Open up the rotation data by a Left Click on its Rot: arrowhead icon.
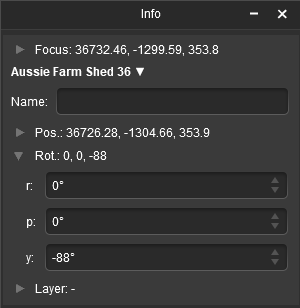 |
The rotational orientation of the selected object (or the last object if more than one is selected) is shown in the r, p and y text boxes (the letters stand for Roll, Pitch and Yaw). These values can be edited to rotate the object or objects in 3D space BUT not all objects can be rotated in certain directions.
|
|
|||||||||||||||||||||||||||||||||||
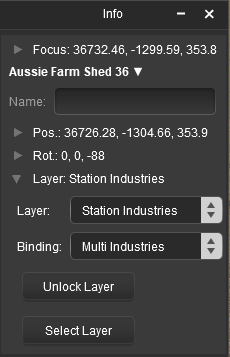
Layer Info and Controls |
You must have an object (or objects) selected for the layer data to be shown and edited. Open up the layer data by a Left Click on its Layer: arrowhead icon.
|
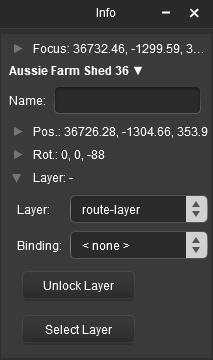 |
This will show the:-
|
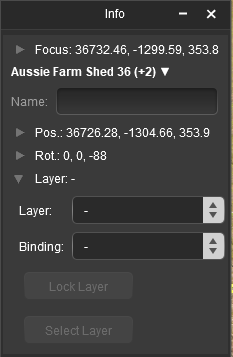 |
If multiple objects from different layers have been selected then no layer name will be shown in the Layer and Binding boxes. Instead they will be left "blank" as shown in the image on the left. Both boxes can still be opened to assign layers to objects.
|
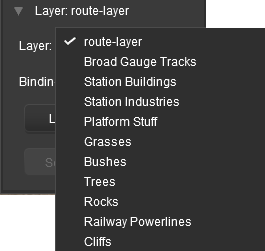
Assigning Objects to a Different Layer |
A selected object or group of selected objects can be assigned to a different layer. If multiple objects have been selected then they do not have to all be in the same layer.
 |
|
||||||||||||||
| The Active Layer is the layer used by the Placement Tool when objects are added to a route (or session). This button gives you the opportunity to set the Active Layer to the same layer that you just used to assign to an object. Its use is optional. |
|
|
||||||||||
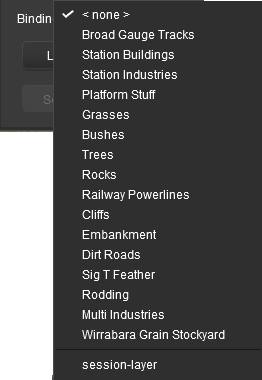
Assigning Objects to a Binding Layer |
| The Binding Layer, or Bound Layer as it is also called, is a tool used in the development of a route or session. It allows you to temporarily assign an object to a second layer while it is still in its original layer. The object will then take on the properties (Locked or Unlocked, Hidden or Visible) of both layers. |
|
|
|||||||||||||||||||||||||||||||||||||||||||||||
|
||||||||||||
 |
|
|||||||||||
| As an example, the image below shows what you will see for a single object that has had:- | |||||||||
 |
|
||||||||
 |
More information on creating, editing and using Layers can be found on the Trainz Wiki at:- |
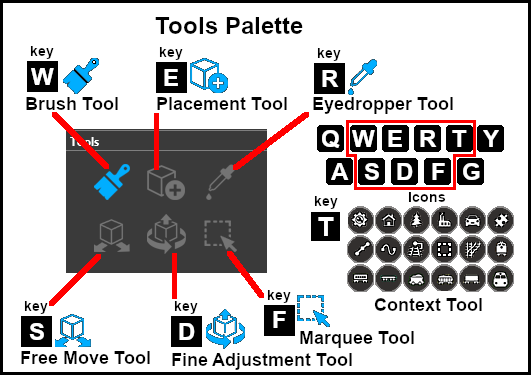
The Tools Palette |
|
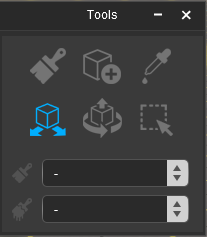 |
|
 |
The Context Tool is attached as an icon to a selected or newly placed object. The icon and its Context menu will vary according to the type of object. |
|
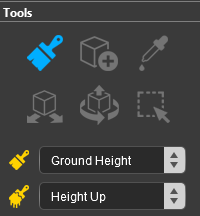
The Brush Tool
| Keyboard Shortcut: W | The Brush Tool "paints" the ground height, ground textures, effect layers and scrapbook scenes in a route |
 |
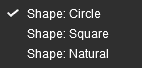
|
|||||||||||||||||||

| The Brush Targets Ground Height , Scrapbook Data and Effect Layers have a second drop down menu that controls the Brush Action. |
|
The Placement Tool
| Keyboard Shortcut: E | The Placement Tool adds objects to a route |
 |
|
||||||||||||||||||||||
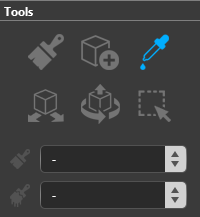
The Eyedropper Tool
| Keyboard Shortcut: R | The Eyedropper Tool identifies and selects objects in a route |
 |
|
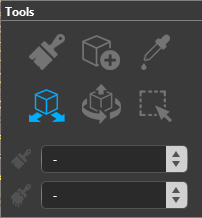
The Free Move Tool
| Keyboard Shortcut: S | The Free Move Tool moves objects around a route |
 |
|
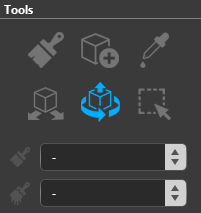
The Fine Adjustment Tool
| Keyboard Shortcut: D | The Fine Adjustment Tool makes 3D adjustments (XYZ position and rotations) to objects in a route |
 |
|
|||||||||||||||||||
|
The Marquee Tool
| Keyboard Shortcut: F | The Marquee Tool selects the content in areas of a route, creates and deletes baseboards and sets their properties. It can also be used in creating Scrapbooks |
 |
The Marquee Tool draws out a rectangular area, the Marquee Selection Area, on the route. Any objects (including Ground Heights, Ground Textures and Effect Layers) that are inside the Marquee Selection Area or touched by its boundary will be selected. The contents of the area can then be moved, rotated, deleted or copied to a Scrapbook.
|
The Tool Options Palette |
| This palette is used by various tools to set controls and parameters. For a detailed description of all the options presented by the Tools Palette for the different tools, see the Trainz Wiki page |
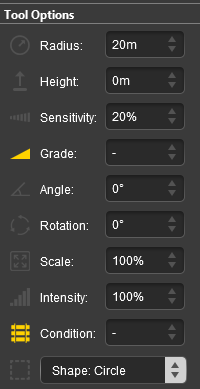
| All the Tool Options controls and settings are shown in the image below. The controls are shown in the image as being "inactive". An "active" control will have its icon (to the left of the control name) shown in Gold . Different Brush Types and Brush Actions will activate different controls. | |||||||||||||||||||||||||||||||||||||||||||||||||||||||||||||||
 |
|
||||||||||||||||||||||||||||||||||||||||||||||||||||||||||||||
|
Tool Options Popups |
| Most of the data entry boxes in the Tool Options Palette have a Popup Menu. Right Click inside a box to bring up its menu |
 |
|
|||||||||||||
|
 |
|
|||||||||||
 |
|
||||||||||||
 |
|
||||||||||||
Tool Options Active Controls |
| Different Tool Palette and Brush Type selections will activate different option controls |
Some examples of when the controls will become active are:-
| If a Brush Tool is selected then the exact controls that will be active will vary between the different brushes and brush actions. For example, selecting the Ground Height Brush and the Set Height brush action will active the following Tool Options. |
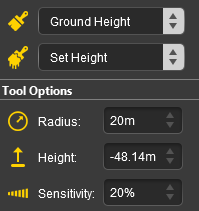 |
|
|||||||||||||||||||
| If a Track Spline Object is selected with the Free Move Tool or the Fine Adjustment Tool then the following Tool Options will become active. |
 |
|
||||||||||||||||||
| If the Scrapbook Data Brush is selected to paint the current Scrapbook into the route then certain controls that will affect the painting of the Scrapbook will, depending on the brush action selected, become active. |
Scrapbook Brush 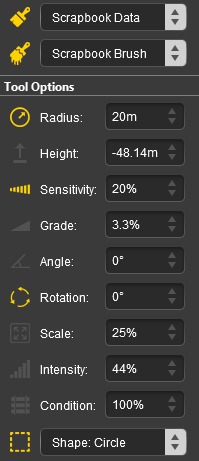 |
Scrapbook Clone 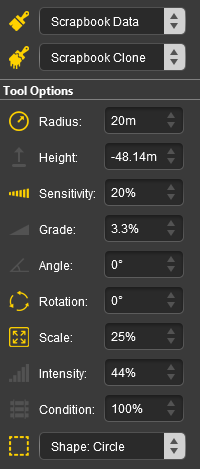 |
|
|||||||||||||||||||||||||||||||||||||||
|
More examples and more detailed descriptions of the Tool Options Palette Active Controls can be found on the Trainz Wiki at:- |
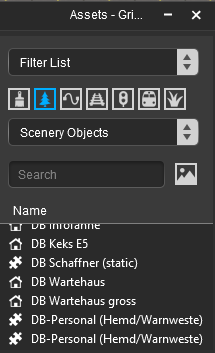
The Assets Palette |
| This palette is used by various tools and other palettes to select and identify assets and objects. It includes a filter function to narrow down the search and selection process. |
Using the Asset Filters
| The Assets Palette provides filter options that can be used with the Placement Tool, Free Move Tool, Fine Adjustment Tool, Marquee Tool and the Eyedropper Tool. |
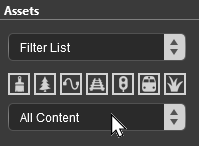
|
Steps:
![]() The first filter option controls where the filters are applied.
The first filter option controls where the filters are applied.
 |
|
| It is recommended that you also make use of either Step |
| The second filter is optional and identifies the type of asset that will be selected by the filter. This option can be selected by a Left Click on a icon that represents the different types of assets or selecting the type of asset from a drop down list. |
Options: Choose from:-
|
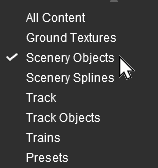
OR |
|
| The third filter is also optional. You can enter a string of text characters that will be used to search the asset names and their descriptions for a match. Those assets that return a positive match, together with a positive asset type, will be shown in the filter name list. |
|
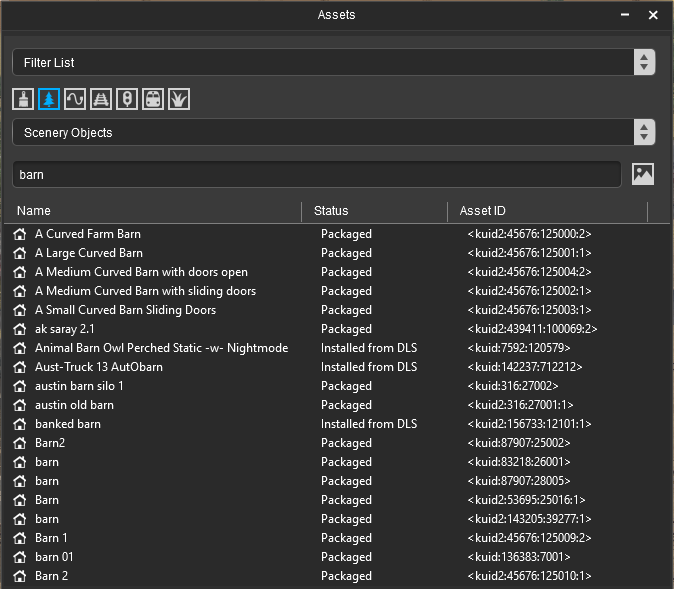
An example: To search for all Scenery Objects that have the text string "barn" in their name or description:-
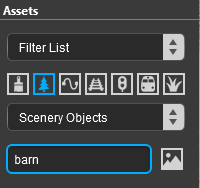 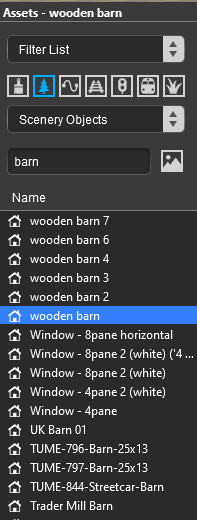 |
|
||||||||||||||||||||||||||||||
Expanding the Assets Name List View |
The list of asset names shown below the filter controls can be expanded to provide more information about each asset.
|
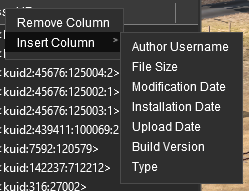
Just like in Content Manager, additional columns can be added, removed, resized and moved to a different position.
|
|||||||||||||||||||||||||
|
Thumbnail View |
As an alternative to the list view of filtered assets, there is a thumbnail view option. Again this works best when the Assets Palette has been undocked.
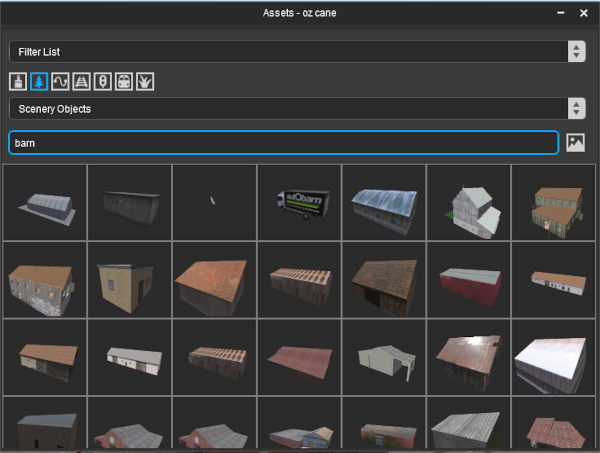 |
|
|||||||||||||
The Layers Palette |
| This palette is used to manage layers, both object (route and session) and effect (TurfFX, clutter and water) layers | |
| It can create, rename, merge, delete, move, hide/show and lock/unlock layers and set the Active Layer |
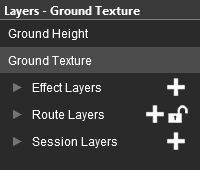 |
The Layers Palette will show all the layers in their groups (Effect, Route and Session) plus the Ground Height and Ground Textures special "layers". In the image on the left all the layer groups have been minimised (the arrowhead symbol to the left of each group name is pointing to the right).
|
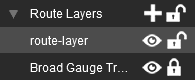
Lock the Route Layer Group
| All the Route Layers can be locked against accidental alteration. | ||
The Route Layers group has a open padlock icon next to its name - shown as ![]() (unlocked).
(unlocked).
|
||||||
Open a Layer Group
To the left of each group name is a small arrowhead pointing to the right. Left Click on the arrowhead to open up the group.
 |
The image on the left shows that the Session Layers is open and its individual layers are now displayed. To close or minimise the group Left Click on the arrowhead again. The image shows that the Session Layers contains 3 individual layers:-
|
Add a New Layer
| You cannot create new layer groups but you can add new layers to a existing group. |
| Each layer group has a |
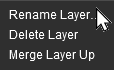
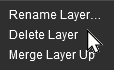
Renaming a Layer
 |
|
|||||||
|
Deleting a Layer
|
 |
|
|||||||||||||||
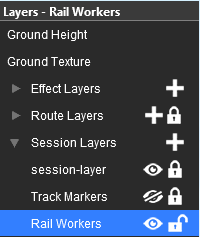
Moving a Layer
| Layers can be individually moved up and down within the same layer group or between the Route Layers and the Session Layers groups. |
|
|||||||||||||||
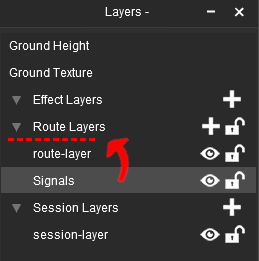
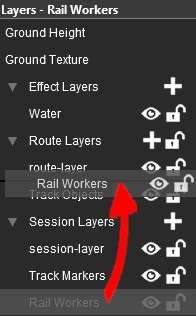 Moving the Rail Workers layer up one level |
|
|||||||||||||||
|
||||||||||||||||||||||||||

Merging a Layer
| A layer can be merged with the layer immediately above it |
 |
|
|||||||
|
Hiding Layers
| Each individual layer has an Eye icon that controls the state (visible or hidden) of that layer |
Left Click on the Eye icon to toggle its state between visible and hidden.
|
|
||||||||||||||||||
Locking Layers
| Each individual layer has a Padlock icon that controls the state (locked or unlocked) of that layer | |
| The Route Layers Group has a Padlock icon that controls the state (locked or unlocked) of ALL the route layers |
Left Click on the Padlock icon to toggle its state between locked and unlocked
|
|
||||||||||||||||||
Setting the Active Layer
| The Active Layer is the layer where new objects will be automatically added when using the Placement Tool | |
| Only Route and Session layers can be selected as the Active Layer |
| The active layer is shown in the palette with its name on a Blue or Light Grey background. The name of the current Active Layer is also shown in the Layer Palette Title Bar. In the images below the Rail Workers layer from the Session Layers Group is the current Active Layer. |
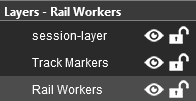 |
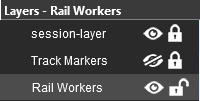 |
|
||||||
|
Move an Object to Another Layer
| Use the Info Palette to move objects to another layer. |
| The Info Palette will show the layer assigned to the currently selected object. An object is selected by using the Free Move Tool (the S key) or the Fine Adjustment Tool (the D key) found in the Tools Palette. |
||||||||||||||||||||
|
|
|
|||||||||||||||||||

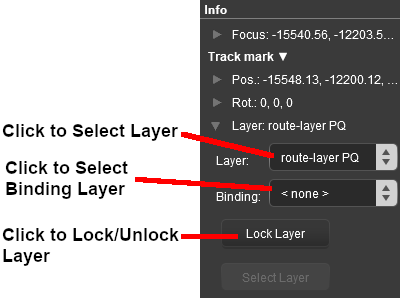
The Scrapbook Palette |
|
| This palette manages the Scrapbooks that you have created yourself, installed from other sources (such as the DLS) or came installed with Trainz. It also controls which parts of a scrapbook are pasted or painted into a route. |
|
|
||||||||||||||||||||||||||||||||||
|
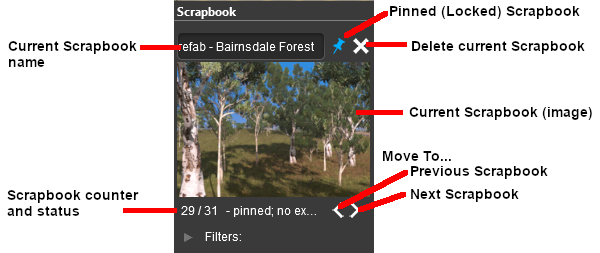
|
|||||||||||||||
Creating a New Scrapbook |
|
||||||||||||||||||||||||
|
When a new Scrapbook is created by a Cut or Copy , it will appear in the Scrapbook palette with some basic details.
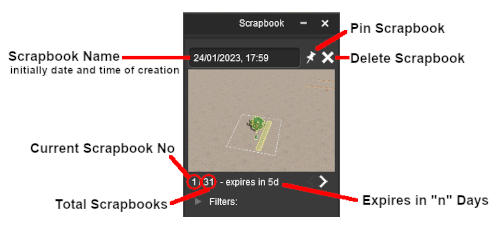 |
|
|||||||||||||||
|
|
|
 |
||||||||||
| Once a scrapbook has been Pinned it becomes an asset and will appear in Content Manager |
 |
|
The scrapbook asset can be saved as a CDP file and uploaded to the DLS.
|
Painting or Pasting a Scrapbook |
| Existing Scrapbooks can be painted into a route using the Brush Tool (see the Trainz Wiki page When using the Brush Tool to paint a Scrapbook you will have a choice of two different brushes or Targets - the Scrapbook Brush and the Scrapbook Clone . The action of each brush will be controlled by its Tool Options Palette settings. |
| Scrapbook Brush |
Scrapbook Clone |
|
||||||||||||||||||||||||||||||||||||||
|
|
||||||||||
Setting the Filters
|
|
||||||
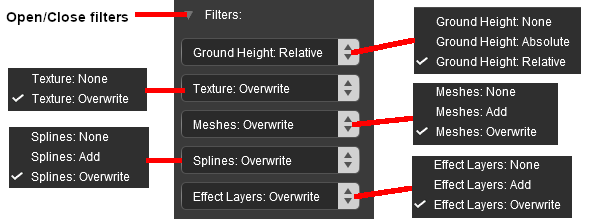
|
|
||||||||||||||||||||||||||||||||||||||||||||||||||||||||||||||||||||||||
The Asset Preview Palette |
| This palette gives a rotating 3D view of an asset that has been selected in the Assets Palette. It works with all assets except effect layers. |
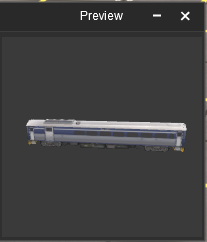 |
The Asset Preview Palette can be enlarged once it has been undocked. The current Surveyor 2.0 version has no display or control options and lacks the "zoom" and other features found in the Preview function of Content Manager. |
The Content Packages Palette |
| This palette is mainly intended for content creators, particularly MPS (Multi Player Surveyor) content. It helps manage, prepare and upload to the MPS Server a user created "Content Package". The web site for the TCCP (Trainz Content Creation Program) can be found at info.trainzsimulator.com/tccp |
|
|
The palette lists all the installed Content Packages that have assets available for use. Two special packages are included in the list:-
| All Installed Content which covers all offline (non-MPS) content, and | |
| multiplayersurveyor which includes all the default content on the live MPS Server |
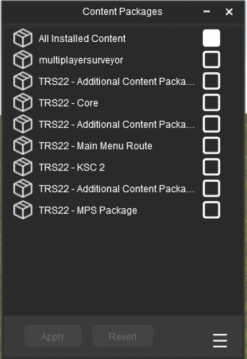 |
|
|||||||||||||||||||||
|
Content Package Details |
 |
|
|||||||
Some packages will display the message ![]()
If details are available then something like the following example will be shown.
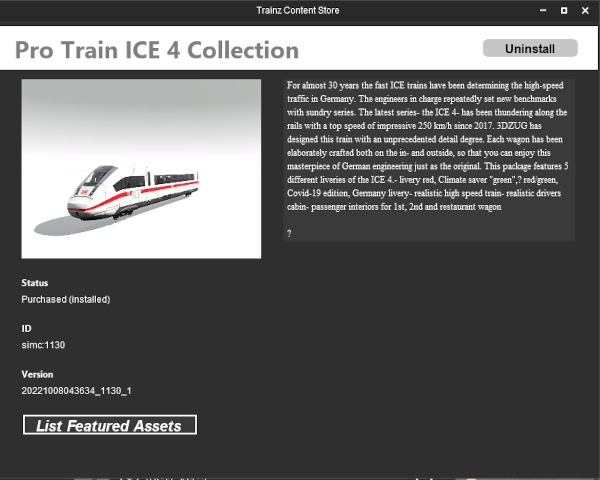 |
|
|||||||||||||||||
|
Testing the Packages |
| While you can manually select the packages to be enabled, an easier option may be to let the program perform that task. |
With or without any packages enabled, Left Click on the icon showing 3 horizontal bars (bottom right) to open a menu.

|
||||||||||
|
||||||||
Dealing with Unsupported Assets |
If you have manually selected and enabled the packages you want to include and have been shown a list of assets that are not supported by your selection, then you will need to identify the missing packages (if any) and add them manually.
|
||||||||||||||
| If you have used the Automatically Enable Required Packages option then any unsupported assets found will not belong to any installed packages. In this case you will need to create a new package using TCCP and add them to that package - see the Trainz Wiki Page at |
||||||||||||||
Apply and Upload |
Once you have enabled the required packages, you need to prepare the route for uploading to the live MPS Server
|
||||||||||||||
The next step is to upload the new package to the live MPS Server.
|
|||||||||||||||||||
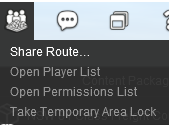
Trainz Wiki
 |
More Tutorials and Guides to Using Trainz |
This page was created by Trainz user pware in February 2023 and was last updated as shown below.