SAR Scenarios Tutorial
m |
m |
||
| Line 193: | Line 193: | ||
</table> <!-- END Path M to B Table --> | </table> <!-- END Path M to B Table --> | ||
<br> | <br> | ||
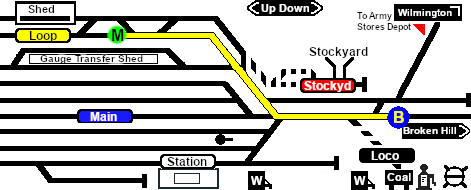
| − | Once the path has been set, use the '''Driver Speed Dial''', the keyboard controls ('''W''', '''S''', '''X'''), advanced on screen controls, or the '''AI''' to drive the train out of '''Gladstone Yard''' to '''Caltowie'''. <span style="font-weight: 700;">Step <span style="color: white; background-color: blue; font-size: 16px;"> 2 </span></span> below explains this process.<br> | + | Once the path has been set, use the '''Driver Speed Dial''', the keyboard controls ('''W''', '''S''', '''X'''), advanced on-screen controls, or the '''AI''' to drive the train out of '''Gladstone Yard''' to '''Caltowie'''. <span style="font-weight: 700;">Step <span style="color: white; background-color: blue; font-size: 16px;"> 2 </span></span> below explains this process.<br> |
<table cellpadding="4" bgcolor=#ffffb0> <!-- BEGIN Tip Table --> | <table cellpadding="4" bgcolor=#ffffb0> <!-- BEGIN Tip Table --> | ||
| Line 278: | Line 278: | ||
<tr valign="top"> | <tr valign="top"> | ||
<td>[[file:DotPoint.JPG|link=]]</td> | <td>[[file:DotPoint.JPG|link=]]</td> | ||
| − | <td> | + | <td>To provide a stopping guide for manual driving, especially for those locations without signals, '''all''' locations have a '''Caution''' track sign placed just in front of the yard entry point and clear of all invisible signals.</td> |
</tr> | </tr> | ||
</table> <!-- END Dot Point --> | </table> <!-- END Dot Point --> | ||
| Line 325: | Line 325: | ||
<tr valign="top"> | <tr valign="top"> | ||
<td>[[file:DotPoint.JPG|link=]]</td> | <td>[[file:DotPoint.JPG|link=]]</td> | ||
| − | <td>All locations in the route have '''Approach Track Marks''' placed a short distance ahead of the approach | + | <td>All locations in the route have '''Approach Track Marks''' placed a short distance ahead of the approach '''Home''' and '''IT Start''' signals, both visible and invisible, that protect the yard entry points. Alongside each is a '''Caution''' track sign.</td> |
</tr> | </tr> | ||
</table> <!-- END Dot Point --> | </table> <!-- END Dot Point --> | ||
| Line 428: | Line 428: | ||
</tr> | </tr> | ||
</table> <!-- END Bullet B --> | </table> <!-- END Bullet B --> | ||
| + | |||
| + | <table cellpadding="4" bgcolor=#ffffb0> <!-- BEGIN Tip Table --> | ||
| + | <tr valign="top"> | ||
| + | <td>[[file:PencilTips.PNG|link=]]</td> | ||
| + | <td>If you are using the manual driving controls (the keyboard or on-screen controls) and want to stop clear of an invisible '''IT Start''' signal that controls the entry '''IT''' paths into a location, such as '''Caltowie''', then stop at the '''Caution''' marker placed alongside the track in front of the semaphore signal. | ||
| + | </td> | ||
| + | </tr> | ||
| + | </table> <!-- END Tip Table --> | ||
| + | <br> | ||
<table> <!-- BEGIN Caltowie EIT paths 2 selection --> | <table> <!-- BEGIN Caltowie EIT paths 2 selection --> | ||
Revision as of 10:06, 23 March 2021
 SAR Peterborough Narrow Gauge Scenarios Tutorial SAR Peterborough Narrow Gauge Scenarios Tutorial |
| A part of the SAR Peterborough Base Session |
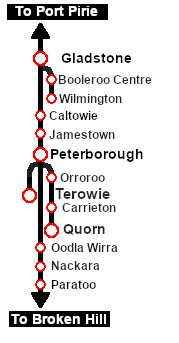
Enhanced Interlocking Towers (EITs or ITs) are included in the SAR Peterborough Base Session (they are not part of the route or layout) to provide easier navigation in some of the more complex yards in the layout. They provide paths into and out of the yards. In some cases they also provide direct paths through the yards.
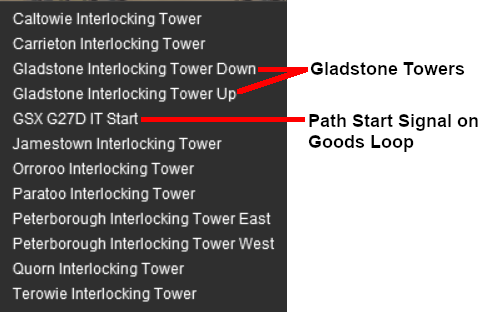
Gladstone and Peterborough have each been split into two ITs because of the large number of paths at each location. |
|
The Tutorial Scenario The scenario used in this tutorial is The task in this tutorial scenario is to drive the coal and fuel oil train out of Gladstone yard and onto the main Port Pirie to Broken Hill main line. Continue through Caltowie yard and into Jamestown yard. |
||||||||||||||||||||||||
|
|
|||||||||||||||||||||||
|
| ||||||||||||||||||||
| Step |
Gladstone to Caltowie
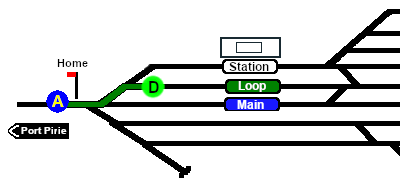
You can manually drive the train through to Caltowie without using the AI Driver Commands. This requires that all the switches along the path are correctly set. You can do this using the information on the Gladstone
You can drive by adding AI Driver Commands directly into the Driver Command Bar on the bottom right of the screen. A large number of track marks and some industies have been added to provide destinations for these commands. The approach to every location in the route has Apart from the standard commands (Drive To, Load, Unload, Couple, Wait For, etc), additional commands have been added to the session. Specifically:-
The Track Marks are shown on the Caltowie
|
|||||||||||||||||||
|
|
|
|||||||||||||
| Step |
Caltowie Interlocking Tower Caltowie does not have a coal stage or a fuel oil store in need of a refill so the consist will not be stopping here. A through path is the best option.
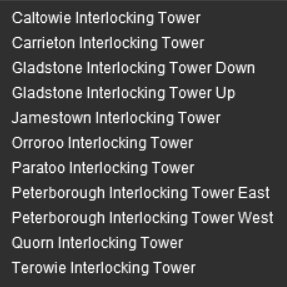
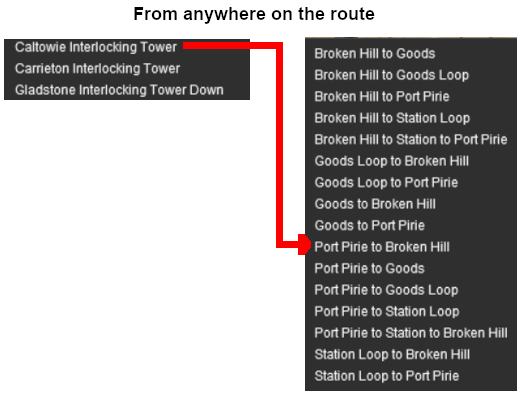
Open the Driver Command Menu and select the IT SetPath (TANE SP4 and later) option. Then select the Caltowie Interlocking Tower . This will open a list of ALL the IT paths controlled by the Caltowie IT, including any paths that will not be directly accessable to your consist.
You could also select any of the Port Pirie to ... paths. The only other through path is Port Pirie to Station to Broken Hill which will take you through the yard via the Station. The other Port Pirie to ... paths will take you into the yard but will not provide a set path out. You will need to select and set the appropriate ... to Broken Hill path to exit the yard.
Once the path has been set, use the Driver Speed Dial, the keyboard controls (W, S, X), advanced on screen controls, or the AI to drive the train through Caltowie Yard to Jamestown. Step 4 below explains this process. |
|||||||||||||
|
| ||||||||||||||||||||||||||
| Step |
Caltowie to Jamestown Caltowie does not have a coal stage or a fuel oil store in need of a refill so the consist will not be stopping here. A through path is the best option.
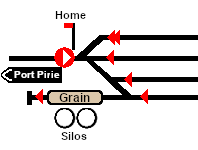
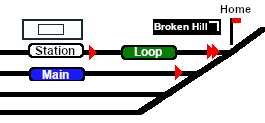
To manually drive the train through Caltowie to Jamestown you will have to set all the switches yourself using the information on the Caltowie
Notice that the Switch Track Diagram above shows three switches in red with letters as IDs - A B C .
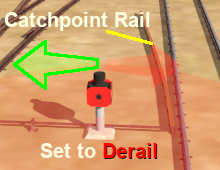
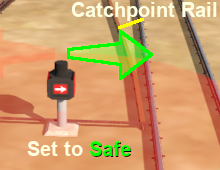
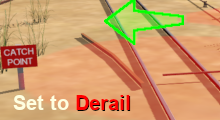
The information above shows that the default position of the Catch Points, the first direction setting shown as an (L) or an (R), is set to Catchpoint which is the Derail position.
After reaching Caltowie you can use the Track Marks placed in the yard to navigate your way through. The track marks are shown on the Caltowie
All stations on the route, including the passenger enabled stations, have track marks on both their Up and Down sides. This allows you to use the Drive To Trackmark command to reach any passenger station. The track marks are named using the name of the station (e.g. Caltowie), the word Station and the direction of travel, Up or Dn. So Caltowie has the station track marks Caltowie Station Dn and Caltowie Station Up (not shown above).
|
|||||||||||||||||||||||||
|
|
|
||||||
| Step |
Jamestown Interlocking Tower Jamestown is the final destination of this tutorial but the Gladstone-Peterborough Depot Fuel Scenario continues on to Peterborough. In this tutorial scenario, we will be using the path into the Loop road. The Jamestown The Jamestown
|
||||||
|
| |||||||||
| Step |
Arriving at Jamestown Jamestown is the final destination of this tutorial but the Gladstone-Peterborough Depot Fuel Scenario continues on to Peterborough. We will be using the Loop road as the destination in Jamestown. As at Gladstone and Caltowie, all the switches will have to be set manually. The Jamestown
The Jamestown
This ends the tutorial but you can continue the Gladstone-Peterborough Depot Fuel Scenario. |
||||||||
| Links: All links will open in this window | ||||
 Session Scenarios List |
 Location List |
 Rolling Stock |
 Active Industries |
|
This page was created by Trainz user pware in March 2021 and was last updated as shown below.

