AssetX/Tutorial Define Tools
Any program can be connected to the AssetX program to be used as a tool within AssetX.
In the first part of this tutorial we will conect PEVs Images2TGA tool to open a N3V binary texture (*.texture).
Firstly ensure that you have Images2TGA installed on the same PC as AssetX.
Open a built-in item for edit in TS12 (or TS2009, TS2010), and ensure that there is a *.texture file present for later testing.
Launch AssetX and select Configure Tools from the Options menu as in Fig 1 below.
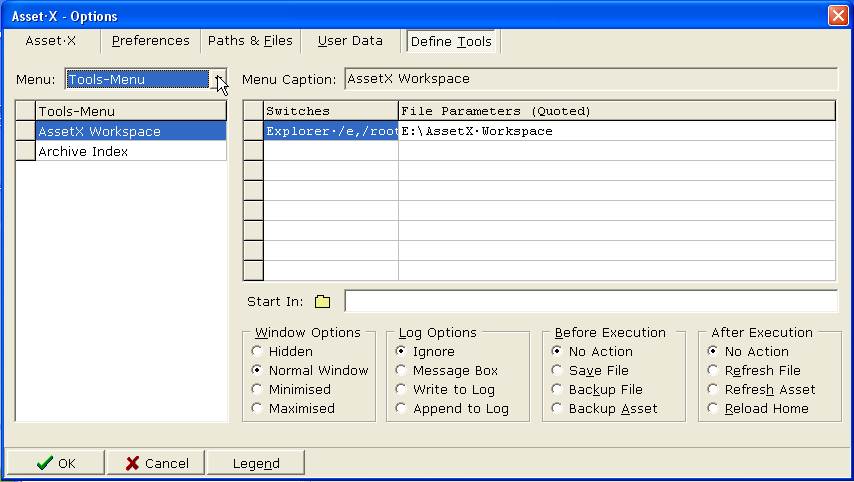
The Define Tools tab page of the options window will open as shown in Fig 2 below.
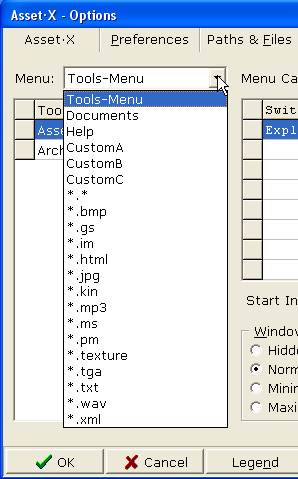
There is a drop-down box in the top left of the window named "Menu:". Click on the drop-down arrow to display the list of available menu locations, as in Fig 3 below.
Note that the list shows Menus and file types. The file types, when selected, add the new item to the Right Click menu for when that file type is selected in the AssetX File List.
In this case we choose *.texture and *.texture will be displayed in the Menu: drop-down box.
Now we give a name to the action we propose for the new tool.
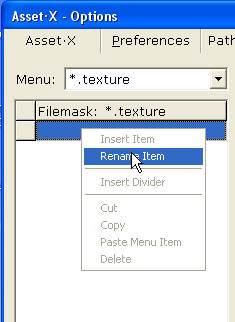
Right Click on the highlighted section immediately below the words Filemask: *.texture and select Rename Item from the pop-up menu, as in Fig 4 below.
A Data entry window will open to allow entry of an action name. Enter Convert to TGA here and click on "OK" to accept, as in Fig 5 below.
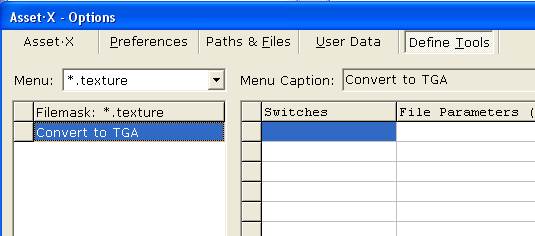
Convert to TGA will now appear at the left below Filemask: *.texture. Note also that the Menu Caption box says Convert to TGA. See Fig 6 below.
We have now defined where our tool will appear and what it's called. We now choose the program we want to run as a tool.
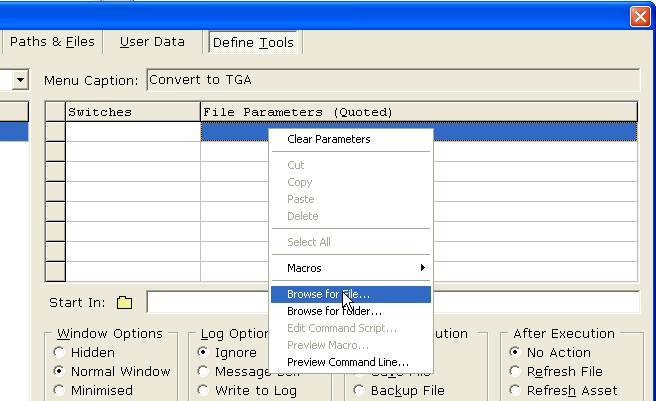
At the upper-right of the Options window we see a vacant list under the heading File Parameters (quoted). In the list Right Click on the first vacant location and select Browse for File from the pop-up menu, as shown in Fig 7 below.
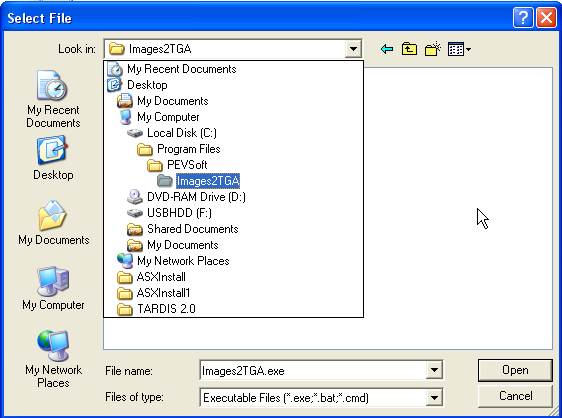
In the Select File dialogue, now presented, navigate to find the Images2TGA.exe program and select it. See Fig 8 below.
Note that the full file path to Images2TGA.exe now appears in the File Parameters List.
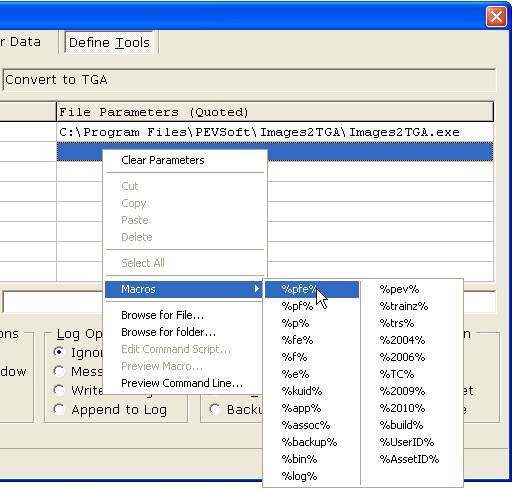
Now to choose what file we want to open with Images2TGA. A set of built-in macros define pathes, files, and extensions. Click on the Legend button at the bottom of the Options Window to see the choices for these macros. In this case we need the full file path, filename and extension to be defined. Right Click on the second box in the File Parameters List and select Macros then %pfe% (for path, filename, extension) from the list offered. See Fig 9 below.
%pfe% will appear in the File Parameters List. %pfe% gives us the file presently selected in the AssetX File List.
Note that we have not put any data in the Switches column. The use of this is explained later.
We can check the command line that this sets up creates by right clicking on the File Parameters List and selecting Preview Command Line from the pop-up menu.
Now we can close the Options window by Clicking on the "OK" Button. This closes and SAVES the data we have entered to in program INI file. Any other exit method will not save the data.
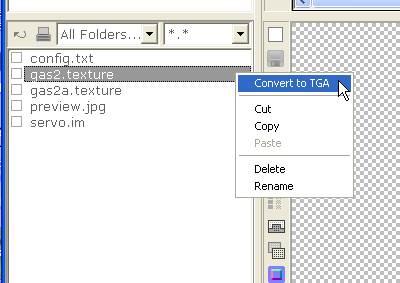
Now when we go to the AssetX File List and Right Click on a *.texture file we get the Convert to TGA Option in the pop-up menu as in Fig 10 below.
Clicking on this option will open Images2TGA to display the selected texture file. It can be converted to TGA by just saving as a TGA.
A further example illustrates the more complex settings in the tool definition.
Let us now connect Images2TGA to the TGA files to make normal maps directly from a source image.
Launch AssetX and open the Define Tools Tab of the Options Window as described above.
From the Menu: drop-down list select *.tga.
Right Click on the highlighted section immediately below the words Filemask: *.texture and select Rename Item from the pop-up menu. The data entry window will open to allow entry of an action name. Enter Make Normal Map here and click on "OK" to accept.
Make Normal Map will now appear at the left below Filemask: *.texture. Note also that the Menu Caption box says Make Normal Map.
In the File Parameters (quoted) list, Right Click on the first vacant location and select Browse for File from the pop-up menu, as shown in Fig 7 above.
In the Select File dialogue, now presented, navigate to find the Images2TGA.exe program and select it as before.
Again choose the %pfe% macro for the next box in the File Parameters (quoted) list.
The Images2TGA program supports -close switch to force it to close after completion of the selected task. It also supports -normalmap switch to force the program to make a normal map from the source image. The operation and purpose of switches is described in the Help files of PEV's tools.
In the command line the switches are expected between the program filename and the filename of the source file.
e.g. "C:\Program Files\Images2TGA\Images2TGA.exe" -normalmap -close "C:\Program Files\Auran\TS2010\User Data\Editing\Alco\body.tga"
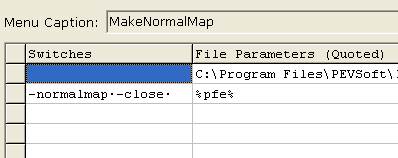
The data in each line of the Switches column is assembled before that in the File Parameters (quoted) column of the AssetX Options Window. Thus we put the switches data in the second line of the Switches column.
Click Twice (but not double click) on the second line of the Switches column.
Then enter "-normalmap -close " in the box. Don't include the quote marks. Note the space AFTER -close. Note also that the spaces are displayed in the column as dots. See Fig 11 below.
Now we look at the options at the bottom of the Options Window.
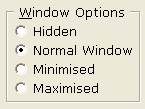
Window Options controls how Images2TGA will be executed as Fig 12 below
I chose Normal Window so we can see Images2TGA working.
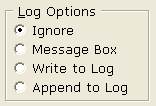
Log Options controls how execution data is recorded in the log file as Fig 13 below.
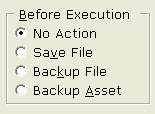
Before Execution controls what AssetX does BEFORE executing Images2TGA in this case. See Fig 14 below.
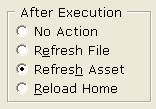
After Execution controls what AssetX does AFTER executing Images2TGA. See Fig 15 below.
Now when we go to the AssetX File List and Right Click on a *.tga file we get the Make Normal Map Option in the pop-up menu.
Clicking on this option will open Images2TGA to automatically make a normal map from the selected tga image.
Please Note that the normal map switch is supported in the Version 1.16 of Images2TGA

