SAR Scenario Wilmington Freight
From TrainzOnline
(Difference between revisions)
(Created page with "<span style="font-size: 19px; font-weight: 700; background-color: black; color: white;"> Gladstone to Wilmington Local Freight </span><br> A twice weekly (if requir...") |
m |
||
| Line 9: | Line 9: | ||
<table> | <table> | ||
<tr valign="top"> | <tr valign="top"> | ||
| − | <td align="center">[[image: | + | <td align="center">[[image:SAR Scenarios.png|link=|alt=Scenarios|200px]] '''[[SAR Peterborough Base Session|Return to the Base Session Scenario List]]'''</td> |
</tr> | </tr> | ||
</table> | </table> | ||
| − | |||
<table bgcolor="lightcyan"> | <table bgcolor="lightcyan"> | ||
<tr valign="top"> | <tr valign="top"> | ||
| Line 29: | Line 28: | ||
</tr> | </tr> | ||
<tr valign="top"> | <tr valign="top"> | ||
| − | <td colspan=2>Click [[image:Line_Index_Label.png|link=SAR_Index]] or the graphic above to access the location data.</td> | + | <td colspan=2>Click [[image:Line_Index_Label.png|link=SAR_Index]] or the graphic above to access the location data (link will open in this window).</td> |
| + | </tr> | ||
| + | <tr valign="top"> | ||
| + | <td colspan=2> | ||
| + | '''Other Links:''' (these will open in this window)<br> | ||
| + | '''[[image:Kurandamini.png|link=|alt=Rolling Stock|100px]] [[SAR Peterborough Base Session#Locos|Locomotives and Rolling Stock]]''' - commodities carried<br> | ||
| + | '''[[image:SAR Industries.png|link=|alt=Industries|100px]] [[SAR Peterborough Base Session#Industries|Active Industries]]''' - commodities produced and consumed | ||
| + | </td> | ||
</tr> | </tr> | ||
</table> | </table> | ||
| Line 63: | Line 69: | ||
*The '''Gladstone-Wilmington Line''' is unsignalled with only one train normally allowed on the line at any one time. | *The '''Gladstone-Wilmington Line''' is unsignalled with only one train normally allowed on the line at any one time. | ||
*The approaches to all locations are protected by invisible signals to prevent the '''AI Half Speed Slowdown Problem''' when approaching a signal at stop. | *The approaches to all locations are protected by invisible signals to prevent the '''AI Half Speed Slowdown Problem''' when approaching a signal at stop. | ||
| − | *'''Enhanced Interlocking Towers''' with set paths are available for your optional use at '''Gladstone''' (departure). Details of all available '''EIT Paths''' are provided in the [[image:Tab_PH_Grey.png|link=|75px]] tab at each location with '''EITs'''. Click [[image:Line_Index_Label.png|link=SAR_Index]] | + | *'''Enhanced Interlocking Towers''' with set paths are available for your optional use at '''Gladstone''' (departure). Details of all available '''EIT Paths''' are provided in the [[image:Tab_PH_Grey.png|link=|75px]] tab at each location with '''EITs'''. Click [[image:Line_Index_Label.png|link=SAR_Index]] for details. |
| − | *Trackmarks and industries have been provided for AI '''Drive To Trackmark''', '''Drive via Trackmark''' and '''Drive to <span style="background-color: yellow;"> Industry </span>''' commands. Details of all available '''Trackmarks''' and '''Industries''' are provided in the [[image:Tab_TM_Grey.png|link=|75px]] and [[image:Tab_IN_Grey.png|link=|75px]] tabs at each location. Click [[image:Line_Index_Label.png|link=SAR_Index]] | + | *Trackmarks and industries have been provided for AI '''Drive To Trackmark''', '''Drive via Trackmark''' and '''Drive to <span style="background-color: yellow;"> Industry </span>''' commands. Details of all available '''Trackmarks''' and '''Industries''' are provided in the [[image:Tab_TM_Grey.png|link=|75px]] and [[image:Tab_IN_Grey.png|link=|75px]] tabs at each location. Click [[image:Line_Index_Label.png|link=SAR_Index]] for details. |
| − | *Manual (no AI) driving is possible. For those locations without home or approach semaphore signals, a '''Caution''' warning sign has been placed at the location of the '''Main Approach Dn''' and '''Main Approach Up''' trackmarks. Details on all switches and suggested switch paths are provided in the [[image:Tab_SW_Grey.png|link=|75px]] tab at each location. Click [[image:Line_Index_Label.png|link=SAR_Index]] | + | *Manual (no AI) driving is possible. For those locations without home or approach semaphore signals, a '''Caution''' warning sign has been placed at the location of the '''Main Approach Dn''' and '''Main Approach Up''' trackmarks. Details on all switches and suggested switch paths are provided in the [[image:Tab_SW_Grey.png|link=|75px]] tab at each location. Click [[image:Line_Index_Label.png|link=SAR_Index]] for details. |
</td> | </td> | ||
</tr> | </tr> | ||
Revision as of 12:49, 18 February 2021
Gladstone to Wilmington Local Freight
A twice weekly (if required) freight service from Gladstone to Wilmington dropping wagons at locations as required.
 |
|
|||||||||

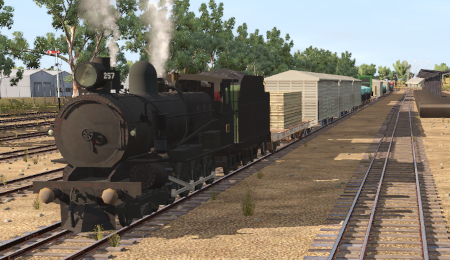
| Duration: | 3 hours |
| Loco: | SAR T 257 on Gladstone Yard 2 Other Unrostered Locos:
|
| Consist: | Attached to SAR T 257. 4 MTW wagons, 5 QLX wagons, 4 WHE covered wagons, 1 DB Guard Van. Each wagon has its destination as part of its name e.g. QLX Wirrabara 2 indicating it is the 2nd QLX wagon for Wirrabara. |
| Task: |
|
| Driving Notes: |
|