SAR Scenario Gladstone Bulk Ore

From TrainzOnline
Revision as of 15:34, 17 February 2021 by Pware (Talk | contribs)

Jump to: navigation, search

 Paratoo to Peterborough Bulk Ore Train 
 Paratoo to Gladstone Bulk Ore Train 

Express bulk ore freight from Broken Hill to Port Pirie

Loaded Ore
Scenarios Return to the Base Session Scenario List
Each location in the layout has a detailed set of track diagrams that provide the following information:-
Location Index
Line Index
  • the names of the tracks, sidings and loops
  • the location of various facilities - stations, turntables, water columns, coal stages, engine sheds, active industries
  • the names of active industries and their products and consumables
  • the names and locations of trackmarks for Drive To and Drive Via commands
  • the names, properties and locations of track switches and lists of switch sets for particular movements
  • Enhanced Interlocking Tower paths for those locations that have EITs
Click Line Index Label.png or the graphic above to access the location data (link will open in this window).

Other Links: (these will open in this window)
Rolling Stock Locomotives and Rolling Stock - commodities carried
Industries Active Industries - commodities produced and consumed

Duration: Paratoo to Peterborough 1 hour 25 minutes (includes refuelling time)
Paratoo to Gladstone 2 hours 45 minutes
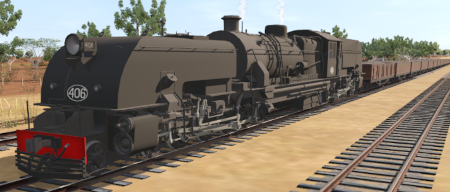
Loco: SAR 406 (Garrett) on the main line approaching Paratoo

Other Unrostered Locos:

  • SAR T 23 on Peterborough Depot Siding 1
  • SAR T 233 on Peterborough Depot Loco Road 1
  • SAR 407 on Peterborough Depot Repair Shop Road 4
Consist: Attached to SAR 406. 23 CCC gondola wagons, 1 DB Guard Van.
Task:
  1. Take the train into Paratoo Yard on the Main Line. Water the loco as needed.
  2. Proceed to Peterborough Loop or Peterborough Yard 1.
  3. Detach the loco and proceed to Peterborough Main Depot Fuel Water Stage to refuel the tender with bunker c oil and water.
  4. Option: Reattach the loco to the train and proceed by 09:30 to Gladstone Yard.
Driving Notes:
  • Fuel oil level is low, but sufficient to reach Peterborough where it can be refilled
  • Water is very low and you will need to refill either here at Paratoo or at Nackara
  • The length of the train restricts its use of passing loops and yard loops to those located at:-
    • Methuen Loop
    • Nackara Station Loop and Nackara Goods
    • Peechara Loop (Note that Nantabibbie Loop is too short)
    • Oodla Wirra Station Loop
    • Ucolta Station Loop
    • Peterborough Loop, Peterborough Station and Peterborough Yard 1
    • Yongala Station Loop and Yongala Goods Loop
    • Belalie North Station Loop
    • Jamestown Station + Yard, Jamestown Loop + Yard and Jamestown Goods Loop + Yard
    • Caltowie Station Loop
    • Gladstone (all loops and yards).
  • The approaches to all locations are protected by invisible signals to prevent the AI Half Speed Slowdown Problem when approaching a signal at stop.
  • Enhanced Interlocking Towers with set paths are available for your optional use at Paratoo (departure), Peterborough (arrival and departure), Jamestown (arrival and departure) and Gladstone (arival). Details of all available EIT Paths are provided in the Tab PH Grey.png tab at each location with EITs. Click Line Index Label.png for details.
  • Trackmarks and industries have been provided for AI Drive To Trackmark, Drive via Trackmark and Drive to  Industry  commands. Details of all available Trackmarks and Industries are provided in the Tab TM Grey.png and Tab IN Grey.png tabs at each location. Click Line Index Label.png for details.
  • Manual (no AI) driving is possible. For those locations without home or approach semaphore signals, a Caution warning sign has been placed at the location of the Main Approach Dn and Main Approach Up trackmarks. Details on all switches and suggested switch paths are provided in the Tab SW Grey.png tab at each location. Click Line Index Label.png for details.
Top
Personal tools