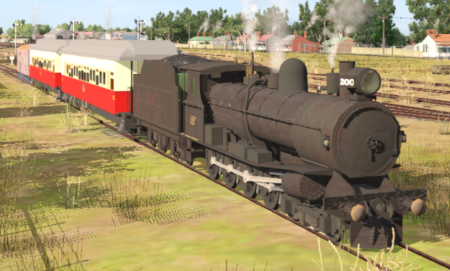
SAR Scenario Gladstone-Terowie Passenger
From TrainzOnline
(Difference between revisions)
(Created page with "<span style="font-size: 19px; font-weight: 700; background-color: black; color: white;"> Gladstone to Jamestown School Run </span><br> <span style="font-size: 19px; ...") |
m |
||
| Line 11: | Line 11: | ||
<table> | <table> | ||
<tr valign="top"> | <tr valign="top"> | ||
| − | <td align="center">[[image: | + | <td align="center">[[image:SAR Scenarios.png|link=|alt=Scenarios|200px]] '''[[SAR Peterborough Base Session|Return to the Base Session Scenario List]]'''</td> |
</tr> | </tr> | ||
</table> | </table> | ||
| − | |||
<table bgcolor="lightcyan"> | <table bgcolor="lightcyan"> | ||
<tr valign="top"> | <tr valign="top"> | ||
| Line 31: | Line 30: | ||
</tr> | </tr> | ||
<tr valign="top"> | <tr valign="top"> | ||
| − | <td colspan=2>Click [[image:Line_Index_Label.png|link=SAR_Index]] or the graphic above to access the location data.</td> | + | <td colspan=2>Click [[image:Line_Index_Label.png|link=SAR_Index]] or the graphic above to access the location data (link will open in this window).</td> |
| + | </tr> | ||
| + | <tr valign="top"> | ||
| + | <td colspan=2> | ||
| + | '''Other Links:''' (these will open in this window)<br> | ||
| + | '''[[image:Kurandamini.png|link=|alt=Rolling Stock|100px]] [[SAR Peterborough Base Session#Locos|Locomotives and Rolling Stock]]''' - commodities carried<br> | ||
| + | '''[[image:SAR Industries.png|link=|alt=Industries|100px]] [[SAR Peterborough Base Session#Industries|Active Industries]]''' - commodities produced and consumed | ||
| + | </td> | ||
</tr> | </tr> | ||
</table> | </table> | ||
| Line 68: | Line 74: | ||
<td> | <td> | ||
*The approaches to all locations are protected by invisible signals to prevent the '''AI Half Speed Slowdown Problem''' when approaching a signal at stop. | *The approaches to all locations are protected by invisible signals to prevent the '''AI Half Speed Slowdown Problem''' when approaching a signal at stop. | ||
| − | *'''Enhanced Interlocking Towers''' with set paths are available for your optional use at '''Gladstone''' (departure), '''Jamestown''' (arrival and departure), '''Peterborough''' (arrival and departure) and '''Terowie''' (arrival). Details of all available '''EIT Paths''' are provided in the [[image:Tab_PH_Grey.png|link=|75px]] tab at each location with '''EITs'''. Click [[image:Line_Index_Label.png|link=SAR_Index]] | + | *'''Enhanced Interlocking Towers''' with set paths are available for your optional use at '''Gladstone''' (departure), '''Jamestown''' (arrival and departure), '''Peterborough''' (arrival and departure) and '''Terowie''' (arrival). Details of all available '''EIT Paths''' are provided in the [[image:Tab_PH_Grey.png|link=|75px]] tab at each location with '''EITs'''. Click [[image:Line_Index_Label.png|link=SAR_Index]] for details. |
| − | *Trackmarks and industries have been provided for AI '''Drive To Trackmark''', '''Drive via Trackmark''' and '''Drive to <span style="background-color: yellow;"> Industry </span>''' commands. Details of all available '''Trackmarks''' and '''Industries''' are provided in the [[image:Tab_TM_Grey.png|link=|75px]] and [[image:Tab_IN_Grey.png|link=|75px]] tabs at each location. Click [[image:Line_Index_Label.png|link=SAR_Index]] | + | *Trackmarks and industries have been provided for AI '''Drive To Trackmark''', '''Drive via Trackmark''' and '''Drive to <span style="background-color: yellow;"> Industry </span>''' commands. Details of all available '''Trackmarks''' and '''Industries''' are provided in the [[image:Tab_TM_Grey.png|link=|75px]] and [[image:Tab_IN_Grey.png|link=|75px]] tabs at each location. Click [[image:Line_Index_Label.png|link=SAR_Index]] for details. |
| − | *Manual (no AI) driving is possible. For those locations without home or approach semaphore signals, a '''Caution''' warning sign has been placed at the location of the '''Main Approach Dn''' and '''Main Approach Up''' trackmarks. Details on all switches and suggested switch paths are provided in the [[image:Tab_SW_Grey.png|link=|75px]] tab at each location. Click [[image:Line_Index_Label.png|link=SAR_Index]] | + | *Manual (no AI) driving is possible. For those locations without home or approach semaphore signals, a '''Caution''' warning sign has been placed at the location of the '''Main Approach Dn''' and '''Main Approach Up''' trackmarks. Details on all switches and suggested switch paths are provided in the [[image:Tab_SW_Grey.png|link=|75px]] tab at each location. Click [[image:Line_Index_Label.png|link=SAR_Index]] for details. |
</td> | </td> | ||
</tr> | </tr> | ||
Revision as of 15:37, 17 February 2021
Gladstone to Jamestown School Run
Gladstone to Terowie Passenger
A morning school run from Gladstone to Jamestown Mondays, Wednesdays, Fridays.
Morning passenger and school run from Gladstone to Terowie Tuesdays, Thursdays, Saturdays.
 |
|
|||||||||
