SAR Peterborough Base Session

From TrainzOnline
Revision as of 14:37, 30 January 2021 by Pware (Talk | contribs)

Jump to: navigation, search

Ten scenarios to use with the SAR Peterborough (Northern) Narrow Gauge Division layout. All rolling stock, EIT paths and industry setting are provided in the session.

Each location in the layout has a detailed set of track diagrams that provide the following information:-
Location Index
Location Index
  • the functions of the tracks and loops, etc
  • the location of various facilities such as stations, turntables, water columns, coal stages, engine sheds
  • the names of active industries and their products and consumables
  • the names and locations of trackmarks for Drive To ... commands
  • the names and locations of track switches and lists of switch sets for particular movements
  • Enhanced Interlocking Tower paths for those locations that have EITs

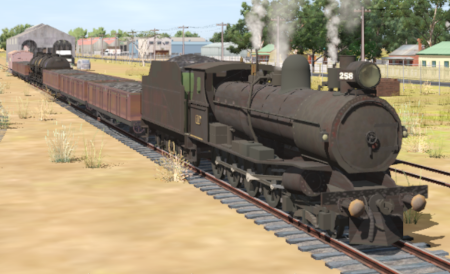
 Gladstone to Peterborough Depot Fuel Run 

Loco coal stages and fuel-oil points need to be refilled regularly. This service delivers coal to the loco coal stages at Jamestown and Peterborough, and bunker c oil (for the SAR 406 Garrett locos) to the loco (main) depot at Peterborough.

Fuel Run

Duration: 2 hours
Loco: SAR T 258 on Gladstone Goods Loop
Other Unrostered Locos: none
Consist: Attached to SAR T 258. 5 TGR CCC wagons, 3 Tank wagons, 1 guards van. Each wagon has its destination as part of its name e.g. Bunker Tank Peterborough 3 indicating it is the 3rd tanker wagon for Peterborough.
Tasks: Run loco light engined to Goods Loop Yard, couple to the train. Deliver wagons according to their destination names. Coal wagons (TGR CCCs) delivered and unloaded at the single coal stage at Jamestown and the two coal stages at Peterborough. Deliver and unload the tank wagons to the Depot Fuel Point in the Peterborough Main Depot. Store the empty wagons on Peterborough Depot Roads 2, 3 or 4.
Driving Notes:
  • The approaches to all locations are protected by invisible signals to prevent the AI Half Speed Slowdown Problem when approaching a signal at stop.
  • Enhanced Interlocking Towers with set paths are available for your optional use at Gladstone (departure), Jamestown (arrival and departure) and at Peterborough (arrival). Details of all available EIT Paths are provided in the Tab PH Grey.png tab at each location with EITs. See Location Index.
  • Trackmarks and industries have been provided for AI Drive To Trackmark, Drive via Trackmark and Drive to  Industry  commands. Details of all available Trackmarks and Industries are provided in the Tab TM Grey.png and Tab IN Grey.png tabs at each location. See Location Index.
  • Manual (no AI) driving is possible. For those locations without home or approach semaphore signals, a Caution warning sign has been placed at the location of the Main Approach Dn and Main Approach Up trackmarks. Details on all switches and suggested switch paths are provided in the Tab SW Grey.png tab at each location. See Location Index.


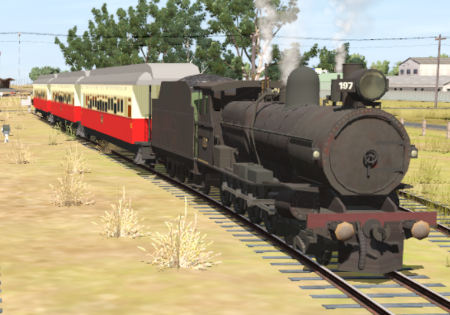
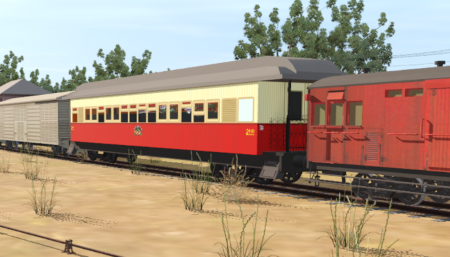
 Vintage East-West Express: Terowie to Quorn Passenger 

Between 1917 and 1932 the Peterborough-Quorn Line was a vital link in the Transcontinental Railway between Sydney on the east coast and Perth on the west coast.

The South Australian Railways provided an express passenger service, the East-West Express, that ran between Terowie and Port Augusta via Quorn. At Terowie it connected with broad gauge services from Adelaide. At Peterborough it connected with narrow gauge services from Broken Hill where there was a standard gauge connection from Sydney. At Quorn it connected with narrow gauge services from the Central Australian Line. At Port Augusta it connected with standard gauge services to Kalgoolie, where there was a narrow gauge connection to Perth.

East West Express

Passengers making the entire trip from Sydney NSW to Perth WA would change trains 5 times - Parkes NSW, Broken Hill NSW, Peterborough SA, Port Augusta SA and Kalgoolie WA. They would change track gauges 3 times (standard to narrow to standard to narrow) and have to navigate through 5 different rail systems (NSWGR, Silverton Tramway, SAR, Commonwealth Railways and WAGR) plus a taxi between two stations in Broken Hill. The entire journey from coast to coast would take 6 days, if all the connections were made.

Today passengers can board a luxury train, the Indian Pacific, in Sydney and travel the entire distance to Perth in 3 days without leaving the train.

Duration: 3 hours
Loco: SAR T 197 at Terowie Station Sidings

Other Unrostered Locos:

  • SAR T 198 at Terowie Depot
  • SAR T 23 at Peterborough (Main) Depot
  • SAR T 233 at Peterborough (Main) Depot
  • SAR 407 at Peterborough (Main) Depot
Consist: Attached to SAR T 197. 3 QR Kuranda BL1 carriages
Task: Shunt train into narrow gauge platfrom at Terowie. Then proceed according to the timetable.
Terowie dep 08:05
Peterborough dep 08:30
Black Rock dep 08:58
Orroroo dep 09:14
Eurelia arr 09:38 (water)
  dep 09:42
Carrieton arr 09:57 (coal)
  dep 10:07
Moockra dep 10:21
Hammond dep 10:35
Bruce dep 10:49
Quorn arr 11:15
Driving Notes:
  • The approaches to all locations are protected by invisible signals to prevent the AI Half Speed Slowdown Problem when approaching a signal at stop.
  • Enhanced Interlocking Towers with set paths are available for your optional use at Terowie (departure), Peterborough (arrival and departure) and at Quorn (arrival). Details of all available EIT Paths are provided in the Tab PH Grey.png tab at each location with EITs. See Location Index.
  • Trackmarks and industries have been provided for AI Drive To Trackmark, Drive via Trackmark and Drive to  Industry  commands. Details of all available Trackmarks and Industries are provided in the Tab TM Grey.png and Tab IN Grey.png tabs at each location. See Location Index.
  • Manual (no AI) driving is possible. For those locations without home or approach semaphore signals, a Caution warning sign has been placed at the location of the Main Approach Dn and Main Approach Up trackmarks. Details on all switches and suggested switch paths are provided in the Tab SW Grey.png tab at each location. See Location Index.


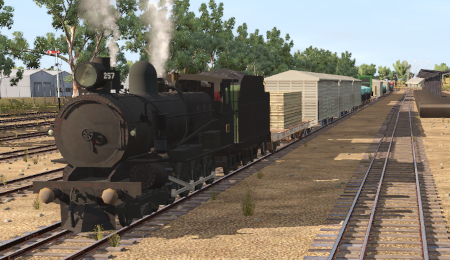
 Gladstone to Wilmington Local Freight 

A twice weekly (if required) freight service from Gladstone to Wilmington dropping wagons at locations as required.

Wilmington Local Freight

Duration: 3 hours
Loco: SAR T 257 on Gladstone Yard 2
Other Unrostered Locos: none
Consist: Attached to SAR T 257. MTW flat cars, QLX wagons, WHE covered wagons, 1 guards van. Each wagon has its destination as part of its name e.g. QLX Wirrabara 2 indicating it is the 2nd WHE wagon for Wirrabara.
Task: Take the train onto the Wilmington Line. Deliver wagons according to their destination names. WHE covered wagons are delivered to grain silos. MTW flat cars are delivered to the yard cranes. QLX wagons are delivered to the goods sheds. Water at Booleroo Center. Turn the loco on the WYE at Wilmington, coal and water.
Driving Notes:
  • The approaches to all locations are protected by invisible signals to prevent the AI Half Speed Slowdown Problem when approaching a signal at stop.
  • Enhanced Interlocking Towers with set paths are available for your optional use at Gladstone (departure), Jamestown (arrival and departure) and at Peterborough (arrival). Details of all available EIT Paths are provided in the Tab PH Grey.png tab at each location with EITs. See Location Index.
  • Trackmarks and industries have been provided for AI Drive To Trackmark, Drive via Trackmark and Drive to  Industry  commands. Details of all available Trackmarks and Industries are provided in the Tab TM Grey.png and Tab IN Grey.png tabs at each location. See Location Index.
  • Manual (no AI) driving is possible. For those locations without home or approach semaphore signals, a Caution warning sign has been placed at the location of the Main Approach Dn and Main Approach Up trackmarks. Details on all switches and suggested switch paths are provided in the Tab SW Grey.png tab at each location. See Location Index.


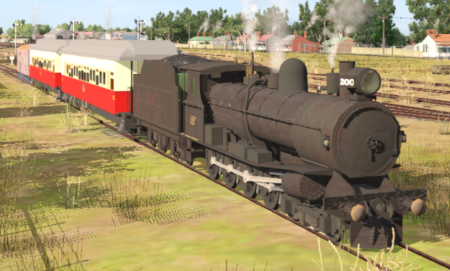
 Gladstone to Jamestown School Run 
 Gladstone to Terowie Passenger 

A morning school run from Gladstone to Jamestown Mondays, Wednesdays, Fridays.
Morning passenger and school run from Gladstone to Terowie Tuesdays, Thursdays, Saturdays.

School Run

Duration: Jamestown School Run 35 minutes
Terowie Passenger 1 hour 40 minutes
Loco: SAR T 200 at Gladstone Station Siding

Other Unrostered Locos:

  • SAR T 23 at Peterborough (Main) Depot
  • SAR T 233 at Peterborough (Main) Depot
  • SAR 407 at Peterborough (Main) Depot
Consist: Attached to SAR T 200. 2 QR Kuranda BL1 carriages, 1 guards van
Task: Reverse the train into Gladstone station.

On Mondays, Wednesdays, Fridays Proceed to stations at Caltowie and Jamestown. Terminate at Jamestown.

On Tuesdays, Thursdays, Saturdays proceed to stations at Yangya (request stop), Caltowie, Jamestown, Belalie North, Yongala, Peterborough and Terowie. Terminate at Terowie.
Driving Notes:
  • The approaches to all locations are protected by invisible signals to prevent the AI Half Speed Slowdown Problem when approaching a signal at stop.
  • Enhanced Interlocking Towers with set paths are available for your optional use at Gladstone (departure), Jamestown (arrival and departure), Peterborough (arrival and departure) and Terowie (arrival). Details of all available EIT Paths are provided in the Tab PH Grey.png tab at each location with EITs. See Location Index.
  • Trackmarks and industries have been provided for AI Drive To Trackmark, Drive via Trackmark and Drive to  Industry  commands. Details of all available Trackmarks and Industries are provided in the Tab TM Grey.png and Tab IN Grey.png tabs at each location. See Location Index.
  • Manual (no AI) driving is possible. For those locations without home or approach semaphore signals, a Caution warning sign has been placed at the location of the Main Approach Dn and Main Approach Up trackmarks. Details on all switches and suggested switch paths are provided in the Tab SW Grey.png tab at each location. See Location Index.


 Paratoo to Peterborough Ore Train 
 Paratoo to Gladstone Ore Train 

Express bulk ore freight from Broken Hill to Port Pirie
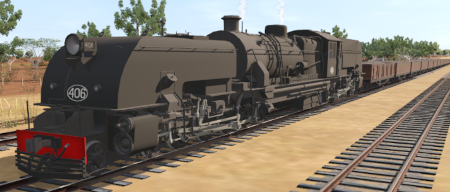
Loaded Ore

Duration: Paratoo to Peterborough 1 hour 25 minutes (includes refuelling time)
Paratoo to Gladstone 2 hours 45 minutes
Loco: SAR 406 (Garrett) on Paratoo Main

Other Unrostered Locos:

  • SAR T 23 at Peterborough (Main) Depot
  • SAR T 233 at Peterborough (Main) Depot
  • SAR 407 at Peterborough (Main) Depot
Consist: Attached to SAR 406. 23 TGR CCC wagons, 1 guards van.
Task: Take the train out of Paratoo Yard. Proceed to Peterborough Loop or Peterborough Yard 1. Detatch loco and proceed to Peterborough Main Depot Fuel Water Stage to refuel the tender with bunker c oil and water. Option: Reattach the loco to the train and proceed by 09:30 to Gladstone Yard.
Driving Notes:
  • Fuel oil level is low, but sufficient to reach Peterborough where it can be refilled
  • Water is very low and you will need to refill either here at Paratoo or at Nackara
  • The length of the train restricts its use of passing loops and yard loops to those located at:-
    • Methuen Loop
    • Nackara Station Loop and Nackara Goods
    • Peechara Loop (Note that Nantabibbie Loop is too short)
    • Oodla Wirra Station Loop
    • Ucolta Station Loop
    • Peterborough Loop, Peterborough Station and Peterborough Yard 1
    • Yongala Station Loop and Yongala Goods Loop
    • Belalie North Station Loop
    • Jamestown Station + Yard, Jamestown Loop + Yard and Jamestown Goods Loop + Yard
    • Caltowie Station Loop
    • Gladstone (all loops and yards).
  • The approaches to all locations are protected by invisible signals to prevent the AI Half Speed Slowdown Problem when approaching a signal at stop.
  • Enhanced Interlocking Towers with set paths are available for your optional use at Gladstone (departure), Jamestown (arrival and departure), Peterborough (arrival and departure) and Paratoo (arrival). Details of all available EIT Paths are provided in the Tab PH Grey.png tab at each location with EITs. See Location Index.
  • Trackmarks and industries have been provided for AI Drive To Trackmark, Drive via Trackmark and Drive to  Industry  commands. Details of all available Trackmarks and Industries are provided in the Tab TM Grey.png and Tab IN Grey.png tabs at each location. See Location Index.
  • Manual (no AI) driving is possible. For those locations without home or approach semaphore signals, a Caution warning sign has been placed at the location of the Main Approach Dn and Main Approach Up trackmarks. Details on all switches and suggested switch paths are provided in the Tab SW Grey.png tab at each location. See Location Index.


 Gladstone to Peterborough Empty Ore 
 Gladstone to Paratoo Empty Ore 

Moving empty ore wagons from Port Pirie to Broken Hill.

Empty Ore

Duration: Gladstone to Peterborough 1 hour 20 minutes
Gladstone to Paratoo 2 hour 45 minutes
Loco: SAR T 201 at Gladstone Depot

Other Unrostered Locos:

  • SAR T 23 at Peterborough (Main) Depot
  • SAR T 233 at Peterborough (Main) Depot
  • SAR 407 at Peterborough (Main) Depot
Consist: 22 TGR CCC wagons, 1 guards van on Gladstone Yard 1
Task: Run loco light engined from the depot to couple to the train. Deliver wagons to Peterborough Loop or Peterborough Yard 1. Coal and water the loco at the main depot or sub depot. Option: Reattach the loco to the train and continue to Paratoo.
Driving Notes:
  • The length of the train restricts its use of passing loops and yard loops to those located at:-
    • Caltowie Station Loop
    • Jamestown Station + Yard, Jamestown Loop + Yard and Jamestown Goods Loop + Yard
    • Belalie North Station Loop
    • Yongala Station Loop and Yongala Goods Loop
    • Peterborough Loop, Peterborough Station and Peterborough Yard 1
    • Ucolta Station Loop
    • Oodla Wirra Station Loop
    • Peechara Loop (Note that Nantabibbie Loop is too short)
    • Nackara Station Loop and Nackara Goods
    • Methuen Loop
    • Paratoo all loops
  • The approaches to all locations are protected by invisible signals to prevent the AI Half Speed Slowdown Problem when approaching a signal at stop.
  • Enhanced Interlocking Towers with set paths are available for your optional use at Gladstone (departure), Jamestown (arrival and departure), Peterborough (arrival and departure) and Paratoo (arrival). Details of all available EIT Paths are provided in the Tab PH Grey.png tab at each location with EITs. See Location Index.
  • Trackmarks and industries have been provided for AI Drive To Trackmark, Drive via Trackmark and Drive to  Industry  commands. Details of all available Trackmarks and Industries are provided in the Tab TM Grey.png and Tab IN Grey.png tabs at each location. See Location Index.
  • Manual (no AI) driving is possible. For those locations without home or approach semaphore signals, a Caution warning sign has been placed at the location of the Main Approach Dn and Main Approach Up trackmarks. Details on all switches and suggested switch paths are provided in the Tab SW Grey.png tab at each location. See Location Index.


 Quorn to Peterborough Local Freight 

A thrice weekly (if required) freight service from Quorn to Peterborough dropping wagons at locations as required.
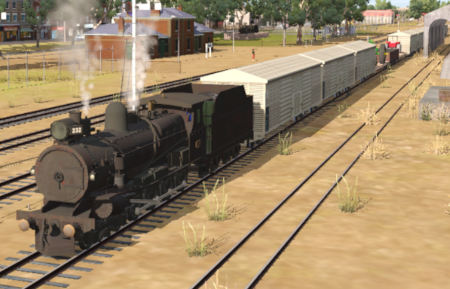
Quorn Local

Duration: 3 hours 30 minutes
Loco: SAR T 232 on Quorn Goods Loop
Other Unrostered Locos: none
Consist: Attached to SAR T 232. MTW flat cars, QLX wagons, WHE covered wagons, TGR CCC wagons, 1 guards van. Each wagon has its destination as part of its name e.g. QLX Orroroo 2 indicating it is the 2nd QLX wagon for Orroroo.
Task: Take the train onto the Peterborough-Quorn Line. Deliver wagons according to their destination names. WHE covered wagons to grain silos. MTW flat cars to the yard cranes. QLX wagons to the goods sheds. Water and coal the loco as needed.
Driving Notes:
  • The approaches to all locations are protected by invisible signals to prevent the AI Half Speed Slowdown Problem when approaching a signal at stop.
  • Enhanced Interlocking Towers with set paths are available for your optional use at Quorn (departure) and Peterborough (arrival). Details of all available EIT Paths are provided in the Tab PH Grey.png tab at each location with EITs. See Location Index.
  • Trackmarks and industries have been provided for AI Drive To Trackmark, Drive via Trackmark and Drive to  Industry  commands. Details of all available Trackmarks and Industries are provided in the Tab TM Grey.png and Tab IN Grey.png tabs at each location. See Location Index.
  • Manual (no AI) driving is possible. For those locations without home or approach semaphore signals, a Caution warning sign has been placed at the location of the Main Approach Dn and Main Approach Up trackmarks. Details on all switches and suggested switch paths are provided in the Tab SW Grey.png tab at each location. See Location Index.


 Quorn to Gladstone Oil Freight 

Through freight from Quorn to Peterborough moving empty fuel cars from Quorn and Port Augusta to Peterborough where they will be attached to a freight for return to Port Pirie.
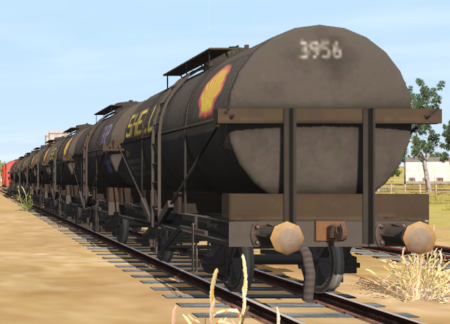
Oil Run

Duration: x hours
Loco: SAR T 51 at Quorn Depot

Other Unrostered Locos:

  • SAR T 23 at Peterborough (Main) Depot
  • SAR T 233 at Peterborough (Main) Depot
  • SAR 407 at Peterborough (Main) Depot
Consist: 8 Tank wagons (from Port Augusta) located at Quorn Goods Sidings, 4 Tank wagons located ar Quorn Fuel Depot, 1 guards van located ar Quorn Goods Sidings. s.
Task: Assemble the train in Quorn Yard and proceed to Peterborough Yard. Coal the loco at Carrieton, water as required at Carrieton or other locations.
Driving Notes:
  • The approaches to all locations are protected by invisible signals to prevent the AI Half Speed Slowdown Problem when approaching a signal at stop.
  • Enhanced Interlocking Towers with set paths are available for your optional use at Quorn (departure) and Peterborough (arrival and departure), Jamestown (arrival and departure), Gladstone (arrival). Details of all available EIT Paths are provided in the Tab PH Grey.png tab at each location with EITs. See Location Index.
  • Trackmarks and industries have been provided for AI Drive To Trackmark, Drive via Trackmark and Drive to  Industry  commands. Details of all available Trackmarks and Industries are provided in the Tab TM Grey.png and Tab IN Grey.png tabs at each location. See Location Index.
  • Manual (no AI) driving is possible. For those locations without home or approach semaphore signals, a Caution warning sign has been placed at the location of the Main Approach Dn and Main Approach Up trackmarks. Details on all switches and suggested switch paths are provided in the Tab SW Grey.png tab at each location. See Location Index.


 Peterborough to Paratoo Mixed Passenger/Freight 

Mixed passenger and freight run from Peterborough to Paratoo.

Mixed Passenger

Duration: x hours
Loco: SAR T 202 on Peterborough Car Siding

Other Unrostered Locos:

  • SAR T 23 at Peterborough (Main) Depot
  • SAR T 233 at Peterborough (Main) Depot
  • SAR 407 at Peterborough (Main) Depot
Consist: Attached to SAR T 202. 1 QR Kuranda BL1 carriage, 3 QLX wagons, 1 MTX flat wagon, 1 guards van. Each freight wagon has its destination as part of its name e.g. "QLX Nackara" indicating it is destined for Nackara.
Task: Reverse the train out of the siding and onto the station line. Pull the train into Peterborough Station. Depart Peterborough at 08:06 and proceed to Paratoo stopping at Ucolta, Oodla Wirra, Nackara and Paratoo. Detatch and shunt wagons at each location as required. QLX wagons to the goods shed, MTX flat cars to the goods cranes.
Driving Notes:
  • The approaches to all locations are protected by invisible signals to prevent the AI Half Speed Slowdown Problem when approaching a signal at stop.
  • Enhanced Interlocking Towers with set paths are available for your optional use at Peterborough (departure) and Paratoo (arrival). Details of all available EIT Paths are provided in the Tab PH Grey.png tab at each location with EITs. See Location Index.
  • Trackmarks and industries have been provided for AI Drive To Trackmark, Drive via Trackmark and Drive to  Industry  commands. Details of all available Trackmarks and Industries are provided in the Tab TM Grey.png and Tab IN Grey.png tabs at each location. See Location Index.
  • Manual (no AI) driving is possible. For those locations without home or approach semaphore signals, a Caution warning sign has been placed at the location of the Main Approach Dn and Main Approach Up trackmarks. Details on all switches and suggested switch paths are provided in the Tab SW Grey.png tab at each location. See Location Index.


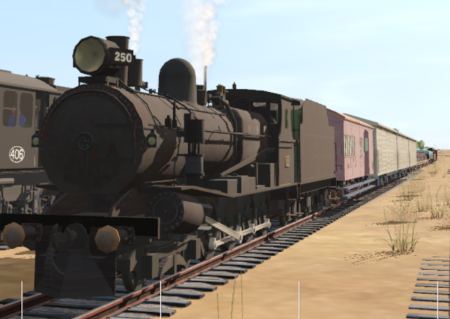
 Paratoo to Gladstone and Terowie Mixed Through Freight 

Express freight from Broken Hill to Port Pirie and Terowie. Train is divided at Peterborough.

Through Freight

Duration: Paratoo to Terowie x hours
Paratoo to Gladstone x hours
Loco: SAR T 250 on Paratoo Goods Loop
  • Other Unrostered Locos:
  • SAR T 23 at Peterborough (Main) Depot
  • SAR T 233 at Peterborough (Main) Depot
  • SAR 407 at Peterborough (Main) Depot
Consist: Attached to SAR T 250. 3 QLX wagons, 4 MTX flat wagons, 2 TGR CCC wagons, 2 WHE wagons, 3 Tank wagons, 2 guards vans (at either end). Each freight wagon has its destination as part of its name e.g. TGR CCC Gladstone or MTX Terowie.
Task: Take the train out of the loop and onto the main line. Proceed to Peterborough Yard. Coal and water the loco as needed. The train has to be divided at Peterborough. Those wagons with Terowie in their names are to be delivered to Terowie Goods Transfer NG. Those with Gladstone in their names are to be delivered to Gladstone Goods Transfer Narrow Gauge. There are additional goods wagons on the Goods Siding at Peterborough that have to be marshalled onto the two trains before departure. Additional locos are available at Peterborough to assist.
Driving Notes:
  • The approaches to all locations are protected by invisible signals to prevent the AI Half Speed Slowdown Problem when approaching a signal at stop.
  • Enhanced Interlocking Towers with set paths are available for your optional use at Paratoo (departure), Peterborough (arrival and departure), Jamestown (arrival and departure), Gladstone (arrival) and Terowie (arrival). Details of all available EIT Paths are provided in the Tab PH Grey.png tab at each location with EITs. See Location Index.
  • Trackmarks and industries have been provided for AI Drive To Trackmark, Drive via Trackmark and Drive to  Industry  commands. Details of all available Trackmarks and Industries are provided in the Tab TM Grey.png and Tab IN Grey.png tabs at each location. See Location Index.
  • Manual (no AI) driving is possible. For those locations without home or approach semaphore signals, a Caution warning sign has been placed at the location of the Main Approach Dn and Main Approach Up trackmarks. Details on all switches and suggested switch paths are provided in the Tab SW Grey.png tab at each location. See Location Index.


Personal tools