HowTo/Build a Car for Traffic (stand-alone version)
Contents |
Make the Texture
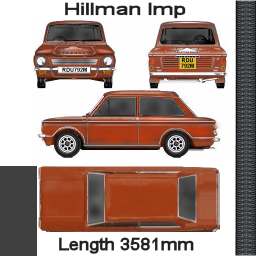
Firstly, get some photographs or coloured drawings of the car. We must have (or make) a side view, top view, front view and back view. If the two sides are different we should have a left and right side view. Assemble these photos/drawings to make a texture.
Make the Model Mesh
Then in our modelling program (3DSMax, Blender, or even GMax) attach the texture to a plane and adjust the size so the the side view of the car is full size for the vehicle.
Create our mesh by tracing around the various parts of the car in side view. Be systematic here so we can line up the vertices. Change view to top and join up the vertices with polys to create surfaces.
This is not a lesson in modelling, so sufficient to say, that the model mesh should have welded vertices and you only make one half, then mirror it to get the other half.
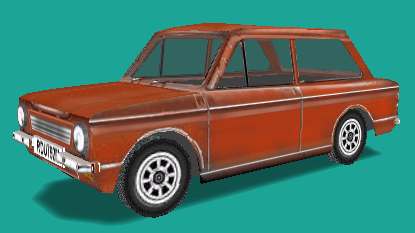
The model should then be texture mapped and, hopefully, we end up with a good representation of the pictured vehicle.
Load Model into Trainz
Trainz has some very specific requirements for traffic and care should be taken to get the correct entries in the config.txt file.
To get our car into the game as a stand-alone item make the asset as follows.
In Content Manager, click on New Asset in the main menu and make a kind scenery item as a new asset. We can change the kind later if you make a mistake.
The Content Creator Plus utility (CCP) will open a "New Asset" folder in the editing area of Trainz.
Copy the mesh, texture images and texture.txt files to this new folder.(its name doesn't matter). Also copy the sound file to this folder if you are including the sound option.
Then ensure that the asset works and no textures are missing by opening the mesh in a Mesh Viewer (see third party Tools for a download). This step can save some pain later if some thing is missing. Any area that is rendered white has a missing texture,
In CCP, right click on the tree view in the LHS pane and add a mesh-table container and then a "default" mesh container. Then add the "mesh" and "auto-create" (on) tags. Locate the mesh as prompted by CCP.
Now save and exit from Content Creator Plus. The rest must be done manually as CCP does not support the traffic tags as yet.
Commit the new asset into the Game and then re-open it for Edit in Explorer using Content Manager.
Open the config.txt in NotePad and edit it so that it is as follows.
kuid             <kuid:XXXXX:YYYY>                        ... the kuid set by CCP
username         "One of my Carz for Traffic in TS2010"   ... the name of the asset set by me in CCP
kind             "scenery"                                ... the kind set by CCP
trainz-build     3.3                                      ... trainz build for TS2010 set by CCP
description      "A whoopee sedan in red for traffic in TS2010"  .. our description of our car (start and end quotes are required)
mesh-table
{
  default
  {
    auto-create  1
    mesh         "hillman_imp.im"
  }
  default-night   ........................................... add this if you want lights at night
  {
    mesh         "lights.im"   .............................. your light mesh with head and tail lights
                                                              and perhaps a light beam above the road.
    night-mesh-base   "default"
  }
}
height-range      -10,50        ............................. recommended to have this tag
nightmode         "car"         ............................. the new nightmode setting for traffic
                                                                if you have lights
trackside         0.01          ............................. the new setting for carz to run on roads
category-era      "1950s;1960s"
category-region   "AU;UK"
category-class    "VL"          ............................. for Land Vehicles
author            "MyName"
license           "No restrictions.....blah blah"
contact-email     "me@braenet.com.au" etc for personal details.

soundscript                     ............................. optional soundscript container
{
  daysingle
  {
    trigger       "carz"        ............................. the "car spawn" trigger
    repeat-delay  0,0           ............................. repeat-delay now has two values
    distance      1,50          ............................. determines the volume a,d fade distance

    sound
    {
      0           "car_4.wav"   ............................. the car sound file must be this asset folder
    }
  }
}

thumbnails
{
  0
  {
    image         "$screenshot$.jpg"
    width         240
    height        180
  }
}
Re-commit the car into the game and ensure there are no errors.
The car is now ready to be added to a route or region to become live traffic. Refer to HowTo/Add Carz Traffic to a Route
A more efficient way to have a group of carz on a route is to combine them into a mesh library. This method allows sharing of textures over a number of vehicles. HowTo/Build a Car for Traffic (mesh library version) describes the extra steps needed to implement this strategy.

