The information in this Wiki Page applies to TANE, TRS19, Trainz Plus and TRS22.
What is the Bulk Asset Update/Replace Tool?
 |
The Bulk Asset Update/Replace Tool allows the replacement, deletion and modification of multiple instances of one or more different assets, including textures. |
 |
Notes:
- The tool automates the tedious process of deleting and replacing objects one at a time, as well as other tasks. It allow the mass:-
- deletion of scenery objects
- replacement of one or more scenery objects by another object
- random rotation of scenery objects
- movement of scenery objects from one layer to another
- These processes can be performed over the entire layout, a single baseboard or in a selected area only.
- Deletion and movement between layers can be performed on a set percentage of the selected or replacement scenery objects.
- The replacement operation can be performed on textures.
|
|
Things it Will NOT Do
 |
The Bulk Asset Update/Replace Tool CANNOT be used on:-
- spline objects (tracks are not counted as splines so you can replace tracks)
- objects that are in a locked layer (easily fixed by unlocking the layer)
- bridge splines
- tunnel splines
- multiple track splines
- consists/trains
- objects of mixed types e.g. replacing non-splines with splines
|
|
Selecting Assets and Options
The tool is located in the Surveyor Main Menu in TANE (below left) and in the Surveyor Tools Menu in TRS19, Trainz Plus and TRS22 (below right).
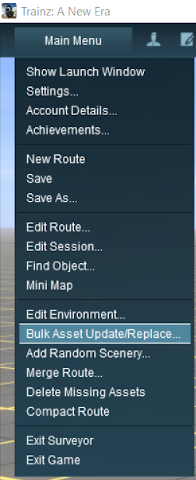
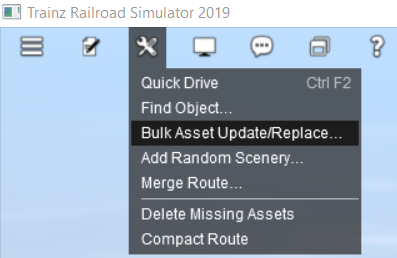
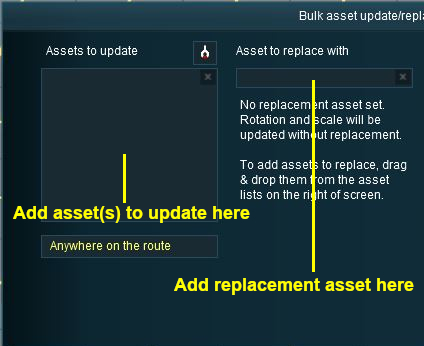 |
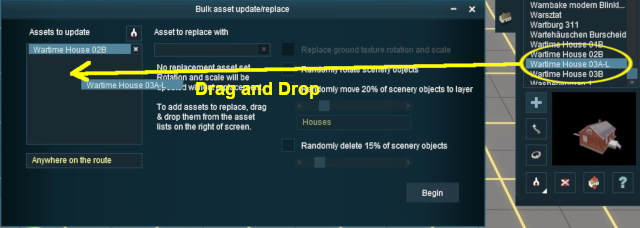
- The large data box on the left of the tool window, the Assets to update list, is used to store the names of the objects that are going to be updated or replaced
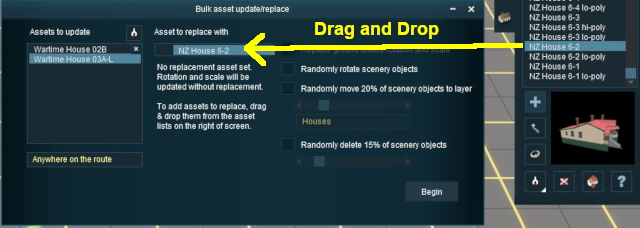
- The smaller entry box on its right. the Asset to replace with list, is to store a single object that will replace the object or objects in the Assets to update list
|
Deleting Assets from the Lists
 |
Use the Drag and Drop method to remove individual objects from the lists or click the x button in each data entry box to remove all its objects. |
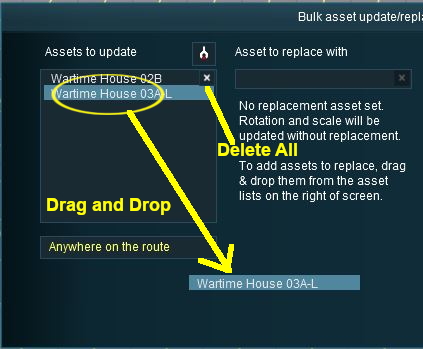 |
Setting the Scope
Select the region of the layout where the updates, replacements or deletions will occur:-
 |
|
 |
Choices:
- Anywhere on the route - the entire layout
- In current section only - the current baseboard
- In selected area - a defined area
|
|
|
If the Selected area option is chosen, then...
|
 |
Steps:

- Click the Red icon, and
- Draw out the area to be used
|
|
Setting the Options - for Non Texture Objects
Option 1: Randomly Rotate Scenery Objects
The first option controls the rotation or orientation of the original OR the replacement scenery objects.
|
 |
Settings:
- If no Replace with object is entered then the objects in the Assets to update list will be randomly rotated to new orientations
- If a Replace with object is entered then the replacement objects in the Replace with list will be randomly rotated to new orientations
All the layers containing the objects must be unlocked. Objects in locked layers will not be rotated.
|
|
Option 2: Move Scenery Objects to Another Layer
The second option allows the original OR replacement scenery objects to be moved to another layer.
 |
Splines are not classified as scenery objects and cannot be moved to another layer by using the Bulk Asset Update/Replace Tool |
 |
To move a spline to another layer set the layer property in the spline property window to the new layer. You will have to do this on every spline segment.
|
|
|
|
 |
Settings:
- If no Replace with object is entered then the selected percentage of the objects in the Assets to update list will be moved to the selected layer
- If a Replace with object is entered then the selected percentage of the replacement objects in the Replace with list will be moved to the selected layer
- Select a percent figure from 0% to 100% in steps of 5%. Values other than 0% and 100% will be approximate, not exact. Selecting 0% will move none of the objects, 100% will move them all
- Select a destination layer for the objects
All the layers containing the objects must be unlocked. Objects in locked layers will not be moved.
|
|
|
 |
Steps:

To move objects to another layer:
- Tick
 the check box to randomly move a set % of the replacement (or original) scenery objects to another layer the check box to randomly move a set % of the replacement (or original) scenery objects to another layer
- Select a percentage figure from 0% (none) to 100% (all)
- Select the layer for the objects to move to (the layer must be unlocked)
To keep the replacement objects in the same layer:
- Untick
 the check box to keep all the replacement scenery objects in the same layer as the original scenery objects. This has no effect if there are no objects in the Replace with list the check box to keep all the replacement scenery objects in the same layer as the original scenery objects. This has no effect if there are no objects in the Replace with list
Click the BEGIN button to complete the process |
|
 |
CAUTION:
When moving track or track objects (signals, switches, etc) to other layers always make sure that no track objects end up in a layer that is above the track layer they are attached to
|
|
 |
Option 1 and Option 2 CAN both be checked ON at the same time to produce a combined effect |
Option 3: Delete Scenery Objects
The third option allows the deletion of scenery objects from the layout.
|
 |
Settings:
- Select a percent figure from 0% to 100% in steps of 5%. Values other than 0% and 100% will be approximate, not exact. Selecting 0% will delete none of the objects, 100% will delete them all
All the layers containing the objects must be unlocked. Objects in locked layers will not be deleted.
|
|
 |
Option 2 and Option 3 CANNOT both be checked ON at the same time. |
 |
Option 1 and Option 3 CAN both be checked ON at the same time to rotate all the scenery objects before deleting a set percentage of them. |
 |
Deleting "Stubborn" Objects:
Some objects simply will not delete, for example some non track splines. The workaround for deleting these objects from a layout is:-
|
 |
Steps:
- exit Surveyor
- start Content Manager
- locate and select (highlight) the stubborn asset
- click the Content menu and select Disable or Hide (depending on your version of Trainz)
This will not delete the object from your layout or from your Trainz installation
- start Surveyor and reload the route. It will now have a missing dependency
- from the Main Menu (in T:ANE) or the Tools Menu in (TRS19/Trains Plus/TRS22) select the Delete Missing Assets option
- save the route and exit Surveyor
The disabled asset will no longer be present in your layout. It should now be restored for other uses.
- start Content Manager
- locate and select (highlight) the now disabled asset
- click the Content menu and select Enable
|
|
 |
This method is an All or Nothing approach. ALL instances of the selected asset will be deleted from your layout |
|
|
Setting the Options - for Texture Objects
 |
Notes:
- You cannot rotate or move textures. The only available texture setting controls the scale and rotation of the replacement texture.
- You can select multiple textures to be replaced by a single texture.
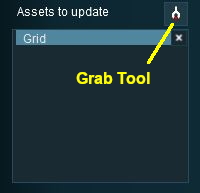
- Select the texture assets by using either the "Grab Tool" or by "dragging and dropping".
- Textures can be deleted by using the workaround for Deleting Stubborn Objects described in the section Delete Scenery Objects above.
|
|
The image below shows a region painted with one texture asset but with different scaling and rotation settings.

With the check box ticked, the following is the result after clicking the BEGIN button. |
|

With the check box unticked, the following is the result after clicking the BEGIN button. |
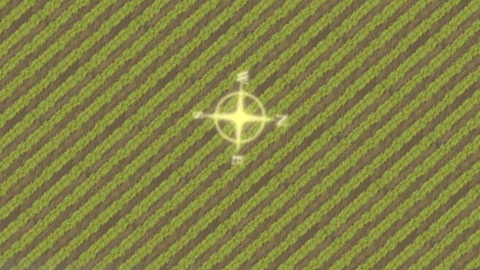
The scale and rotation settings that were used in the original have been replaced with the default scale and rotation settings of the replacement texture. |
|
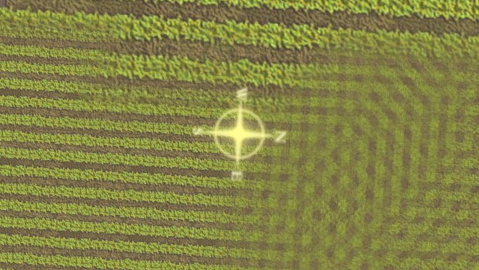
The same scale and rotation settings that were used in the original have been used with the replacement texture. |
Sample Applications
Replacing Some Assets
The Problem:
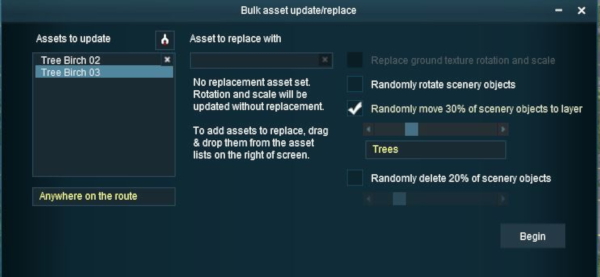
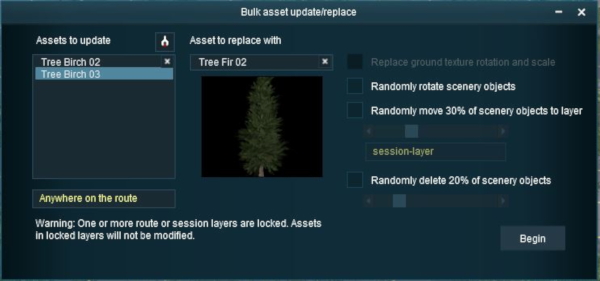
A forest has been created using three different trees. A number (30%) of the two smaller tree types are to be replaced with a larger tree of a different type.
The Solution:
The Bulk Asset Update/Replace Tool does not have a feature that will allow the replacement of only some assets (it is all or none), so a slightly more indirect approach is needed.
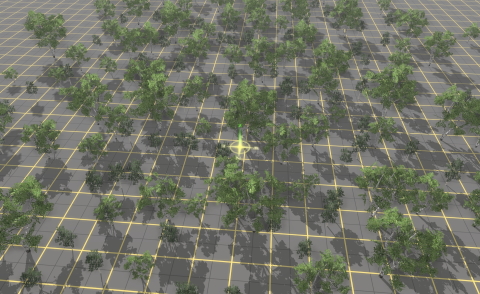
The final result.
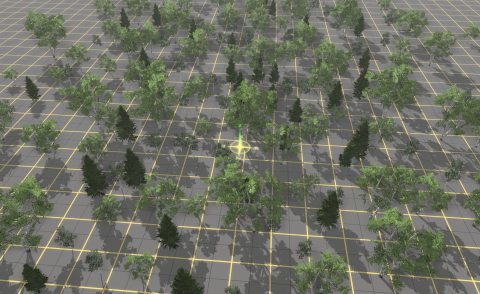 |
|
 |
Steps:
To complete the process:-
- The original layer is unlocked
- The Trees layer is merged with the original layer
|
|
 |
For information on unlocking and merging layers, see the Trainz Wiki Page at:-
|
|
Fixing "Texture Bleeds"
The Problem:
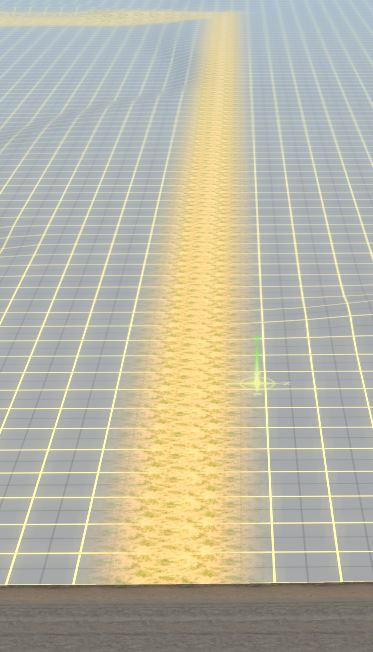 |
Sometimes when adding new baseboards or merging a route containing blank baseboards onto a route containing textured baseboards, there can be a "bleed-over" where a texture from the painted route will flow along some of the baseboard boundaries of the unpainted baseboards as shown in the image left.
As strange as it may seem, this is actually "expected behaviour" and its purpose is to resolve other long standing problems that can occur when baseboards are added.
The unwanted texture can (usually) be painted over by another texture and this will resolve the problem but there may be a lot of it to paint out and you may prefer a simplier solution. The Bulk Asset Update/Replace Tool can provide such a solution.
The Solution:
|
 |
2: Grab the "Bleed Texture" and Clean
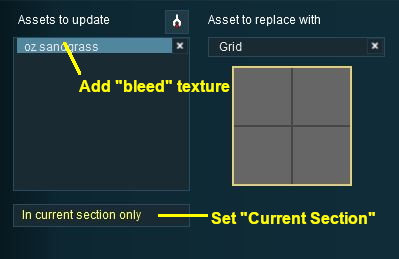 |
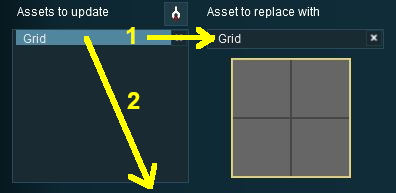
- use the Grab Tool to select the "bleed" texture and place it into the Update list
- IMPORTANT: change the scope setting to Current section only otherwise this texture will be replaced by the grid throughout the entire layout
- click the BEGIN button to complete the process
If more than one baseboard needs this treatment then
- move the Surveyor cursor to the next baseboard and click the BEGIN button to complete the process
- repeat as necessary
|
|
|
Trainz Wiki
 |
More Tutorials and Guides to Using Trainz
|
This page was created by Trainz user pware in June 2018 and was last updated as shown below.


