HowTo/Export from Blender using FBX
(THIS IS A WORK IN PROGRESS)
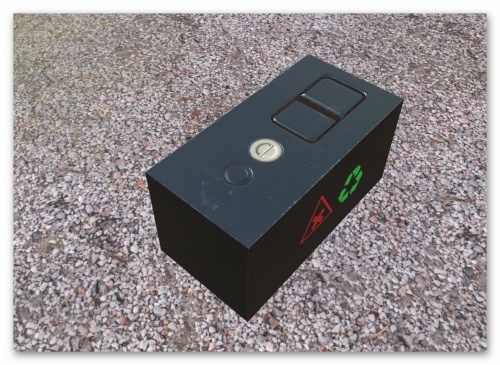
This page describes how to export a simple model from Blender 2.79 and Blender 2.80 into the FBX file format for use in Trainz. The model uses a Trainz PBRMetal format so it is only suitable for TRS2019 and later versions. The Blender source and PBRMetal textures are provided.
Some knowledge of using Blender and Trainz asset creation is assumed.
Contents |
Video Tutorial
A video tutorial can be found at Exporting basic Cube from Blender with PBR Materials.
Asset Creation Workflow
The basic workflow is:
- Create your mesh.
- Create a UV map for mapping mesh polygons to a texture.
- Apply a Trainz material including textures.
- If required, animate the mesh.
- Export the model to an FBX file.
- Import the model into Trainz. Trainz will create a Trainzmesh mesh data file.
The provided Blender models are ready for you to do steps 3 through 6. Step 4 is ignored.
Exporting in Blender 2.79b
Set up the source files. They can be found here File:Mycube 279.zip
- Load the provided Blender sources files into a Trainz asset project folder (directory). The source files include a Blender model file (mycube_279.blend), three images (textures) for the material, the texture description files, and an incomplete config.txt.
- Using a plain ASCII text editor, edit the config.txt and add your own asset kuid.
Loading the Blender Source Model
- Start Blender 2.79.
- Open the provided Blender source file. The model has one mesh: mycube_lod0 in layer 0.
- The model is set up for Blender Render mode.
- The mesh is UV mapped but has no material.
Materials and Textures
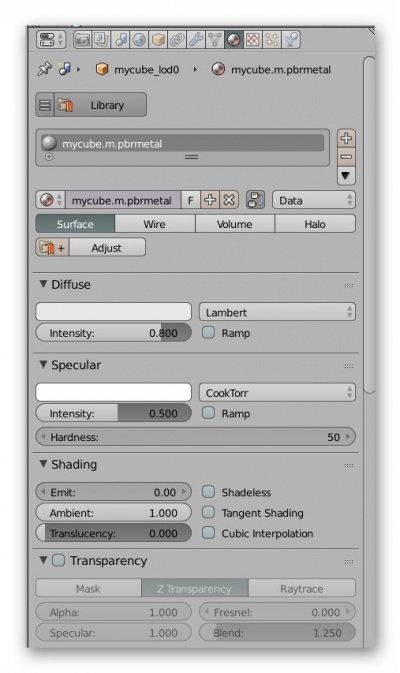
- Create a new material called “mycube.m.pbrmetal”. There is no need to change any other material settings. More information on Materials can be found here:
http://online.ts2009.com/mediaWiki/index.php/Material_Types
Albedo Texture
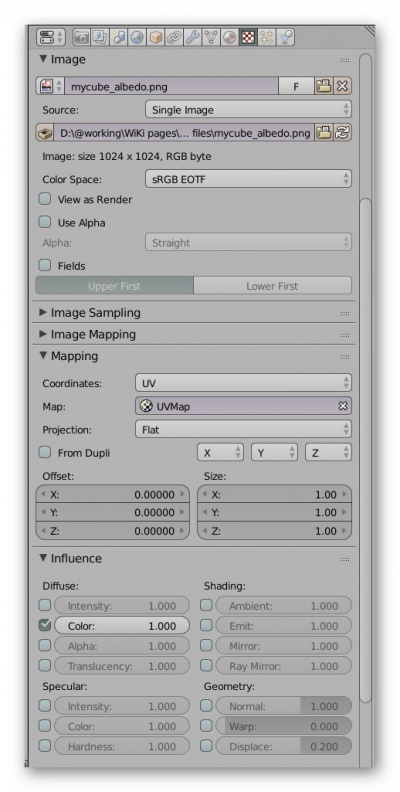
- Add a new texture slot called “albedo”. The name itself is not significant but it is useful to use a name that reflects its purpose.
- Set the texture type to Image or Movie and load the image MyCube_albedo.png.
- Uncheck Use Alpha.
- Set the Mapping Coordinates to UV and select map UVMap.
- Within the Influence Section check Diffuse->Color
Normal Texture
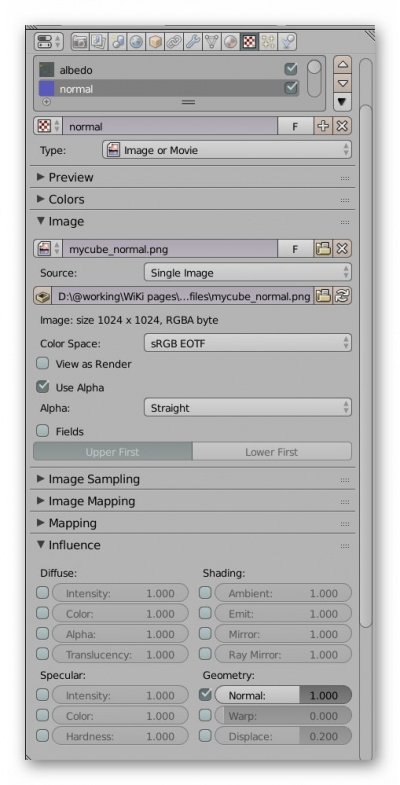
- Add a new texture slot called “normal”.
- Set the texture type to Image or Movie and load the image MyCube_normal.png.
- Check Use Alpha since the provided normal texture uses a height map in the alpha channel.
- Set the Mapping Coordinates to UV and select map UVMap.
- Within the Influence Section check Geometry->Normal. There is no need to set a value since the FBX exporter ignores it. Make sure no other options, such as Diffuse->Color, are selected.
Parameter Texture
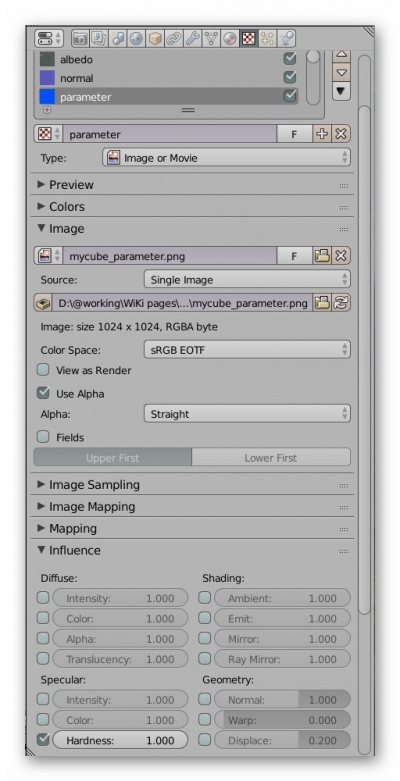
- Add a new texture slot called “parameter”.
- Set the texture type to Image or Movie and load the image MyCube_parameter.png.
- Check Use Alpha since the parameter texture has an alpha channel (metallicity).
- Set the Mapping Coordinates to UV and select map UVMap.
- Within the Influence Section check Specular->Hardness. This is the indication to Trainz that this texture is used for the parameter texture. Make sure nothing else is checked in Influence.
Exporting to FBX
The model is now ready for export.
- Select the mesh object in the 3D window (right click)
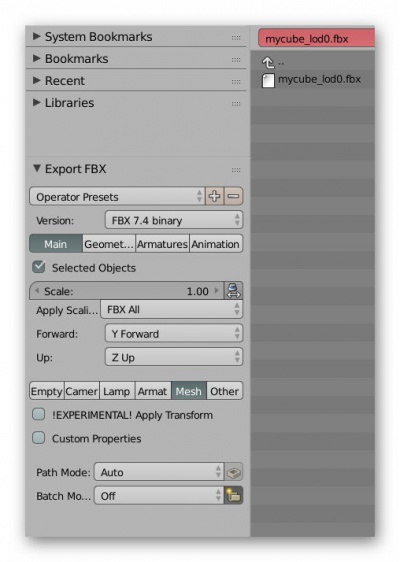
- Select File->Export->Export FBX and the FBX export panel will show in the bottom left hand corner of the window. If the Export FBX option isn’t shown, then make sure it is enabled in User Preferences.
- Operator Presets. This option allows you to define an export configuration that can be recalled rather than having to set options each time.
- Scale: Leave the scale value at 1.0 and make sure the small button to the right of the scale is unchecked.
- Version: Select FBX 7.4 binary.
- The four export options categories: Main, Geometries, Armature and Animation show different menus and sub options for those categories. You can leave the standard settings for Geometries, Armature and Animation.
- For Main options:
- Check Selected Objects. This exports all objects on visible layers.
- Apply Scalings: Use “FBX All”.
- Forward: select option “Y Forward”. This automatically changes the Up option to “Z Up” which is correct for Trainz.
- Check Mesh only since we are not exporting empties or animation.
- Leave all other options at their default values.
- At the top of the window, make sure the selected target folder is your project folder.
- Enter the target FBX file as “mycube_lod0.fbx”.
- Click on the Export FBX button at the top right. The mesh will be exported.
TIP: You can save your preferences for a given situation by clicking on the plus button (+) next to Operator Presets and saving the preset with a name.
Importing into Trainz
Config.txt
When you submit your asset, Trainz will convert the FBX file to a Trainzmesh file so the mesh table will need to identify each mesh as such. For the sample asset the filename will be mycube_lod0.trainzmesh. See the config.txt in the project folder.
Texture.txt files
You can provide your own texture.txt files (advisable) or let the commit process create them for you. The commit process will create suitable files, such as those required for normal maps, but you can provide your own if you have special requirements.
Committing the asset
Commit the asset by dragging the folder onto CM. Assuming the commit is error free, open the asset for edit in explorer and see what Trainz has created. The trainzmesh files should be as described above. The FBX files will also be present so you may want to delete those if you are ready to upload your asset to the DLS or elsewhere. If you delete the FBX files, then you will need to commit the asset again. Since the trainzmesh files already exist no FBX conversion is carried out.
Exporting in Blender 2.80
- CAVEAT At the time of writing this tutorial, Blender 2.80 is still a beta version and so this section may require an update.
Set up the source files. They can be found here File:Mycube 280.zip
- Load the provided Blender sources files into a Trainz asset project folder (directory). The source files include a Blender model file (mycube_280.blend), three images (textures) for the material, the texture description files, and an incomplete config.txt.
- Using a plain ASCII text editor, edit the config.txt and add your own asset kuid.
Loading the Blender Source Model
- Start Blender 2.80.
- Open the provided Blender source file. The model has one mesh: mycube_lod0 in layer 0.
- The model is set up for Blender Render mode.
- The mesh is UV mapped but has no material.
Materials and Textures
- Change the main window editor to Shader Editor (Shader Nodes).
- Select the Material tab/icon in the Properties Editor (right side of screen). The material tab/icon looks like a sphere.
- Create a new material. A shader node of type Principled BSDF together with a Matierial Output node should be displayed in the shader editor. If it is the wrong shader node then you can change it in the material properties editor in the Surfaces->Surfaces section.
- Change the material name to “mycube.m.pbrmetal”. There is no need to change any other material settings. More information on Materials can be found here:
http://online.ts2009.com/mediaWiki/index.php/Material_Types
Albedo Texture
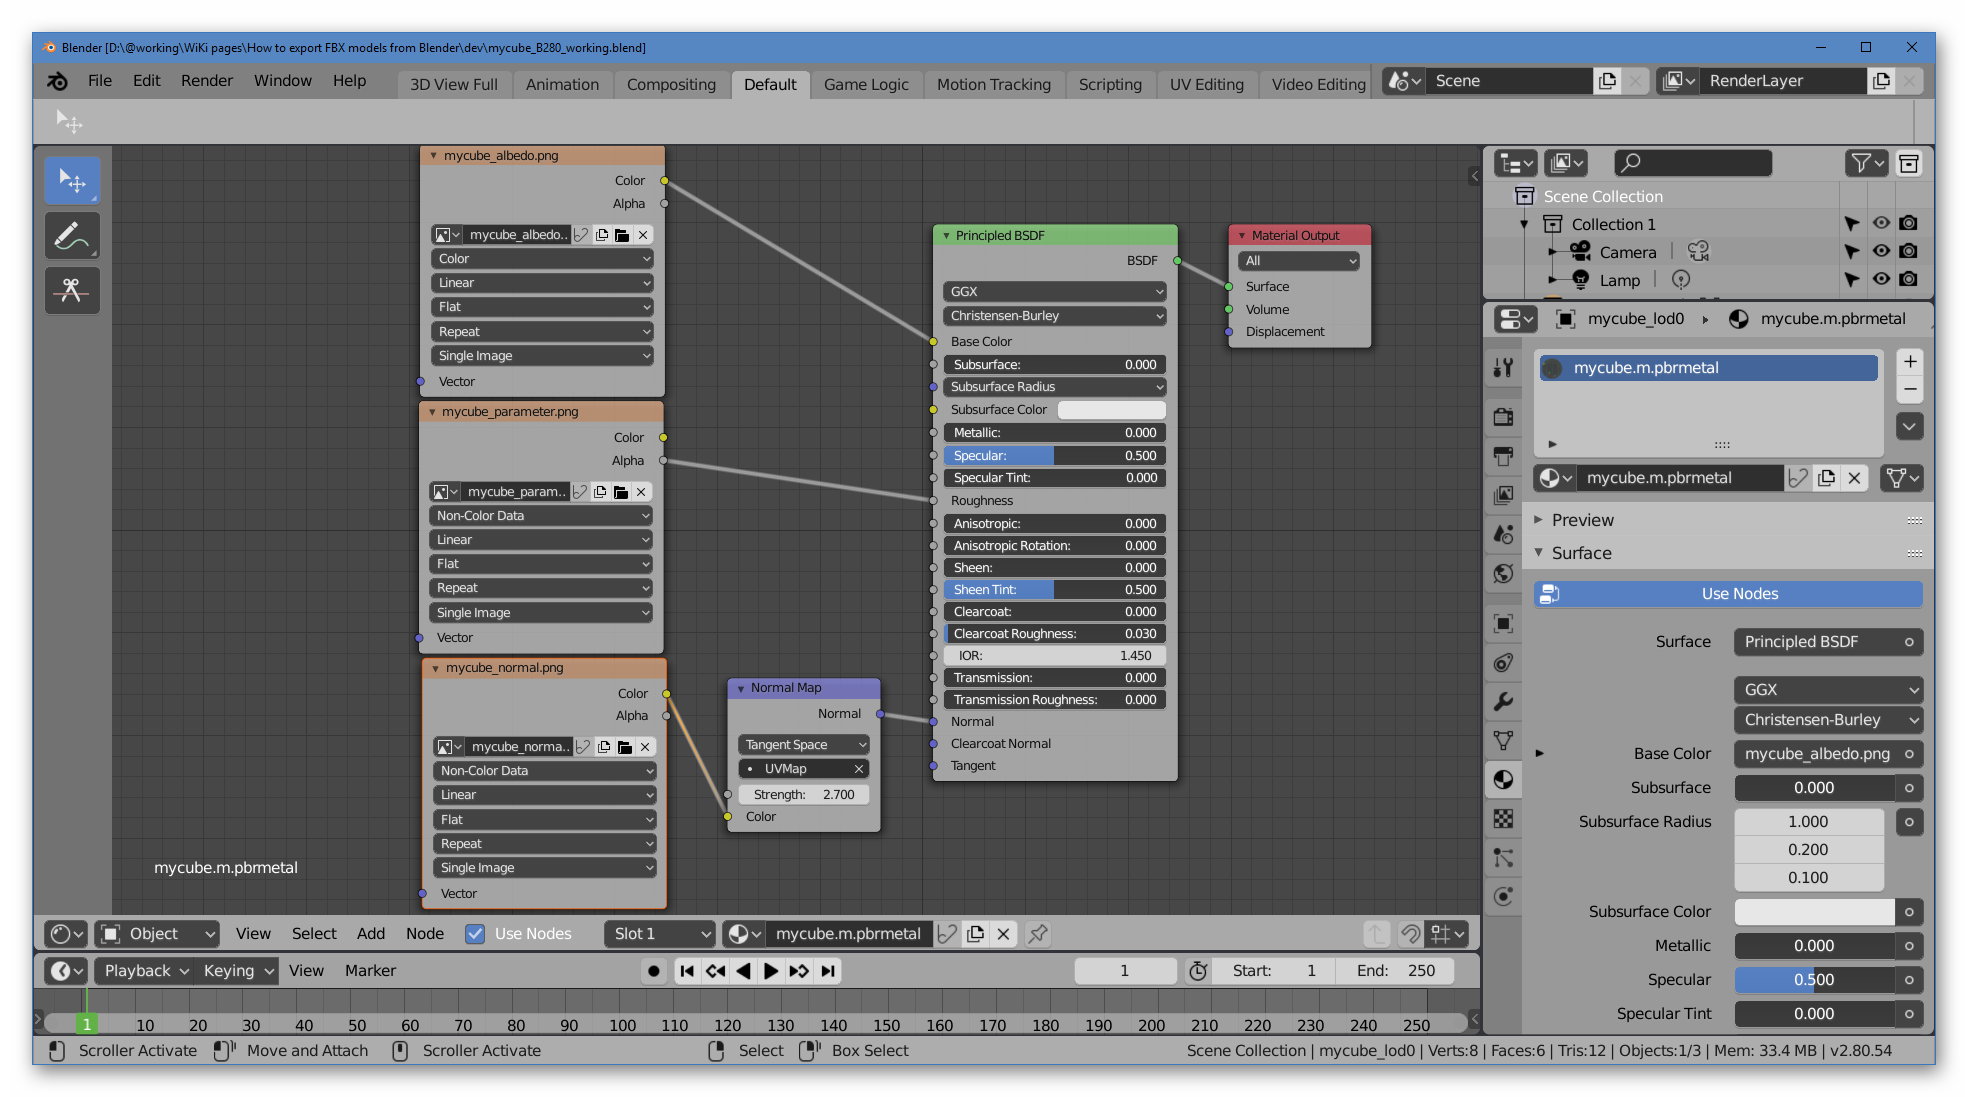
- Within the Shader Editor, select Add->Texture->Image Texture. An image texture node will appear in the Shader Editor.
- Within the texture node, select Open and load the “mycube_albedo.png” image file.
- Connect the Color output to the Principled BSDF shader base color input.
Parameter Texture
- Add a new Image Texture node to the Shader Editor.
- Open and add the “mycube_parameter.png” image file.
- Change the color type to Non Color Data. This option is just below the filename in the node.
- Connect the Alpha output to the shader roughness input.
Normal Texture
- Add a new Image Texture node to the Shader Editor.
- Open and add the “mycube_normal.png” image file.
- Change the color type to Non Color Data.
- The output of this node is not correct for Trainz so we need to add a converter node.
- Add a Vector->Normal Map node and position it between the shader node and the normal image node.
- Connect the Color output of the normal texture to the Color input of the Normal Map node.
- Connect the Normal output of the Normal Map node to the Normal input of the shader.
- Make sure the Normal Map space is set to Tangent Space.
- Set the map to UVMap. For other models you may have a different map name.
- Check Use Alpha since the provided normal texture uses a height map in the alpha channel.
- Set the Mapping Coordinates to UV and select map UVMap.
- Set the strength to a value of about 2.7
Your material nodes should look like this:
Viewing the Model
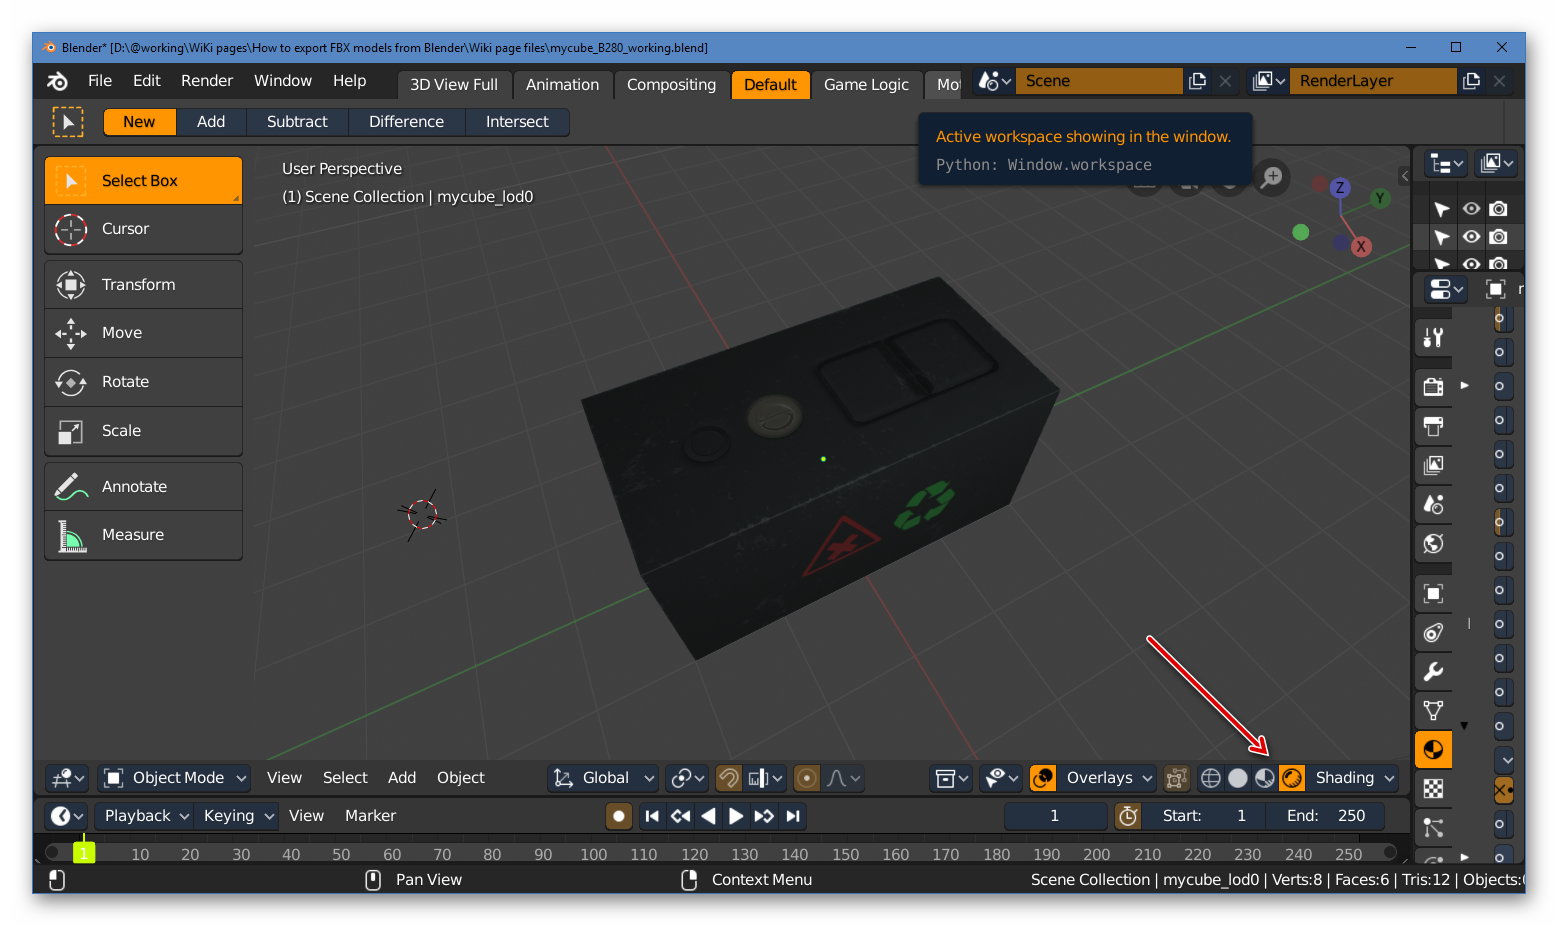
The Eevee render in Blender does a reasonable render of how the model will look in Trainz (TRS19). Change the main window to 3D Viewport, position the cube view and select the Rendered view option. This icon is identified by the arrow in this image:
Exporting to FBX
The model is now ready for export.
- Select the mesh object in the 3D Viewport.
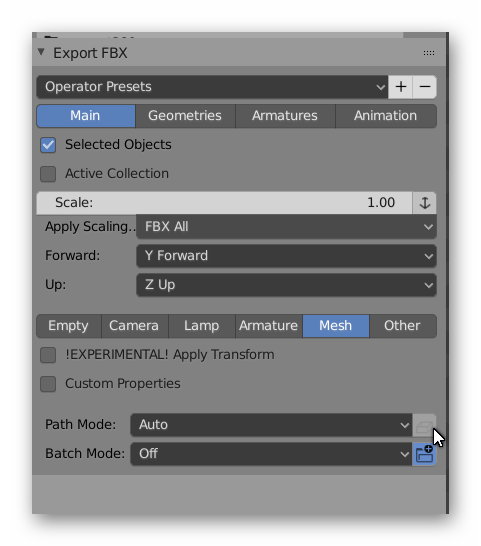
- Select File->Export->Export FBX and the FBX export panel will show in the bottom left hand corner of the window. If the Export FBX option isn’t shown, then make sure it is enabled in User Preferences.
- Operator Presets. This option allows you to define an export configuration that can be recalled rather than having to set options each time.
- Scale: Leave the scale value at 1.0 and make sure the small button to the right of the scale is unchecked.
- The four export options categories: Main, Geometries, Armature and Animation show different menus and sub options for those categories. You can leave the standard settings for Geometries, Armature and Animation.
- For Main options:
- Check Selected Objects.
- Apply Scalings: Use “FBX All”.
- o Forward: select option “Y Forward”. This automatically changes the Up option to “Z Up” which is correct for Trainz.
- Check Mesh only since we are not exporting empties or animation.
- Leave all other options at their default values.
- At the top of the window, make sure the selected target folder is your project folder.
- Enter the target FBX file as “mycube_lod0.fbx” .
- Click on the Export FBX button at the top right. The mesh will be exported.
TIP: You can save your preferences for a given situation by clicking on the plus button (+) next to Operator Presets and saving the preset with a name.
Importing into Trainz
Config.txt
When you submit your asset, Trainz will convert the FBX file to a Trainzmesh file so the mesh table will need to identify each mesh as such. For the sample asset the filename will be mycube_lod0.trainzmesh. See the config.txt in the project folder.
Texture.txt files
You can provide your own texture.txt files (advisable) or let the commit process create them for you. The commit process will create suitable files, such as those required for normal maps, but you can provide your own if you have special requirements.
Committing the asset
Commit the asset by dragging the folder onto CM. Assuming the commit is error free, open the asset for edit in explorer and see what Trainz has created. The trainzmesh files should be as described above. The FBX files will also be present so you may want to delete those if you are ready to upload your asset to the DLS or elsewhere. If you delete the FBX files, then you will need to commit the asset again. Since the trainzmesh files already exist no FBX conversion is carried out.
