ProToolz Yard Ladder Template
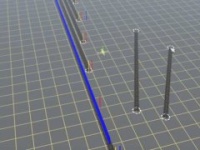
(Created page with "{| |- |Using the ProToolz Yard Ladder template, the following guide will assist in creating a perfectly straight ladder for your new yard. This is one of the most complicated ...") |
|||
| (One intermediate revision by one user not shown) | |||
| Line 1: | Line 1: | ||
{| | {| | ||
|- | |- | ||
| − | |Using the ProToolz Yard Ladder template, the following guide will assist in creating a perfectly straight ladder for your new yard. This is one of the most complicated procedures, but with a bit of patience, you can have a great-looking yard ladder in a few minutes. | + | |[[File:ProTools Yard214.jpg|right|200px]]Using the ProToolz Yard Ladder template, the following guide will assist in creating a perfectly straight ladder for your new yard. This is one of the most complicated procedures, but with a bit of patience, you can have a great-looking yard ladder in a few minutes. |
|- | |- | ||
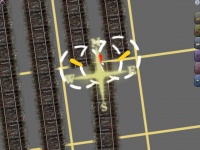
| − | |'''1)''' All tools are accessed by selecting 3DTrains in the Region window of the Objects tab, and ProToolz from the Object Type. | + | |[[File:ProTools Yard201.jpg|right|200px]]'''1)''' All tools are accessed by selecting 3DTrains in the Region window of the Objects tab, and ProToolz from the Object Type. |
| + | |||
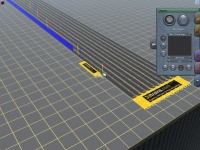
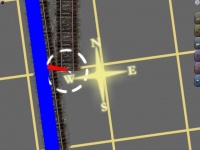
Start by selecting and dropping in the ProToolz Yard Ladder template from the Objects tab. There's a right-hand and left-hand version, so choose the one that matches the yard you're trying to duplicate. The beginning of the yard lead will start exactly where you click you mouse (first YELLOW post). ''Does not apply to all versions, if your version has no region window, use Filter and 3dtrains'' | Start by selecting and dropping in the ProToolz Yard Ladder template from the Objects tab. There's a right-hand and left-hand version, so choose the one that matches the yard you're trying to duplicate. The beginning of the yard lead will start exactly where you click you mouse (first YELLOW post). ''Does not apply to all versions, if your version has no region window, use Filter and 3dtrains'' | ||
| + | |||
Note: The Yard Ladder template has a long BLUE fence running its entire length. This is used for aligning the template to the mainline, should it be set at an angle. | Note: The Yard Ladder template has a long BLUE fence running its entire length. This is used for aligning the template to the mainline, should it be set at an angle. | ||
|- | |- | ||
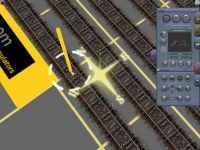
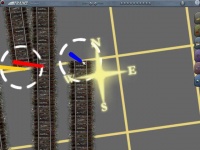
| − | |'''2)''' Once you have the template aligned to your satisfaction, begin by inserting spline points at all YELLOW post locations. | + | |[[File:ProTools Yard202.jpg|right|200px]]'''2)''' Once you have the template aligned to your satisfaction, begin by inserting spline points at all YELLOW post locations. |
| + | |||
Note: The Yard Ladder template is designed to accommodate a 10-track yard (1 mainline, and 9 yard tracks). It's up to you to determine the number of tracks for your yard, and adjust the template to suit. | Note: The Yard Ladder template is designed to accommodate a 10-track yard (1 mainline, and 9 yard tracks). It's up to you to determine the number of tracks for your yard, and adjust the template to suit. | ||
|- | |- | ||
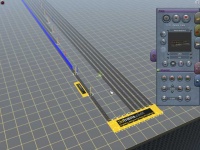
| − | |'''3)''' Delete the unnecessary track pieces from the yard. This will make it easier to view your progress. | + | |[[File:ProTools Yard203.jpg|right|200px]]'''3)''' Delete the unnecessary track pieces from the yard. This will make it easier to view your progress. |
|- | |- | ||
| − | |'''4)''' Create two new track pieces. One will be used as the yard ladder (the one on the left), and the other for the yard lead (the one on the right). | + | |[[File:ProTools Yard204.jpg|right|200px]]'''4)''' Create two new track pieces. One will be used as the yard ladder (the one on the left), and the other for the yard lead (the one on the right). |
|- | |- | ||
| − | |'''5)''' Move the End Spline Point of one of the new track pieces to the last RED post of the Yard Ladder template. | + | |[[File:ProTools Yard205.jpg|right|200px]]'''5)''' Move the End Spline Point of one of the new track pieces to the last RED post of the Yard Ladder template. |
|- | |- | ||
| − | |'''6)''' Move the other End Spline Point of the track moved from the last step to the first RED post of the Yard Ladder template. | + | |[[File:ProTools Yard206.jpg|right|200px]]'''6)''' Move the other End Spline Point of the track moved from the last step to the first RED post of the Yard Ladder template. |
|- | |- | ||
| − | |'''7)''' Repeat Step 5 and Step 6 for the second track piece, aligning the End Spline Points with the first and last BLUE posts. | + | |[[File:ProTools Yard207.jpg|right|200px]]'''7)''' Repeat Step 5 and Step 6 for the second track piece, aligning the End Spline Points with the first and last BLUE posts. |
|- | |- | ||
| − | |'''8)''' Insert a Spline Point over each of the RED posts (except the ends). | + | |[[File:ProTools Yard208.jpg|right|200px]]'''8)''' Insert a Spline Point over each of the RED posts (except the ends). |
|- | |- | ||
| − | |'''9)''' Using the Straighten Track tool from the Track Tab, click on ALL track pieces (between End Spline Points). | + | |[[File:ProTools Yard209.jpg|right|200px]]'''9)''' Using the Straighten Track tool from the Track Tab, click on ALL track pieces (between End Spline Points). |
|- | |- | ||
| − | |'''10)''' You can delete the Yard Ladder template. Doing so will make it easier to view your progress. | + | |[[File:ProTools Yard210.jpg|right|200px]]'''10)''' You can delete the Yard Ladder template. Doing so will make it easier to view your progress. |
|- | |- | ||
| − | |'''11)''' Beginning at the End Spline Points of the yard lead and yard ladder tracks near the mainline, connect these pieces to the mainline with new track pieces. | + | |[[File:ProTools Yard211.jpg|right|200px]]'''11)''' Beginning at the End Spline Points of the yard lead and yard ladder tracks near the mainline, connect these pieces to the mainline with new track pieces. |
|- | |- | ||
| − | |'''12)''' Complete the connections for all tracks ending with the top-most portion of the yard ladder. | + | |[[File:ProTools Yard212.jpg|right|200px]]'''12)''' Complete the connections for all tracks ending with the top-most portion of the yard ladder. |
Note: For best results, all tracks should be connected FROM the yard tracks TO the yard ladder and yard lead. | Note: For best results, all tracks should be connected FROM the yard tracks TO the yard ladder and yard lead. | ||
|- | |- | ||
| − | |'''13)''' Add switch levers and signals to complete your new yard. | + | |[[File:ProTools Yard213.jpg|right|200px]]'''13)''' Add switch levers and signals to complete your new yard. |
| − | You're Done! | + | |- |
| + | |[[File:ProTools Yard214.jpg|right|200px]]You're Done! | ||
| − | And there you have it. A dead-straight multi-track yard ladder, and the whole process took only a few minutes! As Rob at Auran would say: "...and that's all there is to it!" | + | And there you have it. A dead-straight multi-track yard ladder, and the whole process took only a few minutes!<br /> As Rob at Auran would say: "'''''...and that's all there is to it!'''''" |
|} | |} | ||
Latest revision as of 04:35, 19 July 2013
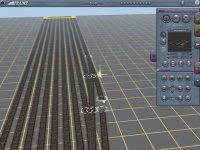
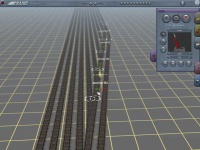
| Using the ProToolz Yard Ladder template, the following guide will assist in creating a perfectly straight ladder for your new yard. This is one of the most complicated procedures, but with a bit of patience, you can have a great-looking yard ladder in a few minutes. |
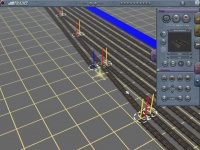
| 1) All tools are accessed by selecting 3DTrains in the Region window of the Objects tab, and ProToolz from the Object Type.
|
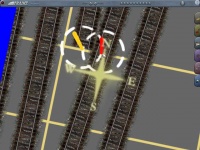
| 2) Once you have the template aligned to your satisfaction, begin by inserting spline points at all YELLOW post locations.
|
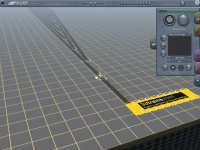
| 3) Delete the unnecessary track pieces from the yard. This will make it easier to view your progress. |
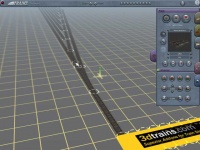
| 4) Create two new track pieces. One will be used as the yard ladder (the one on the left), and the other for the yard lead (the one on the right). |
| 5) Move the End Spline Point of one of the new track pieces to the last RED post of the Yard Ladder template. |
| 6) Move the other End Spline Point of the track moved from the last step to the first RED post of the Yard Ladder template. |
| 7) Repeat Step 5 and Step 6 for the second track piece, aligning the End Spline Points with the first and last BLUE posts. |
| 8) Insert a Spline Point over each of the RED posts (except the ends). |
| 9) Using the Straighten Track tool from the Track Tab, click on ALL track pieces (between End Spline Points). |
| 10) You can delete the Yard Ladder template. Doing so will make it easier to view your progress. |
| 11) Beginning at the End Spline Points of the yard lead and yard ladder tracks near the mainline, connect these pieces to the mainline with new track pieces. |
| 12) Complete the connections for all tracks ending with the top-most portion of the yard ladder.
Note: For best results, all tracks should be connected FROM the yard tracks TO the yard ladder and yard lead. |
| 13) Add switch levers and signals to complete your new yard. |
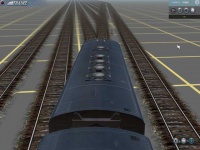
| You're Done!
And there you have it. A dead-straight multi-track yard ladder, and the whole process took only a few minutes! |
