SAR Scenarios Tutorial
m |
m |
||
| Line 119: | Line 119: | ||
<td width=30 align="center" bgcolor="lightcyan">'''Step'''<br>[[image:DotPoint1Blue.JPG|link=]]</td> <!-- Instruction 1 --> | <td width=30 align="center" bgcolor="lightcyan">'''Step'''<br>[[image:DotPoint1Blue.JPG|link=]]</td> <!-- Instruction 1 --> | ||
<td width=940> | <td width=940> | ||
| − | <span style="font-weight: 700; font-size: 19px; background-color: black; color: white;"> | + | <span style="font-weight: 700; font-size: 19px; background-color: black; color: white;"> Using the Gladstone EIT </span><br> |
<br> | <br> | ||
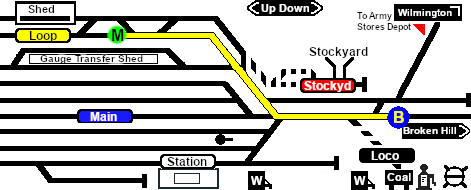
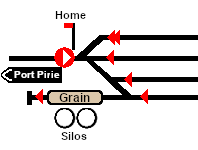
The first path to be set in this tutorial is from the <span style="font-weight: 700;">Gladstone <span style="background-color: yellow; color: black;"> Goods Loop </span></span> to <span style="font-weight: 700;"><span style="background-color: black; color: white;"> Broken Hill </span></span>. On the '''Gladstone''' [[image:Tab_PH_Grey.png|link=|75px]] page (link via [[image:Line_Index_Label.png|link=SAR_Index|Location Index]] - link will open in this window) this is identified on that page as:-<br><br> | The first path to be set in this tutorial is from the <span style="font-weight: 700;">Gladstone <span style="background-color: yellow; color: black;"> Goods Loop </span></span> to <span style="font-weight: 700;"><span style="background-color: black; color: white;"> Broken Hill </span></span>. On the '''Gladstone''' [[image:Tab_PH_Grey.png|link=|75px]] page (link via [[image:Line_Index_Label.png|link=SAR_Index|Location Index]] - link will open in this window) this is identified on that page as:-<br><br> | ||
| Line 194: | Line 194: | ||
<td align="center" bgcolor="lightcyan">'''Step'''<br>[[image:DotPoint2Blue.JPG|link=]]</td> <!-- Instruction 2 --> | <td align="center" bgcolor="lightcyan">'''Step'''<br>[[image:DotPoint2Blue.JPG|link=]]</td> <!-- Instruction 2 --> | ||
<td> | <td> | ||
| − | <span style="font-weight: 700; font-size: 19px; background-color: black; color: white;"> Driving to | + | <span style="font-weight: 700; font-size: 19px; background-color: black; color: white;"> Driving From Gladstone to Caltowie </span><br> |
<br> | <br> | ||
<table cellpadding="4" bgcolor=#c1e7e7> <!-- BEGIN Dot Point --> | <table cellpadding="4" bgcolor=#c1e7e7> <!-- BEGIN Dot Point --> | ||
| Line 290: | Line 290: | ||
<td align="center" bgcolor="lightcyan">'''Step'''<br>[[image:DotPoint3Blue.JPG|link=]]</td> <!-- Instruction 3 --> | <td align="center" bgcolor="lightcyan">'''Step'''<br>[[image:DotPoint3Blue.JPG|link=]]</td> <!-- Instruction 3 --> | ||
<td> | <td> | ||
| − | <span style="font-weight: 700; font-size: 19px; background-color: black; color: white;"> | + | <span style="font-weight: 700; font-size: 19px; background-color: black; color: white;"> Using the Caltowie EIT </span><br> |
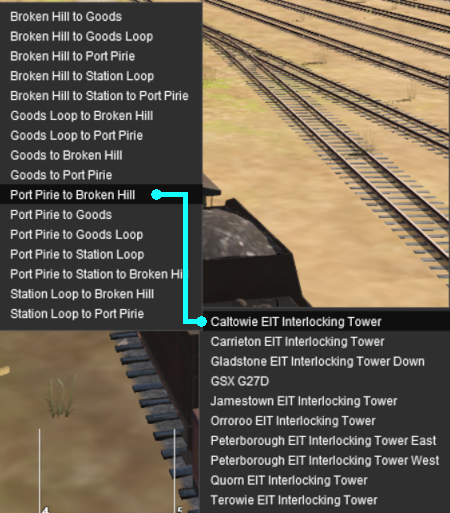
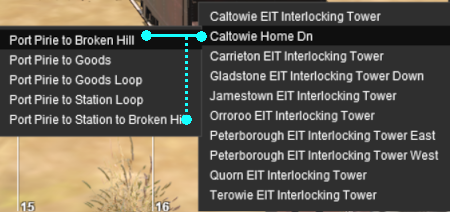
You can set an EIT path without having to be directly in front of a '''Starting Signal'''. For example, you can set all the EIT paths for the train through '''Caltowie''' and into '''Jamestown''' before you even leave '''Gladstone'''. <br> | You can set an EIT path without having to be directly in front of a '''Starting Signal'''. For example, you can set all the EIT paths for the train through '''Caltowie''' and into '''Jamestown''' before you even leave '''Gladstone'''. <br> | ||
| Line 353: | Line 353: | ||
<tr valign="top"> | <tr valign="top"> | ||
<td align="center" bgcolor="lightcyan">'''Step'''<br>[[image:DotPoint4Blue.JPG|link=]]</td> <!-- Instruction 4 --> | <td align="center" bgcolor="lightcyan">'''Step'''<br>[[image:DotPoint4Blue.JPG|link=]]</td> <!-- Instruction 4 --> | ||
| − | <td><span style="font-weight: 700; font-size: 19px; background-color: black; color: white;"> Driving Through Caltowie </span><br> | + | <td><span style="font-weight: 700; font-size: 19px; background-color: black; color: white;"> Driving Through Caltowie to Jamestown </span><br> |
[[image:DotPoint1.JPG|link=]] <span style="font-weight: 700; font-size: 17px; background-color: black; color: white;"> Manual Control </span><br> | [[image:DotPoint1.JPG|link=]] <span style="font-weight: 700; font-size: 17px; background-color: black; color: white;"> Manual Control </span><br> | ||
| + | |||
| + | '''Caltowie''' does not have a coal stage or a fuel oil store in need of a refill so the consist will not be stopping here.<br> | ||
To manually drive the train through '''Caltowie''' to '''Jamestown''' without using the '''EIT''' you will have to manually set all the switches yourself using the information on the '''Caltowie''' [[image:Tab_SW_Grey.png|link=|75px]] page (link via [[image:Line_Index_Label.png|link=SAR_Index|Location Index]] - link will open in this window). | To manually drive the train through '''Caltowie''' to '''Jamestown''' without using the '''EIT''' you will have to manually set all the switches yourself using the information on the '''Caltowie''' [[image:Tab_SW_Grey.png|link=|75px]] page (link via [[image:Line_Index_Label.png|link=SAR_Index|Location Index]] - link will open in this window). | ||
| Line 395: | Line 397: | ||
<tr valign="top"> | <tr valign="top"> | ||
<td align="center" bgcolor="lightcyan">'''Step'''<br>[[image:DotPoint5Blue.JPG|link=]]</td> <!-- Instruction 5 --> | <td align="center" bgcolor="lightcyan">'''Step'''<br>[[image:DotPoint5Blue.JPG|link=]]</td> <!-- Instruction 5 --> | ||
| − | <td><span style="font-weight: 700; font-size: 19px; background-color: black; color: white;"> | + | <td><span style="font-weight: 700; font-size: 19px; background-color: black; color: white;"> Using the Jamestown EIT </span><br> |
</td> | </td> | ||
Revision as of 09:25, 10 March 2021
| A part of the SAR Peterborough Base Session |
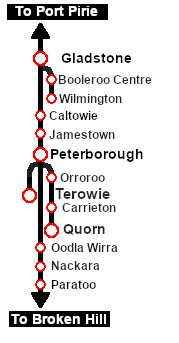
Enhanced Interlocking Towers (EITs) are included in the SAR Peterborough Base Session (they are not part of the route or layout) to provide easier navigation in some of the more complex yards in the layout. The EITs provide paths into and out of the yards. In some cases they also provide direct paths through the yards.
Gladstone and Peterborough have each been split into two EITs because of the large number of paths at each location. |
 |
Driver Commands are available for use in the session.
| Driver Commands are optional, they do not have to be used |
Apart from the standard commands (Drive To, Load, Unload, Couple, Wait For, etc), additional commands have been added. Specifically:-
- IT SetPath (TANE SP4 and later) - to allow EIT paths to be set in the Driver Command Bar
- IT CancelEnhancedPath (TANE SP4 and later) - to cancel any set EIT path
- Instant Load Command - to instantly load all wagons (except locos) with the first item in their product queues
- InstantLoadLocos - to instantly load all locos (or their tenders) with water and either coal or bunker c oil
- InstantUnload - to instantly unload all wagons (except locos)
The Tutorial Scenario
The scenario used in this tutorial is ![]() Gladstone-Peterborough Depot Fuel which has the consist already fully assembled with its locomotive (T 258) at the starting signal of the Gladstone EIT Goods Loop to Broken Hill path. This tutorial will follow the scenario until the consist arrives at Jamestown.
Gladstone-Peterborough Depot Fuel which has the consist already fully assembled with its locomotive (T 258) at the starting signal of the Gladstone EIT Goods Loop to Broken Hill path. This tutorial will follow the scenario until the consist arrives at Jamestown.
Getting Started:
|
| The Driver Command Bar |
||||
| Make sure that the Driver Command Bar is visible on the screen. In Driver Mode the interactive driver controls are at the bottom right of the screen. |
||||
 |
||||
| Cycle Through the Command States Click the 3 dots on the extreme bottom right of the screen to cycle the control display through to the Driver Command Bar - stop when the last of the 3 dots is highlighted. |
Open the Driver Command Menu Click on the chevron icon to open the command menu. |
|||

