SAR Nantabibbie
From TrainzOnline
(Difference between revisions)
m |
m |
||
| Line 31: | Line 31: | ||
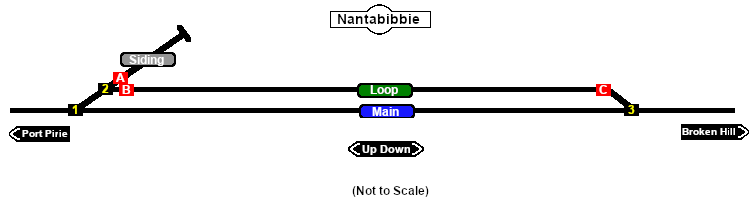
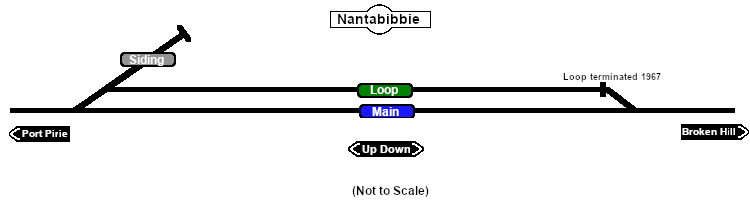
Passing loop and a works siding. Unmanned location on the <span style="font-weight: 700; color: white; background-color: black;"> Port Pirie-Broken Hill Line </span>. This location was bypassed when the line was converted to standard gauge in 1969. | Passing loop and a works siding. Unmanned location on the <span style="font-weight: 700; color: white; background-color: black;"> Port Pirie-Broken Hill Line </span>. This location was bypassed when the line was converted to standard gauge in 1969. | ||
</td> | </td> | ||
| + | </tr> | ||
| + | <tr valign="top"> | ||
| + | <td align="center">[[Image:line740.png|link=]]</td> | ||
</tr> | </tr> | ||
Revision as of 17:45, 12 November 2020
|
 |
|||||||||||||||||||||||||||||||||||||||||||||||||||||||||||||||||||||||||||||||||||||||||||||||||||||||||||||||||||||||||||||||||||||||||||||