Help:TRS19 Driver Track Profile
(→Trackmarks) |
(→Track Features) |
||
| Line 6: | Line 6: | ||
You can zoom in and out of the track profile, to show more or less of the track ahead (the scale will depend on the speed you are traveling at, and the density of track objects ahead of you) by scrolling in and out with the scroll wheel (or equivalent) on your mouse. | You can zoom in and out of the track profile, to show more or less of the track ahead (the scale will depend on the speed you are traveling at, and the density of track objects ahead of you) by scrolling in and out with the scroll wheel (or equivalent) on your mouse. | ||
| − | ==Track | + | ==Track Profile Settings== |
| + | [[File:Track-profile-settings.jpg]] | ||
In addition to showing the track gradient, and distance, the Track Profile UI will show a variety of trackside features. These can be turned on and off by clicking on the 'Gear' icon on the Track Profile, and then clicking on the option you wish to turn on or off. | In addition to showing the track gradient, and distance, the Track Profile UI will show a variety of trackside features. These can be turned on and off by clicking on the 'Gear' icon on the Track Profile, and then clicking on the option you wish to turn on or off. | ||
Revision as of 14:12, 31 July 2018
Contents |
Introduction
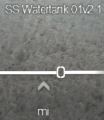
TRS2019 introduces a new Driver Track Profile UI, which displays the track, track gradient, and a variety of track features ahead of your train.
You can zoom in and out of the track profile, to show more or less of the track ahead (the scale will depend on the speed you are traveling at, and the density of track objects ahead of you) by scrolling in and out with the scroll wheel (or equivalent) on your mouse.
Track Profile Settings
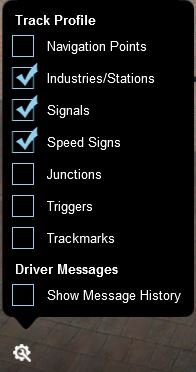 In addition to showing the track gradient, and distance, the Track Profile UI will show a variety of trackside features. These can be turned on and off by clicking on the 'Gear' icon on the Track Profile, and then clicking on the option you wish to turn on or off.
Navigation Points in sessions can be shown in the Track Profile. These will appear near the top of the Track Profile panel, above the location the Navigation Point is placed on the track.
Industries and Stations
Industries and stations can be shown on the Track Profile, with the name of the industry or station placed near the top of the Track Profile panel. These mark the locations of interactive industry or station objects on the track.
Signals
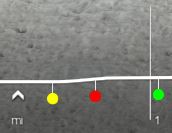
Signals can be shown on the Track Profile, underneath the track, with a line marking their location on the track. Signals will show one of three colours:
Red - This indicates a signal showing a 'Stop' indication Yellow - This indicates a signal showing a 'Caution' type indication Green - This indicates a signal showing a 'Proceed' or 'Clear' type indication.
Some signals may show custom indications in the world, these will be simplified to the above indications on the Track Profile UI.
Speed Signs
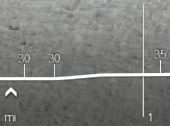
Speed signs can be shown on the Track Profile, with the speed limit shown above the track with a line marking it's location. The speed shown will be in the same units as the rest of the Driver UI (KM/h or MPH).
Junctions
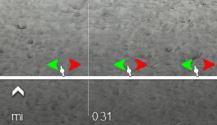
Junctions can be shown on the Track Profile, with a 'lever' icon on the track and the direction arrows then shown above this.
You can change the direction of the junction by clicking on the direction arrows in the Track Profile.
Note, the direction arrows may be different to the physical left or right direction of the junction, depending on the direction of travel and the direction the camera is facing.
Triggers
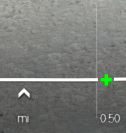
Triggers can be shown on the Track Profile, with a green '+' icon appearing within the track. This can be helpful when testing a session to work out when you have passed over a trigger.
Trackmarks
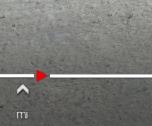
Trackmarks can be shown in the Track Profile, with a red arrow appearing within the track. This can be helpful when testing a session to work out when you have passed over a trackmark.
Return to TRS19 Home Page - TRS2019 Driver UI - TRS19 Help


