 |
The World Origin and Date settings are used to set the current season e.g. January = Summer in the Southern Hemisphere and Winter in the Northern Hemisphere |
The Environment Tool
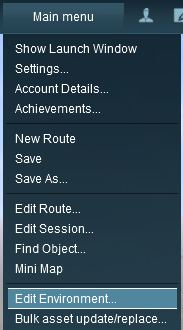 |
Open the Environment Tools Editor from the Surveyor Main Menu as shown on the left.
This will open the Environment Properties Window as shown below.
|
Lighting
The Lighting Tools control the ambient, sun and water colours. This tool tab is opened by default whenever the Environmental Editor is opened.
Light and Time
Setting the Lighting Conditions
The ring around the dial contains a number of green dots. Each dot is a lighting control point. It sets the specific Red Green and Blue colour values for the light at that particular time.
|
Each colour value can be altered by dragging its needle point to a new position around the dial. Each new position will change the balance between the 3 colours and will alter the lighting displayed in the scene at that particular time. |
 |
Notes:
Each control point stores the RGB values for three different types of lighting in the scene.
- The Ambient Colour which is the directional lighting and mostly affects the hue of buildings and other scenery objects
- The Sun Colour which affects the colour of the sunlight and mostly affects the hue of the terrain
- The Water Colour which affects the colours reflected by water surfaces
|
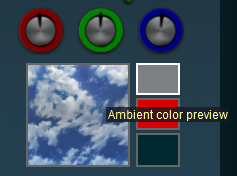
The 3 boxes below the colour wheels and next to the Sky box show the colour effects created for each type of lighting at the selected time.
 |
|
 |
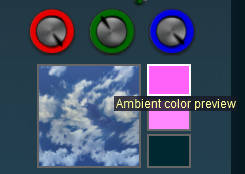
Steps:
- Click on the top box of the three. This is the Ambient Colour
- The dials will show the RGB values for the Ambient Colour at the selected time
- The Ambient color preview box will show the colour produced by the RGB settings
|
|
|
 |
|
|
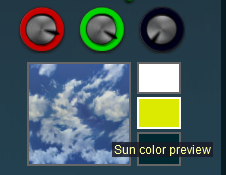
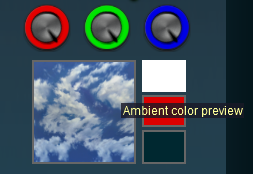
Steps:
- Click on the middle box of the three. This is the Sun Colour
- The dials will show the RGB values for the Sun Colour at the selected time
- The Sun color preview box will show the colour produced by the RGB settings
|
|
|
 |
|
|
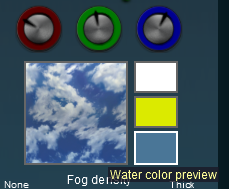
Steps:
- Click on the bottom box of the three. This is the Water Colour
- The dials will show the RGB values for the Water Colour at the selected time
- The Water color preview box will show the colour produced by the RGB settings
|
|
|
Setting the right colours can be more of an art than a science. To get the exact colour you want means mixing the correct quantities of Red, Green and Blue. Each of these colours has 256 different values from 0 to 255 and, when combined, that produces over 16 million different possible colours - but many monitors and most eyeballs will not be able to tell the differences between many of those colours.
 |
Setting all three colours to the same values will produce monotones from Black to White with 254 different shades of gray between those two tones. Note that in the examples below, the "tyre" around each wheel shows the exact quantity of colour that is being added. |
| R = 0; G = 0; B = 0 |
R = 128; G = 128; B = 128 |
R = 255; G = 255; B = 255 |
 |
 |
 |
| Black |
50% Gray |
White |
|
All other colours are made by mixing different quantities of the three colours. |
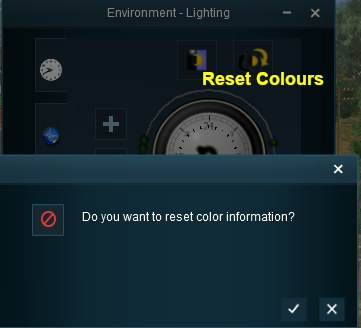
Resetting the Lighting Conditions
|
All the lighting colour settings can be reset back to the TANE default colours. |
 |
|
|
Steps:
- Click the Color Reset button
- Click the Tick icon to confirm the reset
- Click Cross icon to cancel the reset
|
|
|
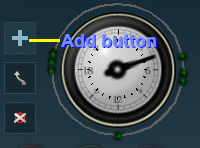
Adding a New Control Point
New control points can be added to the clock dial.
 |
|
|
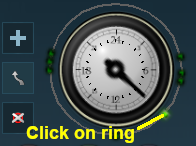
Steps:
- Click the Add button (the + symbol)
- Click on the ring at the place where the new control point is to be located
|
|
|
Notes:
During the running of a Session the lighting will "morph" or "transform" at a steady rate from the set of colour values at one control point to the set of colour values at the next control point. Click the Diurnal Cycle button for a demonstration of this.
- If the control points are far apart then the transition will be slow and gradual
- If the control points are close together then the transition will be faster
- If there are many control points grouped closely together then the transition will be more dramatic
The places where you would need fast and dramatic transitions would be at dawn (around 06:00) and dusk (around 18:00)
|
|


