Clutter Effect Layer
(→Effect Layer Dropdown) |
|||
| Line 35: | Line 35: | ||
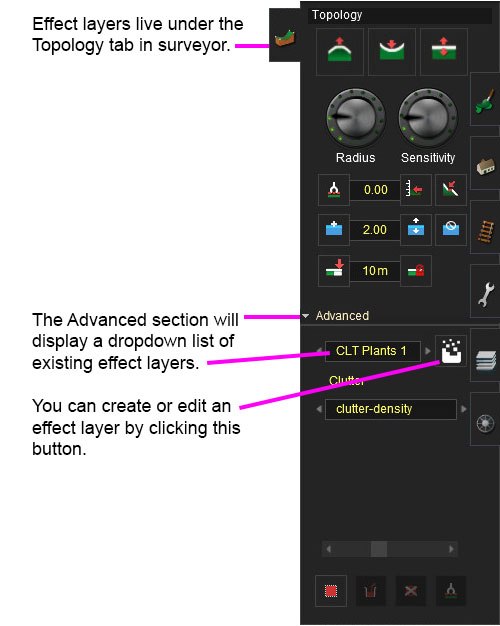
==== Effect Layer Dropdown ==== | ==== Effect Layer Dropdown ==== | ||
| − | This allows you to select any existing effect layers to | + | This allows you to select any existing effect layers to view and edit their parameters. |
[[File:effectlayerwindow1a.jpg]] | [[File:effectlayerwindow1a.jpg]] | ||
Revision as of 09:32, 18 November 2017
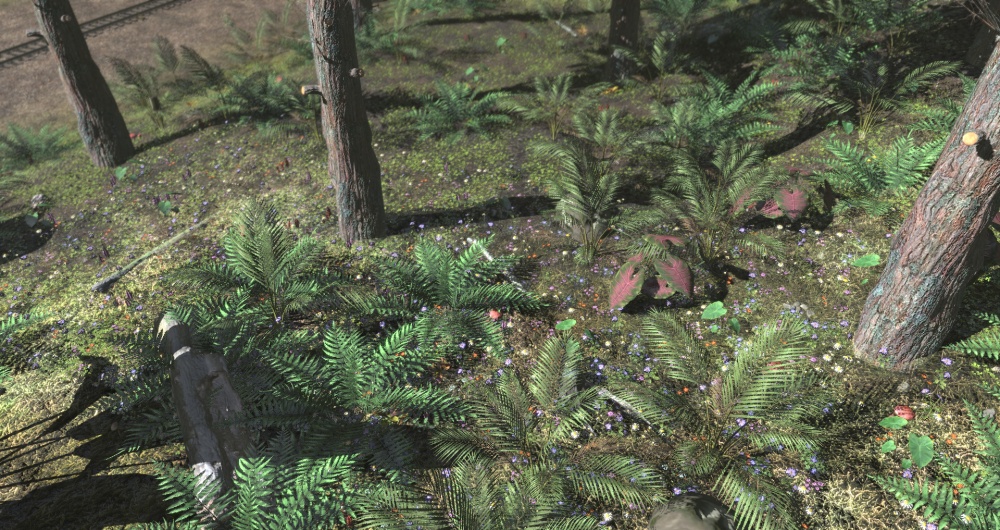
The Clutter Effect Layer is an Effect Layer type which is used to render small localised ground clutter (small foliage, stones, etc.) As with all effect layers, clutter is painted onto the terrain and automatically generates appropriate geometry for the area surrounding the camera.
Contents |
Configuration
Before you start looking at creating assets for Clutter Effect Layers you should have a very good knowledge on how you go about modelling efficient meshes for each LOD level and what textures you should be using for each mesh LOD. You can find an excellent reference on how to model and texture assets under the Modelling Overview on the Art Recommendations Trainz wiki page.
If it's not obvious on that Art Recommendations page; for any large amount of clutter objects you use onscreen at one time, it's best to have at least the lowest LODs (which shouldn't be very far from the camera) using an Texture Atlas. The texture atlas should be as small as can be while maintaining good visual results (256x256 perhaps) and will hold all the images for all the assets lowest LODs. This means when the lowest LODs are showing (which should be the majority of clutter onscreen most of the time) you'll only be paying the cost of 1 material shared across all the lowest LODs. You will also want to share as many single textures between as many assets as possible to cut-down on draw calls where possible - If you have 3 ferns all of different sizes, don't make 3 copies of the same texture.
You will want to make sure you understand how to create a Trainz Mesh Library asset so you can utilise Texture Atlases and sharing of textures between multiple meshes.
Once you start to construct your Trainz mesh library asset be sure to use the m.clutter material for all your meshes. This will allow your clutter asset to fade in and out where required. You will also want to take note about the fadeInEndDistance and fadeOutEndDistance in your mesh metadata files to get your fade transitions correct.
Creating Clutter Layers and Painting
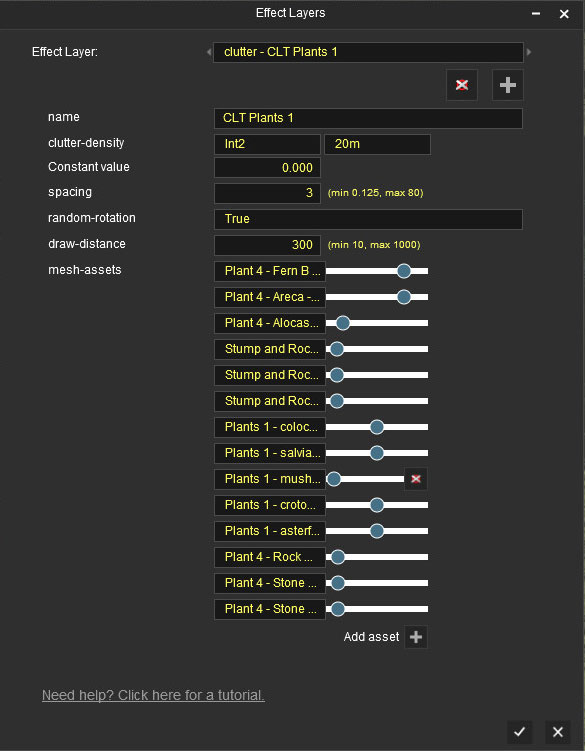
The Effect Layers window allows you to edit your effect properties. The UI in this window will change based on what effect you choose (clutter, turf, something else).
Effect Layer Window
The Effect Layers window allows you to edit your effect properties. The UI in this window will change based on what effect you choose (clutter, turf, something else).
Effect Layer Dropdown
This allows you to select any existing effect layers to view and edit their parameters.
Example Usage
Asset Creation
The clutter effect layer is a pre-release feature and details of the asset creation techniques may change prior to release.
TBD.
It is strongly recommended that assets created for use in a clutter effect layer are small, relatively low polygon (100-500 polygons at highest LOD), with very efficient LOD (typically down to 5-10 polygons at lowest LOD) and using the m.clutter material type. It is possible to create very attractive and high-density scenery with well-built clutter assets, however inefficient asset creation can very quickly lead to horrendous performance.


