HowTo/Hide- & Unhide Meshes
| Line 288: | Line 288: | ||
We use our bool variable for indicating the mesh state. The opened mesh is set with the value of m_bDoorOpened. If m_bDoorOpened is true, the mesh will display, otherwise it'll be hidden. | We use our bool variable for indicating the mesh state. The opened mesh is set with the value of m_bDoorOpened. If m_bDoorOpened is true, the mesh will display, otherwise it'll be hidden. | ||
| − | The closed state mesh is set with the opposite value of m_bDoorOpened. This can be easily done by using the [not] operator "!". Just place it in front of a boolean variable, to use the opposite value. | + | The closed state mesh is set with the opposite value of m_bDoorOpened. This can be easily done by using the [[not]] operator "!". Just place it in front of a boolean variable, to use the opposite value. |
Now you know how to control meshes. Because it will be too much for now, I'll give the last part of the script without explanation and move it to another time :) | Now you know how to control meshes. Because it will be too much for now, I'll give the last part of the script without explanation and move it to another time :) | ||
Revision as of 02:39, 20 August 2017
In HowTo/Your first Trainz Script we created the script:
- myscript.gs
include "MapObject.gs"

class CMyClass isclass MapObject
{
    public void Init(Asset pAsset)
    {
        inherited(pAsset);
    }
};
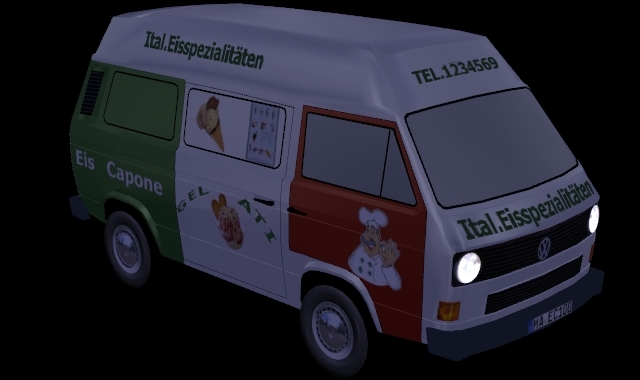
Today we're gonna use this little example for a vehicle. There is an ice cream truck on the DLS by misterairbrush (<kuid:414943:100987>). This ice cream truck has a door that can be opened or closed.
It looks like:
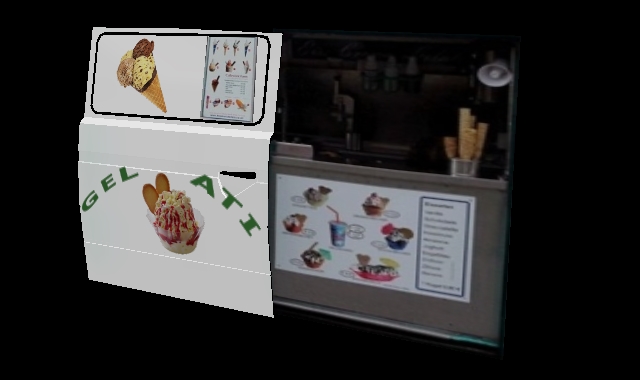
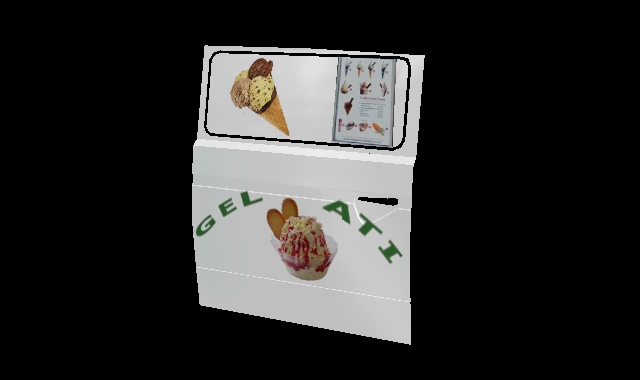
The truck comes equipped with two versions of the door, called meshes. One or the other mesh is visible at any one time but never both together. We'll learn today how to hide the "wrong" and show the right mesh. Also we want users to be able to select an option in the "?"-Window of the scenery object to determine whether the door is to be open or closed.
First we need a member variable to store the (user-selected) open/closed state of the door, then we need functions to save and load the information every time the session starts or is saved.
Variables store values used in the game. These values can be changed by script and are stored in the computer's memory until needed.
In Trainz Script there are four (well, really there are five, but we will ignore one this time!) data Types we can use:
- bool - boolean constants true/false
- int - every number between -2147483647 and 2147483647 (a 32 Bit integer)
- string - characters
- float - numbers with a decimal point (32 Bit)
Today we'll have a closer look at the bool type. The others will be explained another time :)
In our case, we only need a true/false value.
True: The user wants the door to be open
False: The user wants the door to be closed
How do we declare a member variable? This is pretty easy:
- icecreamtruck.gs
include "MapObject.gs"

class CIceCreamTruck isclass MapObject
{
    bool        m_bDoorOpened;

    public void Init(Asset pAsset)
    {
        inherited(pAsset);
    }
};
We begin by stating the data-type of our variable and then give it a name. Now we can use it.
This variable now is available in the whole CIceCreamTruck-Class, because we declared it before any other methods, so we may say it's a global variable (that isn't true, but it's easier to explain).
We may also declare variables within methods/functions. These then will only be accessible inside the function or method and not in other parts of the script.
In Trainz Script there are now real global variables (that's why I think we may call the members global, even if it's not true). We may only declare variables inside classes.
Next, we will have a look at two new methods:
- Class_PropertyObject#GetProperties (GetProperties) - Save data to a soup
- Class_PropertyObject#SetProperties (SetProperties) - Fetch data from a Soup
These methods are implemented in native code. That means we don't have to worry about when they are called. We just have to override them. Trainz will call them whenever needed. To override a class means to replace the built-in class with a new one that extends the functions of the original (the parent) while retaining all the original functionality. Let's override them:
- icecreamtruck.gs
include "MapObject.gs"

class CIceCreamTruck isclass MapObject
{
    bool        m_bDoorOpened;

    public void Init(Asset pAsset)
    {
        inherited(pAsset);
    }

    public Soup GetProperties(void)
    {
        Soup pSoup = inherited();
        return pSoup;
    }

    public void SetProperties(Soup pSoup)
    {
        inherited(pSoup);
    }
};
- GetProperties
As I said above, the purpose of this function is to save data into a Soup. It expects a Soup-Object to be returned. You'll see that Soup is a class, not a data type.
But we're able to declare class instances as variables too. (Look at: Soup pSoup = inherited();)
And again: The inherited is in there! Every function/method we override has in most cases to inherit the parent classes method. The inherited statement calls GetProperties of Class MapObject. This makes sure, that every operation inside a method of the parent class is called too. Remember: We overrode the method. If we don't inherit it here again, the parent classes GetProperties-Method will never be called! Only miss the call to inherited if you want to disable functionality for a class, if not, don't forget it.
In the script above, we return the Soup directly, without any changes. What exactly "return types" are will be explained another time :) (it is too much detail to go into now!)
- SetProperties
In this method we get a parameter of type soup. We inherit the MapObject-Setproprties. This time we don't have to return any value. Here we will load the data from the Soup we got as parameter.
- Saving data
Think of soup as a container into which you throw pieces of paper with names and values. When you want to find out what you wrote on the paper you look through all the pieces until you find the name and then read off the value. I already explained that Soup is a class. So it may have members, and in fact it has. Look at: Class_Soup
I use the variable name as the soup tag name, because it's convenient. The method "SetNamedTag" in class Soup is used to assign a value to each tag in the soup. We can access all public methods inside a class with the dereference operator, that is a single dot (.). So, we call the function like this:
pSoup.SetNamedTag("NAME", [VALUE]);
Now in script, it looks like:
- icecreamtruck.gs
include "MapObject.gs"

class CIceCreamTruck isclass MapObject
{
    bool        m_bDoorOpened;

    public void Init(Asset pAsset)
    {
        inherited(pAsset);
    }

    public Soup GetProperties(void)
    {
        Soup pSoup = inherited();
        pSoup.SetNamedTag("m_bDoorOpened", m_bDoorOpened);
        return pSoup;
    }

    public void SetProperties(Soup pSoup)
    {
        inherited(pSoup);
    }
};
Now you'll understand, why we have to return the Soup back to Trainz. We manipulate the values inside the Soup and Trainz has to be kept informed, if Trainz wants to save the Soup for us.
- Loading data
The opposite of "Setting data" (SetNamedTag) is "Getting data" (GetNamedTag). And, yes, Soup has a method called "GetNamedTag", but it'll return the value as a string. We need a boolean value. So, we could use the method "GetNamedTagAsBool". It expects only one parameter, the name of our value inside the Soup. We can directly assign the value of "GetNamedTagAsBool" to our variable. But this function has another variant which expects two parameters. The first one is the name of our value, and the other one is a default value, if the selected value is not set in the Soup. We'll need to use that method because, if we place an object in surveyor, there are no values in the Soup. So, we can set an initial value for the door state. In our case we will set the initial door state to closed (so: m_bDoorOpened has to be false).
m_bDoorOpened = pSoup.GetNamedTagAsBool("m_bDoorOpened", false);
If we add that part into our script it'll look like:
- icecreamtruck.gs
include "MapObject.gs"

class CIceCreamTruck isclass MapObject
{
    bool        m_bDoorOpened;

    public void Init(Asset pAsset)
    {
        inherited(pAsset);
    }

    public Soup GetProperties(void)
    {
        Soup pSoup = inherited();
        pSoup.SetNamedTag("m_bDoorOpened", m_bDoorOpened);
        return pSoup;
    }

    public void SetProperties(Soup pSoup)
    {
        inherited(pSoup);
        m_bDoorOpened = pSoup.GetNamedTagAsBool("m_bDoorOpened", false);
    }
};
Now we can display and hide the meshes. But the object itself has to be prepared for it. The Ice cream truck has three meshes. The truck with a hole where the door is, a door in the opened state and a door in the closed state. You also may achieve this by using animations, but this way is much easier.
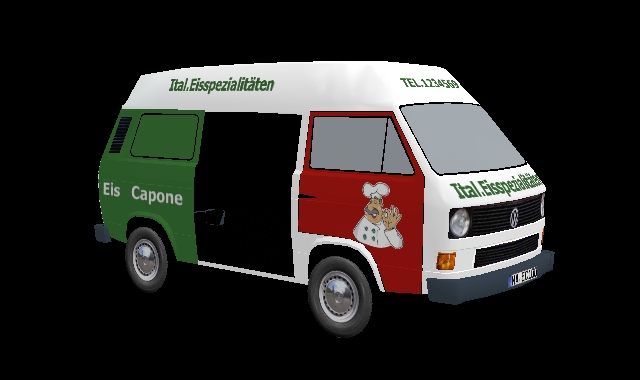
Truck with hole, where the door should be
In script we reference the mesh-table entries of config.txt.
It may look like:
[...]

mesh-table
{
   default
   {
     mesh                                "truck.im"
     auto-create                         1
   }

   door-opened
   {
     mesh                                "door_opened.im"
     auto-create                         0
   }

   door-closed
   {
     mesh                                "door_closed.im"
     auto-create                         0
   }

   [...]
}

[...]
All meshes we want to control by script may never have an auto-create value of 1! It has to be 0, otherwise we can't take the control over the meshes.
Our CIceCreamTruck's parent class is MapObject. And MapObject's parent class is MeshObject, and there we will find a method "SetMeshVisible". We can use it directly, because we automatically inherit from MeshObject, too. SetMeshVsible expects three parameters. The name of our mesh-table entry, a state (true, false - [visible, invisible]) and a floating-point number that sets a fading time in seconds. We'll leave the last parameter 0.0f.
SetMeshVisible("NAME", true/false, 0.0f);
We have two meshes, that have to be set. In script we'll hide/show them like this:
- icecreamtruck.gs
include "MapObject.gs"

class CIceCreamTruck isclass MapObject
{
    bool        m_bDoorOpened;

    public void Init(Asset pAsset)
    {
        inherited(pAsset);
    }

    public Soup GetProperties(void)
    {
        Soup pSoup = inherited();
        pSoup.SetNamedTag("m_bDoorOpened", m_bDoorOpened);
        return pSoup;
    }

    public void SetProperties(Soup pSoup)
    {
        inherited(pSoup);
        m_bDoorOpened = pSoup.GetNamedTagAsBool("m_bDoorOpened", false);

        SetMeshVisible("door-opened", m_bDoorOpened, 0.0f);
        SetMeshVisible("door-closed", !m_bDoorOpened, 0.0f);
    }
};
We use our bool variable for indicating the mesh state. The opened mesh is set with the value of m_bDoorOpened. If m_bDoorOpened is true, the mesh will display, otherwise it'll be hidden.
The closed state mesh is set with the opposite value of m_bDoorOpened. This can be easily done by using the not operator "!". Just place it in front of a boolean variable, to use the opposite value.
Now you know how to control meshes. Because it will be too much for now, I'll give the last part of the script without explanation and move it to another time :)
- icecreamtruck.gs
include "MapObject.gs"

class CIceCreamTruck isclass MapObject
{
    bool        m_bDoorOpened;

    public void Init(Asset pAsset)
    {
        inherited(pAsset);
    }

    public Soup GetProperties(void)
    {
        Soup pSoup = inherited();
        pSoup.SetNamedTag("m_bDoorOpened", m_bDoorOpened);
        return pSoup;
    }

    public void SetProperties(Soup pSoup)
    {
        inherited(pSoup);
        m_bDoorOpened = pSoup.GetNamedTagAsBool("m_bDoorOpened", false);

        SetMeshVisible("door-opened", m_bDoorOpened, 0.0f);
        SetMeshVisible("door-closed", !m_bDoorOpened, 0.0f);
    }

    //////////////////////////////////////////////////////////////////////////////////////////////////////////////

    public string GetDescriptionHTML(void)
    {
        string sHtml = inherited();
        sHtml = sHtml + HTMLWindow.CheckBox("live://property/m_bDoorOpened", m_bDoorOpened) + " Open door";
        return sHtml;
    }

    public string GetPropertyType(string sPropertyId)
    {
        string sRet = "link";
        if(sPropertyId == "m_bDoorOpened")sRet = "link";
        return sRet;
    }

    public void LinkPropertyValue(string sPropertyId)
    {
        if(sPropertyId == "m_bDoorOpened")
        {
            m_bDoorOpened = !m_bDoorOpened;
        }
    }
};
Hope you enjoyed and learned!
Full example here: Media:TrainzDevIceCreamTruck.zip (Thanks to misterairbursh for the permission!)
If you want to contact me, you may use this e-mail: callavsg@gmx.de
callavsg
