Mission Code Stops and TimeTables Manager
(→Mission Code Stops and TimeTables Manager rule : in practice how to use it) |
(→Mission Code Stops and TimeTables Manager rule : in practice how to use it) |
||
| Line 49: | Line 49: | ||
[[File:Help-mcstt-rule-img05.png]] | [[File:Help-mcstt-rule-img05.png]] | ||
| + | |||
| + | |||
[[File:Help-mcstt-rule-img06.png]] | [[File:Help-mcstt-rule-img06.png]] | ||
Revision as of 07:06, 13 November 2017
Mission Code Stops and TimeTables Manager rule
Mission Code Stops and TimeTables Manager is a rule ( <kuid:61392:8300> ) which enables to create, edit and manage stop zones and timetables to easily have some trains following a timetable schedule along a path defined using mission codes.
This page is currently under construction before public release of Mission code Stops and TimeTables Manager.
Mission Code Stops and TimeTables Manager rule : what is it and for which purpose ?
MCSTT Manager rule is a rule that enables to define (create), edit and manage stop zones and timetables.
A stop zone is a group of trackmarks (pathstops trackmarks or standard trackmarks) where a train will make a stop if the stop zone is included in a target timetable to follow. A stop zone is only a logical name under which will be grouped several pathstops or trackmarks. Station names or industry names will be often used as a stop zone, but you can use any arbitrary unique name as a stop zone name to group pathstops or trackmarks.
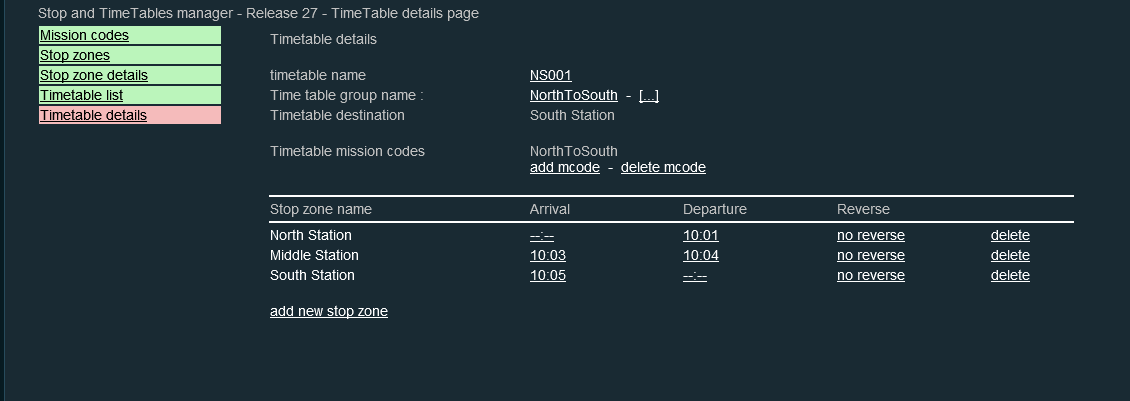
Timetables are defined in MCSTT Manager rule and a named timetable will list all the named stop zone where a train will stop with its arrival time and departure time. Arrival time is optional and is only an indication of the expected arrival time at the stop zone for a train. Departure time is mandatory except for the last final destination. You can also set an option to request your train to reverse direction at a stop zone. You also define in your timetable the mission code to be used by your train when it follows the timetable schedule.
When stop zones and timetables have been defined, you can use two driver commands "SetMCTimeTable" <kuid:61392:8330> to assign a timetable to a train and "AutoDriveWithMCTimeTable" <kuid:61392:8322> to start autodrive for your train following the previously timetable assigned. If the train is currently at a stop zone defined in the timetable, it will leave the stop zone at the departure time defined in the timetable and will autodrive following its mission code path until it reaches a new stop zone defined in the time table. It will then stop at the stop zone and wait until departure time. If the reverse option is set for this stop zone, the train will change direction before restarting autodrive. And the AutoDriveWithMCTimeTable command will end when the train will reach the final destination stop zone defined in the timetable or if reaches the stop zone selected when launching the driver command.
With stop zones and timetables, you can define a timetable schedule for your train and you need only two driver commands to follow the schedule : one command to assign the timetable to your train and one command to autodrive following the current timetable to destination.
The system is very easy to schedule passengers services using stations as stop zones, but you can also define your yards as stop zones for goods train or any target industry destination.
Mission Code Stops and TimeTables Manager rule : in practice how to use it
To use mission code stops and timetables in a session, you need first to add to your session rules the Mission Code Stops and TimeTables Manager rule.
The first screen will show you the current mission codes defined in your session and enables to add, edit or delete these mission codes.
All screenshot examples are taken from a demo session : EIT - DemoRoute - UK1 - Full session with MC TimeTable that you can find and download from the DLS under <kuid:61392:8405>
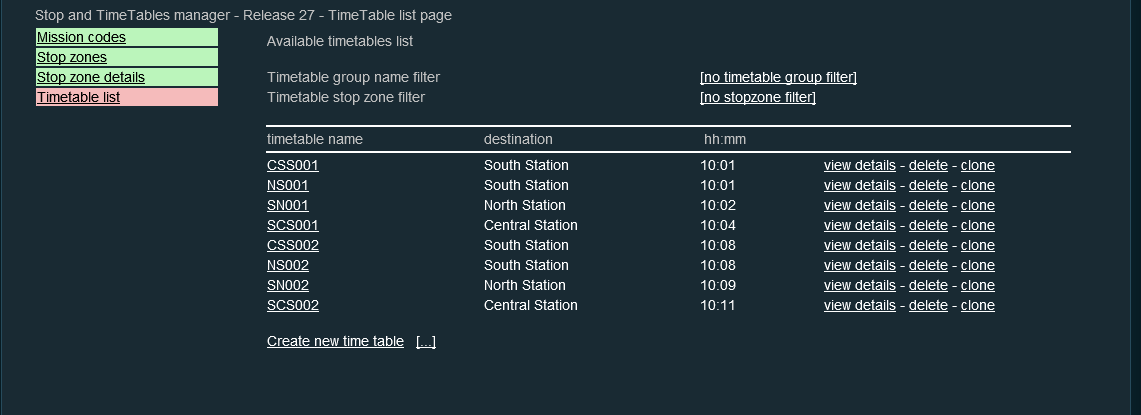
The rule interface has three main tabs : Mission codes, Stop zones, Timetables list. Mission Codes tab (above) enables to add, edit, delete mission codes. Stop zones tab (below) enables to add, view details or suppress stop zones.
The stop zone tab screen will display all the stop zones currently defined and will enable to add new stop zone or to remove existing stop zone. with "Add new stop zone" you can enter a new stop zone name to be created. If you click on the [...] link, the rule will propose you a list of all the available industry names in your route to select as a new stop zone to be created. This option is very usefull for example to add quickly some passenger stations names as stop zone. The remove stop zone will list all the current stop zones names so that you can select which stop zone is to be removed.
In front of each stop zone name, the "view details" link will display the details of the selected stop zone : list of pathstops and trackmarks linked to this stop zone with their properties ( train length, number of cars, ...).
The stop zone details page (above) shows for each stop zone the list of all pathstops or trackmarks currently linked to the stop zone. Linked pathstops and trackmarks have currently three properties : the first one is the name of the linked stop zone, the second one is maximum number of vehicles and the third one is the maximum length of a train. When a train reaches a pathstop or a trackmark, it will stop at it only the train current number of vehicles and length are both less or equal to the pathstop or trackmark property. This enables to have several pathstops or trackmarks linked to the same stop zone : one being used for short length trains and the other for longer trains. When these properties are set to 0 (default value), the pathstop or trackmark will stop any train.
What is the advantage of using pathstops ( a scripted trackmark asset <kuid:61392:8311> ) instead of trackmarks : when you drop a pathstop inside a station or an industry, it will be linked by default to a stop zone name with the same name as the embedding station name or industry name. You can also edit the pathstop properties under surveyor by clicking on the ? in the surveyor tools. For standard trackmarks, which do not have these local properties, you will need to edit the mcstt rule and go to the stop zone details page to be able to set these properties for a trackmark. So there are no functional differences, but pathstops are more easy to edit and set than standard trackmarks.
When you use pathstops or trackmarks linked to mcstt rule, you neither autodrive to a specific trackmark but you autodrive to a stop zone. Your train will stop only when it will reach a pathstop or a linked trackmark which stop zone property is equal to the target stop zone destination selected when launching the autodrive driver command. this enables to have several pathstops or linked trackmarks for a stop zone and your train will stop at any pathstop or trackmark encountered linked to the target stop zone.
And last you have the timetable list tab page and the timetable details tab page.


