SAR Scenario Booleroo Passenger
From TrainzOnline
(Difference between revisions)
m |
m |
||
| Line 1: | Line 1: | ||
<table width=1000> <!-- BEGIN Title table --> | <table width=1000> <!-- BEGIN Title table --> | ||
<tr valign="top"> | <tr valign="top"> | ||
| − | <td width=50 align="left">[[image: | + | <td width=50 align="left">[[image:ArrowLeftBtn.png|link=SAR Scenario Quorn Shunter|30px]]</td> |
<td width=900 align="center"><span style="font-size: 21px; font-weight: 700;"> <span style="background-color: black; color: white;"> 16 </span> <span style="background-color: black; color: white;"> Gladstone - Booleroo Centre Passenger </span></span></td> | <td width=900 align="center"><span style="font-size: 21px; font-weight: 700;"> <span style="background-color: black; color: white;"> 16 </span> <span style="background-color: black; color: white;"> Gladstone - Booleroo Centre Passenger </span></span></td> | ||
| − | <td width=50 align="right">[[image: | + | <td width=50 align="right">[[image:ArrowRightBtn.png|link=SAR Scenario Hawker Freight|30px]]</td> |
</tr> | </tr> | ||
<tr valign="top"> | <tr valign="top"> | ||
| Line 32: | Line 32: | ||
<tr valign="top"> | <tr valign="top"> | ||
<td><span style="font-size: 15px; font-weight: 700; color: white; background-color: black;"> Loco: </span></td> | <td><span style="font-size: 15px; font-weight: 700; color: white; background-color: black;"> Loco: </span></td> | ||
| − | <td>'''[[SAR Scenario Rolling Stock#QR RM|SAR RM55]]''' at '''Gladstone | + | <td>'''[[SAR Scenario Rolling Stock#QR RM|SAR RM55]]''' at '''Gladstone Depot <span style="color: white; background-color: black;"> Loco Shed </span>'''<br> |
'''Other Unrostered Locos:''' '''None'''</td> | '''Other Unrostered Locos:''' '''None'''</td> | ||
</tr> | </tr> | ||
| Line 56: | Line 56: | ||
</tr> | </tr> | ||
</table> <!-- END Scenario image and loco/consist table --> | </table> <!-- END Scenario image and loco/consist table --> | ||
| − | + | <br> | |
<table cellpadding="2" bgcolor="black" width=1000> <!-- BEGIN Black border for Getting Started table --> | <table cellpadding="2" bgcolor="black" width=1000> <!-- BEGIN Black border for Getting Started table --> | ||
<tr valign="top"> | <tr valign="top"> | ||
| Line 185: | Line 185: | ||
</tr> | </tr> | ||
</table> <!-- END Tasks Table --> | </table> <!-- END Tasks Table --> | ||
| − | + | <br> | |
<table cellpadding="2" bgcolor="black" width=820> <!-- BEGIN Black border for Driving Notes sub table --> | <table cellpadding="2" bgcolor="black" width=820> <!-- BEGIN Black border for Driving Notes sub table --> | ||
<tr valign="top"> | <tr valign="top"> | ||
| Line 221: | Line 221: | ||
</tr> | </tr> | ||
<tr valign="center"> | <tr valign="center"> | ||
| − | <td width=63 align="left">[[image: | + | <td width=63 align="left">[[image:ArrowLeftBtn.png|link=SAR Scenario Quorn Shunter|30px]]</td> |
<td width=125 align="center">[[image:Session Scenario Index.png|link=SAR Peterborough Base Session|alt=Scenarios|Scenario Index]]<br>'''[[SAR Peterborough Base Session|Session Scenarios]]'''</td> | <td width=125 align="center">[[image:Session Scenario Index.png|link=SAR Peterborough Base Session|alt=Scenarios|Scenario Index]]<br>'''[[SAR Peterborough Base Session|Session Scenarios]]'''</td> | ||
<td width=125 align="center">[[Image:Location Index.png|link=SAR Index|alt=Location Index|Location Index]]<br>'''[[SAR Index|Location List]]'''</td> | <td width=125 align="center">[[Image:Location Index.png|link=SAR Index|alt=Location Index|Location Index]]<br>'''[[SAR Index|Location List]]'''</td> | ||
| Line 229: | Line 229: | ||
<td width=125 align="center">[[image:Industry Index.png|link=SAR Scenario Industries|alt=Industries]]<br>'''[[SAR Scenario Industries|Active Industries]]'''</td> | <td width=125 align="center">[[image:Industry Index.png|link=SAR Scenario Industries|alt=Industries]]<br>'''[[SAR Scenario Industries|Active Industries]]'''</td> | ||
<td width=125 align="center">[[image:BackToTop.png|link=#top|alt=Top|Top]]</td> | <td width=125 align="center">[[image:BackToTop.png|link=#top|alt=Top|Top]]</td> | ||
| − | <td width=62 align="left">[[image: | + | <td width=62 align="left">[[image:ArrowRightBtn.png|link=SAR Scenario Hawker Freight|30px]]</td> |
</tr> | </tr> | ||
</table> <!-- END End Links Table --> | </table> <!-- END End Links Table --> | ||
Revision as of 09:17, 29 March 2022
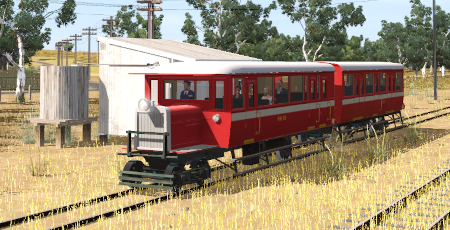
| 16 Gladstone - Booleroo Centre Passenger | ||
| A scenario in the SAR Peterborough Base Session v2.0 | ||
| A morning passenger run from Gladstone to Booleroo Centre and return on Mondays to Fridays using a Rail Motor and Trailer. |
 |
|
||||||||||||
Getting Started:
|
Tutorial:
|
|
|


| Links: All links will open in this window | ||||||||
 Session Scenarios |
 Location List |
 Drive Tutorial |
 Rolling Stock |
 Loco Roster |
 Active Industries |
|||
This page was created by Trainz user pware in February 2021 and was last updated as shown below.