HowTo/Build a tree
Contents |
Under construction
Please be patient as I am learning as I go. This guide is using Blender, version 3.5.1 as Blender is free and Multiplatform.
Add-ons
Sapling Tree Gen - Nothing needs to be downloaded as it is built in to Blender. Just needs to be enabled.This link goes to the help page, with enabling, and list of options.
There is other free and paid add-ons.
Other Tutorials
- Artistic Render - Sapling Tree Gen A more in depth tutorial with UV mapping.Not Trainz related.
- Export from Blender using FBX How to export your object with all the various levels of depth and import in to Trainz.
- Export Blender FBX Animation Deals with objects that are animated to get them in to Trainz.
Sapling Tree Gen
There is three difficult parts to creating a tree, knowing how to create a realistic tree, reducing the polygon count and getting your tree in to Trainz. This covers none of the difficult parts. The first difficult part is covered well in the first tutorial. The last two difficult parts are covered well in the second tutorial. This is just a basic guide.
First thing to do upon starting blender is select General for file type.
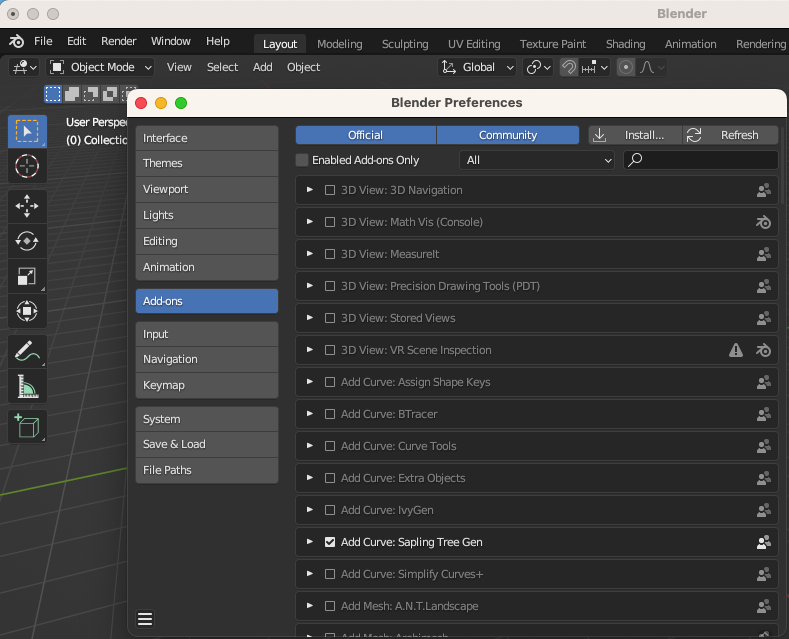
Second thing to do is enable Sapling Tree Gen. Go to Edit menu, and at the bottom is Preferences. Click on Add-ons. Make sure "Enabled Add-ons Only" is not checked. Scroll down till you see "Add Curve: Sapling Tree Gen" and check that. Blender should automatically save your preferences, so close the Preferences window.
Next you should be on the main window of Blender. If there is any other object, select and delete that object.
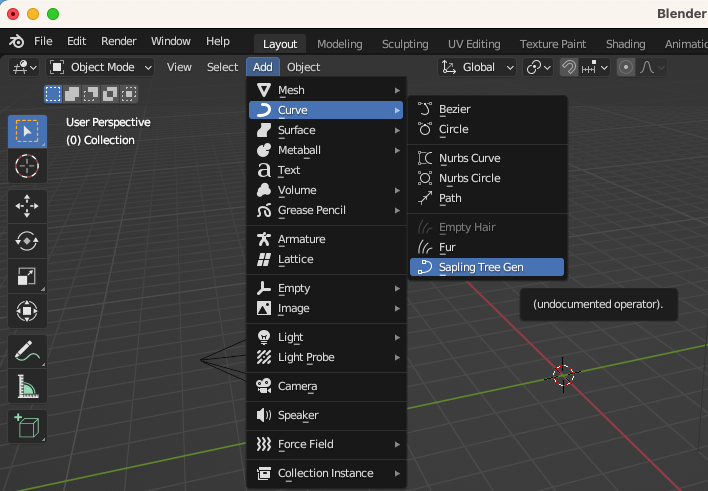
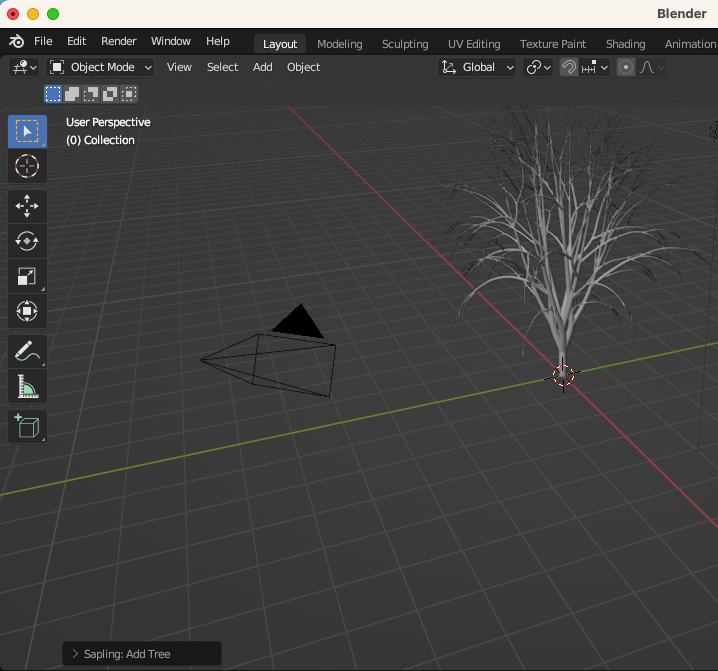
You should be in object mode. On that same horizontal level as object mode, select add, the curve, then Sapling Tree gen. There is not options at this point and the default tree will appear.
In the lower left corner, you will see "> Sapling: Add Tree." This does not add another tree, rather it is the menu to customize the tree you just added. Click on this menu and it will expand.
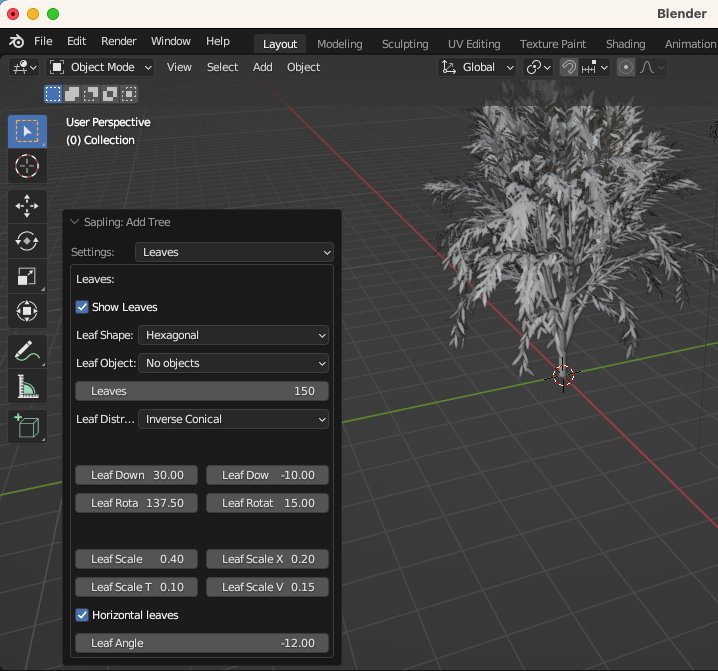
With the Add Tree menu expanded there is a lot of customizations you can do. We are just trying to do the default, however you can try changing the settings. Please see the add-on menu page or the first tutorial for a good idea what they do. When the menu is expanded it starts on geometry for the drop down menu.
Click on the settings drop down, and select leaves. Check the "Show Leaves" checkbox, otherwise you will not have leaves added to the model.
If you want to do animation, make sure the tree looks the way you want first, except for color and texture. Then enable armature, and lastly animation, otherwise you will have to start over.
If you are done, click the down arrow in the upper left corder of this menu. As long as this menu appears in the lower left corner, you can go back in and change your prompters, except if you have enabled armature and animation. You can rotate your view around the model, zoom in and zoom out. If you have tried to make changes to the object outside the Add Tree menu, the add tree menu disappears. You can make manual changes, or delete the tree and start over.
If you are happy, save the scene in Blender.
Now to add color to the tree. (under construction)


