HowTo/Build normal maps in Max
The process of baking normal maps within 3D Studio Max is relatively simple. Before we get into it though let’s talk a little about how the normal map is generated.
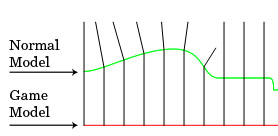
For each pixel the program projects a ray out from the surface of the low poly towards the high poly. When it hits the corresponding surface it records the normal of the model at that point and puts that value in the normal map.
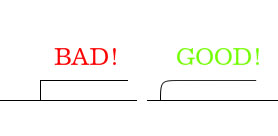
When baking normal maps it’s very important that you understand that it is detecting the normal of the high poly surface and not the height! For any surface you need to be picked up, for example a plate screwed onto the side of a locomotive, the edges of the plate need to be rounded for it to be picked up in the normal map generating process. Keep in mind though if the rounded over edge is to small there is a chance it wont be picked up because the resolution of the map isn’t larger enough to see it.
There is no limit to the amount of detail you can put into your high poly model. Normal maps can add a lot of details you would have to otherwise model into your low poly. It’s important when modeling your poly to find a good balance between geometry detail and detail that will be handled by the normal map. As a general rule of thumb any detail that is important to the profile of the object should be handled in geometry, any detail that is surface detail should be handled in the normal map.
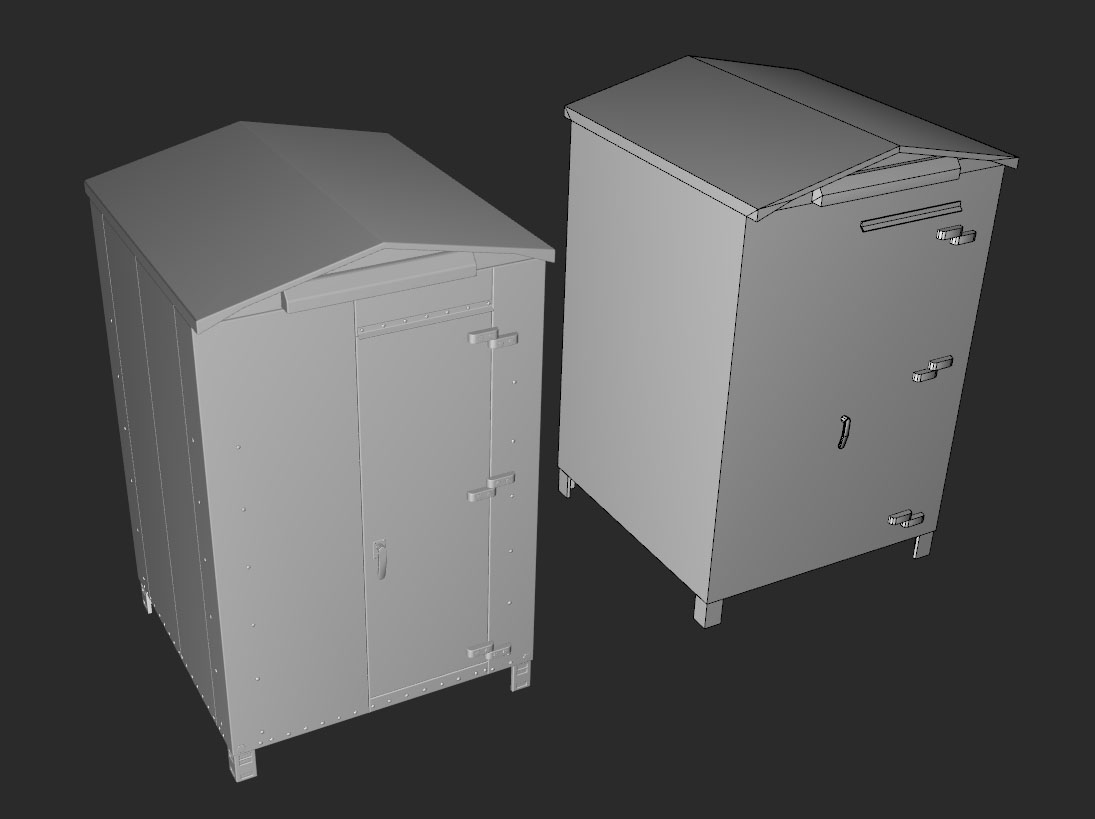
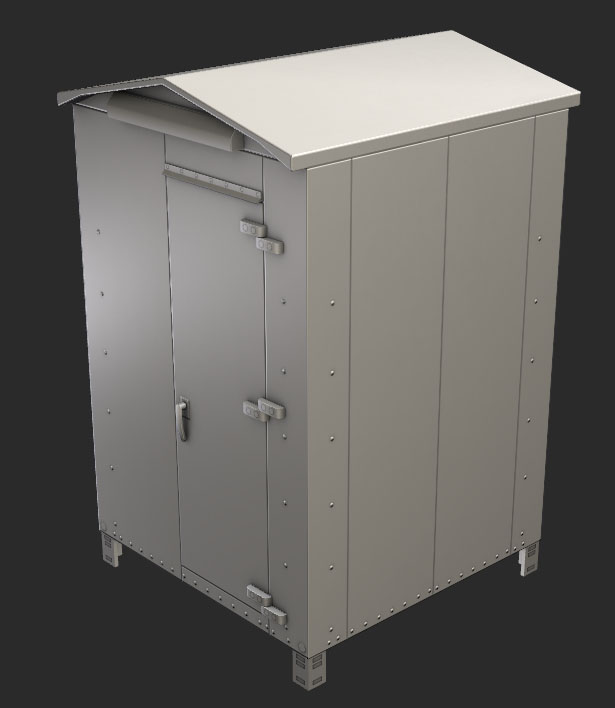
In the Electronics box I have modeled you can see things like the hinges and door handle have been modeled into the geometry but smaller details like panel lines and rivets will come from the normal map. In the following example I moved the low poly off to the side so you can view them side by side.
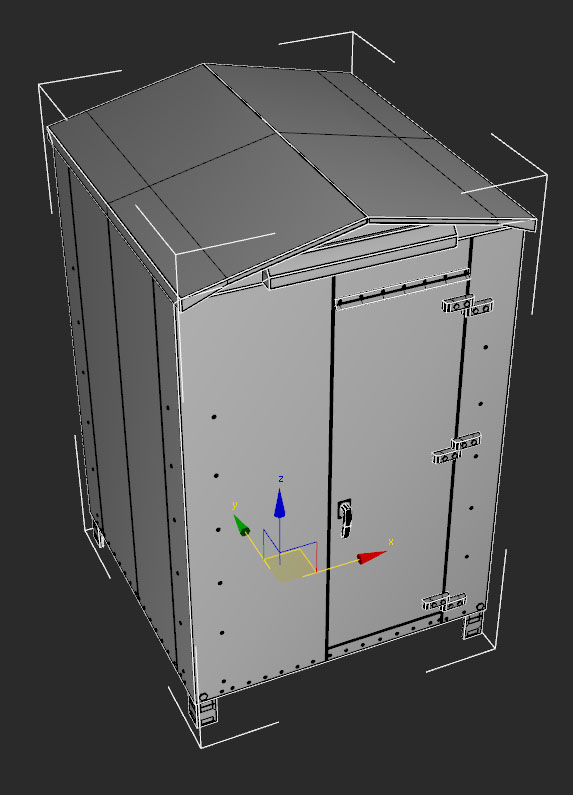
Your game model should fit snuggly over your normal map for best results. Here’s the game model in place, ready for projection.
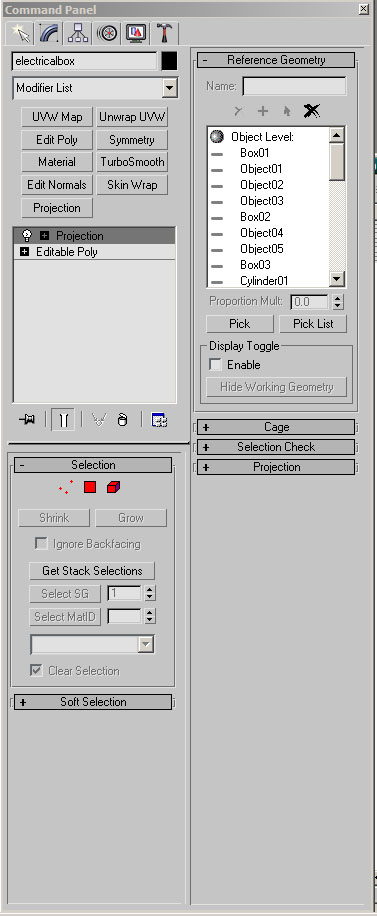
I have selected the game model and applied a Projection modifier. Under the “Reference Geometry” I clicked on “Pick List” and selected all of the meshes that are used on the highpoly object. Since this is a mechanical object I am not concerned about using/adjusting the cage.
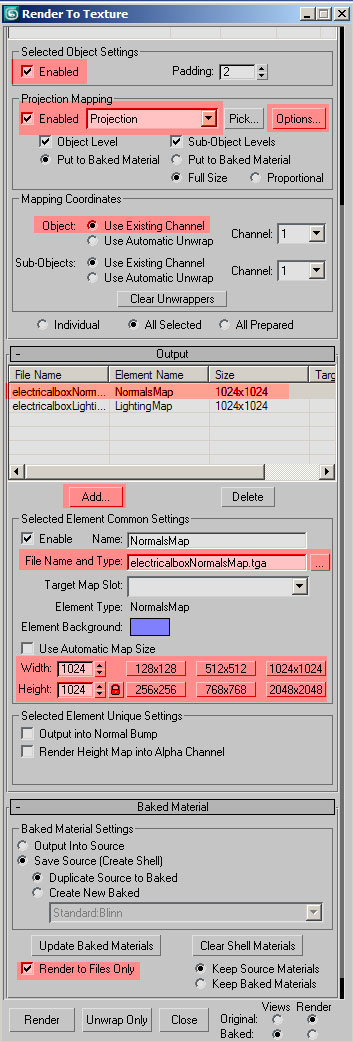
Next, with the low poly still selected I’ll hit the “0” key (or you can go to Render-->Render to Texture…” to bring up the render to texture dialog.
Under “Projection Mapping” we want to check “Enable” You can add the projection modifier here too, but I do it before hand because it allows me to select from a list of objects rather then selecting each one by hand in the viewport.
Under “Mapping Coordinates” Make sure “Object:” is set to “Use Existing Channel” If you have a lot of overlapping uv’s or a sloppy uv layout you will run into problems. The Automatic unwrap is very inefficient.
Under the “Output” rollout we want to click “Add…” and add a “Normals Map” With the map selected you can adjust it’s settings under “Selected Elements Common Settings” Make sure you change where it saves the file (Select the … button next to the file name) So you don’t lose the map after you bake it. Also, un-check the "Compress" setting by clicking on the Setup button when choosing the output filename, otherwise the file won't load into Trainz. You can also change the size of the map here. Generally speaking on more complex objects you will run into issues if you try and render anything above 2048x2048. Also, further down under the “Baked Material” rollout I’ve checked the “Render to Files Only” Option
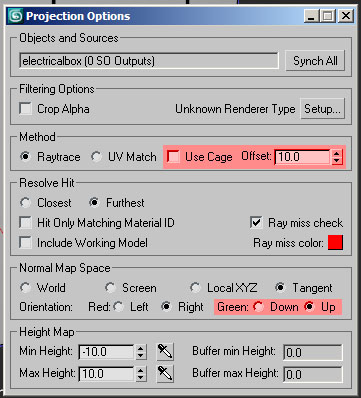
Back up under “Projection Mapping” and click “Options…” You should get the following diagram. Since we aren’t using the cage make sure “Use Cage” is unchecked. The offset dictates how far from the surface a ray will travel to find the high poly. Adjust accordingly.
Trainz uses a flipped green channel (when compared to max) so make sure “Green:” is set to “Up” instead of “Down”
Notice under “Resolve Hit” there is a “Ray Miss Color:” In the map that is rendered out it will render in red areas that did not hit a surface. It is not critical to make sure all pixels hit a surface; in some areas you may not see those pixels or notice. Use your best judgment.
When rendering more complex geometry sometimes the wrong normals will be picked up. A good way to prevent this is to assign material id’s to the different parts of your low poly and their corresponding parts in the highpoly and then selecting the “Hit Only Matching Material ID”
Back on the Render To Texture Dialog, with your low poly model still selected, press the render button. It’ll render an image that kind of looks like your uv layout. It will not display the normals while rendering, you will have to check the map after it is finished render.
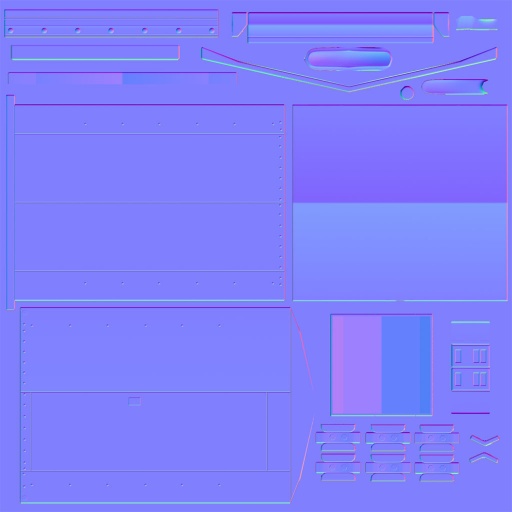
My normal map looked like this when rendered out.
And here is the low poly with the normal map and AO applied.
Related Links
- Content Configuration - A reference manual covering all content types.
