HowTo/Make your first Trainz Asset
The "How to make your first Trainz Object" step by step tutorial will teach you how to:
1. Determine what software you'll need
2. How to setup the model and materials in 3DS Max and export to a Trainz Object
3. How to create the Trainz Asset and import it into Trainz Content Manager
4. Where to find and use the Trainz Object in Trainz Simulator 12
1. Determine what software you'll need
Before you start you will need: - A copy of Trainz Simulator 12 (or technically, a copy of Trainz).
- A copy of 3DS Max studio that has a supported Trainz Exporter. We are using 3DS Max 2008 in this example. Information on all exports can be found link HERE and the download files can be found link HERE
- To setup the exporter in 3DS Max you will want to extract the .zip file and then place the correct versions "JetExporter.dle" file into the plugins directory of your installed 3DS Max. For example, it might look like "C:\Program Files (x86)\Autodesk\3ds Max 2008\plugins"
- (OPTIONAL SOFTWARE) link nDo2 is a Photoshop plugin that makes creating normal (or bump) maps for your models a breeze.
2. How to setup the model and materials in 3DS Max and export to a Trainz Object
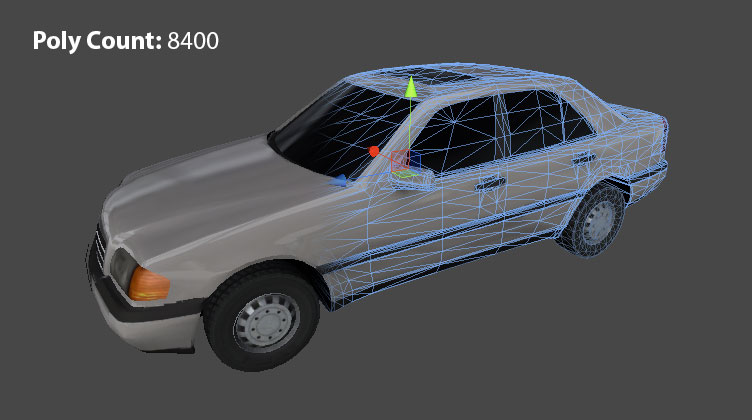
- STEP 1: Model your object at the highest detail required to look good up close. The distance that the highest level of detail model (LOD 0) will be seen in Trainz could be from 0 up to about 40 meters away from the camera. This distance is defined later in the tutorial anyway but keep this in mind.
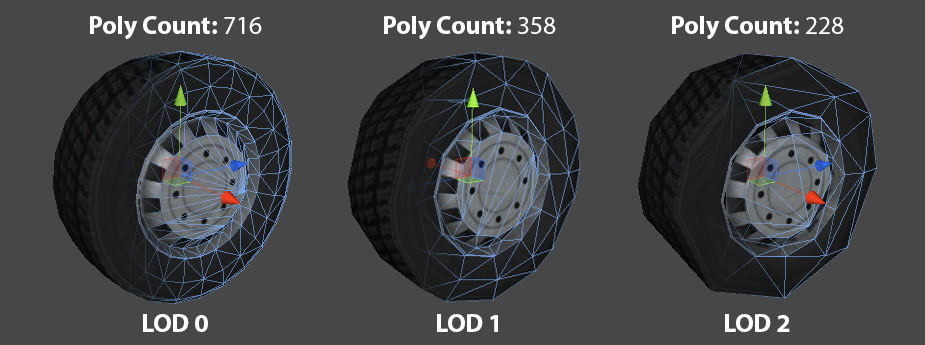
- STEP 2: Continue making a further 2 lower level detail models (LODs) for the exact same item you are modelling.
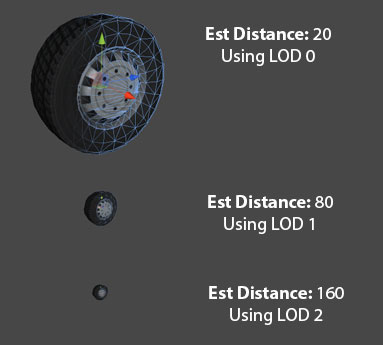
The 2nd highest detail model (LOD 1) is required to still look decent at 40 up to 80 meters away. You will want to remove about 50% of the original polygons found in the highest detailed model (LOD 0 - above).
The 3rd highest detail model (LOD 2) is required to still look decent at 80 up to 160 meters away. You will want to remove about 50% of the original polygons found in the 2nd highest detailed model (LOD 1).
This is an example of the LOD 0 detailed verse LOD 1 and LOD 2 detail.
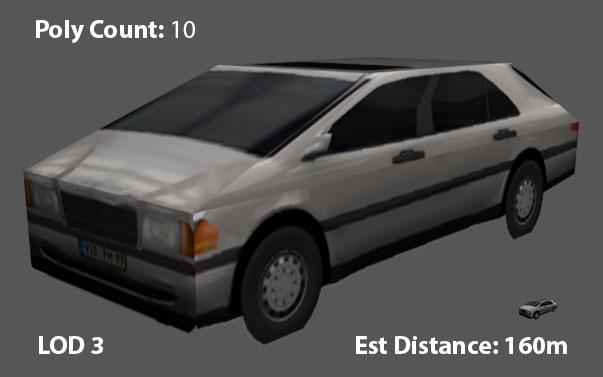
- STEP 3: Create an extremely low detailed model (LOD 3) to be used in the distance. In this example we are saying this model will be used 160 meters and beyond. Usually the lowest detail model which is used in the distance is a billboard (2 polygon object) or a cube type object (8 - 10 polygons). Whatever you choose, this detail must use as fewer polygons as possible.
- STEP 4: Setting up the materials is pretty easy but you'll need to work out what type of material (look) you want for your object. All the Trainz materials available for you to use in 3DS Max can be found here and you'll also want to read here for on additional lighting material setup.
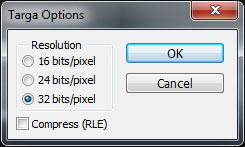
You should setup your image files as .TGA files and save them as 32-bits/pixel without "Compress (RLE)" checked.
- STEP 5: Once your models have LOD and materials applied, it's time to export from 3DS Max and get them into Trainz!
To export into Trainz format you will want to Click File -> Export, Save as type, drop down and select Trainz format (*.IM, *.KIN)
When you have exported all your different LODs from 3DS Max to a folder (without errors), you then need to start Content Manager in Trainz.
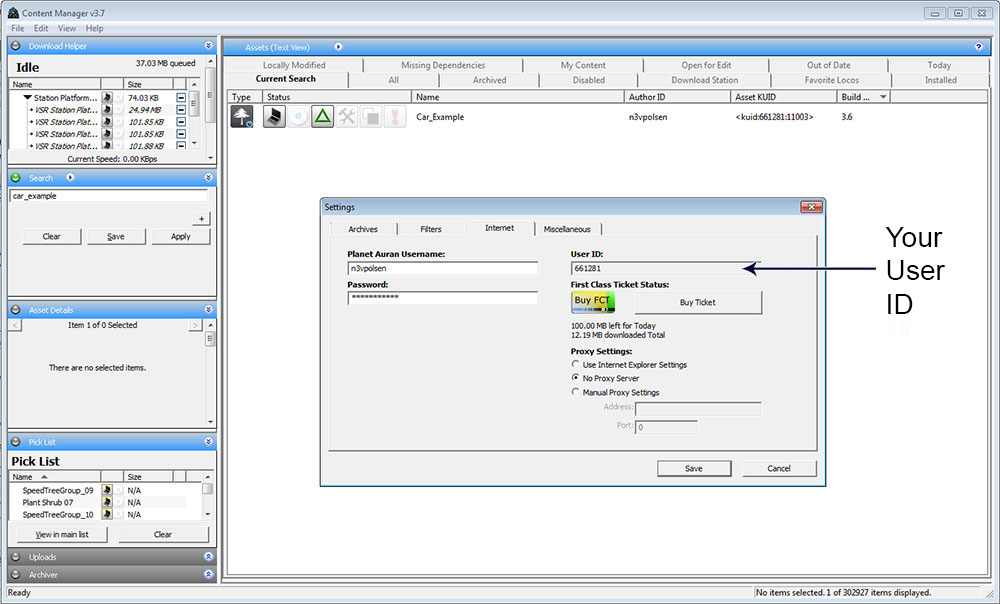
In Content Manager, once you login to Planet Auran you'll find your KUID number (User ID) by going File -> Settings then click on the Internet TAB. You will need this number to create any Trainz assets.
- STEP 6: Now you have your KUID number it is time to create a config.txt file that Trainz Content Manager will read to create your asset from.
Create a new file in the folder where all your exported .IM and .texture.txt files are. Name it "config.txt".
Here and here you will find an enormous amount of information on everything to do with the config.txt options. Reading the Content Configurations can be very overwhelming to start with so below we have created the minimum config.txt file needed to get you up and running. Be sure to expand on this by seeing what else Trainz can do though as it is very powerful!
This is the very basic "scenery" object config.txt file. (Not to worry, we break it down further!)
kind                                    "scenery"
username                                "Car_Example"
trainz-build                            3.7
category-class                          "FT"
mesh-detail-level-count                 4
mesh-table
{
 default-lod0
 {
   mesh                                "car_lod_0.im"
   auto-create                         1
   lod-level                           0
 }
 default-lod1
 {
   mesh                                "car_lod_1.im"
   auto-create                         1
   lod-level                           1
 }
 default-lod2
 {
   mesh                                "car_lod_2.im"
   auto-create                         1
   lod-level                           2
 }
 default-lod3
 {
   mesh                                "car_lod_3.im"
   auto-create                         1
   lod-level                           3
 }
}
thumbnails
{
 0
 {
   image                               "screenshot.jpg"
   width                               240
   height                              180
 }
}
kuid                                    <kuid:661281:11003>
Let's break this down to understand what each part is / does.
kind                                    "scenery"
username                                "Car_Example"
trainz-build                            3.7
category-class                          "FT"
You will find these first 4 parameters in the config.txt file outlined here.
mesh-detail-level-count 4
This parameter is set manually. This specifies the number of LODs our content will use. If you have 2 LODs in your object then you would change the 4 to a 2. Additional information can be found here.
mesh-table
{
 default-lod0
 {
   mesh                                "car_lod_0.im"
   auto-create                         1
   lod-level                           0
 }
 default-lod1
 {
   mesh                                "car_lod_1.im"
   auto-create                         1
   lod-level                           1
 }
 default-lod2
 {
   mesh                                "car_lod_2.im"
   auto-create                         1
   lod-level                           2
 }
 default-lod3
 {
   mesh                                "car_lod_3.im"
   auto-create                         1
   lod-level                           3
 }
}
Let's explain what we are doing with the mesh-table section. We have a container with is 'mesh-table' with two brackets '{' and '}'. You'll notice everything contained within these brackets for the mesh-table so it knows what parameters are to be part of the mesh-table section.
Inside the first '{' bracket we find another section called default-lod0 and it too has it's own '{' and '}' brackets as it too has parameters that it controls. You will notice there are 4 'default-lod' sections that look very similar. Each of the 'default-lod' sections are a level of detail that is manually specified. In the first section 'default-lod0' we have the 'mesh' parameter and have given it our highest detailed mesh called "car_lod_0.im". We also specify another parameter called 'auto-create' which tells Trainz to make this object visible as soon as the mesh loads, so we set this to '1'. Following those 2 parameters we have a final parameter called 'lod-level' with the value of '0'. This means that our 'mesh' which we specified as "car_lod_0.im" is to be used as 'lod-level' 0. NOTE: LOD detail should get smaller the higher the lod-level number specified, e.g. 'lod-level 0' should be the higest detailed polygon model you are using. 'lod-level 1' should use the model that has significantly less polygons than the one being used in 'lod-level 0' ... and so on. You only need to specify a number of 'default-lod' sections that is equal to the number of LOD meshes you have exported.
The mesh-table section has a lot of parameters to choose form. Additional parameters can be found here.
thumbnails
{
 0
 {
   image                               "screenshot.jpg"
   width                               240
   height                              180
 }
}
The thumbnails section can be found here.
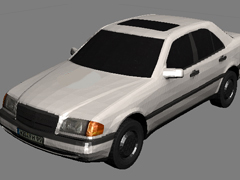
Really all you want to do is create a 240 wide by 180 high .jpg image of your object and save it in the directory where you have your .IM, .texture.txt and config.txt files.
Here is the car example:
kuid <kuid:661281:11003>
This KUID is the unique ID for your Trainz Object. The first number "661281" is the user ID (KUID number) which we grabbed earlier when we signed into Planet Auran in Content Manager. The second number "11003" is any old number we want. It has to be unique to your content though, meaning you can only have 1 Trainz Object for that number. Best to come up with a numbering system for example, having 0 - 1000 for locos, 1001 to 5000 for scenery objects and so on. For detailed information can be found on KUIDs here.
... more to come!
