HowTo/Additional Rules Menu
| Line 1: | Line 1: | ||
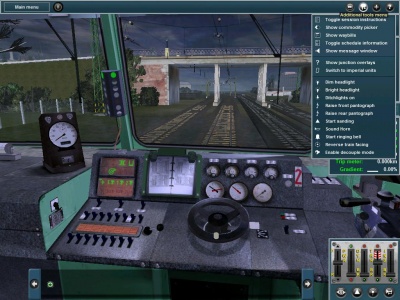
The Additional Tools menu consolidates many functions that are useful when driving in a session. | The Additional Tools menu consolidates many functions that are useful when driving in a session. | ||
| + | [[File:Additional tools menu.jpeg|400px|thumb|right|]] | ||
== Toggle Session Instructions == | == Toggle Session Instructions == | ||
| − | Click on this to display the session instructions. | + | [[File:Toggle session instructions.jpeg|400px|thumb|left|]] Click on this to display the session instructions. |
| − | + | ||
| + | {{clear}} | ||
== Show Commodity Picker == | == Show Commodity Picker == | ||
| − | This displays the | + | [[File:Show commodity picker.jpg|400px|thumb|left|]] |
| + | This displays the commodity picker. | ||
You can allocate which commodities are carried by a particular | You can allocate which commodities are carried by a particular | ||
item of rolling stock. Click on an appropriate icon and then click on an item of | item of rolling stock. Click on an appropriate icon and then click on an item of | ||
| Line 15: | Line 17: | ||
can only assign commodities to vehicles built for carrying | can only assign commodities to vehicles built for carrying | ||
that type of commodity. | that type of commodity. | ||
| − | + | {{clear}} | |
== Show Waybills == | == Show Waybills == | ||
| − | + | [[File:Show waybills.jpg|400px|thumb|left|]] | |
| − | This shows available waybills | + | This shows available waybills from participating industries on |
| − | from participating industries on | + | |
the route, showing that they | the route, showing that they | ||
require certain products for delivery. Click LMB on each | require certain products for delivery. Click LMB on each | ||
| Line 31: | Line 32: | ||
has been delivered, the Waybill is deleted from your list | has been delivered, the Waybill is deleted from your list | ||
(although another one may well have appeared in its place). | (although another one may well have appeared in its place). | ||
| − | + | {{clear}} | |
| Line 39: | Line 40: | ||
== Toggle Schedule Information == | == Toggle Schedule Information == | ||
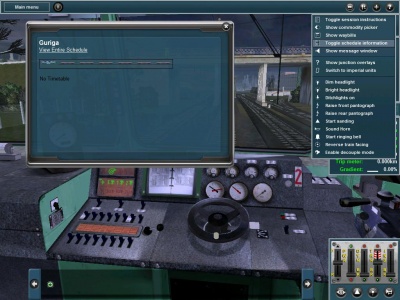
| − | + | [[File:Toggle schedule information.jpg|400px|thumb|left|]] | |
This displays the schedule (if applicable to the session). | This displays the schedule (if applicable to the session). | ||
| − | + | {{clear}} | |
== Show Message Window == | == Show Message Window == | ||
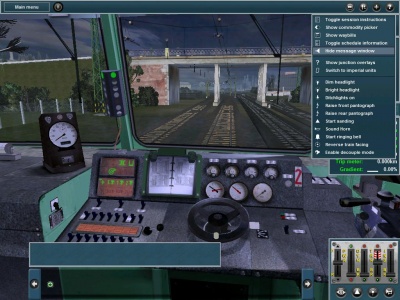
| − | + | [[File:Show message box.jpg|400px|thumb|left|]] | |
This displays the message window which contains many | This displays the message window which contains many | ||
messages about the movements of trains throughout the | messages about the movements of trains throughout the | ||
route. | route. | ||
| − | + | {{clear}} | |
== Show Junction Overlays == | == Show Junction Overlays == | ||
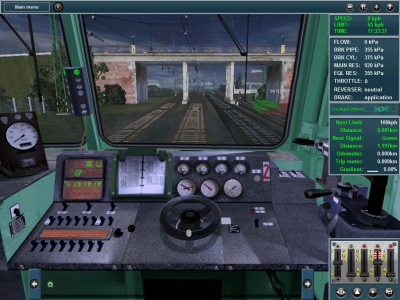
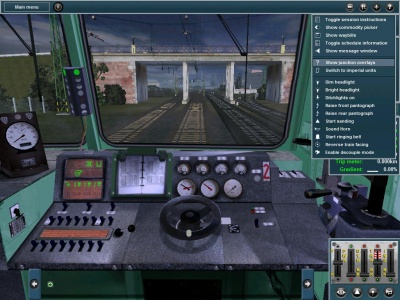
| − | + | [[File:Junctions on.jpg|400px|thumb|left|Always visible]] [[File:Junctions off.jpg|400px|thumb|right|Mouse-over to view]] | |
This toggles whether junction names (and arrow controls) | This toggles whether junction names (and arrow controls) | ||
are visible at all times or only when you hover your mouse | are visible at all times or only when you hover your mouse | ||
over them. | over them. | ||
| − | + | {{clear}} | |
== Switch Between Imperial/Metric Units == | == Switch Between Imperial/Metric Units == | ||
| − | |||
Toggles the settings from Imperial to Metric or vice versa. | Toggles the settings from Imperial to Metric or vice versa. | ||
This will affect parts of Trainz that involve the display of | This will affect parts of Trainz that involve the display of | ||
| Line 65: | Line 65: | ||
| − | == | + | == Train options == |
| − | + | [[File:Quick actions.jpg|400px|thumb|left|]] | |
| − | + | ||
| − | + | ||
| − | + | ||
| − | + | ||
| − | + | ||
| − | + | ||
| − | + | ||
| − | + | ||
| − | + | ||
| − | + | ||
| − | + | ||
| − | + | ||
| − | + | ||
| − | + | ||
| − | + | ||
| − | + | ||
| − | + | ||
| − | + | ||
| − | + | ||
| − | + | ||
| − | + | ||
| − | + | ||
| − | + | ||
| − | + | ||
| − | + | ||
| − | + | ||
| − | + | ||
| − | + | ||
| − | + | ||
| − | + | ||
| − | + | ||
| − | + | ||
| − | + | ||
| − | + | * Dim Headlight: Changes the headlight to dimmed state or if dim, turns off. | |
| + | * Bright Headlight: Changes the headlight to a bright state or if already bright, turns headlights off. This button can also be found in the bottom-right corner of the screen. | ||
| − | + | * Ditchlights on: This toggles the selected train’s ditchlights on and off. | |
| − | + | ||
| − | + | ||
| + | * Raise/Lower Front Pantograph: If applicable, this toggles the selected train’s front pantographs up and down. A pantograph button can also be found in the bottom-right corner of the screen. | ||
| − | + | * Raise/Lower Rear Pantograph: If applicable, this toggles the selected train’s rear pantographs up and down. A pantograph button can also be found in the bottom-right corner of the screen. | |
| − | This toggles the | + | * Start Sanding: This toggles sanding the tracks in front of the selected train to help prevent wheel slippage. |
| − | + | ||
| − | the | + | |
| + | * Start Ringing Bell: | ||
| + | If applicable, this begins ringing the selected train’s bell. To stop it, click again. This button can also be found in the bottom-right corner of the screen. | ||
| − | + | * Reverse Train Facing: This toggles the direction that the train considers forwards. This button can also be found in the bottom-right corner of the screen. | |
| − | Clicking on this display all of the available couplers as bright | + | * Enable Decouple Mode: Clicking on this display all of the available couplers as bright red. You will also be able to see them through other objects. This button can also be found in the bottom-right corner of the screen. |
| − | red. You will also be able to see them through other objects. | + | |
| − | This button can also be found in the bottom-right corner of | + | |
| − | the screen | + | |
Revision as of 05:59, 15 February 2014
The Additional Tools menu consolidates many functions that are useful when driving in a session.
Contents |
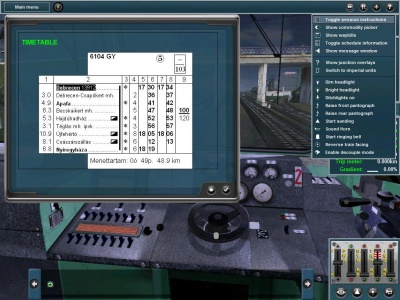
Toggle Session Instructions
Click on this to display the session instructions.Show Commodity Picker
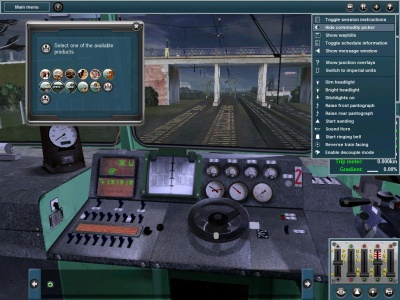
This displays the commodity picker. You can allocate which commodities are carried by a particular item of rolling stock. Click on an appropriate icon and then click on an item of rolling stock. The icon shows that the rolling stock is now limited to carrying only that type of Commodity. To stop any commodity being loaded or unloaded, use the “Stop” icon. To allow the default load only, use the “Default” icon. You can only assign commodities to vehicles built for carrying that type of commodity.
Show Waybills
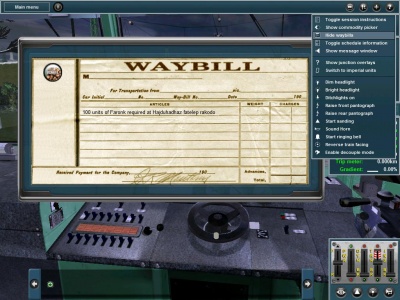
This shows available waybills from participating industries on the route, showing that they require certain products for delivery. Click LMB on each industry icon in the list to show what quantities of products are required. Waybills are automatically produced by an industry when that industry reaches a percentage of capacity of a particular commodity. Once the full amount required by the Waybill has been delivered, the Waybill is deleted from your list (although another one may well have appeared in its place).
Toggle Schedule Information
This displays the schedule (if applicable to the session).
Show Message Window
This displays the message window which contains many messages about the movements of trains throughout the route.
Show Junction Overlays
This toggles whether junction names (and arrow controls) are visible at all times or only when you hover your mouse over them.
Switch Between Imperial/Metric Units
Toggles the settings from Imperial to Metric or vice versa. This will affect parts of Trainz that involve the display of measurement/speed information such as the Time & Speed HUD Panel.
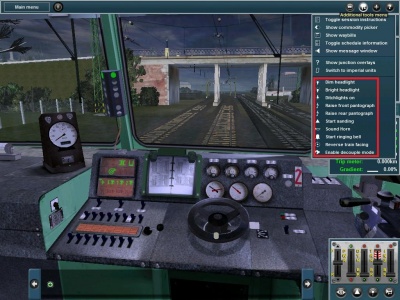
Train options
- Dim Headlight: Changes the headlight to dimmed state or if dim, turns off.
- Bright Headlight: Changes the headlight to a bright state or if already bright, turns headlights off. This button can also be found in the bottom-right corner of the screen.
- Ditchlights on: This toggles the selected train’s ditchlights on and off.
- Raise/Lower Front Pantograph: If applicable, this toggles the selected train’s front pantographs up and down. A pantograph button can also be found in the bottom-right corner of the screen.
- Raise/Lower Rear Pantograph: If applicable, this toggles the selected train’s rear pantographs up and down. A pantograph button can also be found in the bottom-right corner of the screen.
- Start Sanding: This toggles sanding the tracks in front of the selected train to help prevent wheel slippage.
- Start Ringing Bell:
If applicable, this begins ringing the selected train’s bell. To stop it, click again. This button can also be found in the bottom-right corner of the screen.
- Reverse Train Facing: This toggles the direction that the train considers forwards. This button can also be found in the bottom-right corner of the screen.
- Enable Decouple Mode: Clicking on this display all of the available couplers as bright red. You will also be able to see them through other objects. This button can also be found in the bottom-right corner of the screen.
