HowTo/Export from 3DS Max using FBX
Tonyhilliam (Talk | contribs) |
Tonyhilliam (Talk | contribs) |
||
| Line 4: | Line 4: | ||
Trainz supports the FBX file format in assets from trainz-build 4.5 onward. Older asset versions do not support the FBX file format and the legacy [[Autodesk 3ds Max Exporters]] must be used instead. | Trainz supports the FBX file format in assets from trainz-build 4.5 onward. Older asset versions do not support the FBX file format and the legacy [[Autodesk 3ds Max Exporters]] must be used instead. | ||
| − | |||
This tutorial will explain the following steps to demonstrate how to get your 3D creations from 3DS Max 2016 into Content Manager successful. Other 3DS Max versions will be very similar to this tutorial. | This tutorial will explain the following steps to demonstrate how to get your 3D creations from 3DS Max 2016 into Content Manager successful. Other 3DS Max versions will be very similar to this tutorial. | ||
| Line 131: | Line 130: | ||
== References == | == References == | ||
[[Material Types]] | [[Material Types]] | ||
| + | |||
| + | ==Return to Index== | ||
| + | |||
| + | [[HowToGuides|<< How To Guides]] | ||
[[Category:How-to guides]] | [[Category:How-to guides]] | ||
Revision as of 20:44, 16 January 2018
This page describes how to export from the Autodesk 3DS Max modelling software to FBX file format for use in Trainz. Please note that the technologies described on this page are not owned or controlled by N3V Games and may be subject to change at the whim of the owner.
The techniques described here require the use of 3DS Max 2011 or newer.
Trainz supports the FBX file format in assets from trainz-build 4.5 onward. Older asset versions do not support the FBX file format and the legacy Autodesk 3ds Max Exporters must be used instead.
This tutorial will explain the following steps to demonstrate how to get your 3D creations from 3DS Max 2016 into Content Manager successful. Other 3DS Max versions will be very similar to this tutorial.
Contents |
Tutorial Video
You can watch the tutorial video that describes all the information below.
Make sure you continue down the page as there are useful links that might help.
Step 1 – Modelling in 3DS Max
Model your creations the exact same way you would for previous Trainz versions.
There are already many helpful tutorials on how to model for Trainz.
Be sure you have your materials setup correctly and if you are using animation you will need to make sure it is setup correctly also with the correct bones and names for them.
More information on Materials can be found here:
http://online.ts2009.com/mediaWiki/index.php/Material_Types
More information on Animation can be found here: http://online.ts2009.com/mediaWiki/index.php/Attachment_Points
Here are some additional links on modelling for Trainz that might be useful for you:
Modeling http://online.ts2009.com/mediaWiki/index.php/Modeling_Guidelines
Modeling Trains for Trainz http://online.ts2009.com/mediaWiki/index.php/Modeling_Trains_for_Trainz
HowTo/Make your first Trainz Asset http://online.ts2009.com/mediaWiki/index.php/HowTo/Make_your_first_Trainz_Asset
Trainz - Content Creation - #22 - Level of Detail ( LOD ) http://online.ts2009.com/mediaWiki/index.php/Tutorial_Videos#Trainz_-_Content_Creation_-_.2322_-_Level_of_Detail_.28_LOD_.29
Trainz - Content Creation - #16.1 - Materials - Rust (using tbumpgloss) http://online.ts2009.com/mediaWiki/index.php/Tutorial_Videos#Trainz_-_Content_Creation_-_.2316.1_-_Materials_-_Rust_.28using_tbumpgloss.29
Trainz - Content Creation - #16.2 - Materials - Paint (using tbumpenv) http://online.ts2009.com/mediaWiki/index.php/Tutorial_Videos#Trainz_-_Content_Creation_-_.2316.2_-_Materials_-_Paint_.28using_tbumpenv.29
Trainz - Content Creation - #9 - Understanding trainz settings & Level of Detail on assets http://online.ts2009.com/mediaWiki/index.php/Tutorial_Videos#Trainz_-_Content_Creation_-_.239_-_Understanding_trainz_settings_.26_Level_of_Detail_on_assets
Step 2 – Exporting from 3DS Max
If you are ready to export your creations from 3DS Max as FBX files and import them into Trainz Content Manager then this is your next step.
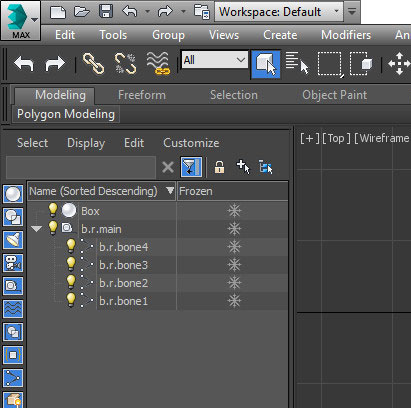
In the “Scene Explorer”, either select the objects you wanted exported or don’t select any at all which will default to exporting all visible objects.
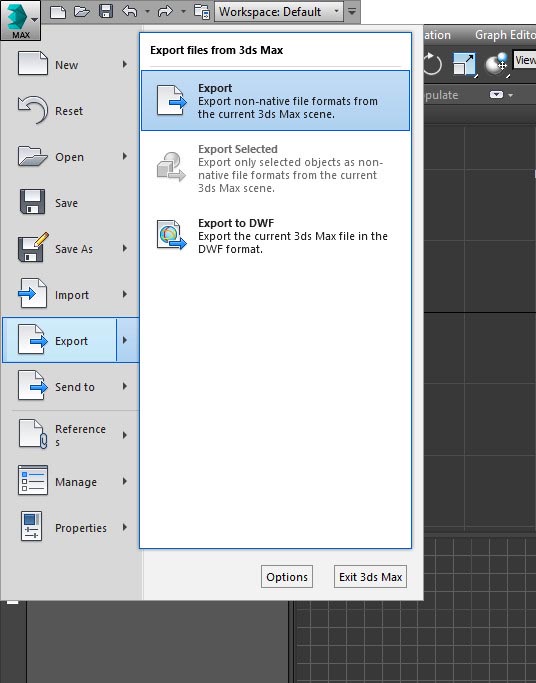
Navigate up to the top left “Max” button (usually where “FILE” is on a menu bar), click and move your mouse to hover over “Export” and finally under “Export files from 3ds Max” click “Export”. Locate the folder where you want to save your .FBX file (usually the Trainz asset you are working in). Once you have the location you want, make sure the “Save as type” is “Autodesk (.FBX). Enter a name for your .FBX file and click the “Save” button.
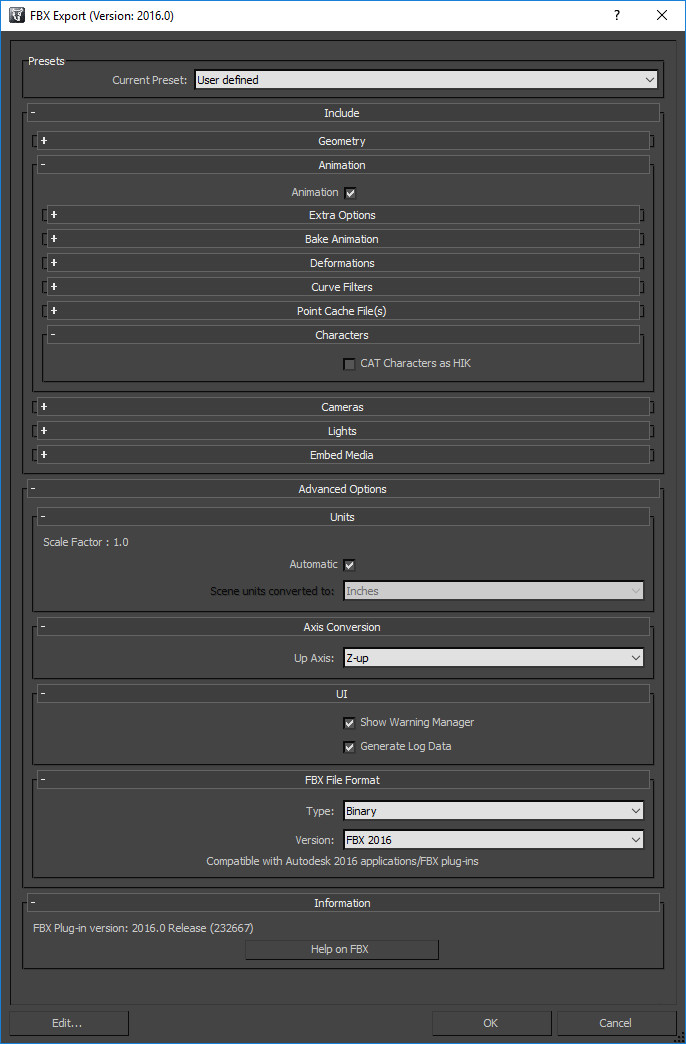
The “FBX Export” window should appear. You will want to probably play around with some of these settings depending on what you want to achieve but to get you started you can follow these instructions.
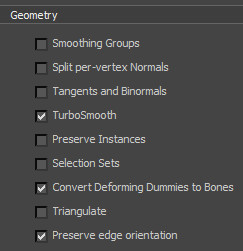
Under Geometry be sure these are ticked:
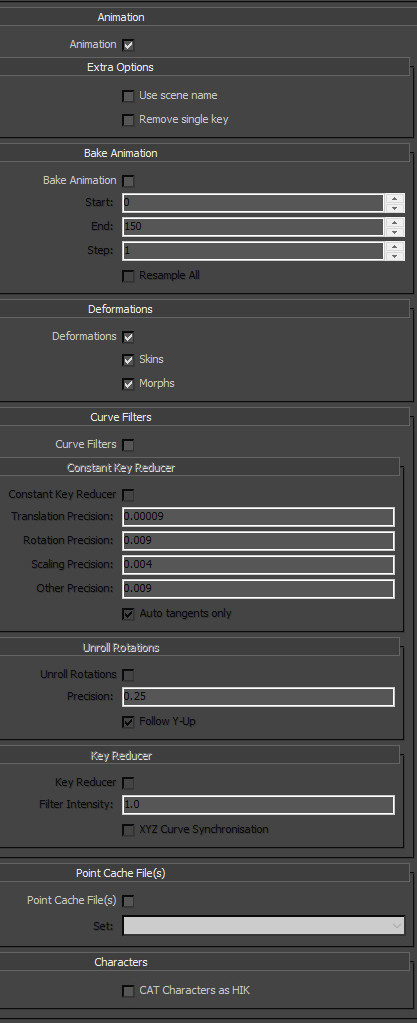
If you have animation in your scene then, under Animation be sure you have these or similar options ticked and values entered. Generally 3DS Max defaults will do for this but if you are using animation you’ll want to check:
Animation = ticked
Bake Animation = NOT ticked
Deformations = ticked
Deformations - Skins = ticked
Deformations - Morphs = ticked
NOTE: If you are using animation be sure to use the “skin” modifier with dummy helpers or bones as this is supported in Trainz. If your animations are not working it is probably because you haven’t set up the scene correctly. Please be sure to read this link and possibly look at the links above if you are still suck on getting your animation to work: http://online.ts2009.com/mediaWiki/index.php/Attachment_Points
A bone or dummy helper called “b.r.main” is required in your scene at the root level. Your objects should have this bone in their “skin” modifier (as well as any others required to animate it). All other bones should be named “b.r.SOMETHING” and should be attached to “b.r.main”. This is the very minimum to get animation working in Trainz.
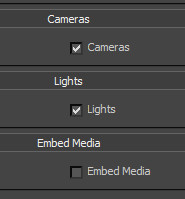
If you want to export cameras or lights then you’ll need to have those options ticked, otherwise don’t tick them. By default these are ticked but if you have none in your scene then none will be exported.
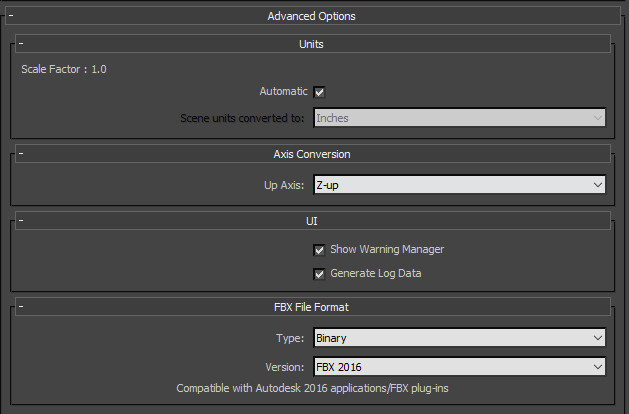
Under the Advanced Options you will probably want the following:
Once the FBX exports without any errors you can move onto the next step. You might see some warnings which you may be able to continue without fixing. If it is saying it is an error though, you’d be best to fix that.
Step 3 – Editing the Asset Folder and Files (Config.txt)
If you’ve got this far you’ve managed to export your .FBX file from 3DS Max.
You can download examples of FBX and Trainz Assets here to use with this tutorial (these assets only work in Trainz builds 4.5 or greater):
Simple cube asset with animation: http://download.trainzportal.com/tutorials/fbx_example_1_animated.zip
Simple cube asset without animation: http://download.trainzportal.com/tutorials/fbx_example_1.zip
Be sure you have the .FBX file in your root directory of your asset. Obviously you can have more than one .FBX file and should if your asset requires level of detail (LOD) which most will.
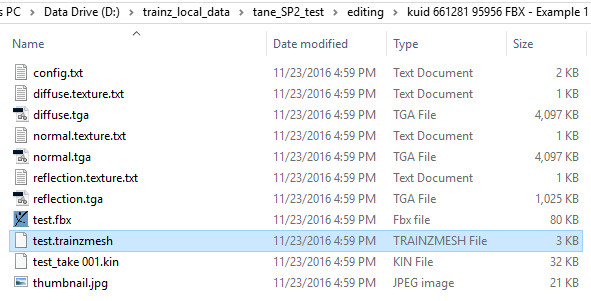
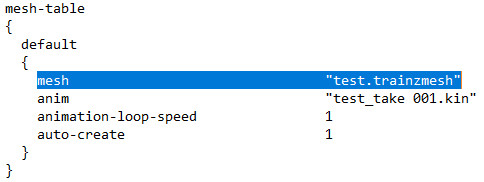
Open the config.txt file. Under the “mesh-table” container, for assets that are built for versions 4.3 or less you would normally use the .im extension on your files in the “mesh” tag. You can still do this for builds that are 4.5 or greater but if you are using .FBX files you must change the “mesh” tag extension to read “.trainzmesh”.
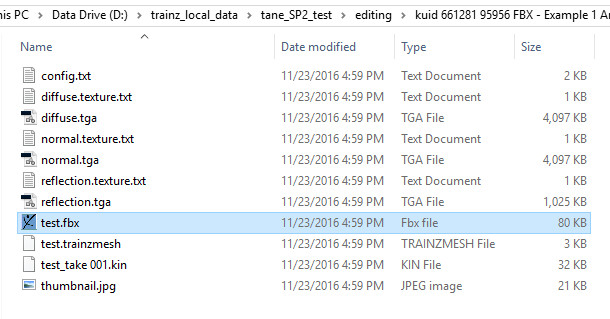
NOTE: When imported into Content Manager, Trainz converts the .FBX file into a .trainzmesh file. When you then select your asset in Content Manager and select “open for edit” and browse it in a file manager, you will see both the .FBX and .trainzmesh file in the asset folder. It is up to you if you wish to then remove your .FBX source file or not before submitting your assets to the Download Station or distributing the asset beyond your local machine. Keep in mind that 3DS software packages (such as 3DS Max) can easily import .FBX files for others to edit.
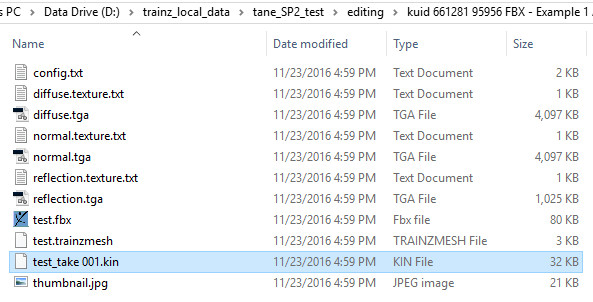
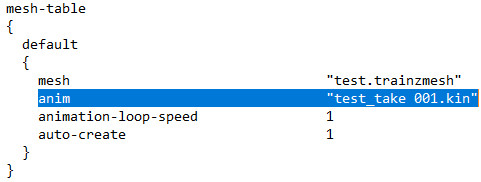
If you have exported animation in your .FBX file then you will want to add it to your “mesh-table” container. Just like in previous asset creation, you will add an “anim” tag and point to the animation .kin file. Since the .FBX file has the animation in it you won’t actually have a .kin file until you import your asset into Content Manager. Once you do import your asset into Content Manager and open it for edit, when you view it in a file manager you will find Trainz has created the .kin file for you.
You can now reference it in the “mesh-table” container under the “anim” tag.
