ProToolz Curve Template
(Created page with "{| |- |200pxProToolz Curve template is the trickiest of the tools included with this package. Some trial and error may be required before y...") |
|||
| Line 6: | Line 6: | ||
|[[File:ProTools Curve01.jpg|right|200px]]'''1)''' All tools are accessed by selecting 3DTrains in the Region window of the Objects tab. | |[[File:ProTools Curve01.jpg|right|200px]]'''1)''' All tools are accessed by selecting 3DTrains in the Region window of the Objects tab. | ||
| − | Start by selecting and dropping in the ProToolz Curve template from the Objects tab. | + | Start by selecting and dropping in the ProToolz Curve template from the Objects tab. ''Does not apply to all versions, if your version has no region window, use Filter and 3dtrains'' |
|- | |- | ||
|[[File:ProTools Curve02.jpg|right|200px]]'''2)''' Align the template by grabbing the yellow 3DTrains block and positioning it near the mainline. Use the mainline as a guide to rotate the template into its proper alignment. | |[[File:ProTools Curve02.jpg|right|200px]]'''2)''' Align the template by grabbing the yellow 3DTrains block and positioning it near the mainline. Use the mainline as a guide to rotate the template into its proper alignment. | ||
| Line 19: | Line 19: | ||
Tip: For spiral easements, position the template slightly offset from alignment of the mainline. In the picture at right, this shows that the template was moved slightly upwards (roughly the equivalent to 2-meters, or 1/5th of a square). Some trial and error is needed before getting it right, but the end results are well worth the effort (and making your passengers happy!). | Tip: For spiral easements, position the template slightly offset from alignment of the mainline. In the picture at right, this shows that the template was moved slightly upwards (roughly the equivalent to 2-meters, or 1/5th of a square). Some trial and error is needed before getting it right, but the end results are well worth the effort (and making your passengers happy!). | ||
| − | |||
|- | |- | ||
|[[File:ProTools Curve04.jpg|right|200px]]'''4)''' Select the track you want from the Track tab, and begin adding splines to where the ProToolz Curve template's poles are located. They need not be perfectly set just yet... | |[[File:ProTools Curve04.jpg|right|200px]]'''4)''' Select the track you want from the Track tab, and begin adding splines to where the ProToolz Curve template's poles are located. They need not be perfectly set just yet... | ||
| − | |||
| − | |||
| − | |||
|- | |- | ||
|[[File:ProTools Curve05.jpg|right|200px]]'''5)''' Zoom in close to each of the poles of the ProToolz Curve template, and use the Move Track tool to adjust the splines. | |[[File:ProTools Curve05.jpg|right|200px]]'''5)''' Zoom in close to each of the poles of the ProToolz Curve template, and use the Move Track tool to adjust the splines. | ||
| − | |||
|- | |- | ||
|[[File:ProTools Curve06.jpg|right|200px]]'''6)''' Connect the curve to the mainline, and delete the template. If you selected to try your hand at creating spiral easements, you can adjust the spline point connecting the curve to the mainline at this time (indicated by the arrow in the picture). | |[[File:ProTools Curve06.jpg|right|200px]]'''6)''' Connect the curve to the mainline, and delete the template. If you selected to try your hand at creating spiral easements, you can adjust the spline point connecting the curve to the mainline at this time (indicated by the arrow in the picture). | ||
| − | |||
|- | |- | ||
| − | |[[File:ProTools Curve07.jpg|right|200px]]You're Done! | + | |[[File:ProTools Curve07.jpg|right|200px]]'''You're Done!''' |
| − | And there you have it. A baby-smooth curve, and the whole process took only a few minutes! As Rob at Auran would say: "...and that's all there is to it!" | + | And there you have it. A baby-smooth curve, and the whole process took only a few minutes! As Rob at Auran would say: "'''...and that's all there is to it!'''" |
|} | |} | ||
Latest revision as of 16:40, 14 June 2013
| ProToolz Curve template is the trickiest of the tools included with this package. Some trial and error may be required before you're comfortable using it. However, once you've got the basics down, you'll be cranking-out curves in a fraction of the time as before! |
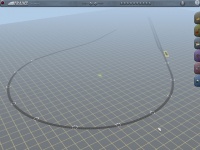
| 1) All tools are accessed by selecting 3DTrains in the Region window of the Objects tab.
Start by selecting and dropping in the ProToolz Curve template from the Objects tab. Does not apply to all versions, if your version has no region window, use Filter and 3dtrains |
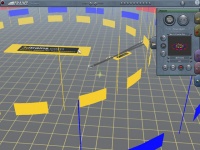
| 2) Align the template by grabbing the yellow 3DTrains block and positioning it near the mainline. Use the mainline as a guide to rotate the template into its proper alignment. |
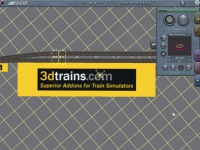
| 3) Move the template to the desired location, positioning it so that the chosen radius is in alignment with the mainline.
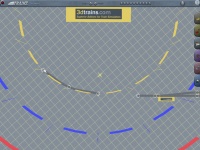
Note: The following colors are used for the various radii of the ProToolz Curve template: Yellow = 120 Meter Radius - Branch Lines and Industrial Spurs Blue = 180 Meter Radius - Mainlines and Branch Lines Red = 240 Meter Radius - Visually Prototypical Mainlines Tip: For spiral easements, position the template slightly offset from alignment of the mainline. In the picture at right, this shows that the template was moved slightly upwards (roughly the equivalent to 2-meters, or 1/5th of a square). Some trial and error is needed before getting it right, but the end results are well worth the effort (and making your passengers happy!). |
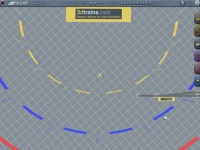
| 4) Select the track you want from the Track tab, and begin adding splines to where the ProToolz Curve template's poles are located. They need not be perfectly set just yet... |
| 5) Zoom in close to each of the poles of the ProToolz Curve template, and use the Move Track tool to adjust the splines. |
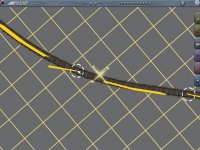
| 6) Connect the curve to the mainline, and delete the template. If you selected to try your hand at creating spiral easements, you can adjust the spline point connecting the curve to the mainline at this time (indicated by the arrow in the picture). |
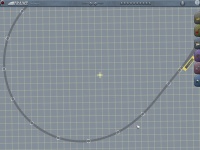
| You're Done!
And there you have it. A baby-smooth curve, and the whole process took only a few minutes! As Rob at Auran would say: "...and that's all there is to it!" |
