HowTo/Create your first Route
Tonyhilliam (Talk | contribs) (Created page with "This is a beginner level tutorial designed to teach new users how to create a very simple Route by using the Track and Train Tools in Surveyor ==Routes and Sessions== You may...") |
Tonyhilliam (Talk | contribs) |
||
| Line 2: | Line 2: | ||
==Routes and Sessions== | ==Routes and Sessions== | ||
| − | You may like to first learn about the differences between [[Help:Route|Routes]] and [[Help:Session|Sessions]]. One way of thinking about this is that the Route is the "world" and the Session is "what happens inside the world". | + | You may like to first learn about the differences between [[Help:Route|Routes]] and [[Help:Session|Sessions]]. One way of thinking about this is that the Route is the "world" comprised of terrain, scenery and tracks, and the Session is "what happens inside the world" such as trains on the tracks, and Rules that govern the operation of the Session. |
==Creating your Test Route== | ==Creating your Test Route== | ||
| − | While it is possible to edit existing routes, this tutorial will teach you how to | + | While it is possible to edit existing routes, this tutorial will teach you how to lay a simple piece of track (without any hills, ground textures or scenery items) to create your first Trainz Route. From these humble beginnings you will begin the journey to expand your route-building skills with the ultimate goal to create your own rail masterpiece. |
| − | + | So let's get started: | |
* From the Main Menu, choose Select Route | * From the Main Menu, choose Select Route | ||
| Line 30: | Line 30: | ||
* First, click on one of the two track-end circles (these are "Spline Points" or Nodes) | * First, click on one of the two track-end circles (these are "Spline Points" or Nodes) | ||
| − | * Move your mouse (do not click yet) | + | * Move your mouse (do not click yet) - you will notice that the track length extends as you move your cursor away from the first Node. |
| − | * Click again on the terrain to lay the next section of track | + | * Click again on the terrain to lay the next section of track in place |
[[File:Track_laying2.jpg|500px|left|thumb|Extending your track section by section]] | [[File:Track_laying2.jpg|500px|left|thumb|Extending your track section by section]] | ||
{{Clear}} | {{Clear}} | ||
Revision as of 14:24, 24 February 2014
This is a beginner level tutorial designed to teach new users how to create a very simple Route by using the Track and Train Tools in Surveyor
Contents |
Routes and Sessions
You may like to first learn about the differences between Routes and Sessions. One way of thinking about this is that the Route is the "world" comprised of terrain, scenery and tracks, and the Session is "what happens inside the world" such as trains on the tracks, and Rules that govern the operation of the Session.
Creating your Test Route
While it is possible to edit existing routes, this tutorial will teach you how to lay a simple piece of track (without any hills, ground textures or scenery items) to create your first Trainz Route. From these humble beginnings you will begin the journey to expand your route-building skills with the ultimate goal to create your own rail masterpiece.
So let's get started:
- From the Main Menu, choose Select Route
- From the Routes Menu, choose Create Route
- Name your Route "Test1"
- Select your Geographical region (this will change the side of the road that cars drive on etc)
- Click on the Tick to close the Set-up menu
Technically, the blank baseboard you are looking at now is a "Route" - of course it isn't very exciting as there is not track or train, so let's change that.
Adding Track
Trainz uses a spline-based track laying system that makes it very easy to lay track.
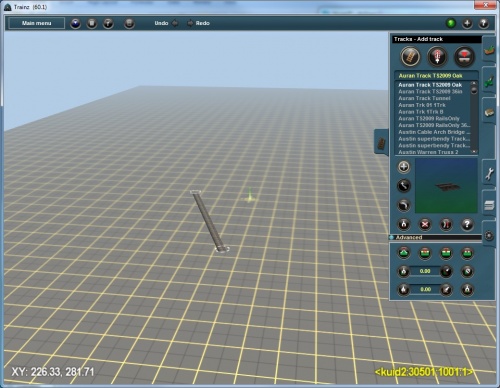
- Choose the Track Tab and select a piece of track in the track listing
- Click on the terrain, and move your cursor up the screen - a "track spline" will appear
- Click again on the terrain and you have laid your first piece of track
Extending your Track
There are many different tools that can be used to lay track, with different tools and methods beign appropriate in different situations. The best way to discover each of the tools is to use each of them and see what happens. We'll start by showing two basic ways of adding track.
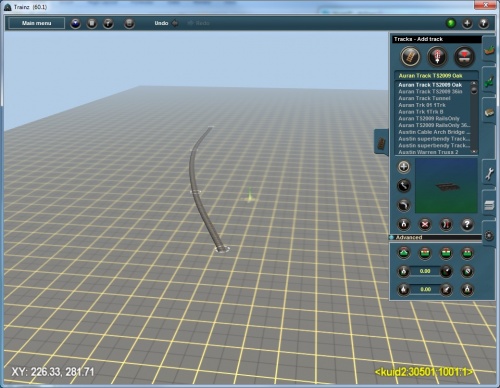
- First, click on one of the two track-end circles (these are "Spline Points" or Nodes)
- Move your mouse (do not click yet) - you will notice that the track length extends as you move your cursor away from the first Node.
- Click again on the terrain to lay the next section of track in place
- TIP: R-click to navigate around the world while using the arrow keys to adjust your camera direction.
- TIP: To lay several pieces in a row, hold the Ctrl key while laying track and this saves you an extra click each time.
Making a loop track
To add more sections quickly, you probably want to see more of the world while you lay the track.
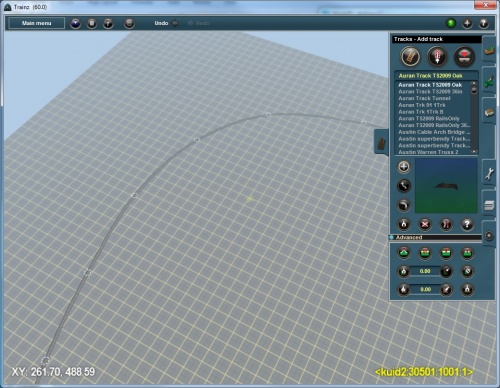
- Zoom your camera out (mousewheel) until the camera is looking straight down
- Track editing is prevented at this zoom level, so zoom back in slightly so that the track circles are visible
- Lay another section of track as before and keep laying track to make a large loop on the baseboard
- Keep moving your viewpoint so that you can see where your track is heading
- To complete the loop, click on the first Spline Point and the track will "Snap" together.
Adjusting the Track
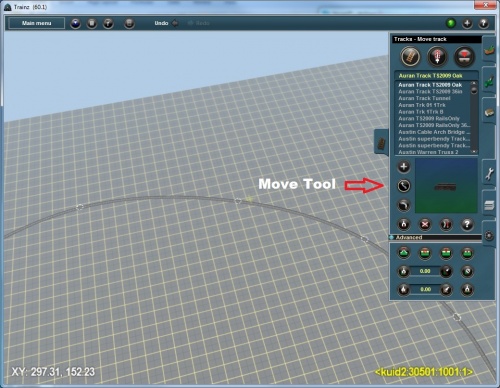
In our loop image above, the final section has a very tight curve. Let's adjust the Nodes so that the track curves more smoothly.
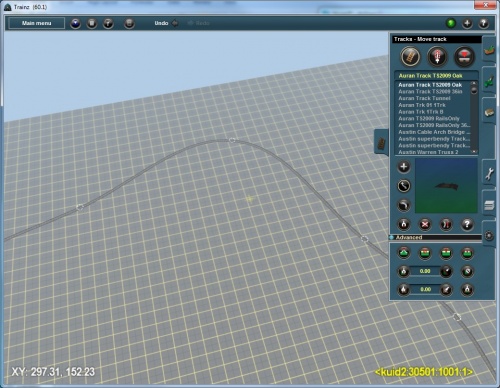
- Select the Move Tool (notice the move icon is highlighted when selected)
- Click on the track and move your mouse to move the Node, which in turn adjusts the curvature of the track.
- Notice that the two track segments attached to the Node move a lot while the next two track segments move a little - this behaviour can be changed with Advanced tools which is for a later lesson.
Saving the Route
We've laid our loop track, so now let's save it:
- Click on Main Menu > Save
- You will now be prompted to save your Test1 Route and Session.
- Click on the Tick to save.
Congratulations! It might not be much to look at, but you are now the newest Trainz Route Builder and you're ready to start exploring all the other Help:Surveyor Tools.
Creating a Session
Of course having a train track without a train is not very exciting. The next Tutorial will show you in a few simple steps how to add your train and begin driving on the tracks.
Click now on HowTo/Create your first Session to get started.
