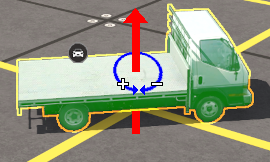
|
|
| Line 15,650: |
Line 15,650: |
| | ='''The Marquee Tool'''= | | ='''The Marquee Tool'''= |
| | </td> | | </td> |
| − | <td width=50>[[image:SkipDown.png|link=#skip The Marquee Tool and the Assets Palette Filter|Skip Down]]</td> | + | <td width=50>[[image:SkipDown.png|link=#skip The Marquee Tool and Assets Filter|Skip Down]]</td> |
| | <td width=50>[[image:SkipUp.png|link=#skip Fine Adjustment: Object Height Problem Solutions|Skip Up]]</td> | | <td width=50>[[image:SkipUp.png|link=#skip Fine Adjustment: Object Height Problem Solutions|Skip Up]]</td> |
| | <td width=46>[[image:BackToTop.png|link=#top|alt=Top|Top]]</td> | | <td width=46>[[image:BackToTop.png|link=#top|alt=Top|Top]]</td> |
| Line 15,775: |
Line 15,775: |
| | <tr valign="top"> | | <tr valign="top"> |
| | <td width=25>[[image:PencilTips.PNG|link=]]</td> | | <td width=25>[[image:PencilTips.PNG|link=]]</td> |
| − | <td>You can use the '''Assets Palette''' filters to restrict the objects that will be selected in the '''Marquee Selection Area'''. See [[image:PageLink.PNG|link=]] '''[[#skip The Marquee Tool and the Assets Palette Filter|Marquee Assets Filter]]''' below for more details</td> | + | <td>You can use the '''Assets Palette''' filters to restrict the objects that will be selected in the '''Marquee Selection Area'''. See [[image:PageLink.PNG|link=]] '''[[#skip The Marquee Tool and Assets Filter|Marquee Assets Filter]]''' below for more details</td> |
| | </tr> | | </tr> |
| | </table> | | </table> |
| Line 15,863: |
Line 15,863: |
| | <table width=1000> <!-- BEGIN Section Nav Buttons --> | | <table width=1000> <!-- BEGIN Section Nav Buttons --> |
| | <tr valign="top"> | | <tr valign="top"> |
| − | <td width=629><span id="skip The Marquee Tool and the Assets Palette Filter"></span> | + | <td width=629><span id="skip The Marquee Tool and Assets Filter"></span> |
| | =='''The Marquee Tool and the Assets Palette Filter'''== | | =='''The Marquee Tool and the Assets Palette Filter'''== |
| | </td> | | </td> |
| Line 15,968: |
Line 15,968: |
| | </td> | | </td> |
| | <td width=50>[[image:SkipDown.png|link=#skip Scrapbook Operations|Skip Down]]</td> | | <td width=50>[[image:SkipDown.png|link=#skip Scrapbook Operations|Skip Down]]</td> |
| − | <td width=50>[[image:SkipUp.png|link=#skip The Marquee Tool and the Assets Palette Filter|Skip Up]]</td> | + | <td width=50>[[image:SkipUp.png|link=#skip The Marquee Tool and Assets Filter|Skip Up]]</td> |
| | <td width=46> </td> <!-- for Top --> | | <td width=46> </td> <!-- for Top --> |
| | <td width=75>[[image:HeadingUp.png|link=#stepMarquee|alt=Heading|To Heading]]</td> | | <td width=75>[[image:HeadingUp.png|link=#stepMarquee|alt=Heading|To Heading]]</td> |
| Line 16,757: |
Line 16,757: |
| | </tr> | | </tr> |
| | </table> <!-- END Section Nav Buttons --> | | </table> <!-- END Section Nav Buttons --> |
| − |
| |
| − | <table width=1000 bgcolor="lightcyan" cellpadding=2>
| |
| − | <tr valign="top">
| |
| − | <td width=10>[[image:BlueDot10x10.png|link=]]</td>
| |
| − | <td>The '''Marquee Selection Area''' can be used to set the ground texture of entire baseboards or just a selected section of one or more baseboards</td>
| |
| − | </tr>
| |
| − | </table>
| |
| − |
| |
| − | <table width=1000 bgcolor=#000000 cellpadding=2>
| |
| − | <tr valign="top">
| |
| − | <td>
| |
| − | <table bgcolor=#ffffff cellpadding=2>
| |
| − | <tr valign="top">
| |
| − | <td colspan=2><span style="font-weight: 700; font-size: 15px;">Steps:</span> To paint the baseboards or area under the '''Marquee Selection Area''' with a ground texture:-</td>
| |
| − | </tr>
| |
| − | <tr valign="top">
| |
| − | <td width=20>[[image:DotPoint1.JPG|link=]]</td>
| |
| − | <td>select a ground texture from the '''Assets Palette'''</td>
| |
| − | </tr>
| |
| − | <tr valign="top">
| |
| − | <td>[[image:DotPoint2.JPG|link=]]</td>
| |
| − | <td>set the brush <span style="font-weight: 700; font-size: 15px; color: gold; background-color: black;"> Scale </span> and any other required controls in the '''Tool Options Palette'''.</td>
| |
| − | </tr>
| |
| − | <tr valign="top">
| |
| − | <td>[[image:DotPoint3.JPG|link=]]</td>
| |
| − | <td>select the '''Marquee Tool''' (or press the <span style="font-weight: 700; font-size: 15px; color: white; background-color: black;"> F </span> key).</td>
| |
| − | </tr>
| |
| − | <tr valign="top">
| |
| − | <td>[[image:DotPoint4.JPG|link=]]</td>
| |
| − | <td><span style="font-weight: 700; font-size: 15px; background-color: lightcyan;">Left Click and Drag</span> to draw out the '''Marquee Selection Area''' area so that it covers the area that will be painted with the texture. This can include multiple baseboards and empty spaces where new baseboards will be created with the selected texture.</td>
| |
| − | </tr>
| |
| − | <tr valign="top">
| |
| − | <td>[[image:DotPoint5.JPG|link=]]</td>
| |
| − | <td><span style="font-weight: 700; font-size: 15px; background-color: lightcyan;"> Left Click </span> on the '''Context Icon''' or press the <span style="font-weight: 700; font-size: 15px; color: white; background-color: black;"> T </span> key to open up the '''Marquee Context Menu''' (see '''Marquee Context Menu''' above).</td>
| |
| − | </tr>
| |
| − | <tr valign="top">
| |
| − | <td>[[image:DotPoint6.JPG|link=]]</td>
| |
| − | <td>select the '''Context Menu''' option <span style="font-weight: 700; font-size: 15px; color: white; background-color: black;"> Paint Within Marquee </span>. If the '''Marquee''' extends over empty space then new baseboards will be created and covered with the selected ground texture. The new baseboards will be created at the '''Default''' altitude for the set '''Region''' or at '''0m''' if no region has been set.</td>
| |
| − | </tr>
| |
| − | </table>
| |
| − | </td>
| |
| − | </tr>
| |
| − | </table>
| |
| − | <br>
| |
| − | <table width=1000> <!-- BEGIN Nav Buttons Table -->
| |
| − | <tr valign="top">
| |
| − | <td width=629><span id="stepMass"></span>
| |
| − |
| |
| − | =='''Marquee Anchor Controls'''==
| |
| − | </td>
| |
| − | <td width=50>[[image:SkipDown.png|link=#skip Scrapbook Operations|Skip Down]]</td>
| |
| − | <td width=50>[[image:SkipUp.png|link=#skip The Marquee Tool and the Assets Palette Filter|Skip Up]]</td>
| |
| − | <td width=46> </td> <!-- for Top -->
| |
| − | <td width=75>[[image:HeadingUp.png|link=#stepMarquee|alt=Heading|To Heading]]</td>
| |
| − | <td width=75> </td>
| |
| − | <td width=75> </td> <!-- for Bottom -->
| |
| − | </tr>
| |
| − | </table> <!-- END Section Nav Buttons -->
| |
| − |
| |
| − | <table width=1000 bgcolor=#000000 cellpadding=2>
| |
| − | <tr valign="top">
| |
| − | <td>
| |
| − | <table width=996 bgcolor=#ffffb0 cellpadding=2>
| |
| − | <tr valign="top">
| |
| − | <td colspan=2>
| |
| − | <table width=996>
| |
| − | <tr valign="top">
| |
| − | <td width=25>[[image:NotePad.PNG|link=]]</td>
| |
| − | <td><span style="font-size: 17px; font-weight: 700;">Notes:</span><br>
| |
| − | ----
| |
| − | </td>
| |
| − | </tr>
| |
| − | </table>
| |
| − | </td>
| |
| − | </tr>
| |
| − | <tr valign="top">
| |
| − | <td>
| |
| − | <table width=498>
| |
| − | <tr valign="top">
| |
| − | <td colspan=2>The '''Marquee Anchors''' will move:-</td>
| |
| − | </tr>
| |
| − | <tr valign="top">
| |
| − | <td width=10>[[image:DotPoint.JPG|10px|link=]]</td>
| |
| − | <td>the selected scenery objects. If the objects are in locked layers then they will '''NOT''' be moved</td>
| |
| − | </tr>
| |
| − | <tr valign="top">
| |
| − | <td>[[image:DotPoint.JPG|10px|link=]]</td>
| |
| − | <td>the ground textures. As shown in two of the images below this will leave the original baseboard ground texture or grid pattern showing</td>
| |
| − | </tr>
| |
| − | <tr valign="top">
| |
| − | <td>[[image:DotPoint.JPG|10px|link=]]</td>
| |
| − | <td>the '''TurfFX/Clutter Effect Layers'''. If an effect layer is locked then it will not be moved but it will still be deleted from the area that was covered by the original Marquee Selection Area</td>
| |
| − | </tr>
| |
| − | <tr valign="top">
| |
| − | <td>[[image:DotPoint.JPG|10px|link=]]</td>
| |
| − | <td>the ground heights</td>
| |
| − | </tr>
| |
| − | </table>
| |
| − | </td>
| |
| − | <td>
| |
| − | <table bgcolor=#ffffe0 cellpadding=2>
| |
| − | <tr valign="top">
| |
| − | <td width=25>[[image:PencilTips.PNG|link=]]</td>
| |
| − | <td>If you do not want to move everything that is in the '''Marquee Selection Area''' then use the '''Asset Filters''' before using the '''Marquee Tool''' to only include those assets that you do want to move</td>
| |
| − | </tr>
| |
| − | </table>
| |
| − | </td>
| |
| − | </tr>
| |
| − | </table>
| |
| − | </td>
| |
| − | </tr>
| |
| − | </table>
| |
| − | <br>
| |
| − | <table width=1000>
| |
| − | <tr valign="top">
| |
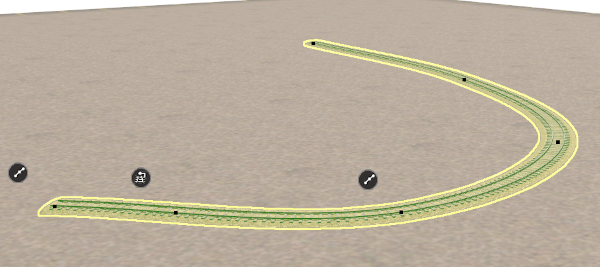
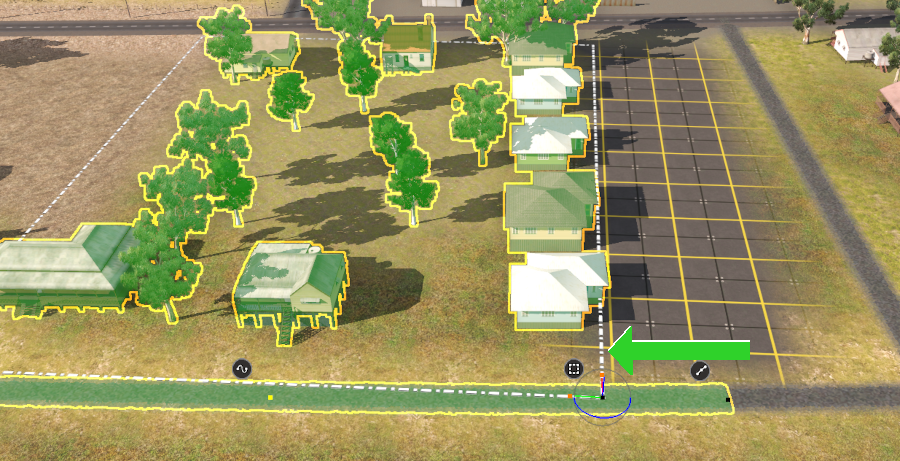
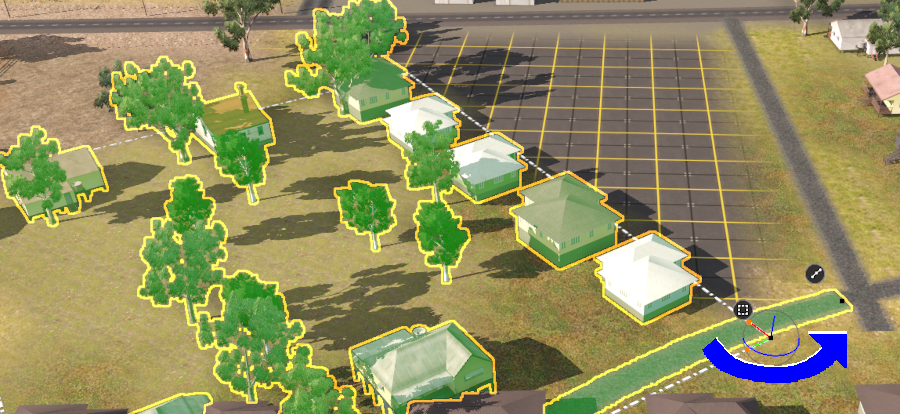
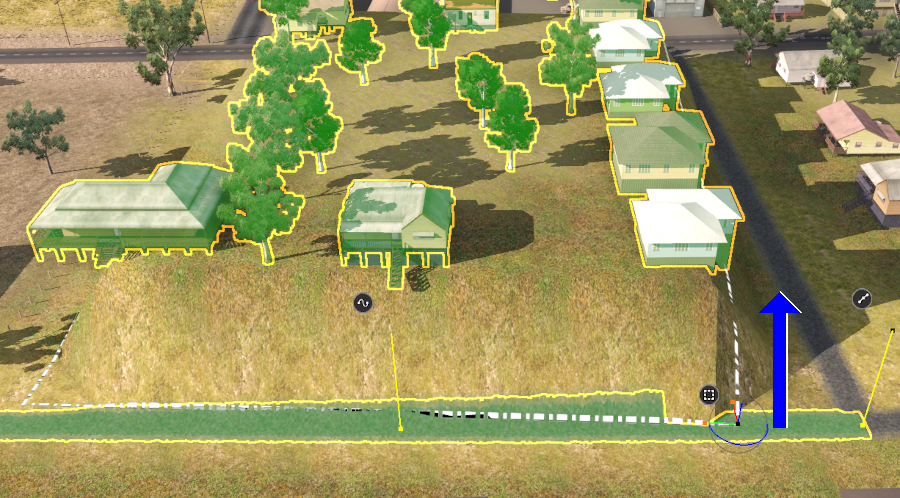
| − | <td>The following images demonstrate the effect of using the '''Marquee Anchor Controls''' on the image shown at the top of this section as the starting point.</td>
| |
| − | </tr>
| |
| − | </table>
| |
| − | <br>
| |
| − | <span style="font-weight: 700; font-size: 17px; color: white; background-color: black;"> Horizontal Anchor Shift </span>
| |
| − | <br>
| |
| − | <table width=1000 bgcolor=#000000 cellpadding=2>
| |
| − | <tr valign="top">
| |
| − | <td>
| |
| − | <table width=996 bgcolor=#ffffff cellpadding=2>
| |
| − | <tr valign="top">
| |
| − | <td width=50> </td>
| |
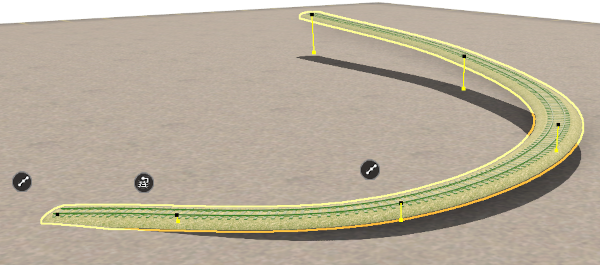
| − | <td>The <span style="font-weight: 700; font-size: 15px; color: white; background-color: green;"> Green </span> horizontal Anchor has been used to shift the Marquee Selection Area to the left. Note that the 3 trees and a small building that were on the left of the Marquee Selection Area in the image above have been replaced (overwritten) by the Marquee contents. Also note that the texture has been moved leaving a gap showing the original grid texture.</td>
| |
| − | <td width=50> </td>
| |
| − | </tr>
| |
| − | <tr valign="top">
| |
| − | <td width=50> </td>
| |
| − | <td>[[image:MarqueeSelectAreaShift_S20.png|link=]]</td>
| |
| − | </tr>
| |
| − | <tr valign="top">
| |
| − | <td colspan=3> </td>
| |
| − | </tr>
| |
| − | </table>
| |
| − | </td>
| |
| − | </tr>
| |
| − | </table>
| |
| − | <br>
| |
| − | <span style="font-weight: 700; font-size: 17px; color: white; background-color: black;"> Rotational Anchor Shift </span>
| |
| − | <br>
| |
| − | <table width=1000 bgcolor=#000000 cellpadding=2>
| |
| − | <tr valign="top">
| |
| − | <td>
| |
| − | <table width=996 bgcolor=#ffffff cellpadding=2>
| |
| − | <tr valign="top">
| |
| − | <td width=50> </td>
| |
| − | <td>The <span style="font-weight: 700; font-size: 15px; color: white; background-color: blue;"> Blue </span> rotational '''Anchor''' has been used to rotate the '''Marquee Selection Area''' about 45° anti-clockwise. Again, anything that was originally in the area now covered by the '''Marquee Selection Area''' has been replaced by the contents of the Marquee. Also note that the texture has been moved leaving a gap showing the original grid texture.</td>
| |
| − | <td width=50> </td>
| |
| − | </tr>
| |
| − | <tr valign="top">
| |
| − | <td width=50> </td>
| |
| − | <td>[[image:MarqueeSelectAreaRotate_S20.png|link=]]</td>
| |
| − | </tr>
| |
| − | <tr valign="top">
| |
| − | <td colspan=3> </td>
| |
| − | </tr>
| |
| − | </table>
| |
| − | </td>
| |
| − | </tr>
| |
| − | </table>
| |
| − | <br>
| |
| − | <span style="font-weight: 700; font-size: 17px; color: white; background-color: black;"> Vertical Anchor Shift </span>
| |
| − | <br>
| |
| − | <table width=1000 bgcolor=#000000 cellpadding=2>
| |
| − | <tr valign="top">
| |
| − | <td>
| |
| − | <table width=996 bgcolor=#ffffff cellpadding=2>
| |
| − | <tr valign="top">
| |
| − | <td width=50> </td>
| |
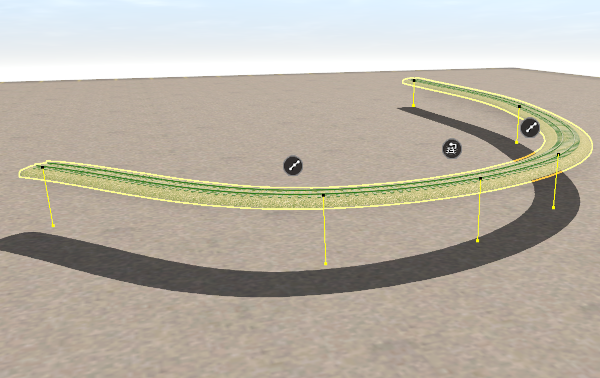
| − | <td>The <span style="font-weight: 700; font-size: 15px; color: white; background-color: blue;"> Blue </span> vertical Anchor has been used to lift the Marquee Selection Area upwards</td>
| |
| − | <td width=50> </td>
| |
| − | </tr>
| |
| − | <tr valign="top">
| |
| − | <td width=50> </td>
| |
| − | <td>[[image:MarqueeSelectAreaUplift_S20.png|link=]]</td>
| |
| − | </tr>
| |
| − | <tr valign="top">
| |
| − | <td colspan=3> </td>
| |
| − | </tr>
| |
| − | </table>
| |
| − | </td>
| |
| − | </tr>
| |
| − | </table>
| |
| − | <br>
| |
| − | <table width=1000> <!-- BEGIN Section Nav Buttons -->
| |
| − | <tr valign="top">
| |
| − | <td width=629><span id="skip Scrapbook Operations"></span>
| |
| − | =='''Scrapbook Operations'''==
| |
| − | </td>
| |
| − | <td width=50>[[image:SkipDown.png|link=#skip Marquee Context Menu|Skip Down]]</td>
| |
| − | <td width=50>[[image:SkipUp.png|link=#skip Marquee Anchor Controls|Skip Up]]</td>
| |
| − | <td width=46>[[image:SkipMinorDown.png|link=#SB: Add]][[image:SkipMinorBlank.png|link=#]]</td> <!-- for Top and Minor Up/Down -->
| |
| − | <td width=75>[[image:HeadingUp.png|link=#stepMarquee|alt=Heading|To Heading]]</td>
| |
| − | <td width=75> </td>
| |
| − | <td width=75> </td> <!-- for Bottom -->
| |
| − | </tr>
| |
| − | </table> <!-- END Section Nav Buttons -->
| |
| − |
| |
| − | <table width=1000>
| |
| − | <tr valign="top">
| |
| − | <td>
| |
| − | <table width=500 bgcolor=#000000 cellpadding=2>
| |
| − | <tr valign="top">
| |
| − | <td>
| |
| − | <table width=496 bgcolor=#ffffb0 cellpadding=2>
| |
| − | <tr valign="top">
| |
| − | <td width=25>[[image:NotePad.PNG|link=]]</td>
| |
| − | <td><span style="font-size: 17px; font-weight: 700;">Notes:</span><br>
| |
| − | ----</td>
| |
| − | </tr>
| |
| − | <tr>
| |
| − | <td colspan=2>'''Scrapbooks''', when created, will contain:-</td>
| |
| − | </tr>
| |
| − | <tr valign="top">
| |
| − | <td>[[image:DotPoint.JPG|10px|link=]]</td>
| |
| − | <td>'''Ground Heights'''</td>
| |
| − | </tr>
| |
| − | <tr valign="top">
| |
| − | <td>[[image:DotPoint.JPG|10px|link=]]</td>
| |
| − | <td>'''Ground Textures'''</td>
| |
| − | </tr>
| |
| − | <tr valign="top">
| |
| − | <td>[[image:DotPoint.JPG|10px|link=]]</td>
| |
| − | <td>'''TurfFX/Clutter Effect Layers''' - if present</td>
| |
| − | </tr>
| |
| − | <tr valign="top">
| |
| − | <td>[[image:DotPoint.JPG|10px|link=]]</td>
| |
| − | <td>'''Selected Objects''' - scenery items, splines, track, signals, etc</td>
| |
| − | </tr>
| |
| − | <tr valign="top">
| |
| − | <td colspan=2><span style="font-weight: 700; font-size: 15px; background-color: yellow;"> But <u>NOT</u> Rolling Stock (Trains) </span>
| |
| − | </td>
| |
| − | </tr>
| |
| − | <tr valign="top">
| |
| − | <td colspan=2>The ground heights, ground textures and '''TurfFX/Clutter Effect Layers''' in the '''Marquee Selection Area''' will always be added to the scrapbook. You can use the '''Asset Palette Filters''' to control which visible objects in the selection area will also be added</td>
| |
| − | </tr>
| |
| − | </table>
| |
| − | </td>
| |
| − | </tr>
| |
| − | </table>
| |
| − | </td>
| |
| − | <td>
| |
| − | <table width=500 bgcolor=#000000 cellpadding=2>
| |
| − | <tr valign="top">
| |
| − | <td>
| |
| − | <table width=496 bgcolor=#ffffb0 cellpadding=2>
| |
| − | <tr valign="top">
| |
| − | <td width=25>[[image:NotePad.PNG|link=]]</td>
| |
| − | <td><span style="font-size: 17px; font-weight: 700;">Notes:</span><br>
| |
| − | ----</td>
| |
| − | </tr>
| |
| − | <tr>
| |
| − | <td colspan=2>
| |
| − | '''Scrapbooks''', when painted or pasted, can contain any combinations of:-</td>
| |
| − | </tr>
| |
| − | <tr valign="top">
| |
| − | <td width=10>[[image:DotPoint.JPG|10px|link=]]</td>
| |
| − | <td>'''Ground Heights'''</td>
| |
| − | </tr>
| |
| − | <tr valign="top">
| |
| − | <td>[[image:DotPoint.JPG|10px|link=]]</td>
| |
| − | <td>'''Ground Textures'''</td>
| |
| − | </tr>
| |
| − | <tr valign="top">
| |
| − | <td>[[image:DotPoint.JPG|10px|link=]]</td>
| |
| − | <td>'''TurfFX/Clutter Effect Layers'''</td>
| |
| − | </tr>
| |
| − | <tr valign="top">
| |
| − | <td>[[image:DotPoint.JPG|10px|link=]]</td>
| |
| − | <td>'''Scenery Objects (Meshes)''' - individual buildings, trees, signals, etc</td>
| |
| − | </tr>
| |
| − | <tr valign="top">
| |
| − | <td>[[image:DotPoint.JPG|10px|link=]]</td>
| |
| − | <td>'''Scenery Splines''' - roads, track, fences, etc</td>
| |
| − | </tr>
| |
| − | <tr valign="top">
| |
| − | <td colspan=2>You have options in [[image:PageLink.PNG|link=]] '''[[#Scrapbook Filters|The Scrapbook Filters]]''' that will control which of these data types are added to your '''Trainz World''' and how they are added.</td>
| |
| − | </tr>
| |
| − | </table>
| |
| − | </td>
| |
| − | </tr>
| |
| − | </table>
| |
| − | </td>
| |
| − | </tr>
| |
| − | </table>
| |
| − | <br>
| |
| − | Once an area has been marked out by the '''Marquee Tool''' a number of options become available.<br>
| |
| − |
| |
| − | <table width=1000>
| |
| − | <tr valign="top">
| |
| − | <td width=165>[[image:MarqueeEditMenu_S20.png|link=]]</td>
| |
| − | <td>
| |
| − | <table width=835 bgcolor=#000000 cellpadding=2>
| |
| − | <tr>
| |
| − | <td>
| |
| − | <table width=831 bgcolor=#ffffff cellpadding=2>
| |
| − | <tr>
| |
| − | <td colspan=2>The [[image:SurveyorEditIcon.png|link=]] '''Surveyor Edit Menu''' will show some additional options specifically for the '''Marquee Tool''':-</td>
| |
| − | </tr>
| |
| − | <tr valign="top">
| |
| − | <td><span style="font-weight: 700; font-size: 15px; color: white; background-color: black;"> Cut </span></td>
| |
| − | <td>the objects selected in the Marquee area (including the ground heights, ground textures and '''TurfFX/Clutter Effect Layers''') will be copied and placed into a new '''Scrapbook'''. Any scenery objects (excluding ground heights, ground textures and effect layers) that are not in a locked layer will be removed from the Marquee area. This is the same as pressing the <span style="font-weight: 700; font-size: 15px;"><span style="color: white; background-color: black;"> Ctrl </span> + <span style="color: white; background-color: black;"> X </span></span> keys</td>
| |
| − | </tr>
| |
| − | <tr valign="top">
| |
| − | <td><span style="font-weight: 700; font-size: 15px; color: white; background-color: black;"> Copy </span></td>
| |
| − | <td>the objects selected in the Marquee area (including ground heights, ground textures and '''TurfFX/Clutter Effect Layers''') will be copied and placed into a new '''Scrapbook'''. This is the same as pressing the <span style="font-weight: 700; font-size: 15px;"><span style="color: white; background-color: black;"> Ctrl </span> + <span style="color: white; background-color: black;"> C </span></span> keys</td>
| |
| − | </tr>
| |
| − | <tr valign="top">
| |
| − | <td><span style="font-weight: 700; font-size: 15px; color: white; background-color: black;"> Paste </span></td>
| |
| − | <td>the contents of the current '''Scrapbook''' will be pasted into the route at the cursor (focus) point. Which contents will be pasted and how they will be pasted are controlled by the '''Filters''' in the '''Scrapbook Palette''' (see [[image:PageLink.PNG|link=]] '''[[#Scrapbook_Data|Scrapbook Data]]''' for more details). This option will always be available with and without a Marquee area being marked if there is a scrapbook available to be pasted. This is the same as pressing the <span style="font-weight: 700; font-size: 15px;"><span style="color: white; background-color: black;"> Ctrl </span> + <span style="color: white; background-color: black;"> V </span></span> keys</td>
| |
| − | </tr>
| |
| − | <tr valign="top">
| |
| − | <td><span style="font-weight: 700; font-size: 15px; color: white; background-color: black;"> Clear </span></td>
| |
| − | <td>the selected scenery '''objects''' that are not in locked layers will be removed from the Marquee area but '''NOT''' the selected ground heights, ground textures and '''TurfFX/Clutter Effect Layers'''. This is the same as pressing the <span style="font-weight: 700; font-size: 15px; color: white; background-color: black;"> Delete </span> key</td>
| |
| − | </tr>
| |
| − | <tr valign="top">
| |
| − | <td><span style="font-weight: 700; font-size: 15px; color: white; background-color: black;"> Select None </span></td>
| |
| − | <td>the '''Marquee Selection Area''' boundary lines are removed from the route cancelling the selection process. Nothing that is inside the area will be removed. This is the same as pressing the <span style="font-weight: 700; font-size: 15px;"><span style="color: white; background-color: black;"> Ctrl </span> + <span style="color: white; background-color: black;"> D </span></span> keys</td>
| |
| − | </tr>
| |
| − | </table>
| |
| − | </td>
| |
| − | </tr>
| |
| − | </table>
| |
| − | </td>
| |
| − | </tr>
| |
| − | </table>
| |
| − | <br>
| |
| − | <table width=1000> <!-- BEGIN Section Nav Buttons -->
| |
| − | <tr valign="top">
| |
| − | <td width=629><span id="SB: Add"></span>
| |
| − | ===<span style="font-weight: 700; font-size: 17px; color: white; background-color: blue;"> Adding a New Scrapbook </span>===
| |
| − | </td>
| |
| − | <td width=50> </td>
| |
| − | <td width=50> </td>
| |
| − | <td width=46>[[image:SkipMinorDown.png|link=#skip Marquee Context Menu]][[image:SkipMinorUp.png|link=#skip Scrapbook Operations]]</td> <!-- for Top and Minor Up/Down -->
| |
| − | <td width=75> </td>
| |
| − | <td width=75> </td>
| |
| − | <td width=75> </td> <!-- for Bottom -->
| |
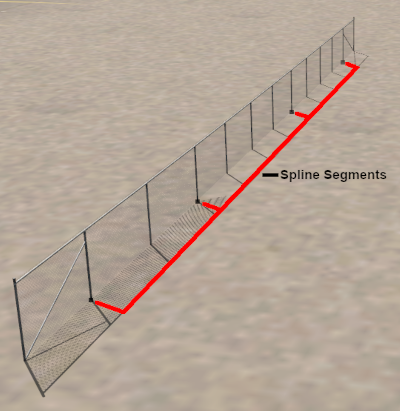
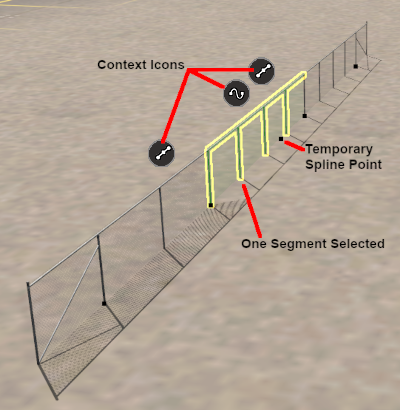
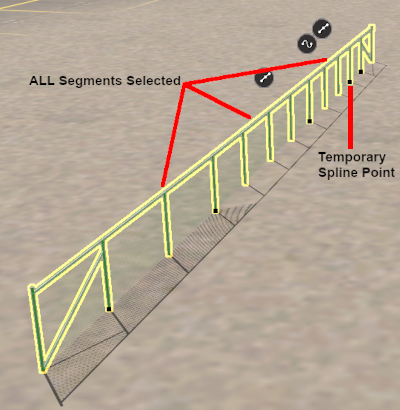
| − | </tr>
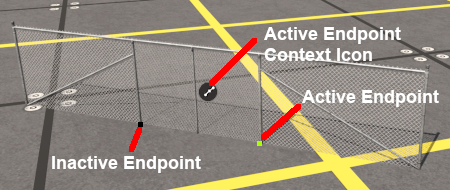
| |
| − | </table> <!-- END Section Nav Buttons -->
| |
| − |
| |
| − | <table width=1000 bgcolor="lightcyan">
| |
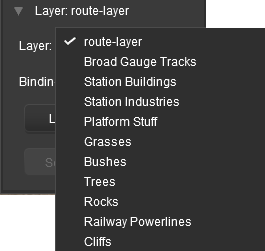
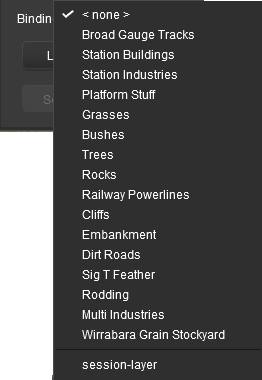
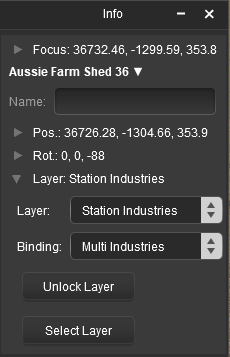
| − | <tr valign="top">
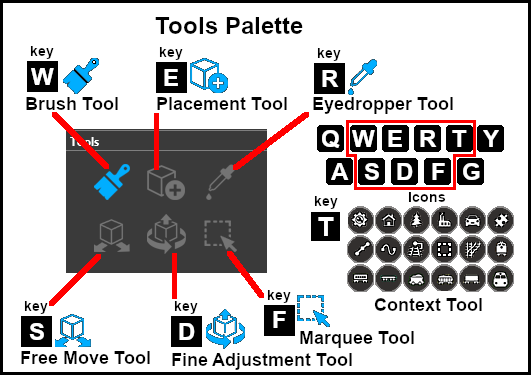
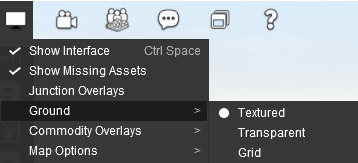
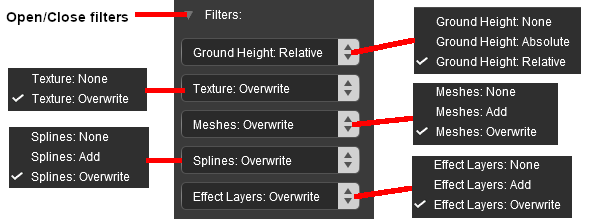
| |
| − | <td width=10>[[image:BlueDot10x10.png|link=]]</td>
| |
| − | <td>The <span style="font-weight: 700; font-size: 15px; color: white; background-color: black;"> Cut </span> and <span style="font-weight: 700; font-size: 15px; color: white; background-color: black;"> Copy </span> '''Scrapbook''' operations are also found in the '''Marquee Context Menu''' (see the '''Marquee Context Menu''' section above).</td>
| |
| − | </tr>
| |
| − | </table>
| |
| − | <br>
| |
| − | <table bgcolor=#000000 width=1000 cellpadding=2>
| |
| − | <tr valign="top">
| |
| − | <td>
| |
| − | <table bgcolor=#ffffe0 width=996 cellpadding=2>
| |
| − | <tr valign="top">
| |
| − | <td width=25>[[image:PencilTips.PNG|link=]]</td><td>You don't have to use the '''Marquee Tool''' to create a new '''Scrapbook'''. You can use the '''Free Move Tool''' or the '''Fine Adjustment Tool''' to select any number of objects and then press <span style="font-weight: 700; font-size: 15px;"><span style="color: white; background-color: black;"> Ctrl </span> + <span style="color: white; background-color: black;"> C </span></span>. The selected objects, along with the ground heights, ground textures, and any '''TurfFX/Clutter Effect Layers''', will be copied into a new '''Scrapbook'''</td>
| |
| − | </tr>
| |
| − | </table>
| |
| − | </td>
| |
| − | </tr>
| |
| − | </table>
| |
| − | <br>
| |
| − | When a new '''Scrapbook''' is created by a <span style="font-weight: 700; font-size: 15px; color: white; background-color: black;"> Cut </span> (or press <span style="font-weight: 700; font-size: 15px;"><span style="color: white; background-color: black;"> Ctrl </span> + <span style="color: white; background-color: black;"> X </span></span>) or <span style="font-weight: 700; font-size: 15px; color: white; background-color: black;"> Copy </span> (or press <span style="font-weight: 700; font-size: 15px;"><span style="color: white; background-color: black;"> Ctrl </span> + <span style="color: white; background-color: black;"> C </span></span>), it will appear in the '''Scrapbook''' palette with some basic details.<br>
| |
| − |
| |
| − | <table width=1000>
| |
| − | <tr valign="top">
| |
| − | <td width=500>[[image:ScrapbookNew_S20.png|link=]]</td>
| |
| − | <td width=500>
| |
| − | <table width=500>
| |
| − | <tr valign="top">
| |
| − | <td colspan=2>The newly created scrapbook will be given:-</td>
| |
| − | </tr>
| |
| − | <tr valign="top">
| |
| − | <td width=10>[[image:DotPoint.JPG|10px|link=]]</td>
| |
| − | <td>a name consisting of the date and time of its creation</td>
| |
| − | </tr>
| |
| − | <tr valign="top">
| |
| − | <td>[[image:DotPoint.JPG|10px|link=]]</td>
| |
| − | <td>a thumbnail</td>
| |
| − | </tr>
| |
| − | <tr valign="top">
| |
| − | <td colspan=2>
| |
| − | <table bgcolor=#000000 cellpadding=2>
| |
| − | <tr valign="top">
| |
| − | <td>
| |
| − | <table bgcolor=#ffffe0 cellpadding=2>
| |
| − | <tr valign="top">
| |
| − | <td width=25>[[image:PencilTips.PNG|link=]]</td><td>The thumbnail image will be taken using the current camera POV (point of view). To get a better image adjust the camera position and view to give the best possible shot of the '''Scrapbook''' objects before giving the <span style="font-weight: 700; font-size: 15px; color: white; background-color: black;"> Cut </span> or <span style="font-weight: 700; font-size: 15px; color: white; background-color: black;"> Copy </span> command
| |
| − | </td>
| |
| − | </tr>
| |
| − | </table>
| |
| − | </td>
| |
| − | </tr>
| |
| − | </table>
| |
| − | </td>
| |
| − | </tr>
| |
| − | <tr valign="top">
| |
| − | <td>[[image:DotPoint.JPG|10px|link=]]</td>
| |
| − | <td>a scrapbook number (it will be inserted as the '''№1''' scrapbook)</td>
| |
| − | </tr>
| |
| − | <tr valign="top">
| |
| − | <td>[[image:DotPoint.JPG|10px|link=]]</td>
| |
| − | <td>an expiry date which will be set 5 days after its creation - this will countdown each day until '''0''' when the new scrapbook will be deleted</td>
| |
| − | </tr>
| |
| − | </table>
| |
| − | </td>
| |
| − | </tr>
| |
| − | </table>
| |
| − | <br>
| |
| − | <table width=1000 bgcolor=#000000 cellpadding=2>
| |
| − | <tr valign="top">
| |
| − | <td>
| |
| − | <table bgcolor=#ffffb0 cellpadding=2>
| |
| − | <tr valign="top">
| |
| − | <td>
| |
| − | <table>
| |
| − | <tr valign="top">
| |
| − | <td width=25>[[image:NotePad.PNG|link=]]</td>
| |
| − | <td><span style="font-size: 17px; font-weight: 700;">Notes:</span><br>
| |
| − | ----</td>
| |
| − | </tr>
| |
| − | <tr valign="top">
| |
| − | <td>[[image:DotPoint.JPG|10px|link=]]</td>
| |
| − | <td>'''Scrapbooks''' use very little memory so there is no real limit to how many you can store in the palette but finding the one you want will be more difficult as the list grows longer</td>
| |
| − | </tr><tr valign="top">
| |
| − | <td>[[image:DotPoint.JPG|10px|link=]]</td>
| |
| − | <td>'''Rolling Stock Objects''' cannot be added to a '''Scrapbook'''. The rolling stock '''Context Menu''' option <span style="font-weight: 700; font-size: 15px; color: white; background-color: black;"> Save to Consist Asset... </span> performs some of the '''Scrapbook''' functions for rolling stock objects and consists</td>
| |
| − | </tr>
| |
| − | <tr valign="top">
| |
| − | <td>[[image:DotPoint.JPG|10px|link=]]</td>
| |
| − | <td>Deleting a '''Scrapbook''' after it has been pasted does not delete the objects that it has added to the route</td>
| |
| − | </tr>
| |
| − | </table>
| |
| − | </td>
| |
| − | </tr>
| |
| − | </table>
| |
| − | </td>
| |
| − | </tr>
| |
| − | </table>
| |
| − | <br>
| |
| − | <table width=710>
| |
| − | <tr valign="top">
| |
| − | <td width=500>
| |
| − | <table bgcolor=#000000 width=500 cellpadding=2>
| |
| − | <tr valign="top">
| |
| − | <td>
| |
| − | <table bgcolor=#ffffff width=496 cellpadding=2>
| |
| − | <tr valign="top">
| |
| − | <td width=496>There are two changes that can be made to the new scrapbook:-<br>
| |
| − | <table width=496>
| |
| − | <tr valign="top">
| |
| − | <td width=10>[[image:DotPoint.JPG|10px|link=]]</td>
| |
| − | <td>'''Give it a name''' - <span style="font-weight: 700; font-size: 15px; background-color: lightcyan;"> Left Click </span> inside the '''Name Text Box''' and type a new name. To set its new name <span style="font-weight: 700; font-size: 15px; background-color: lightcyan;"> Left Click </span> on the image <span style="font-weight: 700; font-size: 15px;">OR</span> press the <span style="font-weight: 700; font-size: 15px; color: white; background-color: black;"> Enter </span> key</td>
| |
| − | </tr>
| |
| − | <tr valign="top">
| |
| − | <td>[[image:DotPoint.JPG|10px|link=]]</td>
| |
| − | <td>'''Make it permanent''' - <span style="font-weight: 700; font-size: 15px; background-color: lightcyan;"> Left Click </span> the white '''Pin''' icon ([[image:ScrapbookUnPinnedIcon_S20.png|link=]]) to change it to blue. The scrapbook will no longer expire but it can still be deleted at any time</td>
| |
| − | </tr>
| |
| − | <tr valign="top">
| |
| − | <td colspan=2>'''Pinned''' scrapbooks are always shown with a '''blue''' pin icon [[image:ScrapbookPinnedIcon_S20.png|link=]] and the words "pinned, no expiry" displayed next to their scrapbook №</td>
| |
| − | </tr>
| |
| − | </table>
| |
| − | <table bgcolor=#ffffe0 cellpadding=2>
| |
| − | <tr valign="top">
| |
| − | <td width=25>[[image:PencilTips.PNG|link=]]</td><td>The '''Pinning''' of any scrapbook can be reversed so that it will then expire in 5 days time. <span style="font-weight: 700; font-size: 15px; background-color: lightcyan;"> Left Click </span> the blue pin icon.</td>
| |
| − | </tr>
| |
| − | </table>
| |
| − | </td>
| |
| − | </tr>
| |
| − | </table>
| |
| − | </td>
| |
| − | </tr>
| |
| − | </table>
| |
| − | </td>
| |
| − | <td width=210>[[image:ScrapbookNewNamedPinned_S20.png|link=]]</td>
| |
| − | </tr>
| |
| − | </table>
| |
| − | <br>
| |
| − | Once a scrapbook has been '''Pinned''' it becomes an asset and will appear in '''Content Manager'''<br>
| |
| − |
| |
| − | [[image:ScrapbookEntryCM_S20.png|link=]]<br>
| |
| − |
| |
| − | The scrapbook can be uploaded to the '''DLS''' and saved as a '''CDP''' file.<br>
| |
| − | <br>
| |
| − | <table bgcolor=#000000 width=1000 cellpadding=2>
| |
| − | <tr valign="top">
| |
| − | <td>
| |
| − | <table bgcolor=#ffffe0 width=996 cellpadding=2>
| |
| − | <tr valign="top">
| |
| − | <td width=25>[[image:PencilTips.PNG|link=]]</td><td>You can archive your scrapbooks as '''CDP''' files to keep the number of installed scrapbooks to a minimum. If an archived scrapbook is needed then you can use the '''Import Content Files''' option in '''Content Manager''' to add it to the '''Scrapbook Palette'''. It can be deleted from the palette later, when no longer needed.</td>
| |
| − | </tr>
| |
| − | </table>
| |
| − | </td>
| |
| − | </tr>
| |
| − | </table>
| |
| − | <br>
| |
| − | <table width=1000> <!-- BEGIN Section Nav Buttons -->
| |
| − | <tr valign="top">
| |
| − | <td width=629><span id="skip Marquee Context Menu"></span>
| |
| − |
| |
| − | =='''Marquee Context Menu'''==
| |
| − | </td>
| |
| − | <td width=50>[[image:SkipDown.png|link=#skip Managing Baseboards|Skip Down]]</td>
| |
| − | <td width=50>[[image:SkipUp.png|link=#skip Scrapbook Operations|Skip Up]]</td>
| |
| − | <td width=46>[[image:SkipMinorBlank.png|link=]][[image:SkipMinorUp.png|link=#SB: Add]]</td> <!-- for Top and Minor Up/Down -->
| |
| − | <td width=75>[[image:HeadingUp.png|link=#stepMarquee|alt=Heading|To Heading]]</td>
| |
| − | <td width=75> </td>
| |
| − | <td width=75> </td> <!-- for Bottom -->
| |
| − | </tr>
| |
| − | </table> <!-- END Section Nav Buttons -->
| |
| − |
| |
| − | <table width=1000 bgcolor="lightcyan" cellpadding=2>
| |
| − | <tr valign="top">
| |
| − | <td width=10>[[image:BlueDot10x10.png|link=]]</td>
| |
| − | <td>The '''Marquee Context Menu''' creates, deletes, converts and paints individual or multiple baseboards. It also creates and pastes scrapbooks.</td>
| |
| − | </tr>
| |
| − | </table>
| |
| − | <br>
| |
| − | To open the '''Context Menu''' for a '''Marquee Selection Area''' <span style="font-weight: 700; font-size: 15px; background-color: lightcyan;"> Left Click </span> on its '''Context Icon''' [[image:MarqueeContextIcon_S20.png|link=]] or press the <span style="font-weight: 700; font-size: 15px; color: white; background-color: black;"> T </span> key.<br>
| |
| − |
| |
| − | <table width=1000>
| |
| − | <tr valign="top">
| |
| − | <td colspan=2><span style="font-weight: 700; font-size: 17px;">Marquee Context Menu</span></td>
| |
| − | </tr>
| |
| − | <tr valign="top">
| |
| − | <td width=300>[[image:MarqueeContextMenu_S20.png|link=]]</td>
| |
| − | <td>
| |
| − | <table width=700 bgcolor=#000000 cellpadding=2>
| |
| − | <tr valign="top">
| |
| − | <td>
| |
| − | <table width=696 bgcolor=#ffffff cellpadding=2>
| |
| − | <tr valign="top">
| |
| − | <td>
| |
| − | <table>
| |
| − | <tr valign="top">
| |
| − | <td><span style="font-weight: 700; font-size: 15px; color: white; background-color: black;"> Cut </span></td>
| |
| − | <td>removes the objects in the selection area from the route and moves them into the '''Scrapbook'''. Ground heights, ground textures and '''TurfFX/Clutter Effect Layers''' will be copied, not cut. Has the same effect as pressing the <span style="font-weight: 700; font-size: 15px;"><span style="color: white; background-color: black;"> Ctrl </span> + <span style="color: white; background-color: black;"> X </span></span> keys</td>
| |
| − | </tr>
| |
| − | </table>
| |
| − | </td>
| |
| − | </tr>
| |
| − | <tr valign="top">
| |
| − | <td>
| |
| − | <table>
| |
| − | <tr valign="top">
| |
| − | <td><span style="font-weight: 700; font-size: 15px; color: white; background-color: black;"> Copy </span></td>
| |
| − | <td>copies the objects in the selection area and moves them into the '''Scrapbook'''. Has the same effect as pressing the <span style="font-weight: 700; font-size: 15px;"><span style="color: white; background-color: black;"> Ctrl </span> + <span style="color: white; background-color: black;"> C </span></span> keys</td>
| |
| − | </tr>
| |
| − | </table>
| |
| − | </td>
| |
| − | </tr>
| |
| − | <tr valign="top">
| |
| − | <td>
| |
| − | <table>
| |
| − | <tr valign="top">
| |
| − | <td width=175><span style="font-weight: 700; font-size: 15px; color: white; background-color: black;"> Paste to Selected Area </span></td>
| |
| − | <td>pastes the objects in the currently selected '''Scrapbook''' into the selection area. Which objects are pasted and how they are pasted is controlled by the settings in the '''Scrapbook Filter'''. Has the same effect as pressing the <span style="font-weight: 700; font-size: 15px;"><span style="color: white; background-color: black;"> Ctrl </span> + <span style="color: white; background-color: black;"> V </span></span> keys</td>
| |
| − | </tr>
| |
| − | </table>
| |
| − | </td>
| |
| − | </tr>
| |
| − | <tr valign="top">
| |
| − | <td>
| |
| − | <table>
| |
| − | <tr valign="top">
| |
| − | <td><span style="font-weight: 700; font-size: 15px; color: white; background-color: black;"> Delete </span></td>
| |
| − | <td>deletes the objects in the selection area except for the ground heights, textures and effect layers. Has the same effect as pressing the <span style="font-weight: 700; font-size: 15px; color: white; background-color: black;"> Delete </span> key</td>
| |
| − | </tr>
| |
| − | </table>
| |
| − | </td>
| |
| − | </tr>
| |
| − | <tr valign="top">
| |
| − | <td>
| |
| − | <table>
| |
| − | <tr valign="top">
| |
| − | <td width=175><span style="font-weight: 700; font-size: 15px; color: white; background-color: black;"> Paint Within Marquee </span></td>
| |
| − | <td>if a texture has been selected in the '''Assets Palette''' then that texture will be painted inside the selection area using the settings in the '''Tool Options Palette'''. If no texture has been selected then this option will be greyed out</td>
| |
| − | </tr>
| |
| − | </table>
| |
| − | </td>
| |
| − | </tr>
| |
| − | <tr valign="top">
| |
| − | <td>
| |
| − | <table>
| |
| − | <tr valign="top">
| |
| − | <td width=225><span style="font-weight: 700; font-size: 15px; color: white; background-color: black;"> Set Marquee To Brush Height </span></td>
| |
| − | <td>changes the ground height of the selection area to the brush height in the '''Tool Options Palette'''</td>
| |
| − | </tr>
| |
| − | </table>
| |
| − | </td>
| |
| − | </tr>
| |
| − | <tr valign="top">
| |
| − | <td>
| |
| − | <table>
| |
| − | <tr valign="top">
| |
| − | <td width=200><span style="font-weight: 700; font-size: 15px; color: white; background-color: black;"> Convert Baseboards To </span></td>
| |
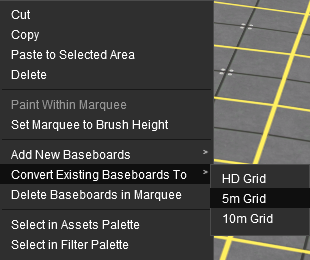
| − | <td>converts the grid of the entire baseboard or baseboards covered by the selection area into the resolution selected from the three options - <span style="font-weight: 700; font-size: 15px; color: white; background-color: black;"> HD Grid </span> (in '''Trainz Plus''' only), <span style="font-weight: 700; font-size: 15px; color: white; background-color: black;"> 5m Grid </span> and <span style="font-weight: 700; font-size: 15px; color: white; background-color: black;"> 10m Grid </span>. If the selection area covers any empty spaces outside the existing baseboards then new baseboards will be created using the ground height in the '''Tool Options Palette'''. See '''Notes:''' below</td>
| |
| − | </tr>
| |
| − | </table>
| |
| − | </td>
| |
| − | </tr>
| |
| − | <tr valign="top">
| |
| − | <td>
| |
| − | <table>
| |
| − | <tr valign="top">
| |
| − | <td width=250><span style="font-weight: 700; font-size: 15px; color: white; background-color: black;"> Delete Baseboards in Marquee </span></td>
| |
| − | <td>deletes the entire baseboard or baseboards covered by the selection area. See '''Notes:''' below</td>
| |
| − | </tr>
| |
| − | </table>
| |
| − | </td>
| |
| − | </tr>
| |
| − | <tr valign="top">
| |
| − | <td>
| |
| − | <table>
| |
| − | <tr valign="top">
| |
| − | <td width=200><span style="font-weight: 700; font-size: 15px; color: white; background-color: black;"> Select in Assets Palette </span></td>
| |
| − | <td>identifies and selects in the '''Assets Palette''' the most common ground texture used in the selection area</td>
| |
| − | </tr>
| |
| − | </table>
| |
| − | </td>
| |
| − | </tr>
| |
| − | </table>
| |
| − | </td>
| |
| − | </tr>
| |
| − | </table>
| |
| − | </td>
| |
| − | </tr>
| |
| − | </table>
| |
| − | <br>
| |
| − | <table width=1000 bgcolor=#000000 cellpadding=2>
| |
| − | <tr valign="top">
| |
| − | <td>
| |
| − | <table width=996 bgcolor=#ffffb0 cellpadding=2>
| |
| − | <tr valign="top">
| |
| − | <td width=25>[[image:NotePad.PNG|link=]]</td>
| |
| − | <td width=970><span style="font-size: 17px; font-weight: 700;">Notes:'''</span><br>
| |
| − | ----</td>
| |
| − | </tr>
| |
| − | <tr valign="top">
| |
| − | <td> </td>
| |
| − | <td>
| |
| − | <table>
| |
| − | <tr valign="top">
| |
| − | <td width=10>[[image:DotPoint.JPG|10px|link=]]</td>
| |
| − | <td>The <span style="font-weight: 700; font-size: 15px; color: white; background-color: black;"> Convert Baseboards To </span> and <span style="font-weight: 700; font-size: 15px; color: white; background-color: black;"> Delete Baseboards in Marquee </span> options will affect the entire baseboard or baseboards that contain the '''Marquee Selection Area''' even if the selection area only covers a small part of a baseboard.
| |
| − | </td>
| |
| − | </tr>
| |
| − | <tr valign="top">
| |
| − | <td>[[image:DotPoint.JPG|10px|link=]]</td>
| |
| − | <td>It is '''NOT RECOMMENDED''' that you mix '''HD Grid''' baseboards (in '''Trainz Plus''' only) with '''5m Grid''' or '''10m Grid''' baseboards in the same route. The boundaries between '''HD''' and '''non-HD''' baseboards will have display issues. If you are going to use the '''HD Grid''' terrain then it is recommended that the entire route should be '''Upgraded''' to '''HD Grid'''. See [[image:PageLink.PNG|link=]] '''[[#stepUpgrading|Upgrading a Route to HD]]''' below for more details. There is no problem with mixing 5m and 10m grid baseboards in the same route</td>
| |
| − | </tr>
| |
| − | </table>
| |
| − | </td>
| |
| − | </tr>
| |
| − | </table>
| |
| − | </td>
| |
| − | </tr>
| |
| − | </table>
| |
| − | <br>
| |
| − | <table width=1000> <!-- BEGIN Section Nav Buttons -->
| |
| − | <tr valign="top">
| |
| − | <td width=629><span id="skip Managing Baseboards"></span>
| |
| − |
| |
| − | =='''Managing Baseboards'''==
| |
| − | </td>
| |
| − | <td width=50>[[image:SkipDown.png|link=#stepMass|Skip Down]]</td>
| |
| − | <td width=50>[[image:SkipUp.png|link=#skip Marquee Context Menu|Skip Up]]</td>
| |
| − | <td width=46> </td> <!-- for Top -->
| |
| − | <td width=75>[[image:HeadingUp.png|link=#stepMarquee|alt=Heading|To Heading]]</td>
| |
| − | <td width=75> </td>
| |
| − | <td width=75> </td> <!-- for Bottom -->
| |
| − | </tr>
| |
| − | </table> <!-- END Section Nav Buttons -->
| |
| − |
| |
| − | <table width=1000 bgcolor="lightcyan" cellpadding=2>
| |
| − | <tr valign="top">
| |
| − | <td width=10>[[image:BlueDot10x10.png|link=]]</td>
| |
| − | <td>The '''Marquee''' is a powerful tool for adding, deleting and changing the properties of multiple baseboards</td>
| |
| − | </tr>
| |
| − | </table>
| |
| − | <br>
| |
| − | ===<span style="font-weight: 700; font-size: 17px; color: white; background-color: blue;"> Add, Delete, Convert Baseboards </span>===
| |
| − |
| |
| − | <table width=1000>
| |
| − | <tr valign="top">
| |
| − | <td width=450>[[image:S20_MarqueeDrawnArea.png|link=|alt=Marquee drawn area]]
| |
| − | <br>
| |
| − | <table bgcolor=#000000 cellpadding=2>
| |
| − | <tr valign="top">
| |
| − | <td>
| |
| − | <table bgcolor=#ffffe0 cellpadding=2>
| |
| − | <tr valign="top">
| |
| − | <td width=25>[[image:PencilTips.PNG|link=]]</td>
| |
| − | <td>In '''Trainz Plus''' you can '''Upgrade''' an existing '''5m''' or '''10m''' resolution route entirely to '''HD'''. See [[image:PageLink.PNG|link=]] '''[[#stepUpgrading|Upgrading a Route to HD]]''' below for more details.</td>
| |
| − | </tr>
| |
| − | </table>
| |
| − | </td>
| |
| − | </tr>
| |
| − | </table>
| |
| − | </td>
| |
| − | <td>
| |
| − | <table bgcolor=#000000 width=550 cellpadding=2>
| |
| − | <tr valign="top">
| |
| − | <td>
| |
| − | <table bgcolor=#ffffff width=546 cellpadding=2>
| |
| − | <tr valign="top">
| |
| − | <td colspan=2><span style="font-weight: 700; font-size: 15px;">Steps:</span> To add, delete and convert baseboards:-</td>
| |
| − | </tr>
| |
| − | <tr valign="top">
| |
| − | <td width=20>[[image:DotPoint1.JPG|link=]]</td>
| |
| − | <td>select the '''Marquee Tool''' (or press the <span style="font-weight: 700; font-size: 15px; color: white; background-color: black;"> F </span> key).</td>
| |
| − | </tr>
| |
| − | <tr valign="top">
| |
| − | <td>[[image:DotPoint2.JPG|link=]]</td>
| |
| − | <td><span style="font-weight: 700; font-size: 15px; background-color: lightcyan;">Left Click and Drag</span> to draw out the '''Marquee Selection Area''' area where the new baseboards will be added or the existing baseboards will be deleted or converted.</td>
| |
| − | </tr>
| |
| − | <tr valign="top">
| |
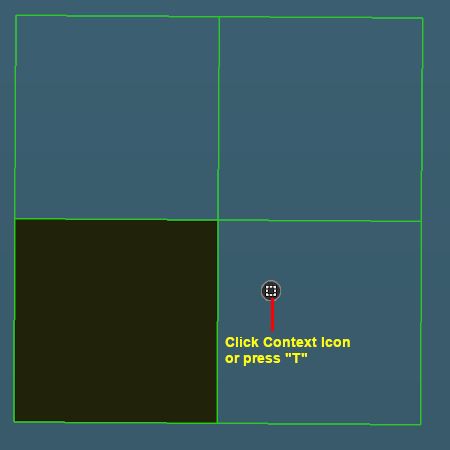
| − | <td colspan=2>The '''Marquee Selection Area''', shown with a green border in the image on the left, covers the existing baseboard (black, bottom left) and where 3 new baseboards will be created. The Marquee has a '''Context Icon''' as shown in the image.</td>
| |
| − | </tr>
| |
| − | <tr valign="top">
| |
| − | <td>[[image:DotPoint3.JPG|link=]]</td>
| |
| − | <td><span style="font-weight: 700; font-size: 15px; background-color: lightcyan;"> Left Click </span> on the '''Context Icon''' or press the <span style="font-weight: 700; font-size: 15px; color: white; background-color: black;"> T </span> key to open up the '''Marquee Context Menu''' (see '''Marquee Context Menu''' above).</td>
| |
| − | </tr>
| |
| − | <tr valign="top">
| |
| − | <td>[[image:DotPoint4.JPG|link=]]</td>
| |
| − | <td>Create, Convert, Delete</td>
| |
| − | </tr>
| |
| − | <tr valign="top">
| |
| − | <td>[[image:DotPoint.JPG|10px|link=]]</td>
| |
| − | <td>To '''Add''' new baseboards select the context option <span style="font-weight: 700; font-size: 15px; color: white; background-color: black;"> Add New Baseboards > </span> then select a resolution from two or three sub-options, <span style="font-weight: 700; font-size: 15px; color: white; background-color: black;"> HD Grid </span> (in '''Trainz Plus''' only), <span style="font-weight: 700; font-size: 15px; color: white; background-color: black;"> 5m Grid </span> and <span style="font-weight: 700; font-size: 15px; color: white; background-color: black;"> 10m Grid </span>. If existing baseboards have also been selected then they will '''NOT''' be converted to the new resolution.
| |
| − | <table>
| |
| − | <tr valign="top">
| |
| − | <td>
| |
| − | <table bgcolor=#ffffb0 cellpadding=2>
| |
| − | <tr valign="top">
| |
| − | <td width=25>[[image:NotePad.PNG|link=]]</td>
| |
| − | <td>It is '''NOT RECOMMENDED''' that you mix '''HD Grid''' baseboards (in '''Trainz Plus''' only) with '''5m Grid''' or '''10m Grid''' baseboards in the same route. It should be '''ALL HD''' or none. There is no problem with mixing 5m and 10m grid baseboards in the same route</td>
| |
| − | </tr>
| |
| − | </table>
| |
| − | </td>
| |
| − | </tr>
| |
| − | </table>
| |
| − | </td>
| |
| − | </tr>
| |
| − | <tr valign="top">
| |
| − | <td>[[image:DotPoint.JPG|10px|link=]]</td>
| |
| − | <td>To '''Convert''' selected baseboards to a different '''Grid Resolution''' select the context option <span style="font-weight: 700; font-size: 15px; color: white; background-color: black;"> Convert Existing Baseboards To > </span> then select a resolution from two or three sub-options, <span style="font-weight: 700; font-size: 15px; color: white; background-color: black;"> HD Grid </span> (in '''Trainz Plus''' only), <span style="font-weight: 700; font-size: 15px; color: white; background-color: black;"> 5m Grid </span> and <span style="font-weight: 700; font-size: 15px; color: white; background-color: black;"> 10m Grid </span>. If empty spaces with no baseboards have been selected then new baseboards will '''NOT''' be created in those spaces.
| |
| − | <table>
| |
| − | <tr valign="top">
| |
| − | <td>
| |
| − | <table bgcolor=#ffffb0 cellpadding=2>
| |
| − | <tr valign="top">
| |
| − | <td width=25>[[image:NotePad.PNG|link=]]</td>
| |
| − | <td>It is '''NOT RECOMMENDED''' that you mix '''HD Grid''' baseboards (in '''Trainz Plus''' only) with '''5m Grid''' or '''10m Grid''' baseboards in the same route. It should be '''ALL HD''' or none. There is no problem with mixing 5m and 10m grid baseboards in the same route</td>
| |
| − | </tr>
| |
| − | </table>
| |
| − | </td>
| |
| − | </tr>
| |
| − | </table>
| |
| − | </td>
| |
| − | </tr>
| |
| − | <tr valign="top">
| |
| − | <td>[[image:DotPoint.JPG|10px|link=]]</td>
| |
| − | <td>To '''Delete''' the selected baseboards select the context option <span style="font-weight: 700; font-size: 15px; color: white; background-color: black;"> Delete Baseboards in Marquee </span>. <span style="font-weight: 700; background-color: yellow;">Note: An entire baseboard will be deleted even if the selection area only covers a small part of the baseboard</span>. The <span style="font-weight: 700; font-size: 15px;"><span style="color: white; background-color: black;"> Ctrl </span> + <span style="color: white; background-color: black;"> Z </span></span> keys can '''Undo''' the deletion.
| |
| − | </td>
| |
| − | </tr>
| |
| − | </table>
| |
| − | </td>
| |
| − | </tr>
| |
| − | </table>
| |
| − | </td>
| |
| − | </tr>
| |
| − | </table>
| |
| − | <br>
| |
| − | ===<span style="font-weight: 700; font-size: 17px; color: white; background-color: blue;"> Baseboard Ground Height </span>===
| |
| − |
| |
| − | <table width=1000 bgcolor="lightcyan" cellpadding=2>
| |
| − | <tr valign="top">
| |
| − | <td width=10>[[image:BlueDot10x10.png|link=]]</td>
| |
| − | <td>The '''Marquee Selection Area''' can be used to set the height of entire baseboards or just a selected section of one or more baseboards</td>
| |
| − | </tr>
| |
| − | </table>
| |
| − |
| |
| − | <table width=1000 bgcolor=#000000 cellpadding=2>
| |
| − | <tr valign="top">
| |
| − | <td>
| |
| − | <table bgcolor=#ffffff cellpadding=2>
| |
| − | <tr valign="top">
| |
| − | <td colspan=2><span style="font-weight: 700; font-size: 15px;">Steps:</span> To set the height of the baseboards or area under the '''Marquee Selection Area''':-</td>
| |
| − | </tr>
| |
| − | <tr valign="top">
| |
| − | <td width=20>[[image:DotPoint1.JPG|link=]]</td>
| |
| − | <td>set the required ground height in the '''Tool Options Palette''' <span style="font-weight: 700; font-size: 15px; color: gold; background-color: black;"> Height </span> setting. '''Note:''' the <span style="font-weight: 700; font-size: 15px; color: gold; background-color: black;"> Grade </span> setting has no effect when used with the '''Marquee''' tool.</td>
| |
| − | </tr>
| |
| − | <tr valign="top">
| |
| − | <td>[[image:DotPoint2.JPG|link=]]</td>
| |
| − | <td>select the '''Marquee Tool''' (or press the <span style="font-weight: 700; font-size: 15px; color: white; background-color: black;"> F </span> key).</td>
| |
| − | </tr>
| |
| − | <tr valign="top">
| |
| − | <td>[[image:DotPoint3.JPG|link=]]</td>
| |
| − | <td><span style="font-weight: 700; font-size: 15px; background-color: lightcyan;">Left Click and Drag</span> to draw out the '''Marquee Selection Area''' area so that it covers the area that will have its height set. This can include multiple baseboards or empty spaces where new baseboards will be created at the new height.</td>
| |
| − | </tr>
| |
| − | <tr valign="top">
| |
| − | <td>[[image:DotPoint4.JPG|link=]]</td>
| |
| − | <td><span style="font-weight: 700; font-size: 15px; background-color: lightcyan;"> Left Click </span> on the '''Context Icon''' or press the <span style="font-weight: 700; font-size: 15px; color: white; background-color: black;"> T </span> key to open up the '''Marquee Context Menu''' (see '''Marquee Context Menu''' above).</td>
| |
| − | </tr>
| |
| − | <tr valign="top">
| |
| − | <td>[[image:DotPoint5.JPG|link=]]</td>
| |
| − | <td>select the '''Context Menu''' option <span style="font-weight: 700; font-size: 15px; color: white; background-color: black;"> Set Marquee to Brush Height </span>. If the '''Marquee''' extends over empty space then new baseboards will be created at the set <span style="font-weight: 700; font-size: 15px; color: gold; background-color: black;"> Height </span> value.</td>
| |
| − | </tr>
| |
| − | </table>
| |
| − | </td>
| |
| − | </tr>
| |
| − | </table>
| |
| − | <br>
| |
| − | ===<span style="font-weight: 700; font-size: 17px; color: white; background-color: blue;"> Baseboard Ground Texture </span>===
| |
| | | | |
| | <table width=1000 bgcolor="lightcyan" cellpadding=2> | | <table width=1000 bgcolor="lightcyan" cellpadding=2> |
| Line 17,646: |
Line 16,828: |
| | </table> | | </table> |
| | | | |
| − | =='''Selecting and Moving Multiple Objects'''== | + | <table width=1000> <!-- BEGIN Section Nav Buttons --> |
| | + | <tr valign="top"> |
| | + | <td width=629><span id="BM: Multiple Move"></span> |
| | + | ===<span style="font-weight: 700; font-size: 17px; color: white; background-color: blue;"> Selecting and Moving Multiple Objects </span>=== |
| | + | </td> |
| | + | <td width=50> </td> |
| | + | <td width=50> </td> |
| | + | <td width=46>[[image:SkipMinorDown.png|link=#BM: Identical Move]][[image:SkipMinorBlank.png|link=]]</td> <!-- for Top and Minor Up/Down --> |
| | + | <td width=75> </td> |
| | + | <td width=75> </td> |
| | + | <td width=75> </td> <!-- for Bottom --> |
| | + | </tr> |
| | + | </table> <!-- END Section Nav Buttons --> |
| | | | |
| | Multiple objects can be selected and moved with the '''Free Move Tool''' and the '''Fine Adjustment Tool'''.<br> | | Multiple objects can be selected and moved with the '''Free Move Tool''' and the '''Fine Adjustment Tool'''.<br> |
| Line 17,772: |
Line 16,966: |
| | </table> | | </table> |
| | <br> | | <br> |
| − | ===<span style="font-size: 17px; color: white; background-color: blue;"> Selecting Multiple Identical Objects </span>=== | + | <table width=1000> <!-- BEGIN Section Nav Buttons --> |
| | + | <tr valign="top"> |
| | + | <td width=629><span id="BM: Identical Move"></span> |
| | + | ===<span style="font-weight: 700; font-size: 17px; color: white; background-color: blue;"> Selecting Multiple Identical Objects </span>=== |
| | + | </td> |
| | + | <td width=50> </td> |
| | + | <td width=50> </td> |
| | + | <td width=46>[[image:SkipMinorDown.png|link=#skip Cloning Objects]][[image:SkipMinorUp.png|link=#BM: Multiple Move]]</td> <!-- for Top and Minor Up/Down --> |
| | + | <td width=75> </td> |
| | + | <td width=75> </td> |
| | + | <td width=75> </td> <!-- for Bottom --> |
| | + | </tr> |
| | + | </table> <!-- END Section Nav Buttons --> |
| | | | |
| | You can quickly select all nearby identical objects by a <span style="font-weight: 700; font-size: 15px; background-color: lightcyan;">Double Left Click</span> on an object.<br> | | You can quickly select all nearby identical objects by a <span style="font-weight: 700; font-size: 15px; background-color: lightcyan;">Double Left Click</span> on an object.<br> |
| Line 17,818: |
Line 17,024: |
| | <td width=50>[[image:SkipDown.png|link=#stepUpgrading|Skip Down]]</td> | | <td width=50>[[image:SkipDown.png|link=#stepUpgrading|Skip Down]]</td> |
| | <td width=50>[[image:SkipUp.png|link=#stepMass|Skip Up]]</td> | | <td width=50>[[image:SkipUp.png|link=#stepMass|Skip Up]]</td> |
| − | <td width=46> </td> <!-- for Top --> | + | <td width=46>[[image:SkipMinorBlank.png|link=]][[image:SkipMinorUp.png|link=#BM: Identical Move]]</td> <!-- for Top and Minor Up/Down --> |
| | <td width=75>[[image:HeadingUp.png|link=#stepMass|alt=Heading|To Heading]]</td> | | <td width=75>[[image:HeadingUp.png|link=#stepMass|alt=Heading|To Heading]]</td> |
| | <td width=75> </td> | | <td width=75> </td> |
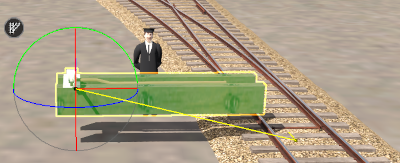
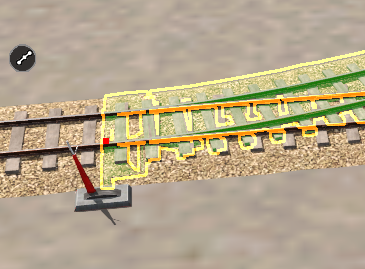
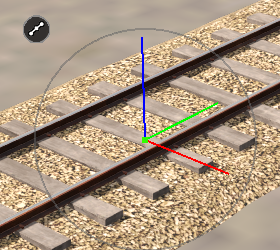
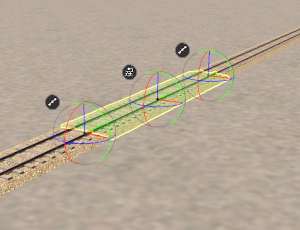
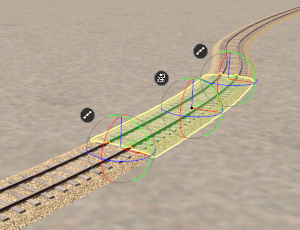
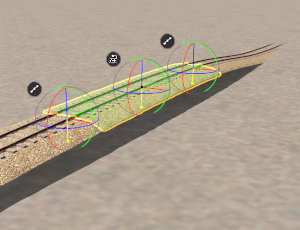
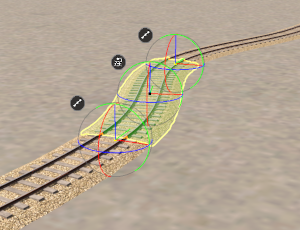
A selected track mesh object, or a group of selected track mesh objects, will have a Context Icon that opens a Context Menu. The icon design will vary between object types.
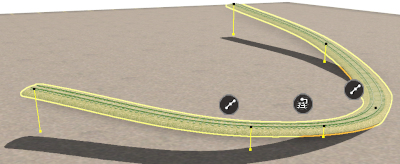
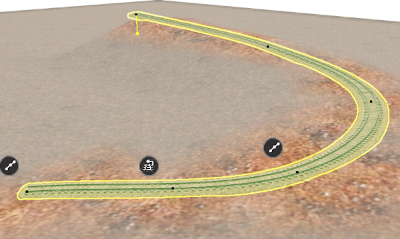
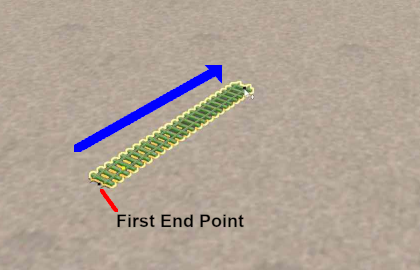
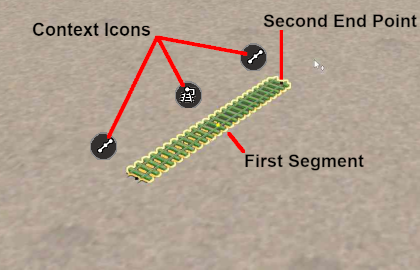
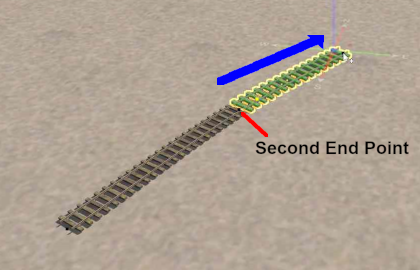
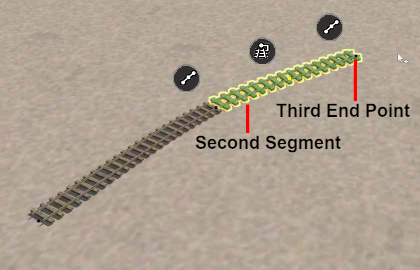
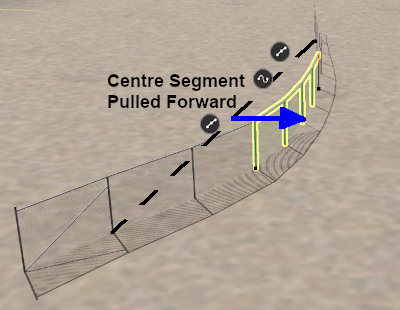
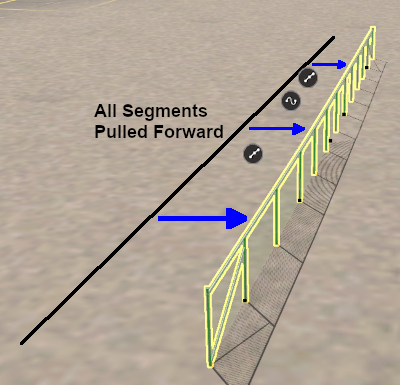
Splines are frequently made of multiple segments joined together. You can easily move a spline by moving its segments, individually or as a group.
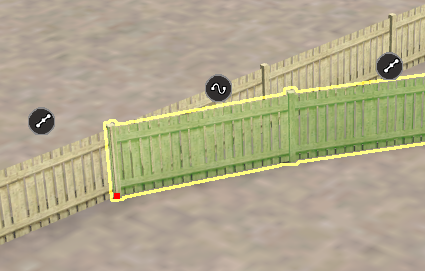
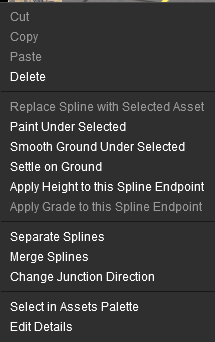
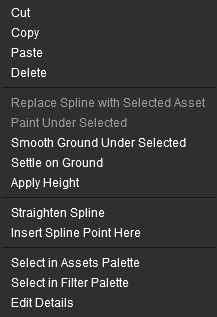
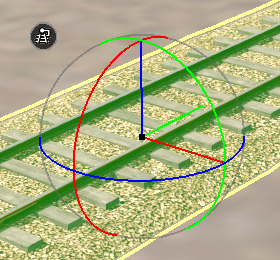
A selected scenery spline object, or a group of selected scenery spline objects, will have a Context Icon that opens a Context Menu. The icon design will vary between object types.
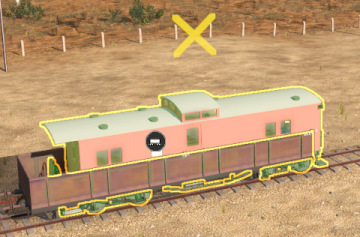
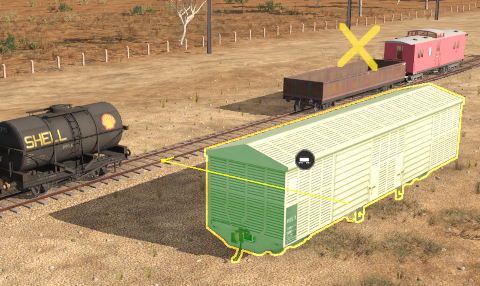
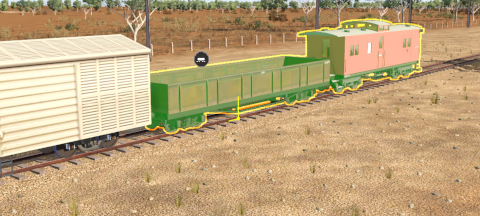
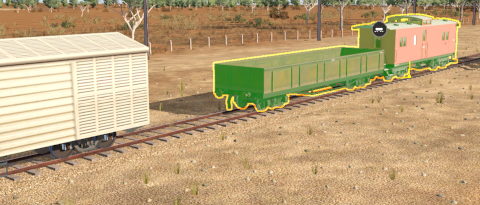
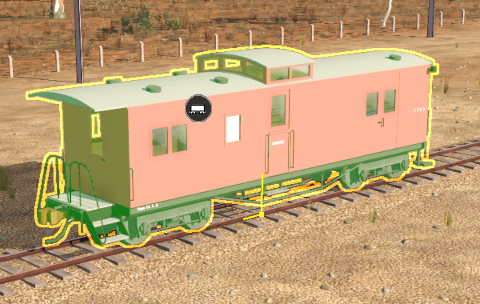
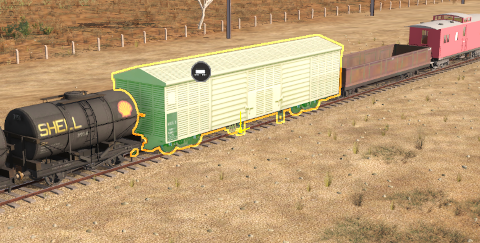
Using the same situation as above, the isolated guard van and the gondola wagon at the end of a consist are to be coupled together.
A selected track mesh object, or a group of selected track mesh objects, will have a Context Icon that opens a Context Menu. The icon design will vary between object types.
A selected scenery spline object, or a group of selected scenery spline objects, will have a Context Icon that opens a Context Menu. The icon design will vary between object types.
Using the same situation as above, the isolated guard van and the gondola wagon at the end of a consist are to be coupled together.
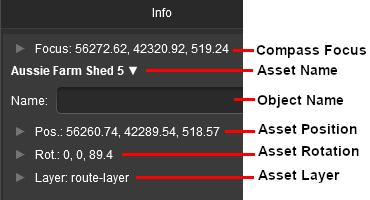
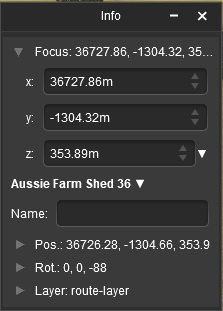
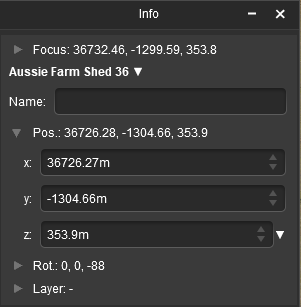
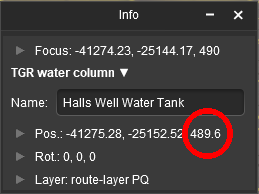
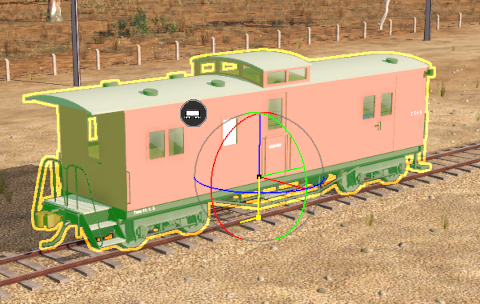
You must have an object (or objects) selected for the position data to be shown and edited. Open up the position data by a Left Click on its Pos: arrowhead icon.
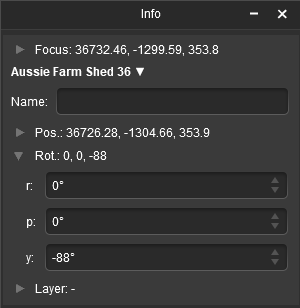
You must have an object (or objects) selected for the rotation data to be shown and edited. Open up the rotation data by a Left Click on its Rot: arrowhead icon.
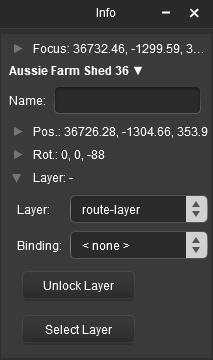
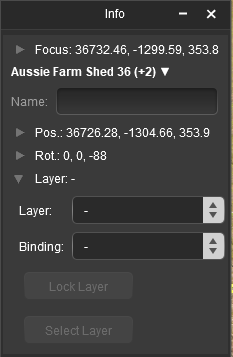
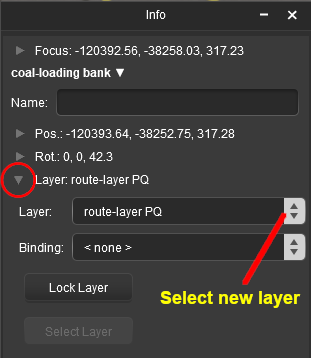
You must have an object (or objects) selected for the layer data to be shown and edited. Open up the layer data by a Left Click on its Layer: arrowhead icon.
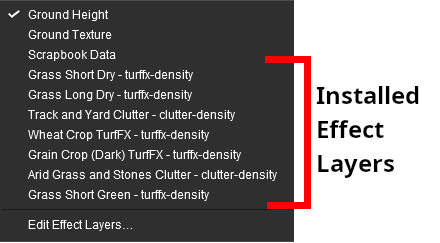
![]() Selecting an Effect Layer from the Brush Tool:
Selecting an Effect Layer from the Brush Tool:
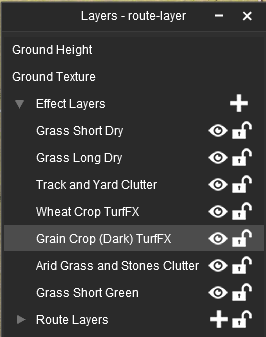
![]() Selecting an Effect Layer from the Layers Palette:
Selecting an Effect Layer from the Layers Palette:
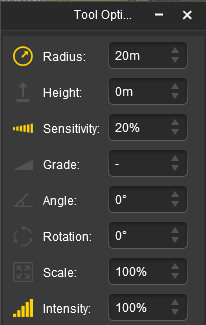
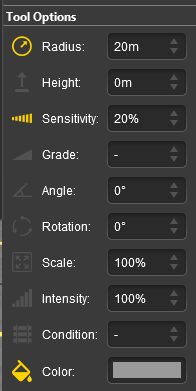
Save a Layer as a Preset below.
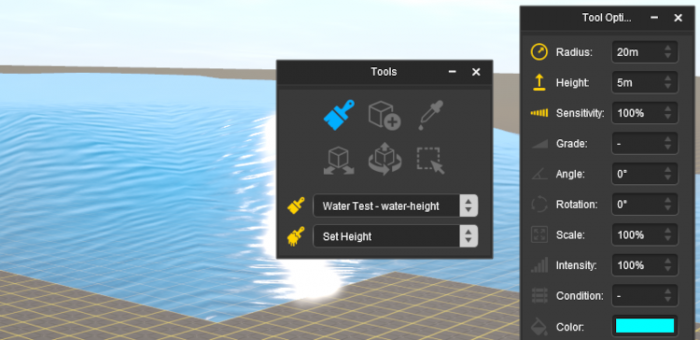

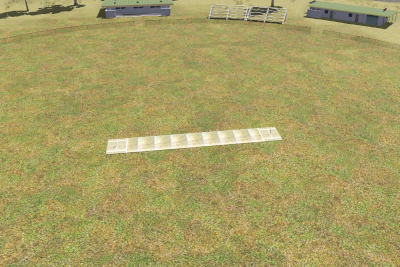
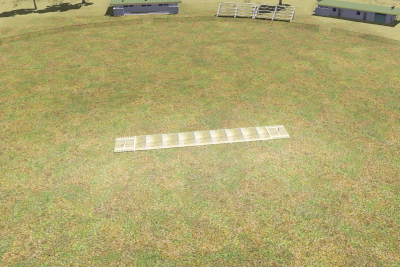
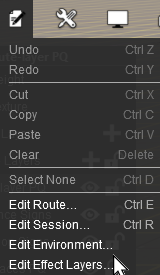

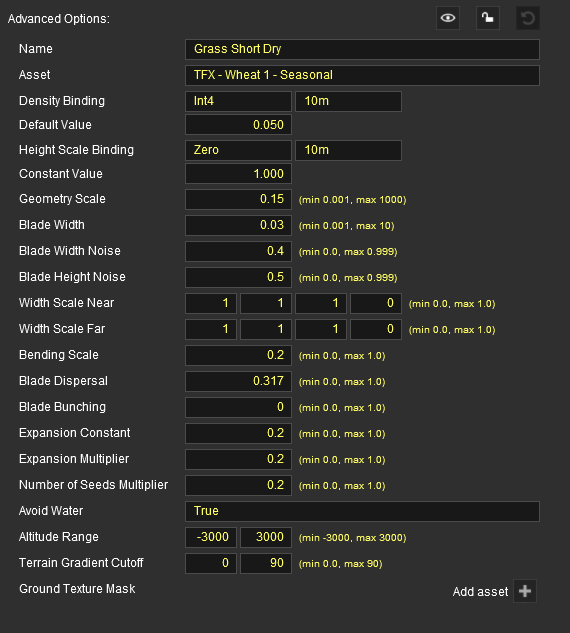
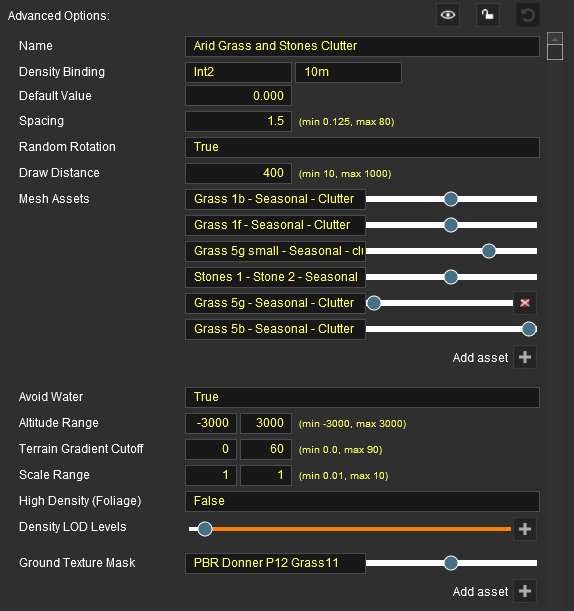
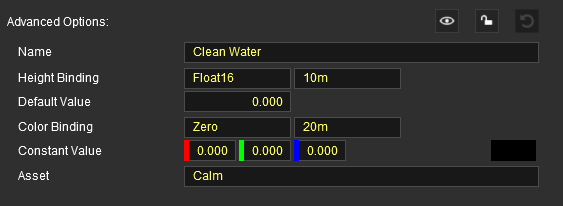

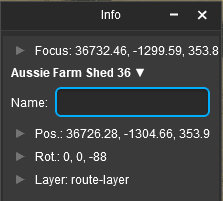
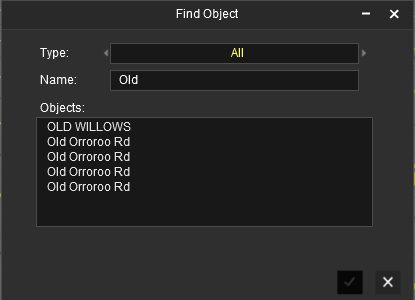
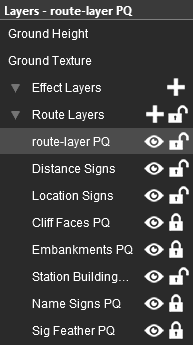
In the Assets Palette choose one of the following:-
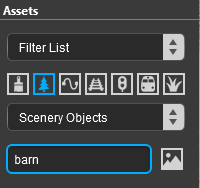
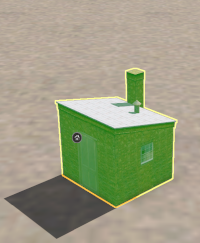
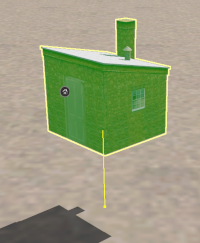
and
, or the
Shortcut , as described in
Placement: Scenery Mesh Objects above.
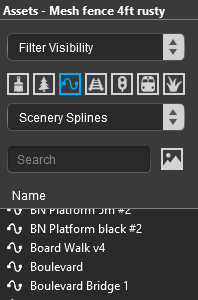
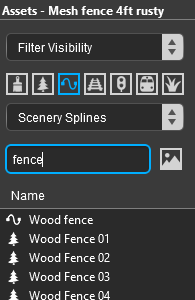



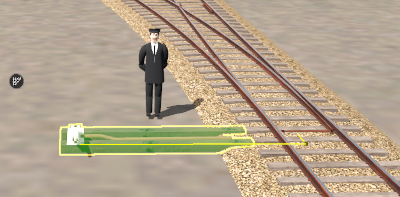
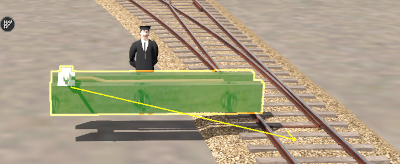



![]() Using "Click and Drag"
Using "Click and Drag"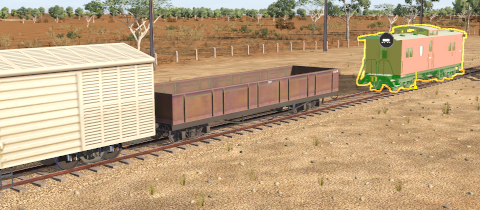
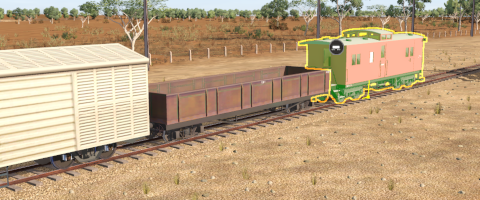
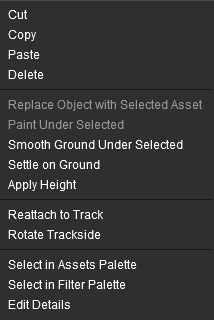
![]() Using the Context Menu
Using the Context Menu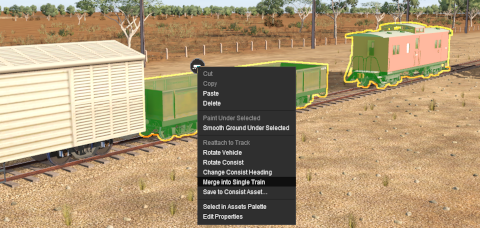


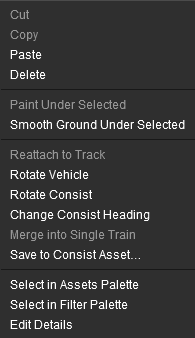
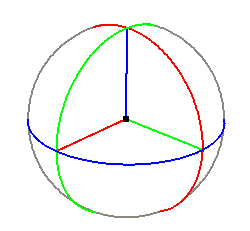


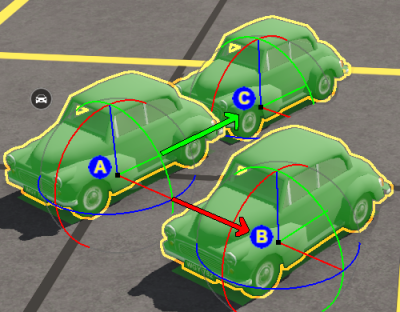
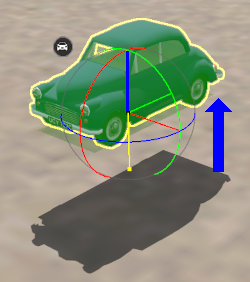
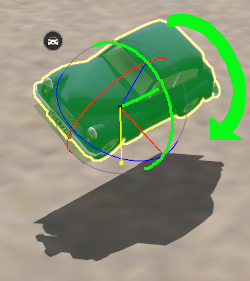
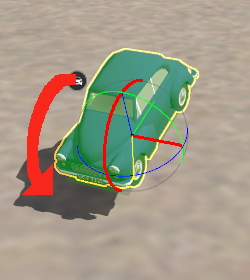
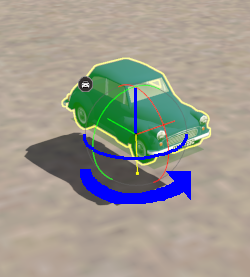





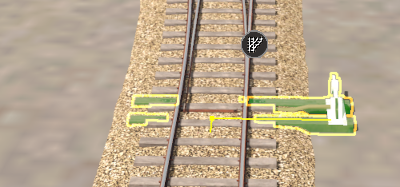
![]() Using "Click and Drag"
Using "Click and Drag"

![]() Using the Context Menu
Using the Context Menu


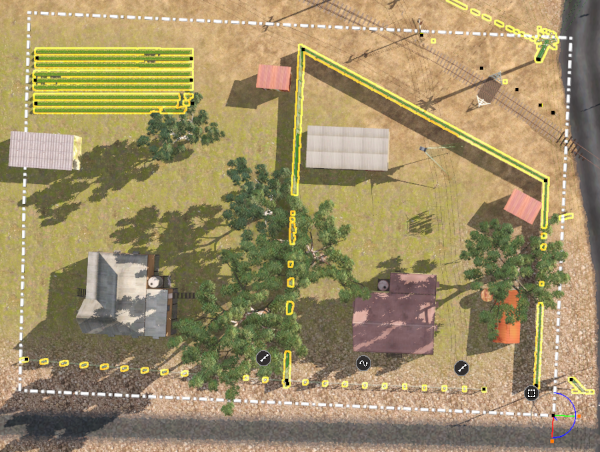

![]() or press the T key.
or press the T key.