HowTo/Render to Texture
(category added) |
|||
| Line 191: | Line 191: | ||
mick1960 | mick1960 | ||
| + | |||
| + | |||
| + | [[Category:How-to guides]] | ||
Latest revision as of 12:18, 19 August 2012
Render to Texture
A Tutorial for the basic steps
In this tutorial I refer to 3dsMax. Render to texture has two main purposes. One is to create a normal map (bump map) and the other is to get a very natural texture which contains what I call diffuse shadows. Here in this tutorial I will describe the second method.
1.) Preparation
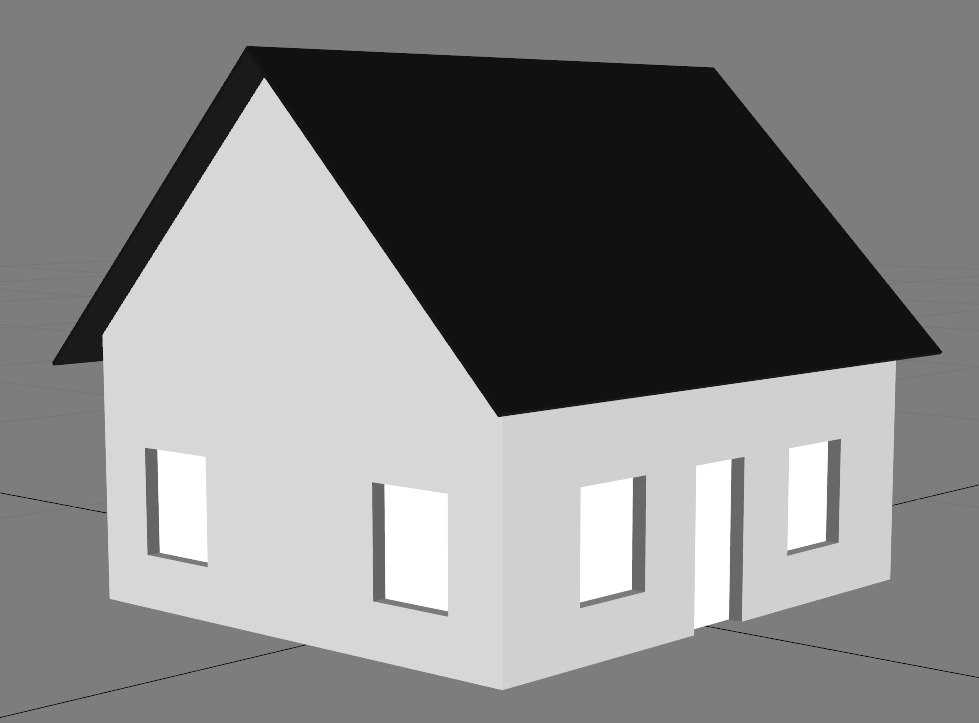
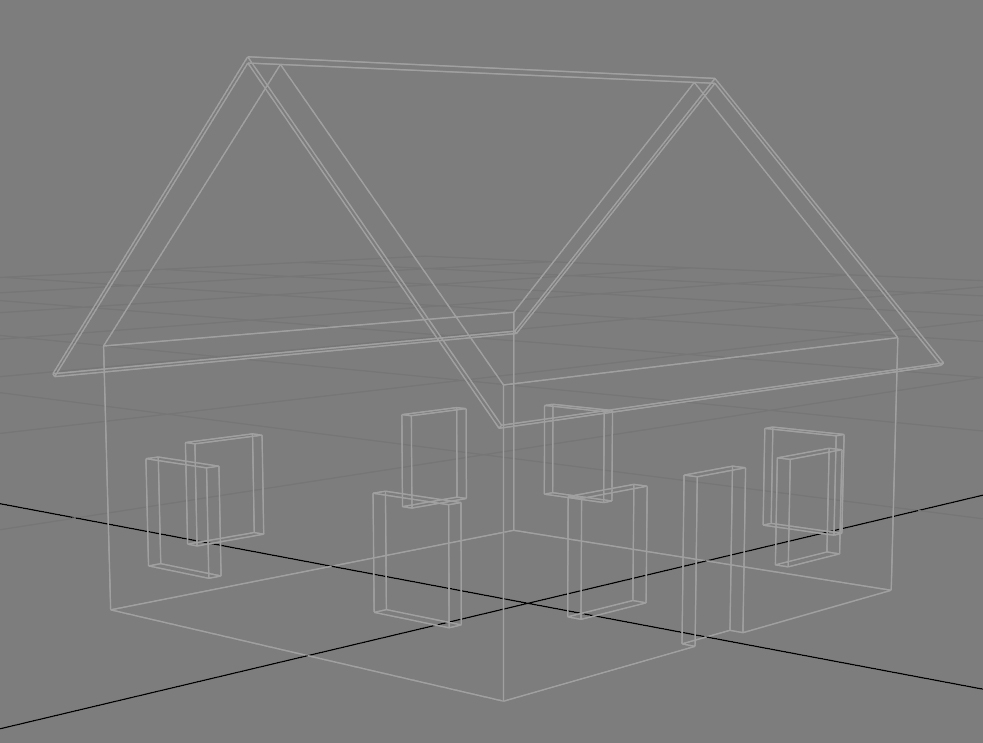
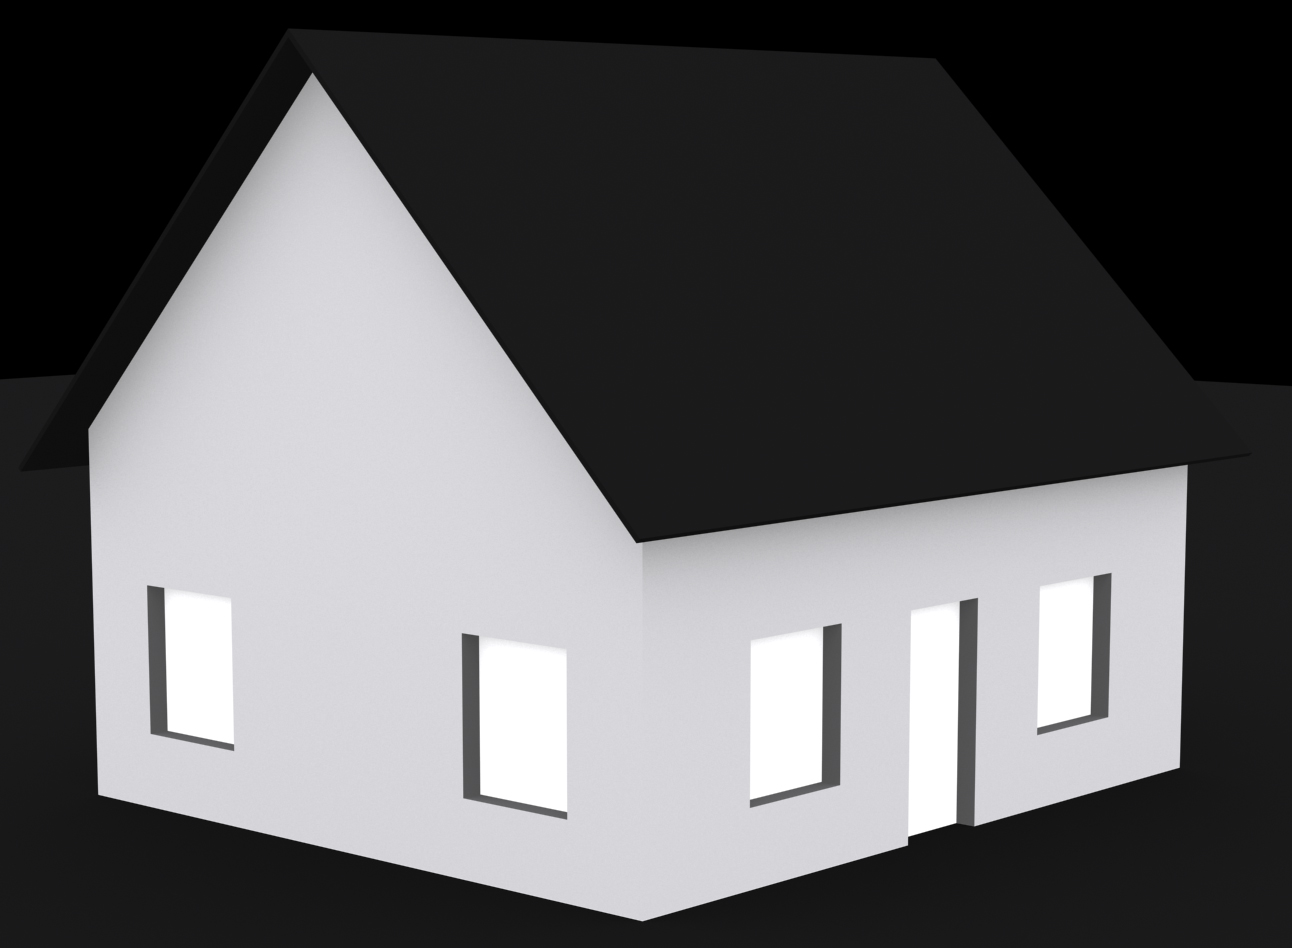
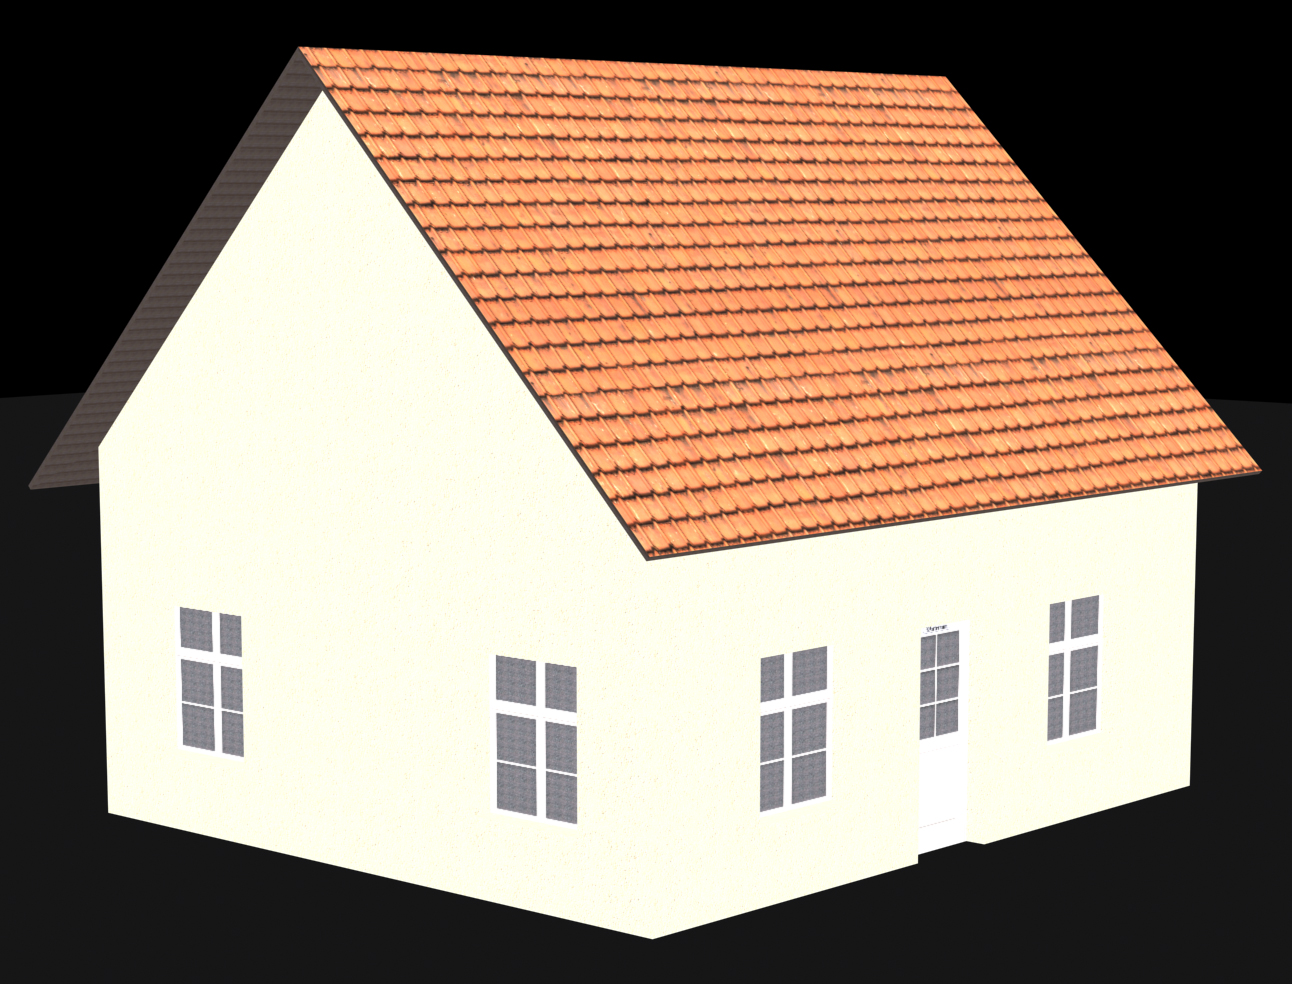
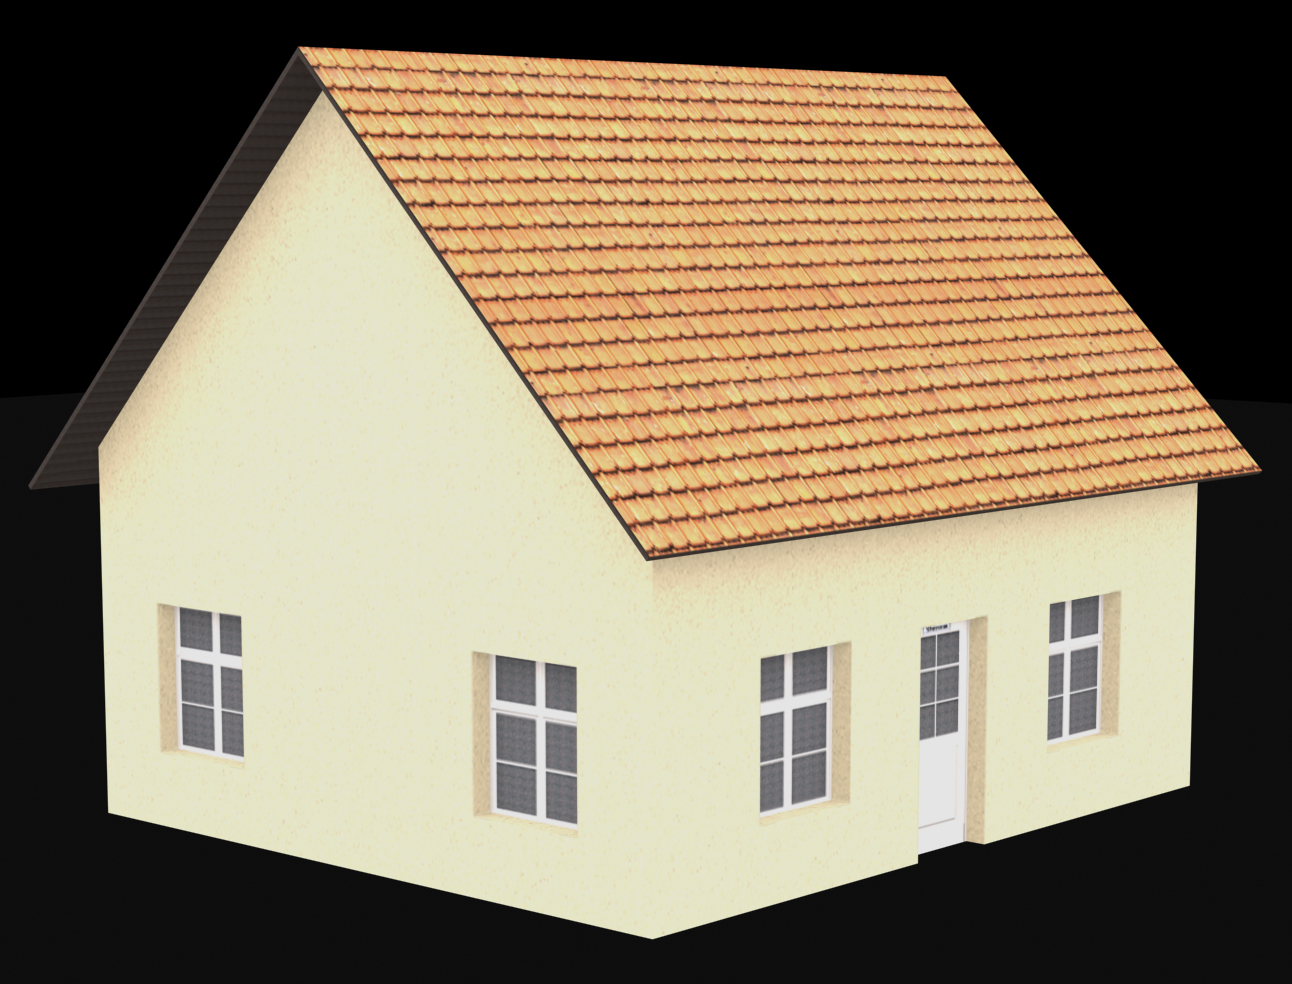
The mesh is a very, very simple house with overlapping roof and windows with meshed embrasure (Picture 1 and 2).
Picture 1
Picture 2
If our mesh is complete ready and I mean complete, that includes all texture mapping work, then we can start to prepare the render process.
To make it easier,in this two pictures I use only xxx.m.notex materials. But for a real object I recommend to use the largest textures you can get. And you do not have to care about the aspect ratio of those textures, as we will not export them, but the texture we get from the render process.
1.1) The Light
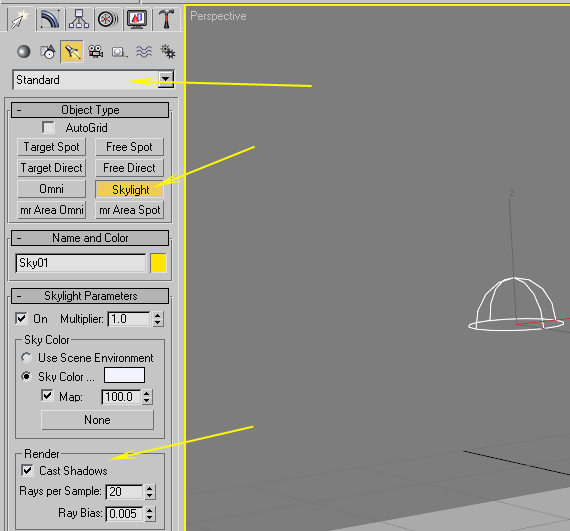
You have to create a so called skylight as seen on the picture above. A skylight is a light source which casts an extreme diffuse light from everywhere. The Cast Shadows option turn off first for testing purposes. Later we need to turn it on again.
You should also place the skylight at x=0, y=0 and z=20. It really doesn't matter, but so it is not in the way if you select objects.
If you leave Rays per Sample at 20 it is enough for final rendering, lower values gives more grain and works faster for testing.
Ray Bias sets the size which is recognized by the rays. So 0.005 means objects which are smaller do not cast shadows.
1.2) The Plane
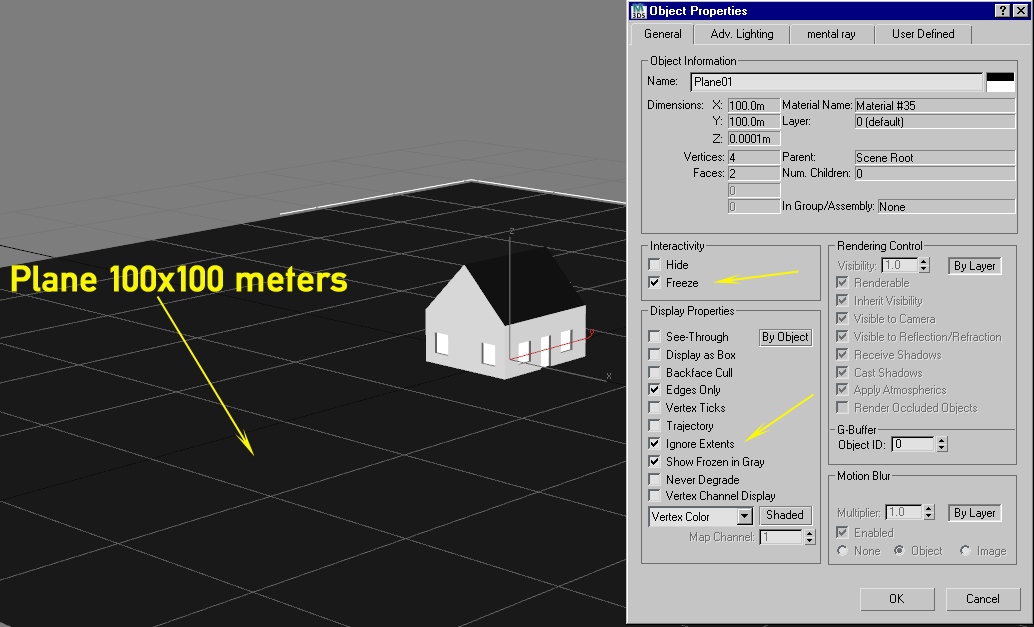
Next you have to create a quite huge plane to avoid the light from coming from below. Without this plane you will not get the desired diffuse shadows. In most cases 100x100 meters will fit. You also have to map the plane with a black, non-reflective material. It's also a good idea to freeze the plane and set Ignore Extents in its property menu.
1.3) The Renderer
For Render to Texture you should use the Default Scanline Renderer.
Skylight without shadows
Skylight with shadows
2.) Texturing
As mentioned before, use the largest textures you can get to map your object. You even can experiment with mental ray materials or others, play with the specular values to get a most realistic look for your object.
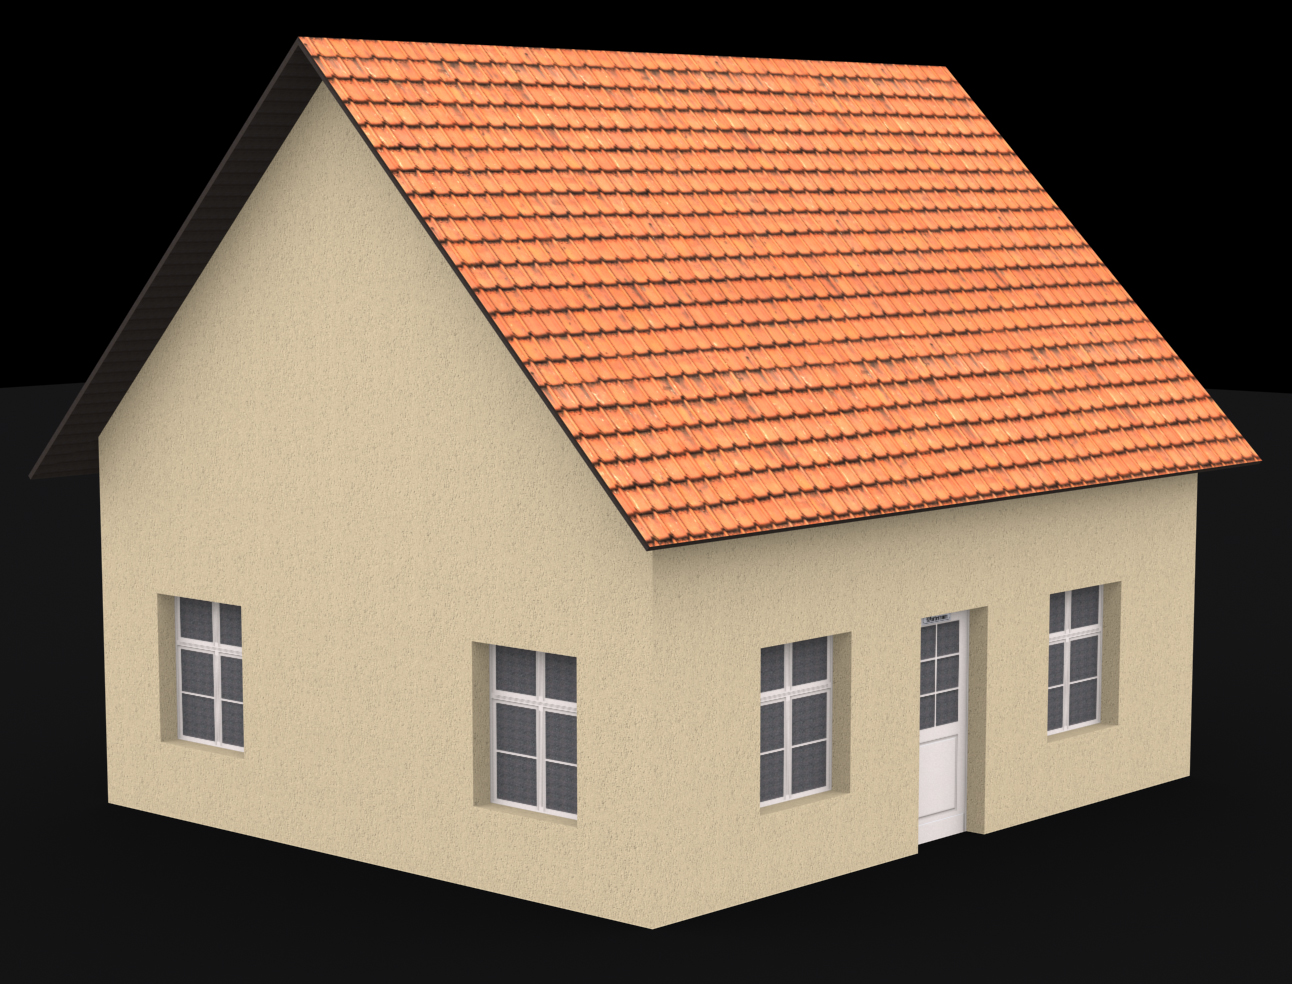
To get some reasonable results, I mapped our house with some textures. But don't be too picky, I did not use too much time for this. It's only a sloppy example...
Skylight without Shadows
Skylight with Shadows
So how we get this into Trainz? The secret spell is Render to Texture!
So let's do the work...
3.) Render to Texture
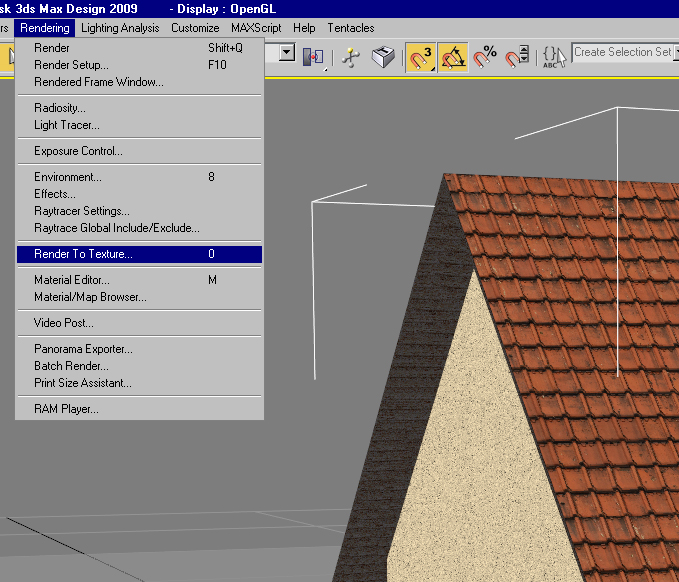
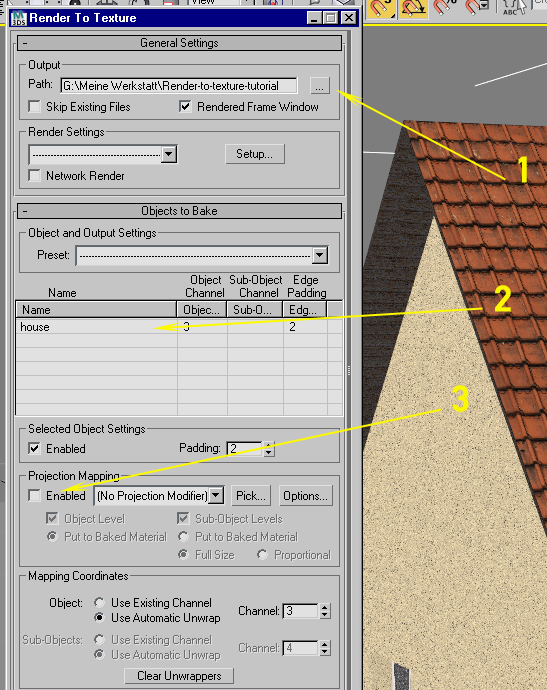
Now we select our house and press the key '0' or use in the menu Rendering the sub-menu Render to Texture.
1: Here you set the path where your texture file is stored.
2: Make sure that the name of the object you want to render appears here!
3: Make sure that this option is not selected. This will be used for create normal maps and projection rendering.
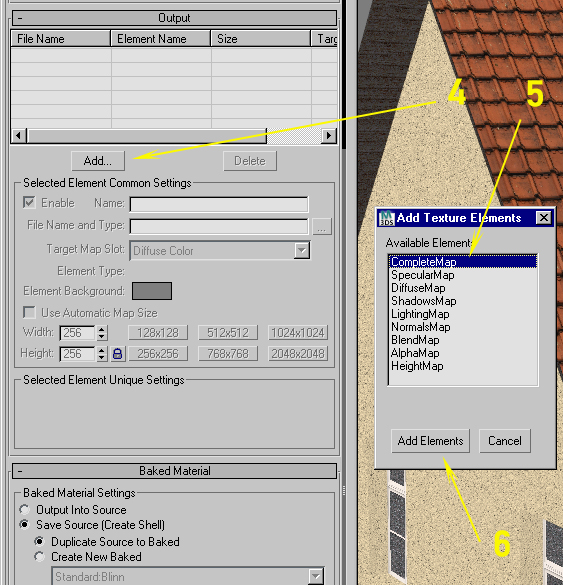
4: Click here to add a map type.
5:For our purpose choose CompleteMap.
6: Click here to add the map.
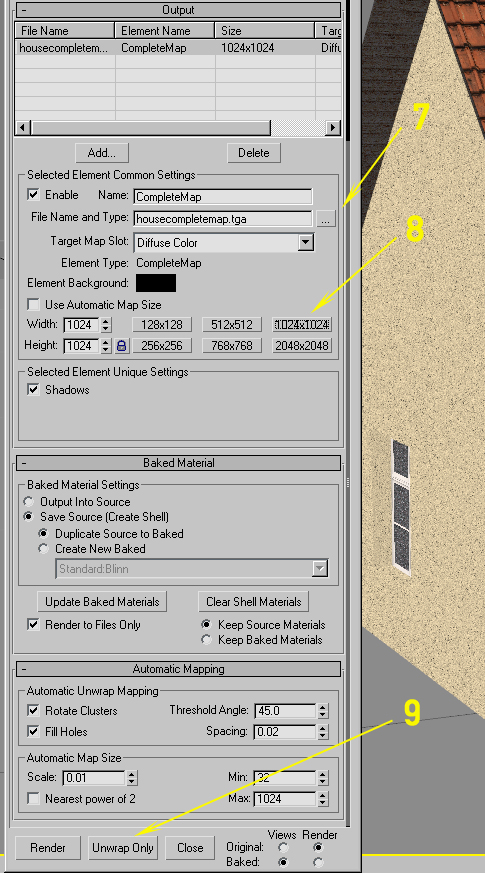
7: Here you can set the name and other parameters of the tga file.
8: Here you can select the size of the texture. Make sure that it is a square format and meets the requirements of Trainz (not larger than 4096x4096).
9: By clicking on Unwrap Only we will start the main work.
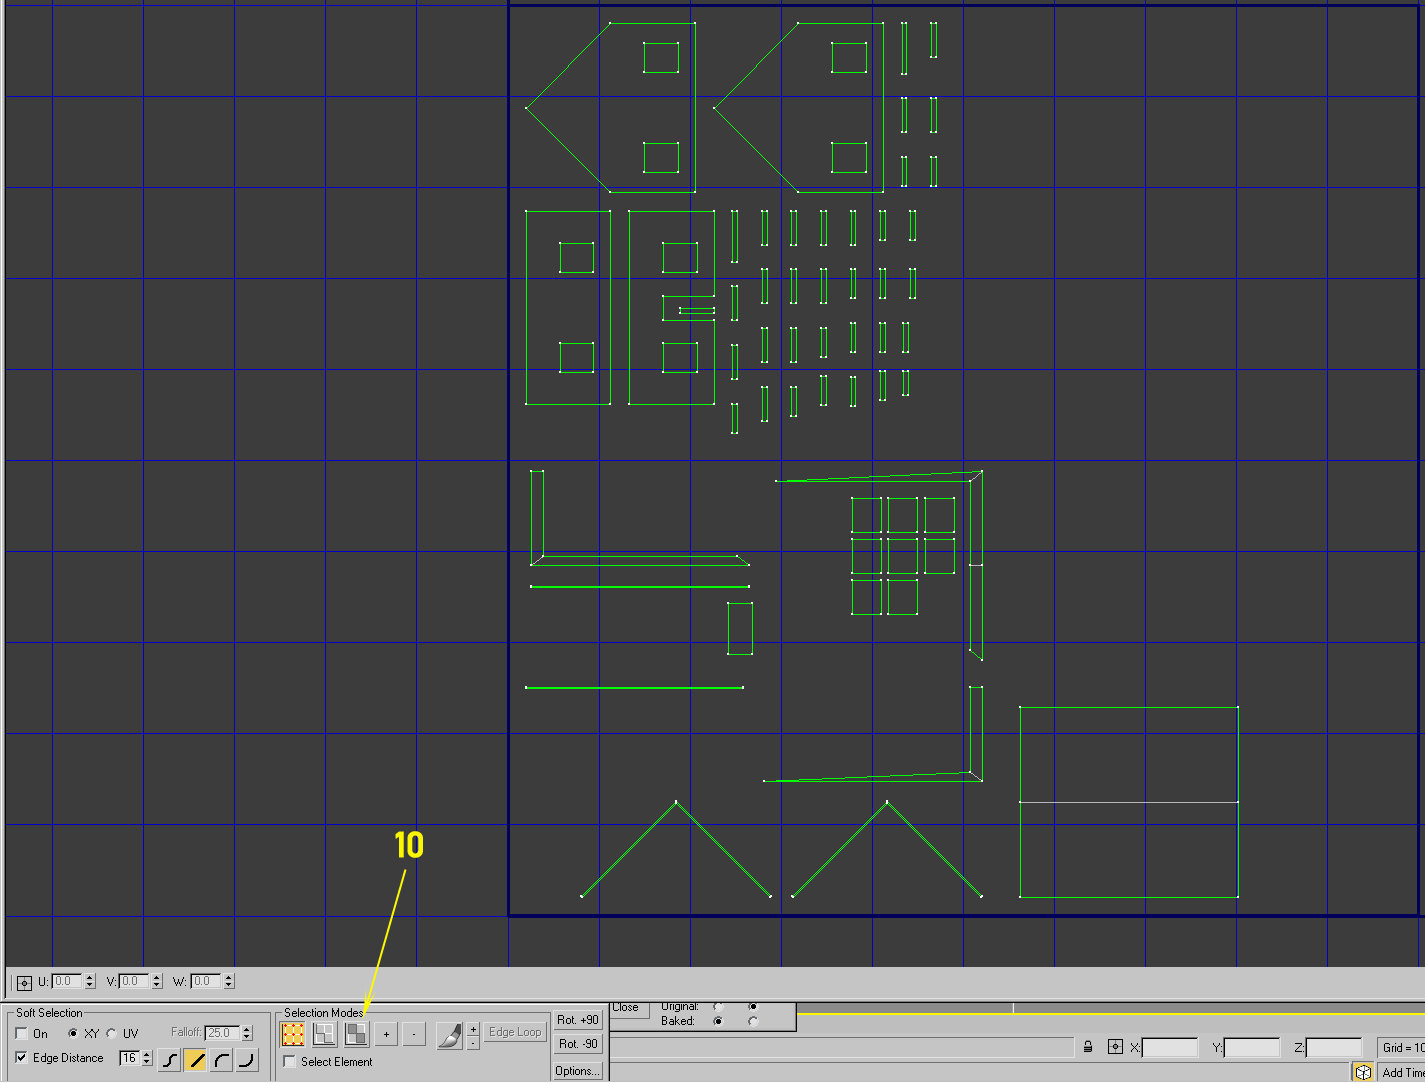
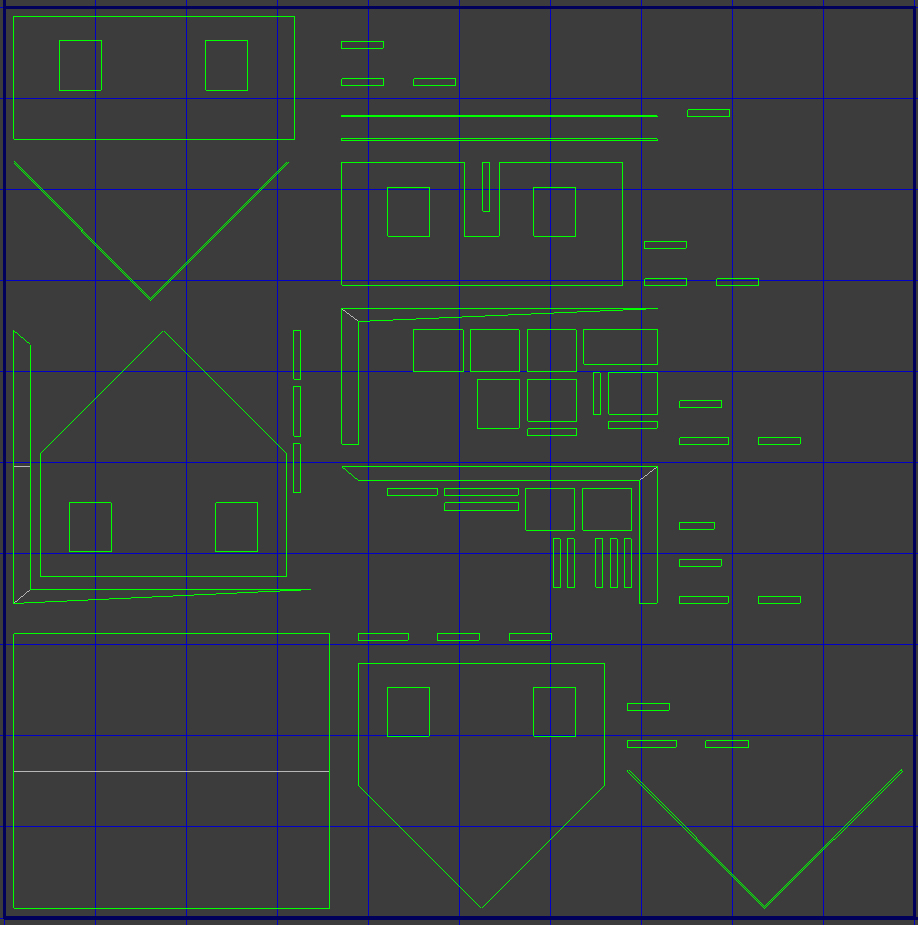
This is what we get to see after we open the UV-editor. Click on Face Sub-Object Mode (10) and select all faces.
Now choose in the Mapping menu Flatten Mapping and for now you can go with the settings in the dialog.
Now our screen looks like this.
Still a huge waste of space in our future texture! So we have to do some hand work.
Important: Always save under File with Save UVs... your mapping! Otherwise your work is useless for later mapping the rendered texture to you object.
Switch to Edge Sub-Object-Mode ![]() and now we are doing some stitching.
and now we are doing some stitching.
Select a desired edge and with right click go to Stitch Selected.
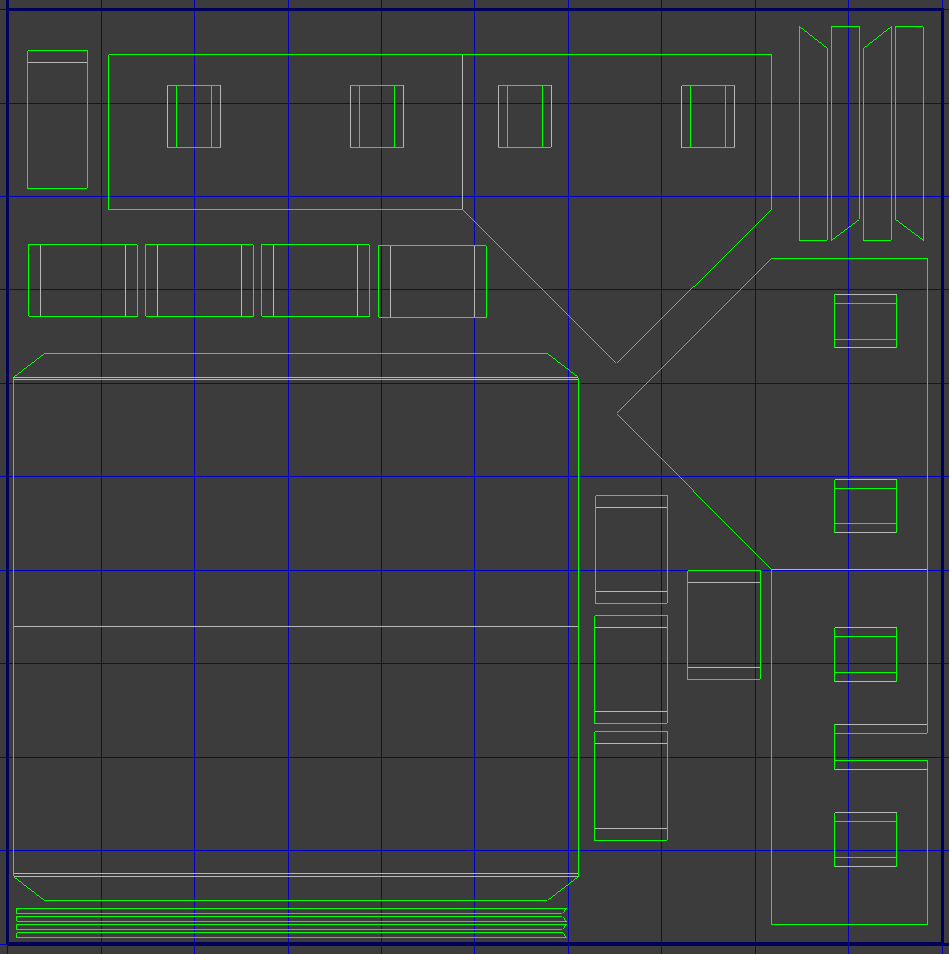
At the moment it doesn't matter where you move your faces, but at the end make sure all faces are exactly inside the square frame. All elements outside this square are not rendered!
To sort some of the faces you can always use Tools → Pack UVs... I use these settings but you can experiment for your own. Undo also works here.
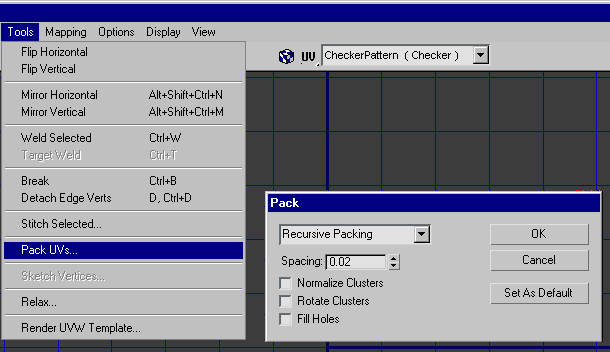
If you move and sort your faces, do not put them too close together, because Max always adds some pixels more than the size of the face to avoid black edges.
Do not go below 0.02 grid units. The relevant square in the UV-editor has in the lower left corner the coordinates 0,0 and in the upper right 1,1. So each grid line represents a step of 0.1.
Be careful with resizing the faces! Do this only with faces which shares the same texture. Otherwise it will look odd if one part of the houses texture has different resolution than the others.
After sorting, moving, stitching edges together the layout looks like this.
Not perfect, but enough as an example.
Now please do not forget to save the mapping with File → Save UVs...!
After saving close the UV-editor and click on Render. But make sure the shadows of the skylight are activated!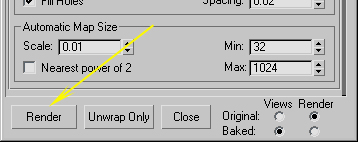
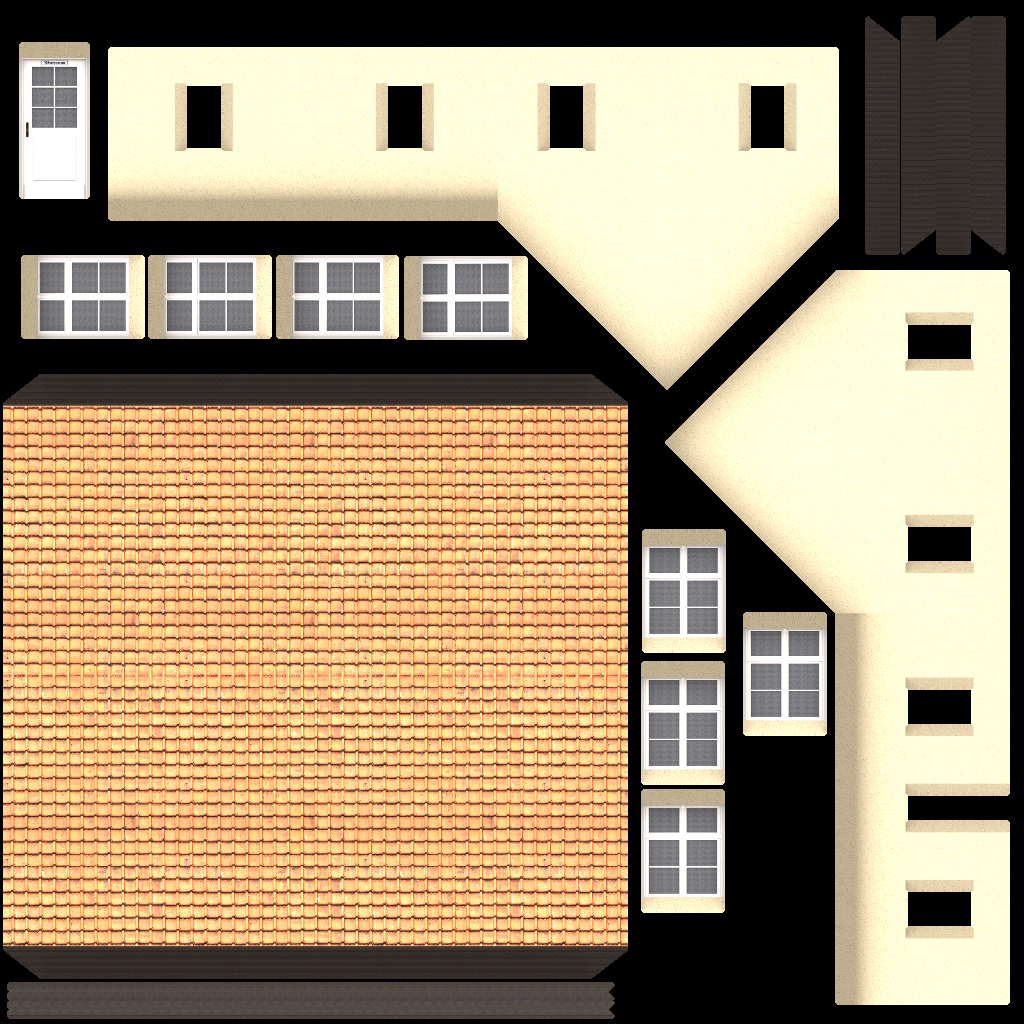
This is the result:
As you can see, all diffuse shadows are in place. Now we only have to map this texture to our object. Close the Render to Texture dialog and collapse the stack of you object.
Open the material editor ('m') and create a new slot in the multi-material (which I always use) or create a new material, up to you. There you load the texture into the diffuse slot.
Now at this moment it might be a good idea to save your mesh under another name e.g. house_with_original_textures.max. Or you clone all objects, group and hide them. But take care that you use the copy not the instance mode, otherwise everything you do to the original happens to the clone too.
Select the object and apply the new material to it. In the polygon mode select all polygons and assign the correct map id. Use the Unwrap UVW modifier and now you load your hopefully saved *.uvw file and collapse. Everything is done.
Our house rendered without skylight and without shadows
Note: If you apply normal maps to the textures you use for the initial texturing it influences the result of the render to texture process. Try and experiment!
If you prefer to have a greater influence on the shadows you can do this trick. Select your object and use the UVW Remove tool by selecting Set Gray and Materials (NOT UVW!). Now the object has a neutral gray. Apply the render to texture procedure (skylight ON, Cast Shadows ON). Rename the result file to xxx_shadows.tga. Then apply again the original material to the object and repeat the render to texture procedure (Skylight ON, Cast Shadows OFF). Then you can combine both files in Gimp or another image program as you like.
I hope this small tutorial might help you creating more realistic content.
mick1960
