CCG/Creating a New Asset
Contents |
Creating a New Asset
The aim of the Content Creator Plus (CCP) module is to create the asset config.txt file. Additionally, it creates a temporary directory (in the editing folder ...ts2009\editing\new asset ) where the model files are to be placed, and then incorporated in the Trainz asset database when the asset is committed.
Please refer to the previous Chapter 3 for an explanation on how to navigate the CCP interface and menus.
A Workflow Process
A logical process should be used to create an asset. This is a brief summary of one such process:
- 1. Using a pixel editing program, for example Photoshop or Paint Shop Pro, create textures for the new model asset, and save to a temporary directory.
- 2. Create the mesh model in 3dsmax or gmax, texture and map the model and save the files to the directory.
- 3. Open CCP and choose the New asset option to select an appropriate Kind for the model, in the example used in this chapter, it would be a Kind traincar.
- 4. Enter as much data as possible, description, username for example, following the guidelines in the previous Chapter 3 for selecting containers and tags, and entering values.
- 5. Find the newly created directory for the asset, it will be called "New Asset" or in some instances may have a coded name until the config file is first saved and committed with a relevant Username tag. The "New Asset" will also appear in the Content Manager Plus main screen.
- 6. Make any appropriate subdirectories in this model directory, and export the mesh files and textures from 3dsmax or gmax, into the directory. After exporting the mesh file, remember to use the Resource Collector from within 3dsmax or gmax to gather and place all the texture files in the directory.
- 7. Continue to add containers and tags in CCP for the model. Now you have a .im mesh file in the directory, additional information and choices will be available for data entry, for instance, selecting the mesh file will make it visible in the graphics window; when choosing attachment points within the mesh for tag data, you will be offered the actual mesh attachment point name for choosing.
- 8. Save the config.txt file (CCP knows where to place it, in the created directory). If any error messages appear, click with the Left Mouse Button (LMB click) on each error message to be taken to the tag within the model. Examine the data and fix the errors.
- 9. Some entries and changes to the asset may not appear until the asset is committed. RMB click on "New Asset" name in the main screen of CMP and select Edit/Commit. The temporary directory is closed and any new error messages that are generated may be examined.
- 10. Launching Trainz from within CMP will allow the new asset to be examined after placing in Surveyor. Of course if there are dependencies that have not been specified at this early stage, or not enough containers or tags added in CCP, the asset may not show up in Trainz.
- 11. Alternately, when working on the asset, the asset does not have to be committed manually to view it in Trainz. When launching Trainz you will be asked to confirm that any assets open for editing should be committed before proceeding. Any uncommitted asset will not show in Trainz.
- 12. If you have selected the settings within CMP to "re-open asset after exiting Trainz", the temporary directory will be re-opened automatically for you to continue working with the asset files.
- 13. It is important to backup assets, particularly as the exported files and textures are incorporated in the Trainz data base on committing the asset, and are not available for examination or copying once the temporary directory has been closed. Refer to Page 14 for options to back up the asset files.
Each creator will determine a suitable workflow process with experience. CCP should make it easier for new creators to create workable config.txt files.
Of course you can examine the saved config.txt file in the asset temporary directory in Explorer, or even edit and re-save the file. This however is not the recommended process, as the config.txt file has then not be checked for errors in the CCP module, and could have newly introduced errors.
It is preferable that CCP be used to build a working config.txt file, and this process will validate the asset as suitable for upload to the Download Station.
Example Asset
The example asset chosen is the PB15 locomotive, which is included in Trainz. The various screenshots will illustrate how the graphical user interface would appear for this asset, and show the various forms of data value input. It will not discuss all the containers or tags in detail, but rather give a feel for the process of creating a new asset.
There are many containers and tags to make a fully functional locomotive asset, and duplicate containers and tags have not been shown in this example. Please refer to Chapter 5 and Chapter 6 for details on containers and tags for all asset kinds.
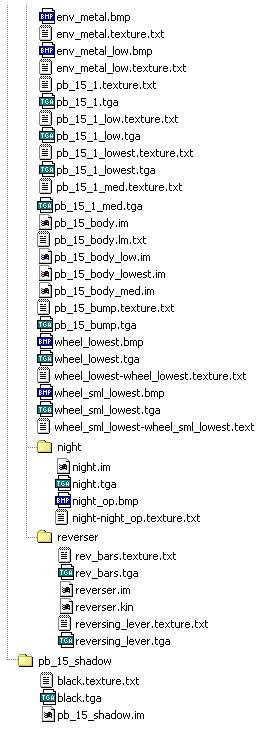
Example Asset PB15 Directory Layout
- Main Directory
- The directory structure for this example consists of a main (or root) directory "qr pb15". By convention from earlier version of Trainz, this was also the name of the asset taken from the Username tag.
- The .tfx files in this directory are Twinkles smoke effect files, created in the Twinkles Editor and placed in the directory by the creator.
- The config.txt file created by CCP will also be placed in this top directory.
- Coalman Directory
- The asset has an animated coalman in the cab. For convenience, a subdirectory "coalman" has been created for the relevant files. This sub-directory includes the exported coalman.im mesh file, a number of animation files, coalman_loop1.kin file for example, and all the textures for the coalman model.
- Main diffuse texture files (main color texture placed and mapped on the mesh in 3dsmax or gamax) in this directory are .tga type files.
- The .bmp file format is used for opacity files associated with the texture files. These files allow certain parts of the main texture file to be transparent or translucent, depending on the amount and location of grey or black areas in the file. Opacity can also be included as an Alpha layer of the main .tga file - this is more efficient as Trainz only has to load one file instead of two separate files.
- Please refer to Page 350 for the correct file format and file sizes to be used for model assets.
- Main Body Directory
- The main body mesh of the model is placed in the "pb_15_body" subdirectory. Files similar to the ones described in the coalman directory, but specific to the main locomotive body, are also included in this directory.
- When the mesh file is exported from 3dsmax or gmax, a texture.txt file is automatically generated for each combination of textures, for example the catcher-catcher. texture.txt file. This text file includes details of the .tga diffuse texture and the .bmp opacity file that have been used in combination to texture the catcher part of the locomotive. The opacity file will make parts of the metal catcher on the front of the locomotive transparent, showing the distinctive steel bars in the typical cow catcher.
When making a complicated model, there may be other textures gathered in the Resource Collector process (in 3dsmax or gmax) into this directory. These textures may have been for another mesh part to be exported later, and are not necessary for this part of the model. All textures without a matching texture.txt file should be removed from the directory.
Likewise, if texture file names are changed during the model development, unused texture.txt files may be left in the directory. If these files do not have the associated texture files present, they cause Trainz to crash.
Good practice at the end of the model development, is to remove all the files except the directory structure, the mesh.im files and config file, and re-export all meshes and the correct texture files. By leaving the mesh.im files, these can be overwritten during the export, without errors being introduced by re-typing the mesh names (they must match the mesh names used in the config.txt file).
LOD files: There are some special mesh and text files in the main body sub-directory, to use LOD (Level of Detail) attributes to enhance frame rate in Trainz. The aim in Trainz is to keep models as simple as possible (reasonably sized textures, lowest polycount) to achieve a high frame rate (minimum display time between frames).
Briefly, Level of Detail (or `LOD') is a technique used for asset mesh reduction. Trainz uses a different mesh dependent on the viewing distance, a lower quality mesh as viewing distance increases.
This concept is different from the previous "progressive mesh" (.pm) reduction. That is, instead of gradually reducing the polycount of a single mesh you can now have several versions of the same asset, each at different polycounts and texture levels.
Assets with LOD reduction must comprise of `indexed meshes' or .im files only (exported from gmax or 3dsmax). No .pm files are used in LOD. TRS2004 looks for these .im files through an .lm.txt (LOD mesh file) which is referenced from the asset's config.txt file.
The pb_15_body.lm.txt file in this example is the text file that lists the details of the various meshes to be used, depending on viewing distance. The four referenced files are called
- pb_15_body_lowest.im,
- pb_15_body_low.im,
- pb_15_body_med.im and
- pb_15_body.im.
The last file is the highest quality for close viewing distance.
Refer to Page 370 for information on Level of Detail.
- Night Directory
- This is an example of the night mesh being placed in a night subdirectory.
- Reverser Directory
- The reverser.im mesh file is for the reverser used in the cab of the locomotive. As the reverser is animated in the model, an animation file, reverser.kin has been exported from 3dsmax or gmax.
- Shadow Directory
- This is used to cast a shadow of the locomotive on the ground when the Shadow option is turned on in the Trainz configuration setup menu. This must be a very simple low polygon mesh (to assist Trainz performance), to match the outline of the locomotive shape, and textured plain black.
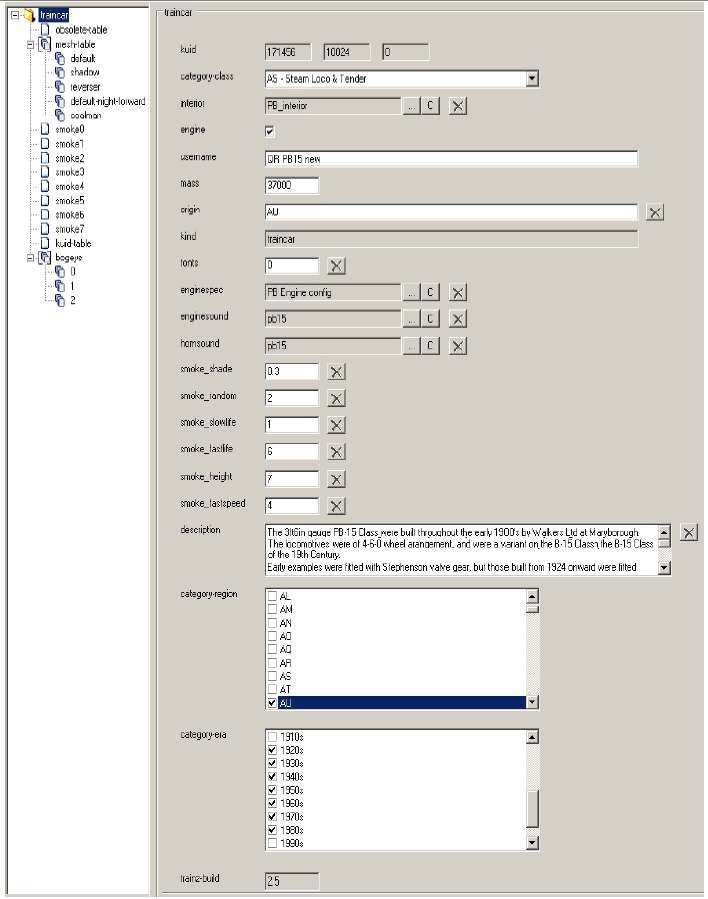
Example Asset Main CCP Screen
This is the main CCP screen for the model, showing the container structure to the left, and tags that have been entered in the top container, for the Kind Traincar container. Some of these tags are mandatory, but many are optional.
- Example Asset Dropdown Selection Box for the Coalman Mesh
The selection box uses a dropdown menu, to display the attachment points found in the mesh model, for selection.
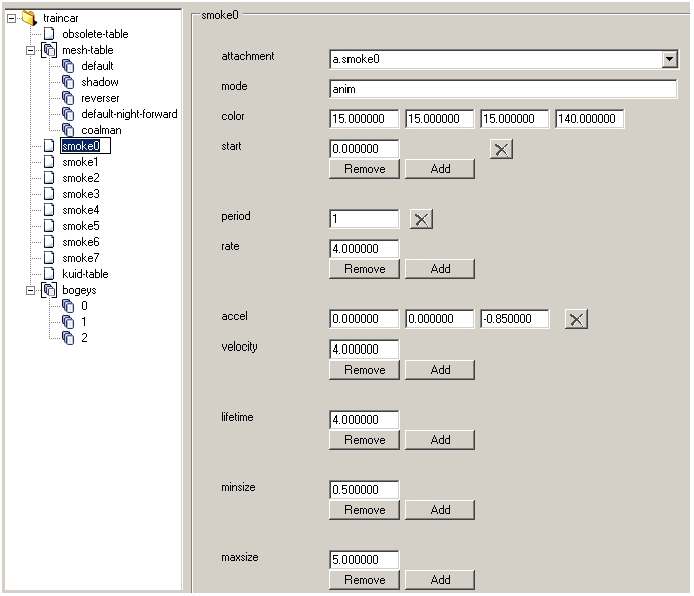
- Example Asset Smoke Container
The menu allows appropriate values to be entered for the smoke effects. Note that some values can be removed or other input boxes added for additional values for the tags.
- Example Asset Smoke Attachment Dropdown Box
The selection box uses a dropdown menu, to display the attachment points found in the mesh model, for selection.
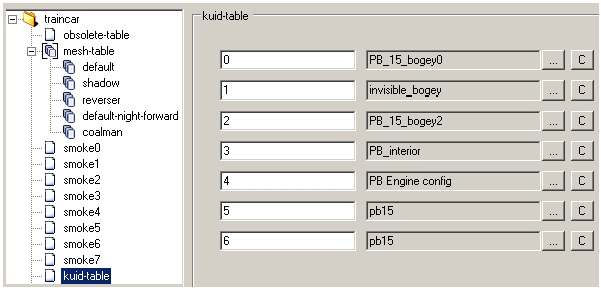
- Example Asset Kuid Table Container
A browse box is provided to select the appropriate kuid for the table. The referenced asset name is used, not the Kuid.
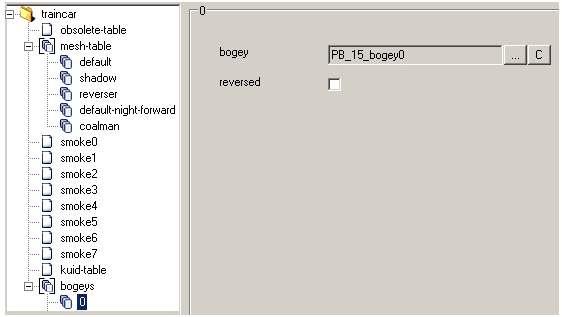
- Example Asset Bogey Container
A browse box is provided to select the appropriate bogey for the model.
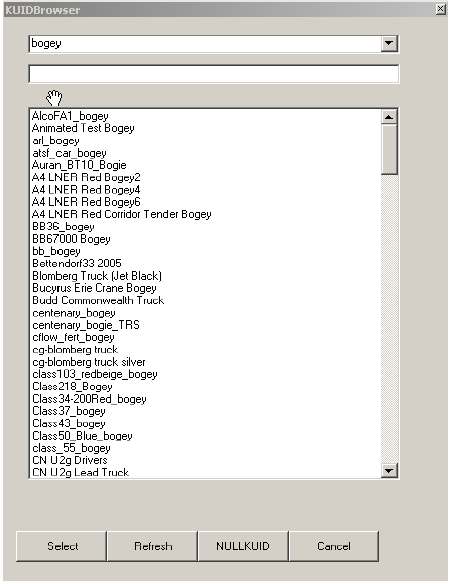
- Example Obsolete Table and Mesh Table Browser
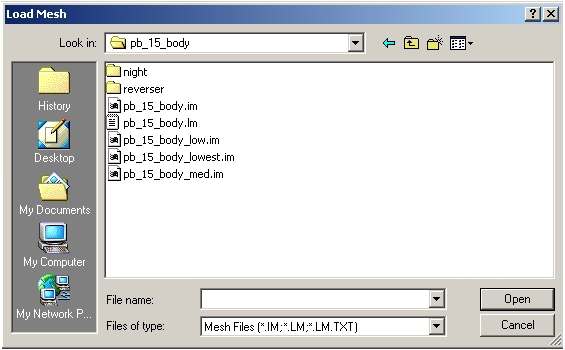
A kuid browse box presents the assets as proper names for selection, not kuids, and the mesh browser lists the available meshes in the model directory.

